Panasonic WV-NS954 Installation Manual
Hide thumbs
Also See for WV-NS954:
- Operating instructions manual (21 pages) ,
- Brochure (2 pages) ,
- Product catalog (125 pages)

Related Manuals for Panasonic WV-NS954


Summary of Contents for Panasonic WV-NS954
-
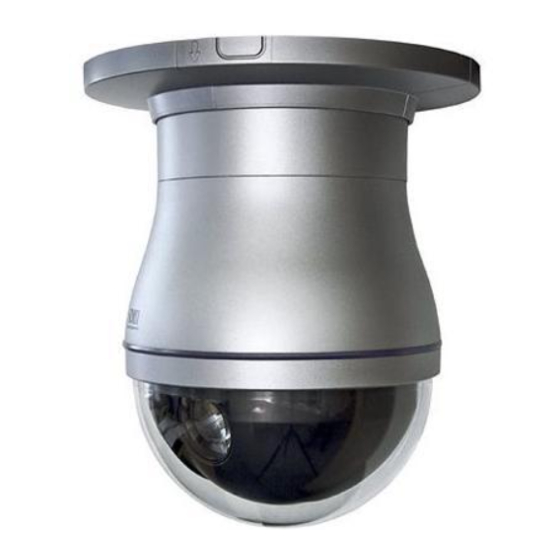
Page 1: Network Camera
Network Camera Installation Guide WV-NS954 Model No. Before attempting to connect or operate this product, please read these instructions carefully and save this manual for future use. - Page 2 WARNING: • This apparatus must be earthed. • To prevent fire or electric shock hazard, do not expose this apparatus to rain or moisture. • The apparatus should not be exposed to dripping or splashing and that no objects filled with liquids, such as vases, should be placed on the apparatus.
-
Page 3: Important Safety Instructions
Important safety instructions 1) Read these instructions. 2) Keep these instructions. 3) Heed all warnings. 4) Follow all instructions. 5) Do not use this apparatus near water. 6) Clean only with dry cloth. 7) Do not block any ventilation openings. Install in accordance with the manufacturer's instructions. 8) Do not install near any heat sources such as radiators, heat registers, stoves, or other apparatus (including amplifiers) that produce heat. -
Page 4: Limitation Of Liability
Limitation of liability THIS PUBLICATION IS PROVIDED "AS IS" WITHOUT THIS PUBLICATION COULD INCLUDE TECHNICAL WARRANTY OF ANY KIND, EITHER EXPRESS OR INACCURACIES OR TYPOGRAPHICAL ERRORS. IMPLIED, INCLUDING BUT NOT LIMITED TO, THE CHANGES ARE ADDED TO THE INFORMATION IMPLIED WARRANTIES OF MERCHANTABILITY, FIT- HEREIN, AT ANY TIME, FOR THE IMPROVEMENTS NESS FOR ANY PARTICULAR PURPOSE, OR NON- OF THIS PUBLICATION AND/OR THE CORRE-... -
Page 5: Preface
Preface The network camera WV-NS954 is designed to operate using a PC on a network (10BASE-T/100BASE-TX). By connecting to a network (LAN) or the Internet, images and audio from the camera can be monitored on a PC via a network. - Page 6 Note: Compatible SD memory card Performance with this camera has been checked by using Panasonic’s SD memory cards (64 MB, 128 MB, 256 MB, 512 MB, 1 GB, and 2 GB). SD High Capacity (SDHC) card is not compatible with this camera.
-
Page 7: About These Operating Instructions
About these operating instructions There are 3 sets of operating instructions for the WV-NS954 as follows. • Installation guide (book, these operating instructions) • Network operating instructions (PDF) • Setup instructions (PDF) The "Installation Guide" contains descriptions of how to install and connect this camera, and of how to perform the required network settings. -
Page 8: Trademarks And Registered Trademarks
Trademarks and registered trademarks • Microsoft, Windows, Windows Vista, Internet • SD logo is a trademark. Explorer, and DirectX are either registered trade- • Other names of companies and products con- marks or trademarks of Microsoft Corporation in the tained in these operating instructions may be United States and other countries. -
Page 9: Table Of Contents
Initialize the camera ............................... 24 Configure the network settings ............................25 Install the software ............................... 25 Configure the network settings of the camera using the Panasonic IP setting software ..........25 Troubleshooting ................................27 Specifications ................................. 29 Standard accessories ..............................30... -
Page 10: Precautions
Precautions When the camera has an internal thermal problem About the PC monitor When displaying the same image on the PC monitor for during operation, the indication "OVER HEAT" will a long time, the PC monitor may be damaged. be displayed. It is recommended to use a screen-saver. - Page 11 MPEG-4 Visual patent portfolio license This product is licensed under the MPEG-4 Visual patent portfolio license for the personal and non-com- mercial use of consumer for(i) encoding video in com- pliance with the MPEG-4 Visual Standard ("MPEG-4 Video") and/or(ii) decoding MPEG-4 Video that was encoded by a consumer engaged in a personal and non-commercial activity and/or was obtained from a video provider licensed by MPEG LA to provide MPEG-...
-
Page 12: Major Operating Controls And Their Functions
Major operating controls and their functions <Front> External I/O cable Microphone input cable (connector: white) Audio output cable (connector: black) Base unit RJ45 conversion connector (provided) Network cable Output cable for adjustment-specific monitor Power cable for camera Safety wire Decorative cover SD memory card slot cover Camera <How to detach the dome cover>... -
Page 13: Precautions For Installation
Precautions for installation All work related to the installation of this product should be made by qualified service personnel or system installers. Use this product for indoor use only. Do not expose this product to direct sunlight for hours and do not install the product near a heater or an air condition- er. - Page 14 Be sure to remove this product if it is not in use. Power switch • This product does not have a power switch. The power will be turned on when the power plug is inserted to an outlet. When cleaning this product, unplug first.
- Page 15 • It is recommended to use Panasonic’s SD memory cards (64 MB, 128 MB, 256 MB, 512 MB, 1 GB and 2 GB) since they have tested and confirmed full compatibility with this product. If another SD mem- ory card is used, this product may not work proper- ly or performance deterioration may be caused.
-
Page 16: Installations/Connections
Installations/connections Installation Before starting installation/connection, make sure that the power plug is not connected to an outlet. Read the "Precautions for installation" section before starting installation/connection.( page 13) Step 1 Step 3 Remove the screw (M3 x 6) fixing the camera and the Manufacture the camera and the decorative cover. - Page 17 • When the provided contact protection sheet is still Step 4 on the camera, remove it before attaching the safe- Make 4 markings for fixing screw holes while holding ty wire. the base unit. • When wiring through a hole in the ceiling, make a hole after determining the position for a cable hole in the ceiling.
- Page 18 Step 9 Step 13 Fix the camera onto the base unit using the removed Attach the decorative cover to the camera. screw in step 1. • Position the pieces of the decorative cover that have been split in step 12 to tuck down the camera body, and then attach them together.
-
Page 19: Detach The Camera
Detach the camera Important: The camera is fixed on the base unit. Do the following to detach the camera since the camera is fixed with the double fixation structure. Otherwise, it may damage the camera. Step 1 Step 3 Separate the provided decorative cover into 2 pieces. Remove the screw fixing the camera and the base unit. -
Page 20: Connection
Connection Caution: Before starting connection, make sure that the circuit breaker is switched off. Failure to do so could result in fire, injury, electric shock or property destruction. Power cable To an outlet (24 V AC, 60Hz) Grounding wire * Network cable Ethernet cable To a hub, PC, etc. - Page 21 • Network cable • Audio output connector Connect with an Ethernet cable (category 5 or better). Connect a monaural mini plug (ø3.5 mm). Use a pow- ered external speaker. Recommended cable length: Less than 10 m Important: Maximum length of an Ethernet cable that can be connected is 100 m.
-
Page 22: Connection Example
Connection example When connecting with a PC directly RJ45 conversion connector (provided) Amplifier built-in speaker (procure locally) Ethernet cable (category 5, cross) To an outlet Plug-in power type microphone (24 V AC) (procure locally) Recommended total extended cable length: 1 m <Required cables>... -
Page 23: Insert/Remove A Sd Memory Card
Insert/remove a SD memory card Important: Before inserting the SD memory card, turn off the power of the camera first. Insert a SD memory card Step 1 Important: • Do not pull the SD memory card slot strongly. Loosen the lock screw of the SD memory card slot Otherwise, it may damage the camera. -
Page 24: Initialize The Camera
Initialize the camera Use the DIP switch to initialize the camera. The DIP switch can be found when the base unit is Step 5 detached. ( page 19) Turn off the power of the camera, and then detach the camera from the base unit. ( page 19) Important: The settings including the network settings will be initialized. -
Page 25: Configure The Network Settings
When using multiple cameras, it is necessary to configure the network settings of each camera independently. If the Panasonic IP setting software does not work, perform the network settings of the camera and the PC individually on the "Network setup" page of the setup menu. Refer to the setup instructions (PDF) for further information. - Page 26 Step 1 Step 3 Start the Panasonic IP setting software. Complete each network setup item and click the [Apply] button. Step 2 Click the [IP setting] button after selecting the MAC address/IP address of the camera to be configured. Note:...
-
Page 27: Troubleshooting
Troubleshooting Before asking for repairs, check the symptoms on the following table. Contact your dealer if a problem cannot be solved even after checking and trying the solution or if the problem is not described below. Reference Symptom Cause/solution pages •... - Page 28 Inspect the power cable, power plug and connectors periodically. Symptom Cause/solution The power cable insulation is damaged. • The power cable, plug and connectors are worn out. The power cable, plug and This may result in electric shock or a fire. connectors get hot during Unplug the power plug from the AC outlet immediately, and refer to use.
-
Page 29: Specifications
Specifications General Power source 24 V AC, 60 Hz Power consumption 15 W Ambient temperature –10 °C - +50 °C {14 °F - 122 °F} (Recommended temperature: 35 °C {95 °F} or below) Ambient humidity 90 % or less VBS: 1.0 V [P-P]/75 Ω (NTSC), composite (BNC) Monitor output (for adjustment) External I/O terminals ALARM IN 1/BW IN, ALARM IN 2/ALARM OUT, ALARM IN 3/AUX OUT (x1 each) -
Page 30: Standard Accessories
Images from 16 cameras (4 cameras x 4 groups) can be displayed simultaneously. SD memory card (option) Manufactured by Panasonic (Performance with this camera has been checked.) Capacity: 64 MB, 128 MB, 256 MB, 512 MB, 1 GB, 2 GB * SD High Capacity (SDHC) card is not compatible with this camera. - Page 31 For customer support, call 1.877.733.3689 Panasonic Sales Company Executive Office: Three Panasonic Way 2H-2, Secaucus, New Jersey 07094 Division of Panasonic Puerto Rico Inc. Zone Office San Gabriel Industrial Park 65th Infantry Ave. KM. 9.5 Carolina Eastern: Three Panasonic Way, Secaucus, New Jersey 07094 P.R.