Table of Contents
Troubleshooting

Related Manuals for GE Profile PSF26PGWBB


Summary of Contents for GE Profile PSF26PGWBB
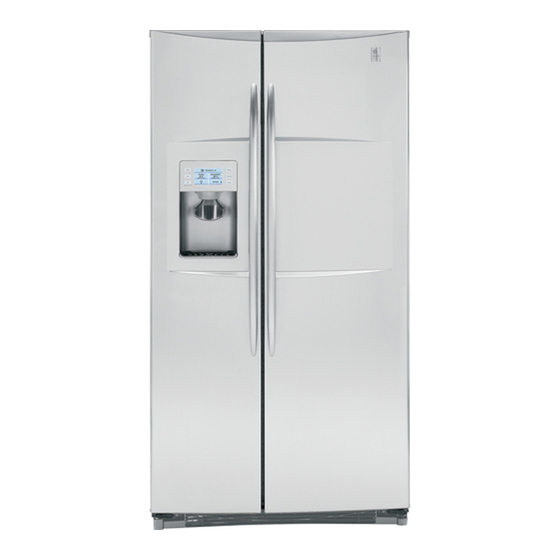
- Page 1 GE Consumer & Industrial Technical Service Guide June 2007 Profi le Side-By-Side Refrigerators PSF26PGWBB PSS26PSWSS PSC25PSWSS PSW26RSWSS HOME WATER CRUSHED HELP CUBED LOCK 31-9153 9153 GE Appliances General Electric Company Louisville, Kentucky 40225...
- Page 2 If grounding wires, screws, straps, clips, nuts, or washers used to complete a path to ground are removed for service, they must be returned to their original position and properly fastened. GE Consumer & Industrial Technical Service Guide Copyright © 2007 All rights reserved.
-
Page 3: Table Of Contents
Table of Contents 3-Way Valve ..................................40 Beverage Center Blower Motor ..........................30 Check Valve ..................................29 Components ..................................25 Components Locator Views ............................20 Condenser Fan ................................32 Control Board Connector Locator .......................... 52 Control Diagnostics Using LCD Screen ........................ 49 Control Features ................................ -
Page 4: Introduction
• Electronic Beverage Center ― Keeps beverages and treats icy cold and easily accessible. • GE Reveal ® Lighting ― Casts a clean, beautiful light throughout the refrigerator. The 3-speed compressor* is controlled by an inverter that receives input from the low voltage DC side of the main control board. -
Page 5: How It Works
About ClimateKeeper the airfl ow between the fresh food and freezer compartments during normal cooling operations.* This ensures that the humidity levels in the fresh food compartment are signifi cantly higher than in a conventional system,** allowing fresh produce and other unsealed foods to retain their moisture content and freshness longer. -
Page 6: Technical Data
Technical Data – 6 –... -
Page 7: Nomenclature
Nomenclature P S F 26 P G W B B Exterior Color Brand/Product WW - White on White BB - Black on Black P - Profi le Confi guration Model Year S - Side by Side W - 2007 Depth/Power H - Inverter Compressor/Energy Star Icemaker/Exterior S - Standard Depth... -
Page 8: Control Features
Control Features About the home screen The Home screen is the initial screen presented after Not all features are on all models. power-up. The status bar at the top displays the status of many of the refrigerator features. Freezer and Refrigerator sections display present compartment temperatures. - Page 9 To change the Freezer temperature: Access By: Home > Freezer Activate By: Using the arrows to select the desired temperature. You must press ENTER to set the new temperature. Once the desired temperature has been set, the display will return to the HOME screen and show the set temperatures underneath the actual temperature display for several seconds.
-
Page 10: Quick Ice
Quick Ice How to Use When you need to speed up ice production, use the Quick Ice feature. While this feature is turned on, the Access by pressing: Home > Options > Freezer Options freezer fan runs continuously for 48 hours, or until the >Quick Ice. - Page 11 About CustomCool (on some models) How it Works The CustomCool™ feature is used to quickly chill items, thaw items, or hold the pan at a specifi c temperature. This feature is a system of dampers, a fan, a temperature thermistor, and a heater. The pan is tightly sealed to prevent temperature fl uctuations in the rest of the refrigerator.
- Page 12 About TurboCool How it Works How to Use TurboCool™ rapidly cools the refrigerator compartment Access by pressing: Home > Options > Refrigerator in order to more quickly cool foods. Use TurboCool Options > TurboCool. Activate by pressing ON. Deactivate when adding a large amount of food to the refrigerator by pressing OFF.
- Page 13 Precise Fill (on some models) This water dispenser is equipped with a feature called “precise fi ll.” This feature allows you to choose a precise amount of water (cups, ounces, pints, or liters) that you would like dispensed. Access by pressing: Home > Options >...
- Page 14 Information and Settings Use Information and Settings to access Settings, Screen Appearances, and Feature Info. Access by: Home> Options> Information and Settings. • Press Settings to access Button Beep, Door Alarm, Units Metric/English, and Cooling System Off. • Press Screen Appearance to access Color Options, Brightness, and Screen Saver.
- Page 15 Feature Info Access by: Home> Options> Information and Settings> Feature Info. Features will access information related to: • Precise Fill • CustomCool™ • QuickFreeze™ • LCD Screen Colors • Beverage Center • Temperature Set • Quick Ice • TurboCool™ About the help screen The Help screen provides General information and guidance to certain features of the refrigerator.
- Page 16 Demo Mode The LCD screen has a DEMO MODE that can be accessed. To enter the DEMO Mode press the HOME and HELP pads simultaneously for 3 seconds. Upon entering, the cooling system will turn off. The VIEW FEATURE selection provides a description and instructions on how to use 8 features of the refrigerator.
-
Page 17: Replacing The Light Bulbs
Replacing the light bulbs. Setting the controls to OFF does not remove power to the light circuit. ® Reveal appliance bulbs are used on some models. They can be identifi ed by their blue color when they are not illuminated. Not all features are on all models. - Page 18 Dispenser LED Light If the lock is engaged when the fi lter timer expires, the LED will come on but cannot be reset until the The LIGHT selection on the LCD screen turns the lock is turned off. dispenser LED lights on and off. When the light selection is turned off, the LEDs will fade out.
- Page 19 About the refrigerator doors. Door Closure Mechanism The closure mechanism consists of a lever, attached Hook with a spring to a hook in the base channel, which interacts with a cam mounted to the bottom of each door with two T-20 Torx screws. A pair of pliers can be used to remove the spring from the hook.
-
Page 20: 3-Way Valve
Components Locator Views Rear View (Non-Inverter model shown) Main Control Board 3-Way Valve Condenser Fan Compressor Condenser Dryer Water Valve Jumper Tube Rear View (Inverter model shown with drain tube and selected wiring Compressor removed for clearer view.) Inverter (Continued next page) –... - Page 21 Check Valve Front View Over-Temp Thermostat Note: The check valve is part of the freezer evaporator and is not available separately. Freezer Evaporator Note: Thermistor locations Freezer Evaporator Thermistor Freezer Thermistor Fresh Food Thermistor Fresh Food Evaporator Fresh Food Evaporator Thermistor (located on back of evaporator)
-
Page 22: Freezer Section Cooling
Refrigeration System Fresh Food Section Cooling *Note: Variable speed compressors have an accumulator. Single-speed compressors do not have an accumulator. Freezer Section Cooling Condenser Fan Running Freezer Fan Running Fresh Food Fan Off *Note: Variable speed compressors have an accumulator. Single-speed compressors do not have an accumulator. -
Page 23: Fresh Food And Freezer Section Cooling
Fresh Food and Freezer Section Cooling Condenser Fan Running Freezer Fan Running Fresh Food Running *Note: Variable speed compressors have an accumulator. Single-speed compressors do not have an accumulator. – 23 –... -
Page 24: Evacuation And Charging Procedure
4. Open the ball valve. Recover the purge/sweep Evacuation and Charging Procedure charge using the recovery pump and the refrigerator compressor until a 20-in. vacuum Refer to Service Guide #31-9118 for complete is attained. Close the ball valve and remove the instruction on replacing the freezer &... -
Page 25: Freezer Evaporator
Components Rotate the icemaker to the right, then pull the Freezer Evaporator left side towards the front to disengage it from the 2 posts. The following components must be removed in the appropriate order to access the freezer evaporator: Unplug the refrigerator. Remove the ice bucket, shelves, and drawers. - Page 26 Lift the fan housing up, pull it forward, and Unclip the light bulb sockets from their mounting disconnect the wire harness. holes and disconnect the sockets. Remove the two ¼-in. hex-head screws that attach each mounting bracket. Wire Harness Note: The evaporator cover is held in place by four ¼-in.
- Page 27 Press inward on the 2 tabs and release the Unclip the evaporator thermistor and ground auger motor assembly wire harness receptacle wires from the evaporator. from the evaporator fan plenum. Remove the two ¼-in. hex-head screws from the fan bracket. Thermistor Ground Wires Remove the 4 hex-head screws that hold the...
-
Page 28: Fresh Food Evaporator
Carefully pull the cover forward, then disconnect Fresh Food Evaporator the fresh food evaporator fan and beverage center blower. The following components must be removed in the appropriate order to access the fresh food evaporator: Remove the CustomCool™ drawer, and Disconnect Disconnect necessary drawers and covers above the... -
Page 29: Check Valve
Fresh Food Evaporator Fan Check Valve A variable speed 12-VDC motor is mounted in front of the fresh Check Valve food evaporator. The fan, the blower, and evaporator cover are replaced as a complete assembly. • A nylon piston inside the check valve fl oats back When activated, the fresh food evaporator fan and forth, depending upon refrigerant fl... -
Page 30: Beverage Center Blower Motor
For testing, the beverage center blower motor can Beverage Center Blower Motor be run for short periods using a 9-volt battery. A 12-VDC blower motor is mounted inside the fresh Note: Unless turned off at the control, the beverage food evaporator fan housing. The blower motor, center feature will remain active for 6 months. -
Page 31: Freezer Evaporator Fan
Fan speed is selected and maintained by the main Freezer Evaporator Fan control board regulating the length and frequency of the 13.6-VDC pulse. Temperature can cause The position of the fan blade in relation to the some fan speed variation. Fan speed can vary shroud is important. -
Page 32: Quickfreeze™ Fan Motor
QuickFreeze™ Fan Motor Condenser Fan A 12-VDC motor is mounted in front of the freezer The fan is mounted in the machine compartment evaporator cover. The fan motor and fan housing with the no-clean condenser. The fan and fan are replaced as a complete assembly. shroud are mounted on one end of the condenser, and the other end of the condenser is blocked. - Page 33 The condenser fan is mounted with screws to a fan The speed of the fan is controlled by the voltage shroud and mounting bracket that is attached to output from the main control board (J2 pin 8 to J2 the condenser. To access the condenser fan motor, pin 3).
-
Page 34: Thermistors
Fresh Food and Freezer Thermistors Thermistors The fresh food and freezer thermistors (part # WR55X10025) are located in the mullion dividing the fresh food and freezer compartments. Thermistor Resistance Note: The fresh food and freezer thermistors are Temperature Temperature Resistance in Kilo- (°F) (°C) Ohms... -
Page 35: Defrost Cycles
Fresh Food Evaporator Thermistor Insert the new thermistor into the thermal block. Add RTV102 silicone to hold the thermistor in place. The fresh food evaporator thermistor (part # Make certain to wire tie the thermal block back to WR55X10025) is located in an aluminum thermal the evaporator. - Page 36 The system is designed to run the fan until the fresh Fresh Food Forced Defrost food evaporator thermistor reaches 35°F. If the main control board senses the fresh food Once this temperature is reached, the fan continues section has been cooling for 45 minutes, it to run for an additional 5 minutes.
-
Page 37: Inverter
Lift and rotate the inverter counterclockwise. Inverter Disconnect the compressor harness from the The inverter is accessed from the back of the compressor terminals. refrigerator and is located on the left side of the compressor behind the water valve. The water valve must be removed to access the inverter. -
Page 38: Inverter Compressor
The inverter controls compressor speed by Inverter Compressor frequency variation and by pulse width modulation. Changing frequency and pulse width modulation Caution: Do not attempt to direct-start the will cause an effective voltage between 80 and 230 compressor. The compressor operates on a 3-phase VAC to be received at the compressor. -
Page 39: Refrigeration System
3°F to 5°F above refrigerator set point - medium • Single-Speed Compressor speed. The compressor is a reciprocating type. Refer to • 5.5°F to 7°F above refrigerator set point - high the mini-manual for the BTU/hour rating and the speed. compressor capacity test specifi... - Page 40 3-Way Valve Coil 3-Way Valve The 3-way valve coil receives 12-VDC pulses from The 3-way valve is located beneath the main control the main board to change the position of the valve. board in the machine compartment and is accessed The pulses come too quickly to measure with a volt from the back of the refrigerator.
- Page 41 3-Way Valve Body Valve Rotation • The valve body contains a cam, rotor, and • The pulses of the valve coil cause the magnet to magnet. rotate inside the valve body. • The rotor and cam are grooved to rotate with •...
-
Page 42: Replacing The 3-Way Valve
Testing the 3-Way Valve Replacing the 3-Way Valve The valve returns to “home” at the end of every Parts Needed: freezer defrost cycle and whenever the refrigerator • 3-Way Valve (part # WR57X10053) is reconnected to power. • Thermal Paste (part # WX5X8927) To test the valve, disconnect the refrigerator from •... - Page 43 1. Unplug the refrigerator. 5. Connect the new jumper tube to the inlet tube of the new 3-way valve. 2. Remove the rear access cover and evacuate the sealed system. (See 6. Prepare the taped capillary tube, and insert Evacuation and Charging it into the 3-way valve freezer outlet port Procedure (identifi...
-
Page 44: Customcool™ Assembly
9. Angle the torch so the fl ame is not directed CustomCool™ Assembly towards the valve body when brazing the three joints. Note: Refer to Service Guide #31-9075 for complete instruction on servicing CustomCool™ components. 10. Remove the thermal paste residue and dry the valve body thoroughly. - Page 45 Remove the support from under the evaporator Place the unit vertically on its right side. tubing. Peel back the foam seal from the left side and Remove the 3 Phillips-head screws that hold the tape from the rear of the unit. the CustomCool™...
-
Page 46: Dispenser Assembly
The dispenser shield can be removed to access Dispenser Assembly the cradle switch, duct door, duct door solenoid, and dispenser LED lights. The dispenser shield is The dispenser assembly consists of the interface, attached to the dispenser recess with 4 Phillips- display board, dispenser shield, and duct door head screws. -
Page 47: Precise Fill
Precise Fill The Precise Fill mode allows the user to select a specifi c volume to be dispensed in either cups, ounces, pints, or liters. Overview The Precise Fill design places a fl owmeter between the water valve and the dispenser to measure water fl ow through the system. - Page 48 Flowmeter Remove the ¼-in. hex-head screw from the fl owmeter bracket. The fl owmeter is located in the machine compartment behind the water valve. The water valve must be removed to access the fl owmeter. Inlet Tube Lift and rotate the fl owmeter bracket counterclockwise to disengage the 2 tabs at the top of the bracket.
-
Page 49: Troubleshooting
Troubleshooting Control Diagnostics Using LCD Screen The LCD screen has a self-diagnosis mode that can be accessed and will assist the technician to test certain functions of the LCD screen, dispenser, and interior fans. This mode can aid the service technician in quickly identifying failed or improper operation of certain components and systems. - Page 50 Diagnostics Aid Kit The diagnostic aid kit may assist the technician to functionally test individual components. A diagnostic aid kit can be assembled and consists of a key pad temperature control assembly and wire harness. The parts required are WR55X10390 and WX05X14999. Using the kit, diagnostics can be performed by removing the base grill and plugging into the diagnostic aid wire harness located on the left side.
- Page 51 Fresh Freezer Food Diagnostics Results Comments Display Display See Note 1. Checks each Control and Sensor System Test thermistor in order. Custom Cool™ Test will not start for damper will open, approximately 20 close after 10 seconds after pad Dampers Test seconds, pause is depressed.
-
Page 52: Control Board Connector Locator
Control Board Connector Locator Main Control Board J10 and J13 - Earth (Ground) J4 - LCD Board J8 - Line (L1) to AC Compressor* J3 - QuickFreeze™ Fan, Beverage Center Fan, 3-way Valve J9 - Defrost Heater J1 - Fresh Food Thermistor, Freezer Thermistor, Fresh J11 - Line (L1) Food Evaporator Thermistor, Freezer Evaporator Thermistor, Model Selector... - Page 53 – 53 –...
- Page 54 MAIN CONTROL BOARD TROUBLESHOOTING The main control board is located at the back of the refrigerator, above the machine compartment on the right-hand side. (See Control Board Connector Locator CONTROL BOARD PIN DEFINITIONS CONNECTOR PIN INPUT OUTPUT FUNCTION Feedback of fresh food evaporator thermistor value. Thermistor value is NTC (when temperature drops, resistance value increases), causing return voltage reduction.
- Page 55 CONTROL BOARD PIN DEFINITIONS CONNECTOR PIN INPUT OUTPUT FUNCTION Feedback from evaporator fan. Evaporator fan feedback is not read for this application. Model pin selection. Model pin selection. Evaporator fan and condenser fan common. Output to evaporator fan for motor operation. Effective voltage is determined by pulse width modulation.
- Page 56 CONTROL BOARD PIN DEFINITIONS CONNECTOR PIN INPUT OUTPUT FUNCTION ExpressChill (CustomCool™) damper. ExpressChill (CustomCool™) damper. ExpressChill (CustomCool™) damper. ExpressChill (CustomCool™) damper. Provides 5 VDC for ExpressChill (CustomCool™) thermistor. Feedback of ExpressChill™ (CustomCool™) thermistor. Thermistor is NTC (when temperature drops, resistance value increases), causing return voltage reduction.
- Page 57 CONTROL BOARD PIN DEFINITIONS CONNECTOR PIN INPUT OUTPUT FUNCTION Switched L1 voltage to the defrost circuit - 120 VAC. A timer (main control software), counts how long this circuit is energized and uses this information to determine if the next defrost cycle is adaptive or nonadaptive.
- Page 58 Main Control Board J2 Connector (Low-Voltage DC Side) Component Input/ Wire Color Pin-to-Pin Voltage Reading Termination Output Evaporator fan Blue Input Not applicable to this model. tachometer Blue/White Model Input J2 pin 2 to pin 3 = 12 VDC White/Silver Fan Common Common J2 pin 3 to pin 8 = 12 VDC...
- Page 59 Main Control Board J4 Connector (Low-Voltage DC Side) Component Input/ Wire Color Pin-to-Pin Voltage Reading Termination Output Black Temperature control Communication 2-way digital communication Temperature control Output J4 pin 2 to pin 3 = 12 VDC Blue Temperature control Common J4 pin 2 to pin 3 = 12 VDC Comm.
- Page 60 Main Control Board J8 Connector (High-Voltage Side) Component Input/ Wire Color Pin-to-Pin Voltage Reading Termination Output Black Compressor Output J8 to J7 pin 9 = 120 VAC EARTH Line (L1) to AC Compressor (Not Used for Inverter Compressor, Wire Ends in Cabinet) Defrost Heater Line (L1) Neutral...
- Page 61 Main Control Board J11 Connector (High-Voltage Side) Component Input/ Wire Color Pin-to-Pin Voltage Reading Termination Output Brown L1 Input Input J 11 to J7 pin 9 = 120 VAC EARTH Line (L1) to AC Compressor (Not Used for Inverter Compressor, Wire Ends in Cabinet) Defrost Heater Line (L1)
-
Page 62: Precise Fill Troubleshooting
Precise Fill Troubleshooting – 62 –... -
Page 63: Icemaker Service Test Mode
Icemaker Service Test Mode The electronic icemaker has a service test mode that can be utilized by the service technician in order to test basic operation of the icemaker. The service test mode consists of a harvest cycle followed immediately by a water fi... -
Page 64: Schematic
Schematic Single-Speed Compressor Model Note: This schematic may be different than the one in the Mini-Manual. (Continued next page) – 64 –... - Page 65 Inverter Compressor Model Note: This schematic may be different than the one in the Mini-Manual. – 65 –...
-
Page 66: Warranty
This warranty is extended to the original purchaser and any succeeding owner for products purchased for home use within the USA. If the product is located in an area where service by a GE Authorized Servicer is not available, you may be responsible for a trip charge or you may be required to bring the product to an Authorized GE Service location for service.