
Related Manuals for Haier HDY-E60


Summary of Contents for Haier HDY-E60
- Page 1 INNOVATIVE DESIGN HDY-E60 30min Extra Dry 60min 100min 30min number of the tumble dryer.
- Page 2 Read all instructions before using this dryer. 2 The interior of the dryer should be cleaned periodically by qualified service personnel. An excessive amount of lint build up in the interior of the dryer could result in inefficient drying and pose a possible fire hazard. The appliance must not be installed behind a lockable door, a sliding door or a door with a hinge on the opposite side to that of the tumble dryer in such a way that a full opening of the tumble dryer is restricted.
- Page 3 Do not dry unwashed items in the tumble dryer. 16 Fabric softeners, or similar products, should be used as specified by the fabric softener instructions. 17 To prevent fire, do not use heat to dry items containing plastic, foam rubber or similarly textured rubber-like materials, or items containing feathers or down.
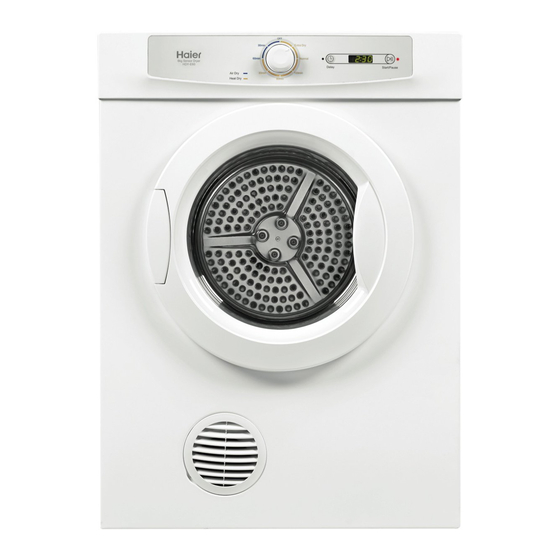
- Page 4 Top panel Control panel Program selector Door Door switch Exhaust grill Lint filter Model number Power supply cord and Serial number Back plate Air intake grill Outlet cover Read all instructions before using this dryer. This dryer has been designed for domestic use only. SAVE THESE INSTRUCTIONS.
- Page 5 Attention: 1.Before operation, clean off any dust and dirt inside the drum of the dryer with a damp towel. 2.Clean off any debris on the lint filter and in the duct to increase the drying efficiency. Turning on power Before turning on the power of the dryer check whether the supply voltage is in accordance with the value indicated on the name plate.
-
Page 6: Laundry Loading
1. Power up Insert the power plug into an appropriate power outlet that is properly installed and grounded. Operating power supply: 220-240V~50Hz. 2. Laundry loading Open the door and load the laundry into the drum of the dryer. For a more energy efficient and better drying result, make sure the load has been spun dry. - Page 7 30min Extra Dry 60min 30min 100min A - Program control knob B - Delay button You may choose to start the dryer after a preset time. The delay range is between 0.5 and 24 hours. Gently touch the delay button before a program starts, each touch will add one hour.
- Page 8 WARNING! Unplug the power cord prior to any cleaning Cleaning the surface Wipe off any dust or dirt. Note: Do not use excessive water, . a damp cloth is fine. Do not use solvent. Do not use spray cleaners when cleaning the interior. Do not use harsh or abrasive cleaners.
-
Page 9: Dimensions
INSTALLATION INSTRUCTIONS Unpacking your dryer Dimensions a=830 mm b=600 mm c=560 mm Weight=30 kg Remove the transport packaging (fig.1) Remove the tape on the door (fig.2), the wall mounting kit and the inverted panel film attached to the inside of the drum (fig.3) before starting the dryer. fig.1 fig.2 fig.3... -
Page 10: Free Standing
INSTALLATION INSTRUCTIONS Free standing The dryer stands on the floor and can easily be moved into position. Ensure that it is placed on a level floor. Also ensure there is at least 50 mm air clearance between the back of the dryer and the wall to allow fresh air flow for efficient operation. - Page 11 INSTALLATION INSTRUCTIONS 2.Fix the wall hanging brackets to the wall securely (eg. into the stud). If the studs are too far apart, fit a timber slat to the studs then mount the brackets onto the slat. The distance between each is 553 mm as per diagram (Fig.1).
-
Page 12: Stacking Installation
Stacking installation You can use a stacking kit (included as an accessory) if you want to mount your dryer on the top of a Haier front load washing machine, ensure the washer is the same width as the dryer. 1. Remove 4 screws among screws on the bottom panel (see fig.1), and install the stacking kit on the bottom panel (see fig.2). - Page 13 INSTALLATION INSTRUCTIONS 2. Install the dryer with stacking kit on the top of the front load washing machine (Fig.3). Drill two holes on both sides of washer with 2.9mm diameter drill. Detailed drill postion as shown on the stacking kit. Make sure the included screws are used.
-
Page 14: Rear Venting
INSTALLATION INSTRUCTIONS Rear venting If you want to choose the rear venting mode, the exhaust grill at the front of the dryer needs to be replaced with the outlet cover from the back panel of the dryer. Gently open the grill, using a thin tool such as a key. Next, remove the cover from the back panel and clip it into the grill space at the front panel. -
Page 15: Control Board
The following must be confirmed before calling for service: Problem Possible Cause Is the dryer plugged in? Is the power on? Is the door closed properly? The dryer does not start Has a drying program been set? Has the Start/Pause button been pressed? Was the correct drying program set? Is the filter screen clean? The drying result is not... - Page 16 TYPE HDY-E60 ITEM 220-240)V~ · 50Hz Power supply Maximum operating current (A) Rated load (kg) Drying program 2100 Maximum power (W) 830x560x600 Dimensions (HxDxW) mm Weight (kg) IPX4 Waterproof degree 0180500432...