Table of Contents
Advertisement
Quick Links
Operating Instructions
Dishwasher
Dear Customer,
Thank you for choosing this quality product from ASKO.
We hope it will meet your expectations and ful l your needs for many years to come.
Scandinavian design combines clean lines, everyday functionality and high quality. These
are key characteristics of all our products and the reason they are greatly appreciated
throughout the world.
To get the most from your new dishwasher, we recommend that you read the operating
instructions before using the dishwasher. The operating instructions also include information
on how you can help protect the environment.
ASKO D5644
Operating Instructions
Advertisement
Table of Contents

Related Manuals for Asko D5644


Summary of Contents for Asko D5644
-
Page 1: Operating Instructions
Dishwasher Dear Customer, Thank you for choosing this quality product from ASKO. We hope it will meet your expectations and ful l your needs for many years to come. Scandinavian design combines clean lines, everyday functionality and high quality. These are key characteristics of all our products and the reason they are greatly appreciated throughout the world. -
Page 2: Table Of Contents
Contents Before washing for the first time Rinse aid Read the operating instructions Error messages Be careful with certain materials Troubleshooting Checking water hardness Performance information Program key Installation Safety instructions Safety instructions General Suggested machine installations Installation Adjust the height and slide the dishwasher into place Winter storage/Transport Drainage connection... -
Page 3: Before Washing For The First Time
Before washing for the first time Read the operating instructions Read through the operating instructions before using the dishwasher, especially the sections Safety instructions, Child safety and Dishwashing. Be careful with certain materials Read the section Fragile dishes before dishwashing porcelain with unglazed decoration or other utensils made from plastic, wood or crystal that you value. -
Page 4: Safety Instructions
Safety instructions General Winter storage/Transport • Read the operating instructions and keep them in • Store the dishwasher where the temperature a safe place! remains above freezing. • Never use the dishwasher for any purpose other • Avoid long transport distances in very cold than that specified in these operating instructions. -
Page 5: Child Safety
Child safety Child safety and dishwashing Activate the child safety lock • Use the knife basket, or knife stand, for all (only certain models) long/sharp items. A child safety lock is fitted to prevent children from • Always close the door and start the program opening the dishwasher door. -
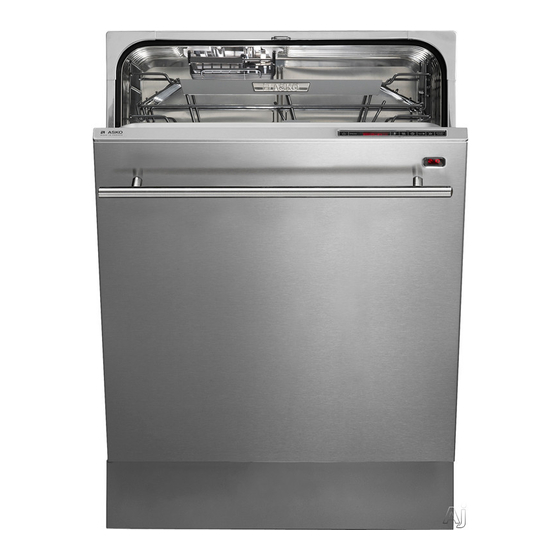
Page 6: Dishwasher Components
Dishwasher components* Knife basket Spray arms Filters Serial number plate Cutlery basket Lower basket Detergent compartment Rinse aid compartment Upper basket Panel *Specifications may differ depending on the model and market. -
Page 7: Dishwasher Baskets
Dishwasher baskets* Upper basket 1. Wine glass shelf 2. Handle 3. Knife guard 4. Spray arm 5. Locking handle for upper basket Raising the upper basket 1. Pull out the upper basket. 2. Grab the sides of the upper basket with both hands and lift it up. - Page 8 Dishwasher baskets* Cutlery basket Cutlery basket with lid *Specifications may differ depending on the model and market.
- Page 9 Dishwasher baskets* Positioning of cutlery basket lid (in upper basket) The cutlery basket lid can be removed and used, for example, as an extra cutlery basket in the upper basket (see below). *Specifications may differ depending on the model and market.
-
Page 10: Front Panel
Front panel The panel is fitted with touch buttons with audible feedback (see the chapter Settings). Main power switch Temperature Program selector Drying Program symbol Delayed start Display Set time (for the Time program) Rinse aid indicator Start/Stop Child lock (button lock) NOTE! •... -
Page 11: Dispenser
Dispenser 1. Prewash detergent compartment 2. Main wash detergent compartment 3. Rinse aid compartment 4. Detergent compartment lid 5. Rinse aid compartment lid... -
Page 12: Economic Dishwashing
Economic dishwashing Run programs only with a full load Wait to run a program until the dishwasher is full. This way you save energy. Use the Rinse & Hold program to rinse the dishes if there are any unpleasant odours while you wait for the dishwasher to become fully loaded. -
Page 13: Fragile Dishes
Fragile dishes Some cookware is not dishwasher safe. This can be for several reasons. Some materials cannot withstand strong heat, others can be damaged by dishwashing detergent. Fragile decoration Porcelain with decoration on top of the glazing (the items feel rough) should not be washed in a dishwasher. -
Page 14: Dishwashing
Dishwashing Below are step-by-step instructions to help you Ensure that spoons do not stack inside each other. achieve the best possible dishwashing results. The cutlery basket is placed in the lower basket. Load the baskets correctly Do not rinse dishes under running water before WARNING! loading them in the dishwasher. -
Page 15: Press The Main Power Switch Until The Display Lights Up
Dishwashing NOTE! Use only dishwasher detergent! Washing up liquid Time program must not be used as the foam that forms prevents The program adapts to the specified running time or the dishwasher from operating effectively. finish time. With this program it is important to choose a time suited to how dirty the dishes are. - Page 16 Dishwashing Delicate wash Rinse & Dry If the dishes are not very dirty, you can select Delicate This program comprises a rinse with heating and wash. This program is intended for glasses and drying. This is a suitable program if, for example, you porcelain that have just been used and as such do plan to make jam and want to rinse and heat clean not require such a powerful program.
- Page 17 Dishwashing Program chart...
-
Page 18: Select Options
Dishwashing Select options Delayed start To select an option, press one of the option When you select Delayed start, the dishwasher will buttons. The field under the button lights when start 1–24 hours after you press the Start/Stop button. the option is activated. The available options depend 1. -
Page 19: After Dishwashing
Dishwashing Do you want to add more dishes? After dishwashing Open the door. The dishwasher stops automatically. Once the program has finished, "End" appears Add the dishes, close the door and the dishwasher on the display. continues the program. A buzzer also sounds at the end of the program. See If the dishwasher is turned off using the main the section Settings, which describes how to change power switch or due to a power failure... -
Page 20: Settings
Settings Settings menu overview: Current menu. Current selection. Browse selections. Confirm selection and open next menu. Do as follows to open the settings menu: Turn off the dishwasher using the main power switch. Then press the main power switch again. Press the Program selector and Drying buttons simultaneously. -
Page 21: Time Remaining
Time remaining Once you have selected a program and options, the display indicates how long the program took the last time it was used.Once you have started the dishwasher, the display indicates how much program time remains. The remaining time is updated after the water for the final rinse has been heated. -
Page 22: Care And Cleaning
Care and cleaning 1. Turn the handle anticlockwise once. The dishwasher tub is made of stainless steel and is kept clean through normal use. However, if you have hard water, limescale deposits may form in the dishwasher. If this happens, run the Normal wash program with high temperature and two tablespoons of citric acid in the detergent compartment (with no dishes in the machine). -
Page 23: Lower Spray Arm
Care and cleaning If the dishwasher still does not start and a whirring NOTE! sound is heard, the overflow protection has been The dishwasher must not be used without the filter activated. in place! • Shut off the water. Diswashing efficiency can be affected if the course •... -
Page 24: Upper Spray Arm
Care and cleaning Upper spray arm 1. Pull out the basket. 2. Unscrew the spray arm bearings as illustrated to remove the spray arm from the upper basket. Spray arm bearings 3. Clean the upper spray arm in the same manner as the lower spray arm. -
Page 25: Rinse Aid
Rinse aid Select dosage The rinse aid dispenser can be adjusted between 0 Drying is faster if you use rinse aid. When the rinse (off) and 6. At the factory, the rinse aid dispenser is aid needs topping up, the above symbol lights on the set to 1. -
Page 26: Error Messages
Error messages Display Type of fault Action Overfilling Call the service division. Water outlet fault See "Possible causes" in the chapter Trou- bleshooting. Water inlet fault Check that the water tap is on. Check whether dishwasher inlet hose is connected to a pressure limiting valve (some pressure limiting valves may restrict the supply of water to the dishwasher). -
Page 27: Troubleshooting
Troubleshooting Problem Possible causes Action The dishes are not clean. The spray arms do not rotate. Remove the arms and clean them. Check that the dishes are not blocking the spray arms. Old detergent. Detergent is a perish- Avoid large packages. able product. - Page 28 Troubleshooting Problem Possible causes Action The dishwasher does not start. You have forgotten to turn on the main Press and hold the main power switch power switch. until the display lights up. The door is not properly closed. Check. A fuse/circuit breaker has been Check.
- Page 29 Troubleshooting Problem Possible causes Action Cannot close door. The baskets are not correctly posi- Check that the baskets are correctly tioned. positioned horizontally. Check that the dishes are not blocking the baskets from sliding properly into place. The touch buttons do not react when You have pressed the touch buttons Wait a moment then try again.
-
Page 30: Performance Information
Performance information Energy labelling Australian standard: AS/NZS 2007 Number of place settings: Dishwashing programs: Normal wash 45 °C, no options The door should be opened upon completion of the drying cycle a distance of 35 mm at V. Program time: 1:45 hours:minutes Connection: Cold water 20 °C... -
Page 31: Technical Data
Performance information 1. Teaspoons 2. Dessertspoons 3. Soupspoons 4. Forks 1 1 1 5. Knives 1 1 1 Technical data Height: 817-875 mm Width: 596 mm Depth: 550 mm Weight: 42 kg Capacity: 14 place settings Water pressure: 300 - 1000 kPa 0.3–10 kp/cm 3–100 N/cm Electrical connection:... -
Page 32: Installation
Installation [mm] 1189 30-94 Safety instructions • Connections to electricity, water and drainage WARNING! must be performed by a qualified professional. The plug must be disconnected or power to the • Electrical, water and drainage installations must socket turned off while the work is carried out! be carried out by a qualified professional. -
Page 33: Suggested Machine Installations
Installation Suggested machine installations The dishwasher can be installed built-in, completely freestanding or partially built-in. A. Built-in The dishwasher is intended for installation under a worktop. The recess dimensions are illustrated. Holes for wires/cables need not be larger than 38 mm in diameter. -
Page 34: Adjust The Height And Slide The Dishwasher Into Place
Installation Adjust the height and slide the dishwasher into place 1. Attach the coasters (if applicable) to the dishwasher. 2. Start by measuring the height from the floor to the bottom edge of the worktop. 3. Measure the height from the floor to the top edge of the dishwasher. -
Page 35: Drainage Connection
Installation Drainage connection When the drainage hose is routed to a connection nipple on the sink unit's water trap (see illustration 1), please note that the hose must be attached at the Max. 950 mm same height as the underside of the sink unit, Min. -
Page 36: Connection To Water Supply
Installation Connection to water supply Adjusting the plinth (only when using toe kick accessory) Use only the supply hose provided with the dishwasher. Do not re-use old hoses or other spare The dishwasher is supplied with one or two toe kicks supply hoses. -
Page 37: Set The Correct Plinth Depth As Follows
Installation Set the correct plinth depth as follows 1. Attach the supplied soundproofing material to the back of the toe kick (certain models only). If you use the low toe kick, adjust the height of the soundproofing by removing the thinner part of the strip. -
Page 38: Service
Service Read the chapter Troubleshooting before contacting the service division. Make a note of the information on the serial number plate on the right inside the dishwasher. Note the type number (1) and the serial number (2). TYPE SERIAL NO... - Page 39 Your notes...
-
Page 40: Quick Guide
Quick guide Load the baskets Press the main power switch until the display lights up Do not rinse dishes under running water before loading them in the dishwasher. Simply scrape off large food particles before loading the Select a program and any dishwasher.