KitchenAid 5KFP1644 Instructions Manual
Hide thumbs
Also See for 5KFP1644:
- Instructions manual (516 pages) ,
- Owner's manual (201 pages) ,
- Instruction manual (106 pages)
Table of Contents
Advertisement
Advertisement
Table of Contents

Related Manuals for KitchenAid 5KFP1644


Summary of Contents for KitchenAid 5KFP1644
- Page 1 5KFP1644...
-
Page 2: Table Of Contents
Using the multipurpose blade .................. 26 Using a slicing or shredding disc ................27 Using the dough blade ..................... 27 Helpful hints ......................28 troubLEShootINg ....................29 WArrANtY AND SErvIcE KitchenAid Food Processor warranty ..............30 Customer service ....................30... -
Page 3: Food Processor Safety
Return appliance to the nearest Authorized Service Facility for examination, repair, or electrical or mechanical adjustment. 8. The use of attachments not recommended or sold by KitchenAid may cause fire, electric shock, or injury. 9. Do not use outdoors. 10. Do not let cord hang over edge of table or counter. -
Page 4: Electrical Requirements
FooD ProcESSor SAFEtY IMPortANt SAFEguArDS 15. Never feed food by hand. Always use the food pusher. 16. Do not attempt to defeat the cover interlock mechanism. 17. This product is designed for household use only. SAvE thESE INStructIoNS Electrical requirements Voltage: 220-240 Volts Frequency: 50/60 Hertz Wattage: 650 Watts... -
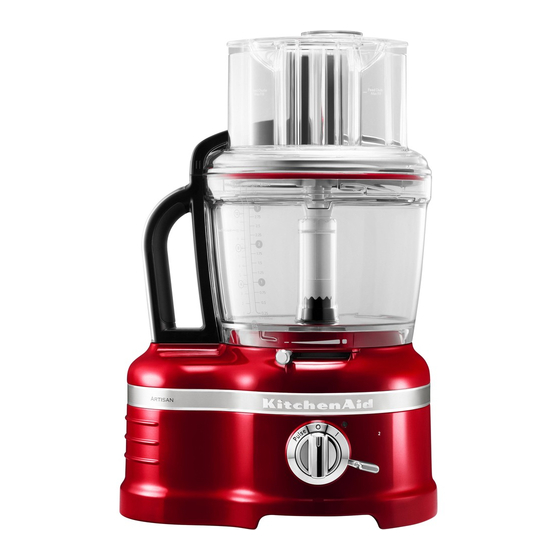
Page 5: Parts And Features
PArtS AND FEAturES Parts and accessories 3-piece food pusher with 3-in-1 feed tube ultratight Seal 4 L Work bowl Externally adjustable blade control Die-cast Accessory case base Stainless steel Dough blade 1 L Mini-bowl multipurpose blade and mini-blade Spatula Egg whip... - Page 6 PArtS AND FEAturES Parts and accessories DIcINg KIt Dicing kit lid ➃ Externally adjustable slicing disc (thin to thick) 2.4 L Prep bowl 8mm Dicing kit blade ➂ Dicing kit grid ➁ reversible (2 mm and 4 mm) shredding disc citrus press 8mm grid cleanout tool ➄...
-
Page 7: Selecting The Right Tools
PArtS AND FEAturES Selecting the right tools Action Setting Food Accessory Vegetables Fruit Fresh herbs Nuts Mince Chop Meat Multipurpose stainless steel blade Mini-bowl and mini multipurpose stainless steel blade Puree Pesto Sauces Cake batter Pie dough Cream Yeast dough Plastic dough blade Knead Fruit (soft) - Page 8 PArtS AND FEAturES Selecting the right tools Action Food Accessory Setting Hard cheese grate/shave disc Chocolate Grate Shave Potatoes French fry disc Firm vegetables Fries Sticks Potatoes 8 mm dicing kit Tomatoes Onions Cucumbers Dice Fruit Vegetables Egg whip Eggs Whip Citrus fruit citrus press...
-
Page 9: Using Your Food Processor
uSINg Your FooD ProcESSor Attaching the work bowl before First use Before using your Food Processor for the first time, wash the bowls and accessories as described in the “Care and Cleaning” section. Power shaft Be sure the Food Processor is turned off, Place the work bowl on the base unplugged, and placed on a level surface. -
Page 10: Using The 3-In-1 Feed Tube
uSINg Your FooD ProcESSor using the 3-in-1 feed tube before use Before operating the Food Processor, be sure the work bowl, blades, and lid are properly assembled on the Food Processor base. Large food pusher Max Fill line on feed tube Use the entire feed tube and the large food pusher to process large items. -
Page 11: Using The Speed Controls
uSINg Your FooD ProcESSor using the speed controls NotE: If the Food Processor fails to operate, make sure the work bowl and lid are properly locked on the base. To turn on, flip the speed lever to “2” To stop, turn the dial to “O” (OFF). (high) or “1” (low), then turn the dial to “I”... - Page 12 uSINg Your FooD ProcESSor Turn the work bowl and lift to remove, Or turn the lid to unlock, as shown, and and then turn and lift the lid. lift the lid to remove, continuing next steps with bowl still attached to Food Processor.
-
Page 13: Using Your Accessories
uSINg Your AccESSorIES Preparing the dicing kit for first use IMPortANt: Follow these directions in order to properly wash all parts of the dicing kit before using it for the first time. Using the handle, place the assembled When placing kit in the work bowl, line dicing kit into the work bowl. -
Page 14: Installing/Using The Dicing Kit
uSINg Your AccESSorIES Installing/using the dicing kit Place the disc adapter onto the Place the ➁ dicing kit grid, with the grid power shaft. facing front, and line up the kit’s tab with the groove in the work bowl. “cLIcK” Place the ➂... -
Page 15: Installing/Removing The Multipurpose Blade
uSINg Your AccESSorIES Installing/removing the multipurpose blade NotE: The multipurpose blade has a spill resistant seal and can be left in work bowl, or removed before the contents are emptied. Place the blade on the power shaft. Press down firmly on the blade. You will hear a click when the accessory locks into place. -
Page 16: Installing/Removing The Prep Bowl
uSINg Your AccESSorIES Installing/removing the prep bowl NotE: The prep bowl can be used only with the discs and the dicing kit. To use the prep bowl, place into the Place the adapter on the power shaft. work bowl using the two finger grips. Place the desired disc on the power Install the lid, aligning the tabs and shaft. -
Page 17: Installing/Removing The Shredding, French Fry, And Parmesan Discs
uSINg Your AccESSorIES Installing/removing the shredding, french fry, and parmesan discs Place the adapter on the power shaft. Slightly rotate the disc until it drops into place onto the adapter. Finger grip Finger grip Install the lid, aligning the tabs and To remove shredding disc and french fry disc, remove the lid and using the locking it into place. -
Page 18: Installing/Removing The Slicing Disc
uSINg Your AccESSorIES Installing/removing the slicing disc Place the disc on the power shaft. Slightly rotate the disc until it drops into place. Finger grip Finger grip To remove slicing disc, remove lid and Install the lid, aligning the tabs and using the 2 finger grips, lift the disc locking it into place. -
Page 19: Installing/Removing The Mini-Bowl And Mini-Blade
uSINg Your AccESSorIES Installing/removing the mini-bowl and mini-blade Mini-blade Power shaft Place the mini-bowl inside the work Press down firmly on the mini-blade. bowl, making sure the tab on the You will hear a click when it locks mini-bowl lines up with the notch in into place. -
Page 20: Installing/Removing The Citrus Press
uSINg Your AccESSorIES Installing/removing the citrus press Place the citrus press adapter onto the Place the strainer basket in the work power shaft. bowl with the locking clip positioned to the left of the work bowl handle. Turn the basket counter-clockwise until Place the cone inside the strainer the clip locks into the handle. -
Page 21: Installing/Removing The Egg Whip Or Dough Blade
uSINg Your AccESSorIES Installing/removing the egg whip or dough blade Place the egg whip or dough blade onto Press down firmly on the egg whip or power shaft. dough blade. After processing, firmly grasp egg whip or dough blade and lift straight up. -
Page 22: Care And Cleaning
cArE AND cLEANINg IMPortANt: Never use abrasive cleansers or scouring pads on the Food Processor. They may scratch or cloud the work bowl and cover. Be sure the Food Processor is off and Clean the base and cord with a warm, unplugged before disassembling. -
Page 23: Tips For Great Results
tIPS For grEAt rESuLtS using the multipurpose blade to chop nuts or make nut butters: Process up to 710 ml (3 cups) of nuts to desired texture, using short pulses, 1 to 2 seconds each time. For a coarser texture, process smaller batches, pulsing 1 or 2 times, 1 to 2 seconds each time. -
Page 24: Using A Slicing Or Shredding Disc
tIPS For grEAt rESuLtS using a slicing or shredding disc to slice uncooked meat or poultry, to slice or shred fruits or such as stir-fry meats: vegetables that are long Cut or roll food to fit feed tube. Wrap and relatively small in and freeze food until hard to the touch, diameter, such as celery, carrots, and bananas: 30 minutes to 2 hours, depending on... -
Page 25: Helpful Hints
tIPS For grEAt rESuLtS helpful hints • Sometimes slender foods, such as • To avoid damage to the blade or motor, do carrots or celery, fall over in the feed not process food that is so hard or firmly tube, resulting in an uneven slice. To frozen that it cannot be pierced with the minimize this, cut food in several pieces tip of a sharp knife. -
Page 26: Troubleshooting
tIPS For grEAt rESuLtS • Use the spatula to remove ingredients • If any plastic parts should discolor due to from the work bowl. the types of food processed, clean them with lemon juice • Your Food Processor is not designed to perform the following functions: - Grind coffee beans, grains, or hard spices... -
Page 27: Warranty And Service Kitchenaid Food Processor Warranty
Contact number for Ireland: Tollfree number +44 (0) 20 8616 5148 E-mail contact for U.K. and Ireland: Go to www.kitchenaid.co.uk, and click on the link “Contact Us” at the bottom of the page. Address for U.K. and Ireland: KitchenAid Europa, Inc. - Page 28 © 2012. All rights reserved. Specifications subject to change without notice. W10529664A 12/12...