Nilfisk-ALTO ATTIX 30 H Operating Instructions Manual
Hide thumbs
Also See for ATTIX 30 H:
- Operating instructions manual (32 pages) ,
- Service manual (31 pages) ,
- Quick start manual (28 pages)

Related Manuals for Nilfisk-ALTO ATTIX 30 H


Summary of Contents for Nilfisk-ALTO ATTIX 30 H
-
Page 1: Operating Instructions
ATTIX 30 H / M / PC / XC ATTIX 50 H / M / PC / XC Operating Instructions 107400338 A en... -
Page 3: Table Of Contents
ATTIX 30/50 H/M Contents english Important safety instructions ....................2 Description Operating elements ..............7 Operating panel ..............8 Before starting the Assembling the vacuum cleaner...........9 cleaner 3.1.1 Taking accessories out of the packaging ......9 3.1.2 Attaching the suction pipe holder to the suction pipe ..9 Before starting the cleaner ...........9 Insert the safety filter bag "H"... -
Page 4: Important Safety Instructions
ATTIX 30/50 H/M 1 Important safety instructions english Symbols used to mark Prior to using the appliance for the first time, be sure to read instructions this document through and keep it ready to hand. DANGER Danger that leads directly to serious or irreversible injuries, or even death. WARNING Danger that can lead to serious injuries or even death. - Page 5 ATTIX 30/50 H/M english Dust Class M (medium). The dusts which belong to this class are: dusts with OEL values > 0.1 mg/m³ as well as saw dust. The machine is tested in its entirety by vacuums for this dust class.
- Page 6 2. disposed of in a manner that complies with valid regulations for such waste removal. At least once a year, a Nilfisk-ALTO technician or an instructed per- son must perform a technical inspection including filters, air tight- ness and control mechanisms. According to AA.22.201.2 appliances in class H must have their filtration efficiency checked once a year.
- Page 7 2. Regularly check whether the power cord is damaged or shows signs of ageing. 3. Have the faulty mains connecting lead replaced by your Nilfisk-Alto service representative or a qualified electri- cian prior to using the appliance again. DANGER The upper section of the vacuum cleaner contains live components.
- Page 8 The use of non-genuine spare parts and accessories can impair the safety of the appliance. 1. Only use spare parts and accessories from Nilfisk-Alto. 2. Use only the brushes supplied with the vacuum cleaner or specified in the operating manual.
-
Page 9: Description
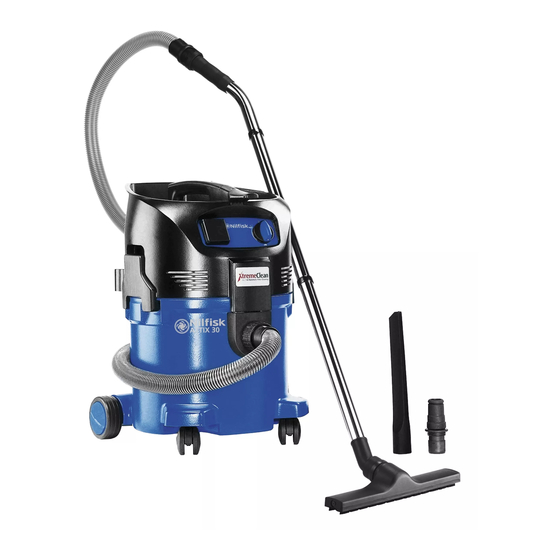
ATTIX 30/50 H/M 2 Description english 2.1 Operating elements Handle with receptacle for electrical lead Fixing point for suction pipe holder Retaining clamp Castor Dirt tank Inlet fitting Applicance switch Hose diameter setting Appliance socket 10 Operating knob for filter cleaning ATTIX 30 ATTIX 50 Optional accessories / Option depending on model... -
Page 10: Operating Panel
ATTIX 30/50 H/M english 2.2 Operating panel ATTIX 30- /50-0M / PC/XC ATTIX 30- /50-0H / PC/XC auto ATTIX 30- /50-2M / PC/XC ATTIX 30- /50-2H / PC/XC... -
Page 11: Before Starting The
ATTIX 30/50 H/M 3 Before starting the cleaner english 3.1 Assembling the 1. Take vacuum cleaner and vacuum cleaner accessories out of the pack- 3.1.1 Taking accessories out aging. of the packaging 2. The mains plug should not yet be inserted into a sock- 3. Open the retaining clamps (A) and remove the up- per section of the vacuum cleaner. -
Page 12: Insert The Safety Filter Bag "H
ATTIX 30/50 H/M english Type of dust Filter bag/waste bag/filter element • Dusts with values Waste bag (5 pcs.) >0.1 mg/m (observe any addi- Order No. tional national regulations) ATTIX 30-XM: 302000804 • Wood dusts & concrete dusts ATTIX 50-XM: 302000728 • Dusts with values Filter bag >0.1 mg/m (observe any addi-... -
Page 13: Inserting The Filter Bag "M
ATTIX 30/50 H/M 7. Attach the upper section of english the vacuum cleaner. 8. Close the retaining clamps (A). Ensure that the retain- ing clamps fit properly. 3.4 Inserting the filter bag 1. The mains plug should not "M" yet be inserted into a socket. 2. - Page 14 ATTIX 30/50 H/M 5. Attach the upper section of english the vacuum cleaner. 6. Close the retaining clamps (A ). Ensure that the retain- ing clamps fit properly.
-
Page 15: Control / Operation
ATTIX 30/50 H/M 4 Control / Operation english 4.1 Connections 1. Connect the suction hose. 4.1.1 Connecting the suction hose 4.1.2 Electrical connection 1. Ensure that the cleaner is switched off. The operating voltage shown on 2. Insert the power cord into a the rating plate must corres pond properly installed and fused to the voltage of the mains power socket with earthing contact. -
Page 16: Suction Power Control
ATTIX 30/50 H/M 4.2.3 Suction power control english Switch Function position The suction auto power control switch allows precise adaptation of the suction power for different cleaning tasks. 4.2.4 Auto-On/Off-Operation - 1. Switch off the vacuum clean- "auto" switch position 2. Switch off the power tool. The vacuum cleaner is switched on and off by the power tool con- nected. -
Page 17: Cleaning The Filter Element
ATTIX 30/50 H/M 4.3 Cleaning the filter english element 4.3.1 Cleaning the filter element " Push&Clean Filter Cleaning System System " (ATTIX 30- / 50-xx PC) Only for vacuum cleaning without a filter bag and without a cloth insert filter. If suction performance drops: cleaning three times. The re- 1. Turn switch to position "I" sulting stream of air removes (maximum suction power). -
Page 18: Techniques
The use of a seperate filter element or filter screen is recommend- If foam appears, stop work immediately and empty the tank. To reduce the amount of foam, use foam killer Nilfisk-ALTO Foam Stop (see section "Accessories" for order number). -
Page 19: Switching The Vacuum Cleaner Off And Storage
ATTIX 30/50 H/M 6 After finishing work english 6.1 Switching the vacuum 1. After picking up hazardous cleaner off and storage dust, vacuum clean the out- side of the cleaner. 2. Switch off the cleaner and pull the mains plug out of the socket. 3. Remove the suction hose form the vacuum cleaner and close the inlet fitting (A) with the plug (B). -
Page 20: Maintenance Plan
ATTIX 30/50 H/M 7 Maintenance english 7.1 Maintenance plan After finishing work When required 7.2.1 Emptying dirt tank 7.2.2 Replacing the safety filter bag "H" 7.2.3 Replacing the filter bag "M" 7.2.4 Replacing the disposal bag "M" 7.2.5 Replacing filter element "H" (Push&Clean) 7.2.6 Replacing filter element "H" (XtremeClean) 7.2.7 Replacing filter element "M"... -
Page 21: Replacing The Safety Filter Bag "H
ATTIX 30/50 H/M 7.2.2 Replacing the safety 1. Open the retaining clamps english filter bag "H" (A) and remove the up- per section of the vacuum cleaner. During the following work, ensure that dust is not unnecessarily spread around, Wear a P2 breath- ing mask. CAUTION! In the case of asbestos abatement wear additional single- use clothing. -
Page 22: Replacing The Filter Bag "M
ATTIX 30/50 H/M 7.2.3 Replacing the filter bag 1. Switch off the vacuum clean- english "M" er and pull the mains plug out of the socket. 3. Open the retaining clamps (A) and remove the upper section of the vacuum clean- During the following work, ensure that dust is not unnecessarily spread around, Wear a P2 breath- ing mask. -
Page 23: Replacing The Disposal Bag "M
ATTIX 30/50 H/M 7.2.4 Replacing the disposal 1. Switch vacuum english bag "M" cleaner and pull the mains plug out of the socket. 2. Open retain- ing clamps (A) and re- move the upper section vacuum cleaner. During the following work, ensure that dust is not unnecessarily spread around, Wear a P2 breath- ing mask. -
Page 24: Replacing Filter Element "H" (Push & Clean System)
ATTIX 30/50 H/M 7.2.5 Replacing filter element 1. Switch vacuum english "H" (Push & Clean cleaner and pull the mains System) plug out of the socket. 2. Open the retaining clamps (A) and remove the up- per section of the vacuum cleaner. During the following work, ensure that dust is not unnecessarily spread around, Wear a P2 breath- ing mask. -
Page 25: Replacing Filter Element "H" (Xtreme Clean System)
ATTIX 30/50 H/M 7.2.6 Replacing filter element 1. Switch off the vacuum clean- english "H" (Xtreme Clean er and pull the mains plug System) out of the socket. 2. Open the retaining clamps (A) and remove the upper section of the vacuum clean- During the following work, ensure that dust is not unnecessarily spread around, Wear a P2 breath- ing mask. -
Page 26: Replacing Filter Element "M" (Push & Clean System)
ATTIX 30/50 H/M 11. Attach the upper section of english the vacuum cleaner. 12. Close the retaining clamps (A). Ensure that the retaining clamps fit properly. 7.2.7 Replacing filter element 1. Switch vacuum "M" (Push & Clean cleaner and pull the mains System) plug out of the socket. 2. -
Page 27: Replacing Filter Element "M" (Xtremeclean System)
ATTIX 30/50 H/M 7.2.8 Replacing filter element english 1. Switch vacuum "M" (XtremeClean cleaner and pull the mains System) plug out of the socket. 2. Open the retaining clamps (A) and remove the up- per section of the vacuum cleaner. During the following work, ensure that dust is not unnecessarily spread around, Wear a P2 breath- ing mask. -
Page 28: Troubleshooting
• Switch off the vacuum cleaner has tripped. and allow it to cool for approx. 5 minutes. If the cleaner cannot be started again, contact the Nilfisk-Alto service department. > Motor is faulty. • Have motor changed by Nilfisk-Alto Service. -
Page 29: Further Information
ATTIX 30/50 H/M 9 Further information english 9.1 Recycling the cleaner Make the old cleaner unusable immediately. 1. Unplug the cleaner. 2. Cut the power cord. 3. Do not discard of electrical appliances with household waste. As specified in European Directive 2002/96/EC on old elec- trical and electronic appliances, used electrical goods must be collected separately and recycled ecologically. -
Page 30: Technical Data
Zylindrical H-filter element PC 302000658 Zylindrical M-filter element PC 302000490 Flat H-filter element XC (2 pcs.) 107400449 Flat M-filter element XC (2 pcs.) 302002842 Motor Cooling air filter 302003721 Blowing adapter 302003717 Cloth insert filter ATTIX 30,50 302000525 Nilfisk-Alto-Foam-Stop (6x1l) 8469... - Page 32 E-mail: service@nilfisk-alto.dk Sd 14, Jalan KIP 11 www.nilfisk-alto.se www.nilfisk-alto.dk Taman Perindustrian KIP TAIWAN Sri Damansara Nilfisk-ALTO Food Division 52200 Kuala Lumpur Nilfisk-Advance Taiwan Branch Division of Nilfisk-Advance A/S Malaysia No. 5, Wan Fang Road Blytækkervej 2, Tel.: (+60) 3 603 6275 3120...