E-Mu 202 Owner's Manual
Usb 2.0 audio interface
Hide thumbs
Also See for 202:
- Getting started (52 pages) ,
- Owner's manual (25 pages) ,
- Getting started manual (52 pages)
Table of Contents
Advertisement
Advertisement
Table of Contents

Related Manuals for E-Mu 202


Summary of Contents for E-Mu 202
- Page 1 O w n e r ’ s M a n u a l O w n e r ’ s M a n u a l...
- Page 2 Owner’ s Manual © 2006 E-MU Systems All Rights Reserved Revision: D E-MU World Headquarters Europe Creative Labs (Ireland) Ltd E-MU Systems Ballycoolin Business Park 1500 Green Hills Road Blanchardstown, Dublin 15 Scotts Valley, CA 95066 IRELAND Asia Pacific, Africa, Middle East Japan Creative Media K.
-
Page 3: Table Of Contents
Uninstalling the Audio Drivers and Applications ..........11 Connection Diagram ..............12 Controls & Headphone Output ........... 13 Input/Output ................14 E-MU USB Audio Control Panel ........... 15 Direct Monitoring ............... 16 Tutorials ..................17 Introduction ....................17 Before you Begin..................17 Getting Started with Steinberg Cubase LE (Windows) ........17... - Page 4 Internet References ..............43 Forums ......................43 Technical Specifications .............. 44 Declaration of Conformity ............46 Index ..................49 E-MU Systems...
-
Page 5: Introduction
24-bit/192kHz A/D and D/A converters, ultra-low jitter clock, and Class-A, ultra-low noise mic/line/hi-Z preamps. The signal-to-noise specs of the E-MU 0202 USB 2.0 are unmatched by any other USB interface on the market! From its plug-and-play functionality and hands-on ergonomic design, to profes- sional features like zero-latency direct monitoring, the USB will forever change your expectations of USB audio. -
Page 6: Package Includes
E-MU Production Tools Software Bundle CD-ROM (OS X) • BIAS Peak Express • Celemony Melodyne essential • IK Multimedia AmpliTube LE • SFX Machine LT • Minnetonka diskWelder BRONZE (5-burn trial) Ableton Live Lite for E-MU CD-ROM (OS X, Windows) • Ableton Live Lite E-MU Systems... -
Page 7: Computer Requirements
Computer Requirements COMPUTER REQUIREMENTS The minimum computer system requirements for the E-MU 0202 USB 2.0 are listed below. Windows • Intel® or AMD® processor — 1.2 GHz or faster • Intel, AMD, or 100% compatible motherboard & chipset • Microsoft® Windows® XP (SP 2 or greater) or Windows XP x64 •... -
Page 8: Software Installation
Testing” warning screen. See the note below. 6. When prompted, restart your computer. 7. Be sure to register your 0202 USB 2.0 so we can advise you of future software updates and special offers. You can register online at: www.emu.com/register 8. -
Page 9: Macintosh Os X
11. Select the 0202 USB 2.0 for the following: Default Input, Default Output, System Output, Properties For. 12. Play a song on iTunes to verify that the 0202 USB 2.0 is the default device for audio playback. 13. Quit iTunes. - Page 10 Connecting a MIDI keyboard will allow you to use the virtual instruments provided in the software bundle and get the most out of your purchase. You’ll also need a MIDI interface such as the E-MU Xmidi 2x2 or Xmidi 1x1. 14. Click the MIDI Devices button. The window shown below appears.
-
Page 11: Uninstalling The Audio Drivers And Applications
23. Continue to install applications from the bundle as desired, Uninstalling the Audio Drivers and Applications At times you may need to uninstall or reinstall the 0202 USB 2.0 application and device drivers to correct problems, change configurations, or upgrade outdated drivers or applications. -
Page 12: Connection Diagram
(like the one supplied) for USB 2.0 Stereo Hi Z / Line the USB connection. Using a USB 1.1 cable may cause - Mic Line erractic behavior and degraded performance. Computer Powered Speakers 1/4” male to 1/4” male (unbalanced) E-MU Systems... -
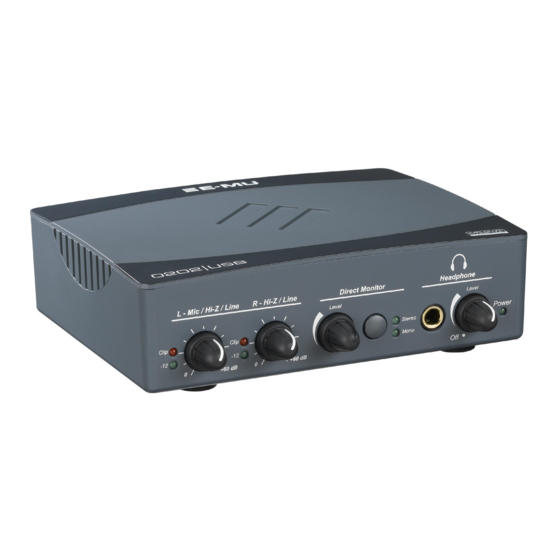
Page 13: Controls & Headphone Output
See “Direct Monitoring” on page Headphone Jack Connect your stereo headphones here. Headphone Level Control This knob controls the volume of the headphone output. This switch also turns the 0202 USB 2.0 on or off. 0202 USB 2.0 Owner’s Manual... -
Page 14: Input/Output
USB connection provides two-way communication when connected to the computer. The 0202 USB 2.0 receives its power from the USB. Always connect to the USB NOTE to PC Users: jack on the computer itself and NOT to a low-power USB connection that When using a USB 1.1 port,... -
Page 15: E-Mu Usb Audio Control Panel
After you have successfully installed the audio drivers, launch the E-MU USB Audio control panel. The E-MU USB Audio control panel is shown below. • Windows: The E-MU USB Audio control icon will be visible in the Taskbar, which is normally located in the bottom right of the screen. It can also be launched from the Start Menu (All Programs, Creative Professional, E-MU USB Audio Application). -
Page 16: Direct Monitoring
176.4 or 192 kHz. tracks. Direct monitoring is controlled manually from the Direct Monitor switch on the 0202 USB 2.0. It’s not necessary to turn it on in your recording application Latency (delay) Software Monitoring Direct Monitoring Direct Monitoring allows you to listen to the direct sound of your instrument during recording, without the delay incurred by going to the computer and back. -
Page 17: Tutorials
Before you Begin... • You should have already installed the E-MU software on your computer • You should hear the computer sounds coming out of the E-MU 0202 USB 2.0 WARNING! and your speakers when you play a CD or an MP3 using Windows Media Windows Users - After Player or iTunes. - Page 18 6. Select Device Setup… from the Devices menu. 7. Select VST Multitrack from the Devices list. 8. In the Setup section of the dialog box, select ASIO E-MU 0202|USB. A pop up dialog box asks, if you want to keep or switch the ASIO driver. Select Switch.
-
Page 19: Basic Multitrack Recording
Stereo/Mono button Monitor Track Input 2. The screen shows the “L” input of the 0202|USB. Note that IN 1 is shown in NOTE the Track Input field (Input L =IN1, Input R =IN2). If you want to record in If the Inputs aren’t available, stereo, turn the Stereo/Mono button On and select IN 1 + IN 2 for the Track check Devices, VST Inputs. - Page 20 Tutorials 4. Press the Direct Monitor button on your E-MU 0202|USB 2.0. If you are recording a mono track, set Direct Monitor to Mono by pressing the Direct Monitor button again. Get Ready To Record 5. Plug in your instrument or microphone and set the input gain control for a good signal level.
-
Page 21: Recording A Midi Track Using Proteus Vx
The Cubase Project Window should now look more or less like the one below with one or more Audio tracks and one MIDI track: MIDI Track 3. Click the Devices menu, and select VST Instruments. 0202 USB 2.0 Owner’s Manual... - Page 22 9. Bring up the mini keyboard by clicking the icon on Proteus VX and play a few notes. You should be hearing sound. If not, verify that the 0202 USB 2.0 is properly configured. 10. Play your MIDI controller and verify that it plays Proteus VX.
- Page 23 Play. Proteus VX now plays both MIDI channels. On Your Own Cubase LE and Proteus VX include excellent online documentation and help files. Take the time to learn all the features of these powerful programs, and most of all have fun. 0202 USB 2.0 Owner’s Manual...
-
Page 24: Getting Started With Cakewalk Sonar Le (Windows Only)
The first time you run Sonar LE, the following dialog box appears: 2. Click No to close the dialog box. (The tests do not apply to the 0202 USB 2.0.) Sonar LE opens and the following dialog box appears. - Page 25 6. Select ASIO as the Driver Mode and click OK. You’ll get a pop-up dialog box explaining that the ASIO settings won’t take effect until the next time you start Sonar LE. 7. Close Sonar LE completely and restart the application. 0202 USB 2.0 Owner’s Manual...
- Page 26 TIP . . . If you have two or more 13. Select Audio Data, then select a location for the Global Audio Folder. hard disks, it’ s better to store audio files on a disk that isn’t running your OS. E-MU Systems...
-
Page 27: Basic Multitrack Recording
2. Select the input source by clicking on the small triangle on the input field. If you wish to record a mono signal on the Left input of the 0202 USB, select Left ASIO E-MU 0202|USB Analog In A. To record both inputs in stereo select Stereo ASIO E-MU 0202|USB Analog In A. - Page 28 Output Select 6. If your input signal is either too weak or too strong, adjust the input level control on the 0202 USB 2.0. 7. Optional Step - Metronome: First, select Toolbars from the View menu and check the Metronome Toolbar. Next turn Metronome During Record On by clicking the button.
-
Page 29: Recording A Midi Track Using Proteus Vx
(You may have to scroll down to see the new tracks.) New Proteus VX Tracks Audio Output from Proteus VX MIDI input to Proteus VX Click Here to view the strip controls. 0202 USB 2.0 Owner’s Manual... - Page 30 MIDI channel to channel 1. MIDI. Open Proteus VX 9. Double-click on the number (or on the Proteus VX name) to open the Proteus VX editor. Synth Rack with Proteus VX Double-Click Here to Open Proteus VX E-MU Systems...
- Page 31 13. Play your MIDI keyboard and verify that it plays Proteus VX. 14. Feel free to play around for awhile selecting presets and exploring Proteus VX. Don’t worry about losing anything. Nothing is made permanent until you Save the bank, so don’t worry and have fun. 0202 USB 2.0 Owner’s Manual...
- Page 32 Now that you’ve had a taste of what Proteus VX can do, please read the Proteus VX Operation Manual PDF to learn all about this exceptional instrument. Sonar LE also includes useful online documentation and help files to help you learn about the features of this powerful program. E-MU Systems...
-
Page 33: Getting Started With Ableton Live Lite 4 (Windows/Os X)
Live’s excellent interactive Lessons and read the Ableton Live reference manual pdf in order to learn more about the program. Before you Begin: • You should have already installed the 0202 USB 2.0 and software on your computer according to the instructions in your printed “Getting Started” manual. - Page 34 Set up the Audio Parameters as shown above. 8. Windows Users:Select ASIO and ASIO E-MU 0202|USB as the Audio Device. OS X Users: Select Core Audio and E-MU 0202|USB as the Audio Device. Set up the MIDI Parameters 9. Click the MIDI/Sync tab of the Preferences dialog box. The MIDI Setup page NOTE appears.
-
Page 35: Playing Audio Clips
8. When you’re finished exploring, and are ready to go on to the next tutorial, just make sure that you have at least one drum clip in Audio Track 1 and one empty slot in Audio Track 2. 0202 USB 2.0 Owner’s Manual... -
Page 36: Recording Audio Into Ableton Live
1 or 2 from the drop-down menu. 4. Feed an input signal into the 0202|USB 2.0 from a guitar, keyboard, CD player or other audio source. A mini-meter appears in the input selection field. -
Page 37: Running Proteus Vx Vsti From Ableton Live (Windows Only)
Load the Proteus VX Bank 4. Click on the wrench icon on Proteus VX in the area below the mixer. See the image at right. Step 2: Step 4: Plug-in Device Browser Select Wrench Icon 0202 USB 2.0 Owner’s Manual... - Page 38 7. Choose Open from the File menu on Proteus VX. Locate and load the Proteus X Composer bank, which is located here: (“Program Files/Creative Profes- sional/E-MU Sound Central”). This big bank takes a few seconds to load. Play the Proteus X Composer Bank 8.
- Page 39 21. Currently, the MIDI To box reads “No Output”. Instead, select 3-MIDI. Select Another option box labeled “Track In” now appears beneath 3-MIDI. 3-MIDI 22. Click on the Track In box to see the list of MIDI channels. 0202 USB 2.0 Owner’s Manual...
- Page 40 Ableton Live Programs are offset by +1 from Proteus Here’s another way to change the MIDI Program (Preset in E-MU speak) without going into the Proteus VX editor. 30. Double-click on one of the currently playing MIDI clips. The Clip View appears at the bottom of the window.
-
Page 41: Other Cool Tips
Simply select the Proteus VX Channel and Proteus VX controller letter A-M for each axis of the X/Y controller. Open Proteus VX to see what controllers A-M are controlling. For more information about MIDI controllers please refer to the Proteus VX pdf manual. Assign Controllers 0202 USB 2.0 Owner’s Manual... -
Page 42: Troubleshooting
E-MU 0202 USB 2.0 as the “Default Audio Device”. 1. Open the Control Panel, then select Sounds and Audio Devices. 2. Click the Audio tab and select the E-MU 0202 USB 2.0 as the Default device under Sound Playback. -
Page 43: Internet References
USB 2.0 vs. USB 1.1 Operation (PC only) The 0202 can operate in USB 2.0 or USB 1.1 mode on the PC. 96 kHz and 192 kHz sample rates are only available while operating in USB 2.0. The included E-MU USB Audio Control panel software includes an indicator to let the user know which mode the device is running in. -
Page 44: Technical Specifications
ASIO2, WDM MME, Apple Core Audio and Core MIDI drivers Anti-Pop speaker protection minimizes noise during power on/off Ultra-low jitter clock subsystem: <100ps RMS Combo Microphone Preamplifier/Hi-Z/Line Input (1) Type: Balanced E-MU combo mic preamplifier and Hi-Z/line input A/D converter: AK5385A Input Impedance: 1.5 Kohms Max Level: +6.5dBV (+8.7dBu) - Page 45 Stereo Crosstalk: (1kHz at -1dBFS, 300 ohm load) < -91dB Dimensions / Weight Weight: 0.94 lb / 0.43 kg Dimensions: W: 6.5” H: 2.0” L: 5.5” W: 165 mm H: 50.8 mm L: 140 mm 0202 USB 2.0 Owner’s Manual...
-
Page 46: Declaration Of Conformity
Declaration of Conformity DECLARATION OF CONFORMITY E-MU Systems Trade Name: EM8740 Model No.: E-MU Systems Responsible Party: 1500 Green Hills Road, Suite 101 Address: Scotts Valley, CA 95066 U.S.A. This device complies with Part 15 of the FCC rules. Operation is subject to the... -
Page 47: Compliance Information
EMC Directive for using connection cables shorter than 3 meters (9.8 feet). Notice If static electricity or electromagnetism causes data transfer to discontinue midway (fail), restart the application or disconnect and connect the USB cable again. 0202 USB 2.0 Owner’s Manual... - Page 48 Declaration of Conformity E-MU Systems...
-
Page 49: Index
INDEX Headphone Level Control 13 Headphone Output 14 Inputs 14 Inspector, Cubase LE 22 Latency 16 Ableton Live Lite 4 for E-MU Lost Communication 42 changing presets 40 playing MIDI clips 38 running Proteus VX in 37 MIDI setting up 33... - Page 50 USB 2.0 vs. USB 1.1 Operation 43 USB Jack 14 VST Instruments 21 VST Plug-ins, locating in Ableton Live Lite 33 WDM/ASIO Playback 43 Windows Logo Testing Note 8 Windows Media Player, no audio 42 X/Y Controller, Ableton Live Lite 41 E-MU Systems...