
Related Manuals for Electrolux IQ-Touch


Summary of Contents for Electrolux IQ-Touch
- Page 1 Use & Care Guide IQ-Touch™ Front-Load Washer Guide d’utilisation et d’entretien Laveuse à chargement frontal IQ-Touch Guía de uso y cuidado Lavadora de carga frontal IQ-Touch 137262400 A (0907)
-
Page 2: Table Of Contents
Please read and save this guide Thank you for choosing Electrolux, the new premium brand in home appliances. This Use & Care Guide is part of our commitment to customer satisfaction and product quality throughout the service life of your new appliance. -
Page 3: Safety
Safety Important Safety Instructions Recognize safety symbols, words and WARNING labels For your safety the following information in this Your safety and the safety of others is very manual must be followed to minimize the risk of important. fi re or explosion or to prevent property damage, personal injury or death. - Page 4 Safety WARNING To reduce the risk of fi re, electrical shock, or injury to persons when using this washer, comply with the basic warnings listed below. Failure to comply with these warnings could result in serious personal injuries. You can be killed or seriously injured if you don’t follow these Important Safety Instructions: PROTECT CHILDREN PREVENT FIRE •...
- Page 5 Safety Important Safety Instructions, continued PREVENT INJURY PREVENT INJURY AND DAMAGE TO THE WASHER • To prevent shock hazard and assure stability during operation, the washer must be installed To prevent serious personal injury and damage to and electrically grounded by a qualifi ed service the washer: person in accordance with local codes.
-
Page 6: Features
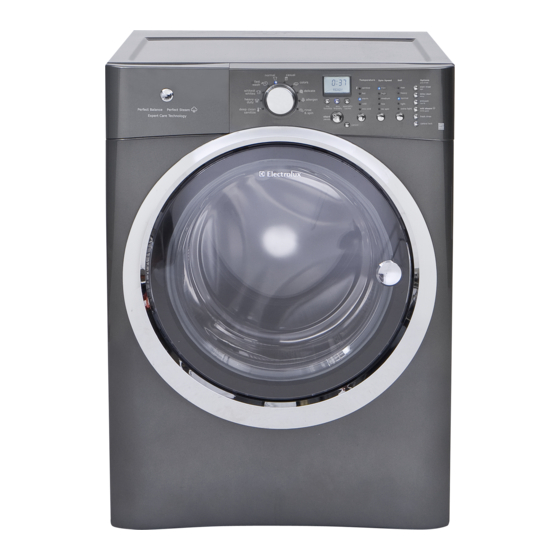
Wash Drum Dual Stage, Wide-Angle Door Hinge Touch-2-Open™ Adjustable Door Latch with Leveling Legs Safety Lock ® As an ENERGY STAR Partner, Electrolux Major Appliances has determined that this ® product meets the ENERGY STAR guidelines for energy effi ciency. -
Page 7: Operating Instructions
Operating Instructions Getting Started To run your washer, follow these basic steps: Sort laundry into loads that can be washed Add laundry products to the dispenser. (See together. (See page 8.) page 10-11.) Prepare items for washing. (See page 8.) Select the appropriate cycle and settings for the load. -
Page 8: Operating Your Washer
Operating Instructions Operating Your Washer BEFORE USING YOUR WASHER Read the important instructions in this section of the Use and Care Guide before operating your washer. WARNING To reduce the risk of fi re, electric shock or injury to persons, read the IMPORTANT SAFETY INSTRUCTIONS in this Use and Care Guide before operating your washer. - Page 9 Operating Instructions OPERATING YOUR WASHER, continued 3. Pretreat stains and heavy soil. See Stain Removal Guide in this guide for safe, successful stain removal instructions. 4. Add laundry load to washer. Combine large and small items in a load. Load large items fi rst. Large items should not be more than half the total wash load.
- Page 10 Operating Instructions OPERATING YOUR WASHER, continued 5. Add laundry products to the dispenser. For best results Use a low-sudsing, high effi ciency detergent to prevent oversudsing in front load washers. Look for this symbol on the detergent label: Detergent, liquid chlorine bleach and liquid fabric softener will be dispensed at the proper times in the cycle.
- Page 11 Operating Instructions OPERATING YOUR WASHER, continued Liquid Chlorine Bleach If desired, add liquid chlorine bleach to the Other Wash Products chamber labeled “Liquid Bleach” and marked Color-safe bleach, water conditioner, detergent with this symbol . Fill to the MIN line for booster and enzyme products may be added small loads or the MAX line for large loads.
- Page 12 Operating Instructions OPERATING YOUR WASHER, continued 6. Select the appropriate cycle and settings for the load. Turn the cycle selector knob in either direction to select the cycle desired. The indicator for that cycle will be illuminated. See the “Cycle Selection”...
-
Page 13: Operating Your Washer
Operating Instructions OPERATING YOUR WASHER, continued 7. Start the washer. Close the door and press start. The washer DOOR will not operate with the door open and OPEN will be displayed. Select delay start to delay the beginning of the cycle for up to 14 hours if desired. As a safety measure, the door will automati- cally lock during the entire wash cycle. -
Page 14: Cycle Selection
Operating Instructions Cycle Selection Turn the cycle selector in either direction to the cycle desired. The indicator for that cycle will be illuminated. Press on the cycle selector knob to extend it or return it fl ush to the console. For best results Follow the fabric care label instructions on items to be washed. - Page 15 Operating Instructions Cycle Selection, continued DEEP CLEAN SANITIZE Use the deep clean sanitize cycle to clean and sanitize heavily soiled, colorfast fabrics including towels, bedding, and children’s clothing. Very hot water, all spin speeds, all soil levels except light and extra light, and all options except prewash, eco friendly and stain clean are available with this cycle.
- Page 16 Operating Instructions Cycle Selection, continued CASUAL The casual cycle provides 5-20 minutes of revers- ing tumble action for cottons and blends with a permanent press or no-iron fi nish. To minimize wrinkling, the warm/warm and sanitize/cold tem- peratures are not available with this cycle. All spin speeds, soil levels, and options are available.
-
Page 17: Washing/Rinsing Temperature
Operating Instructions Cycle Selection, continued MY FAVORITE To program a cycle with your preferred water temperature, spin speed, soil level and options, press and hold the my favorite button for 3 sec- onds. To use that customized cycle to wash future loads, simply press the my favorite button and the se- lected cycle, water temperature, spin speed, soil level and options will be indicated. -
Page 18: Spin Speed
Operating Instructions Temperature, continued SANITIZE/COLD This setting sanitizes heavily soiled colorfast fabrics such as towels, bedding, and children’s clothing by killing 99.9% of bacteria using wash water heated with a boost heater to 152° F (67° C). Cold water is used to cool and rinse the load. -
Page 19: Options
Operating Instructions Options Suitable options will automatically be indicated when the cycle is selected. To add options, press the corresponding options buttons to illuminate the selections desired. To de- lete options, press the options buttons again and the indicator lights will turn off. To protect your fabrics, not all options are available with every cycle. -
Page 20: Washer Features
Operating Instructions Washer Features DELAY START SYSTEM CLEAN Use delay start with any cycle to select a wash To clean and freshen the washer, perform the SYS- time convenient to your schedule or during off TEM CLEAN cycle. If you wish to begin the cycle, peak energy hours. -
Page 21: Cycle Chart
Cycle Chart Washer Settings Chart These Temperature, Spin Speeds, Soil levels and Options are available with the following cycles: deep heavy whites colors normal casual fast delicate hand spin clean duty wash wash only sanitize 144 min 57 min 52 min 31 min 52 min 31 min... -
Page 22: Stain Removal Guide
Stain Removal Guide Stain Removal Procedures SAFE STAIN REMOVAL PROCEDURES WARNING To reduce the risk of fi re or serious injury to per- sons or property, comply with the basic warnings HARMFUL VAPOR HAZARD listed below: Do not use or mix liquid chlorine bleach with other •... -
Page 23: Stain Removal Suggestions
Stain Removal Guide Stain Removal Suggestions STAIN TREATMENT Adhesive tape, chewing Apply ice. Scrape off excess. Place stain face down on paper towels. Saturate with gum, rubber cement prewash stain remover or nonfl ammable dry cleaning fl uid. Baby formula, dairy Use product containing enzymes to pretreat or soak stains. - Page 24 Care & Cleaning Inside Routine Cleaning (Preventative) To help prevent odors, mold or mildew, leave the door open for a few hours after use or whenever the washer is not in use. CAUTION ENTRAPMENT and TIP-OVER HAZARD An open door could entice children to hang on the door or crawl inside the washer.
-
Page 25: Care & Cleaning
Care & Cleaning Other Inside Routine Cleaning (Preventative) CLEANING DISPENSER DRAWER AREA NOTE Detergent and fabric softener may build up in the dispenser drawer. Residue should be removed once or twice a month. • Remove the drawer by pulling the drawer out until it stops. - Page 26 Care & Cleaning Inside Cleaning (Aggressive) In cases where SYSTEM CLEAN cycle along with care and cleaning of rubber gasket folds isn’t done, and severe odor, mold, mildew, or residue buildup REMOVE “LIQUID ONLY” have developed, follow the below cleaning procedure DISPENSER CUP to help alleviate the problem.
- Page 27 Care & Cleaning Outside Routine Cleaning • When washing is completed, wipe top and sides of washer with a damp cloth. Turn water faucets off to prevent pressure build-up in the hoses. • Clean the cabinet with mild soap and water. Never use harsh, gritty or abrasive cleansers •...
- Page 28 Solutions to Common Problems Common Washing Problems Many washing problems involve poor soil and stain removal, residues of lint and scum, and fabric damage. For satisfactory washing results, follow these suggestions provided by The Soap and Detergent Association. PROBLEM POSSIBLE CAUSES SOLUTIONS PREVENTIVE MEASURES Blue stains...
-
Page 29: Solutions To Common Problems
Solutions to Common Problems Common Washing Problems, continued PROBLEM POSSIBLE CAUSES SOLUTIONS PREVENTIVE MEASURES Yellow • Agitation time too short. • Soak in detergent booster or • Select correct wash cycle. buildup of • Wash water temperature too product containing enzymes. •... -
Page 30: Service Prevention Checklist
Solutions to Common Problems Service Prevention Checklist Before calling for service, review this list. It may save both time and expense. The list includes common occurrences that are not the result of defective workmanship or materials in this washer. OCCURRENCE POSSIBLE CAUSE SOLUTION NOISE... - Page 31 Solutions to Common Problems Avoid Service Checklist, continued OCCURRENCE POSSIBLE CAUSE SOLUTION WATER Water collects in folds of This is a result of the washing action and the bellows at the end of is part of the normal operation of the the cycle.
-
Page 32: Warranty Information
Warranty Information Your appliance is covered by a one year limited warranty. For one year from your original date of purchase, Electrolux will repair or replace any parts of this appliance that prove to be defective in materials or workmanship when such appliance is installed, used, and maintained in accordance with the provided instructions.