
Related Manuals for Electrolux WAVE-TOUCH 137356900 A


Summary of Contents for Electrolux WAVE-TOUCH 137356900 A
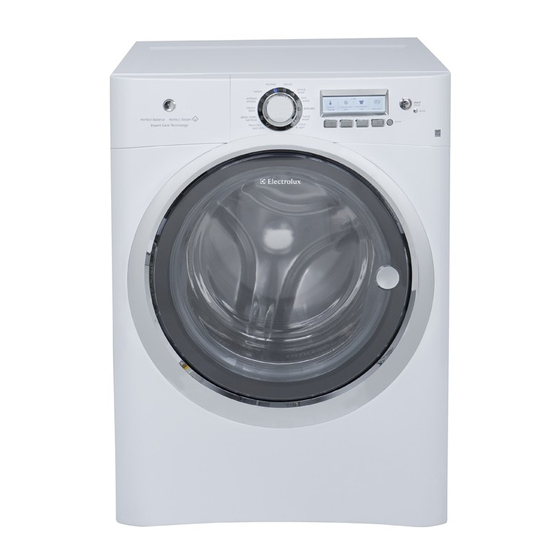
- Page 1 Use & Care Guide Wave-Touch™ Front-Load Washer Guide d’utilisation et d’entretien Laveuse à chargement frontal Wave-Touch Guía de uso y cuidado Lavadora de carga frontal Wave-Touch 137356900 A (1005)
-
Page 2: Table Of Contents
Please read and save this guide Thank you for choosing Electrolux, the new premium brand in home appliances. This Use & Care Guide is part of our commitment to customer satisfaction and product quality throughout the life of your new appliance. -
Page 3: Safety
Important Safety Instructions Recognize safety symbols, words and labels Your safety and the safety of others is very important. We have provided many important safety messages in the Use and Care Guide, Installation Instructions and on your appliance. Always read and obey all safety messages. - Page 4 Safety WARNING To reduce the risk of fi re, electrical shock, or injury to persons when using this washer, comply with the basic warnings listed below. Failure to comply with these warnings could result in serious personal injuries. You can be killed or seriously injured if you don’t follow these Important Safety Instructions: PREVENT FIRE •...
- Page 5 • Do not tamper with controls. • Do not install or store the washer where it will be exposed to the weather. • Do not install on carpet. Install washer on a solid fl oor. It may be necessary to reinforce the fl oor to prevent vibration or movement.
-
Page 6: Features
ENERGY STAR for energy effi ciency. Multi-language Control Lock LCD Interface Stainless Steel Wash Drum Dual Stage, Wide-Angle Adjustable Door Hinge Leveling Legs ® Partner, Electrolux ® guidelines Theater-Style, Luxury-Lighting™ System Cascading Wash Vanes Touch-2-Open™ Door Latch with Safety Lock... -
Page 7: Operating Instructions
You may or may not hear the following sounds from your new washer: A. DRAIN HOSE The washer has a fl exible drain hose to carry water from the washer to the stand pipe of your home. You will hear water fl... -
Page 8: Operating Your Washer
Operating Instructions Operating Your Washer BEFORE USING YOUR WASHER Read these important instructions in this section of the Use and Care Guide before operating your washer. WARNING To reduce the risk of fi re, electric shock or injury to persons, read the IMPORTANT SAFETY INSTRUCTIONS in this Use and Care Guide before operating your washer. - Page 9 Wash a single heavy item such as a king-sized comforter, bedspread or sleeping bag sepa- rately. The washer can be fully loaded, but the items should not be tightly packed. The door should close easily. Operating Instructions...
- Page 10 From time to time you may see water in the “Main Wash -liquid only”, “Pre-Wash”, “Liquid Bleach” and “Fabric Softener” chambers. This is part of the normal operation of the washer. Liquid Detergent Add the recommended amount of a high ef- fi...
- Page 11 OPERATING YOUR WASHER, continued Other Wash Products Water conditioner, detergent booster and en- zyme products may be added with the deter- gent. Put liquid products with liquid detergent in the “Main Wash - liquid only” detergent cup or powder products with powder deter- gent in the “Main Wash”...
- Page 12 Operating Instructions OPERATING YOUR WASHER, continued 6. Select the appropriate cycle and settings for the load. Turn the cycle selector knob in either direc- tion to select the cycle desired. The icon for that cycle will be illuminated and if the cycle...
- Page 13 DOOR LOCKED entire wash cycle and displayed. To add a forgotten item to the washer any time during the wash portion of the cycle, press pause. When the door unlocks, open the door, add the item, close the door and press start to resume the cycle.
-
Page 14: Cycle Selection
To change the selection after the cycle begins, press cancel before making another choice. Just turning the cycle selector knob to another selec- tion will not change the cycle. Refer to Washer Settings Chart for complete in- formation regarding available options and settings for each cycle. NORMAL Use this load for cotton, linen, towels, shirts, sheets, denims and mixed loads. - Page 15 fi nal temperature of the wash water may be lower and sanitation may be reduced. As a precaution, the washer door is locked once the water temperature reaches 130° F (55° C). If the cycle is cancelled during the wash phase and the water temperature is greater than 150°...
- Page 16 Operating Instructions Cycle Selection, continued SPECIALTY CYCLES To access you washer’s Specialty Cycles: • Turn the cycle selector knob to cialty. • Press the button under the LCD corresponding to specialty cycles. • Rotate the cycle selector knob to scroll through the list of available Specialty Cycles to choose from.
- Page 17 To prevent deformation of toys, freshwater rinse and low spin speed are also preset selections. Protect your washer drum fi nish and maximize toy life by placing it in a pillow case and tying the end closed before washing it.
- Page 18 Operating Instructions Cycle Selection, continued MY FAVORITES To select one of your 3 favorite cycles: • Turn the cycle selector knob to cialty. • Press the button under the LCD corresponding to my favorites to display the favorites cycles. • Press the button corresponding to the favorite cycle desired.
- Page 19 If more than one user has been entered in CUSTOM MODE: • The current user’s name will be displayed when the washer is turned on if CUSTOM MODE is on. • Press the button under to continue using that user’s favorite cycles.
-
Page 20: Washing/Rinsing Temperature
To protect your fabrics, not all temperatures are available with every cycle. Settings will not be dis- played if they are not available with that cycle. See the “Washer Settings Chart” in this guide for more information. The temperature selected for the cycle will be remembered and recalled each time that cycle is selected in the future. - Page 21 Temperature, continued SANITIZE TEMP This setting sanitizes heavily soiled white and color- fast fabrics such as towels, bedding, and children’s clothing by killing 99.9% of bacteria using wash water heated with a boost heater to 152° F (67° C). Cold water is used to cool and rinse the load. This setting is only available with the deep clean sani- tize cycle.
-
Page 22: Spin Speed
Operating Instructions Spin Speed Maximum spin, high spin, medium spin, mini- mum spin, and low spin speeds are available for each cycle. The spin speed and/or duration of fi nal spin vary from cycle to cycle. Increasing the spin speed will extract more water, decrease drying time and conserve energy. -
Page 23: Options
DO NOT force open - it will unlock upon cooling. • During a steam cycle you may notice steam exiting from the rear vent of the washer - this is normal and not cause for alarm. Operating Instructions will disappear. - Page 24 Select extended fresh to apply periodic rinses with load tumbling after the wash cycle is com- plete to keep clothes left in the washer fresh for up to 12 hours. When you are ready to remove the load during the extended fresh segment, you must press cancel to end the cycle and open the door.
-
Page 25: Options
Operating Instructions Options, continued WARM RINSE Select the warm rinse option with the normal, heavy duty, active wear, fast wash, delicates and hand wash cycles. DELAY START Use delay start to select a wash time convenient to your schedule or during off-peak energy hours. The start of any cycle can be delayed for 30 min- utes to 22 hours. -
Page 26: Cycle Chart
Operating Instructions Washer Settings Chart These temperature, spin speeds, soil levels and options are available with the following cycles: temperature sanitize eco hot warm eco warm cold eco cold spin speed maximum spin high spin medium spin low spin minimum spin... -
Page 27: Operating User Interface Features
The set prefs feature allows you to personalize cycles, hide cycle descriptions, select the lan- guage, volume, brightness and contrast of the display, reset settings, clean the washer, and run the installation cycle. See SET PREFS in “Operat- ing User Interface Features” for more details. -
Page 28: Saving Favorites
Operating User Interface Features Saving Favorites Use the save as favorite feature to name and save a custom cycle to memory with all options and settings preferred. Up to 3 favorites may be saved for each custom user. Follow these steps: •... -
Page 29: Setting Preferences
To edit names while in CUSTOM MODE, turn the washer off by pressing cancel. Press any other button to wake the washer up. Screen will display to change or turn off USERS press SELECT You must press select within 5 seconds or washer will return to normal operation with previous user selected. - Page 30 Setting Preferences, continued INSTALL CYCLE Run the INSTALL CYCLE before operating the wash- er the fi rst time. Remove all items from the washer drum and press start. For more information on performing the washer INSTALL CYCLE, refer to the Installation Instructions accompanying this washer.
-
Page 31: Setting Preferences
Operating User Interface Features Setting Preferences, continued CONTRAST Press the button beneath plus (+) or minus (-) symbols to increase or decrease the contrast of the display. Press select to accept the change or press the button under EXIT to return to normal operation without any changes. -
Page 32: Other Features
A situation where oversudsing has been detected by the washer will result in the washer automatically adding up to 4 extra rinses to attempt to clear the suds. Each extra rinse the washer performs to clear the suds will add 5 minutes to the cycle display time. -
Page 33: Stain Removal Guide
Stain Removal Procedures SAFE STAIN REMOVAL PROCEDURES To reduce the risk of fi re or serious injury to per- sons or property, comply with the basic warnings listed below: • Read and comply with all instructions on stain removal products. •... -
Page 34: Stain Removal Suggestions
Stain Removal Guide Stain Removal Suggestions STAIN Adhesive tape, chewing gum, rubber cement Baby formula, dairy prod- ucts, egg Beverages (coffee, tea, soda, juice, alcoholic beverages) Blood Candle wax, crayon Chocolate Collar or cuff soil, cosmet- Dye transfer on white fabric Grass Grease, oil, tar (butter,... -
Page 35: Care & Cleaning
ENTRAPMENT and TIP-OVER HAZARD An open door could entice children to hang on the door or crawl inside the washer. If there are no small children present, you may leave the door ajar to prevent mildew and odor build up. - Page 36 • If there are no small children or pets present, you may leave the door ajar when the washer is not in use. • Leave the dispenser drawer open slightly at the end of the wash day.
- Page 37 Select CLEAN WASHER cycle in the specialty cycles section. Upon cycle completion inspect the interior of the washer to see if the odor/residue has been eliminated. If any additional cleaning is required, repeat the above procedure. This may take several cycles depending on the severity of the odor/residue.
- Page 38 fi berboard under the front leveling legs to prevent damage to the fl oor. Winterizing Instructions IMPORTANT If the washer is stored in an area where freezing can occur or moved in freezing temperatures, follow these winterizing instructions to prevent damage to the washer: Turn off water supply faucets.
-
Page 39: Solutions To Common Problems
Do not overload washer. Use correct temperature and amount of detergent, water and wash time. Use fabric softener in the washer to lubricate fi bers. When ironing, use spray starch or fabric fi nish on collars and cuffs. Turn items inside out to reduce abrasion. - Page 40 Run dehumidifi er in laundry room. Avoid overfi lling detergent and fabric softener com- partments of dispenser. Dry the inside of washer and gasket after every run. Avoid overfi lling detergent and fabric softener com- partments of dispenser. Leave door and dispenser...
-
Page 41: Service Prevention Checklist
Solutions to Common Problems Service Prevention Checklist Before calling for service, review this list. It may save both time and expense. The list includes common occurrences that are not the result of defective workmanship or materials in this washer. OCCURRENCE POSSIBLE CAUSE NOISE High pitch “jet engine”... -
Page 42: Solutions To Common Problems
120°F (49°C). Adjust water heater as neces- sary. Avoid using hot water elsewhere before or during washer use. There may not be enough hot water avail- able for proper cleaning. If problem persists, your hot water system may be unable to support more than 1 use at a time. -
Page 43: Warranty Information
Your appliance is covered by a one year limited warranty. For one year from your original date of purchase, Electrolux will repair or replace any parts of this appliance that prove to be defective in materials or workmanship when such appliance is installed, used, and maintained in accordance with the provided instructions. -
Page 44: Notes
Notes...