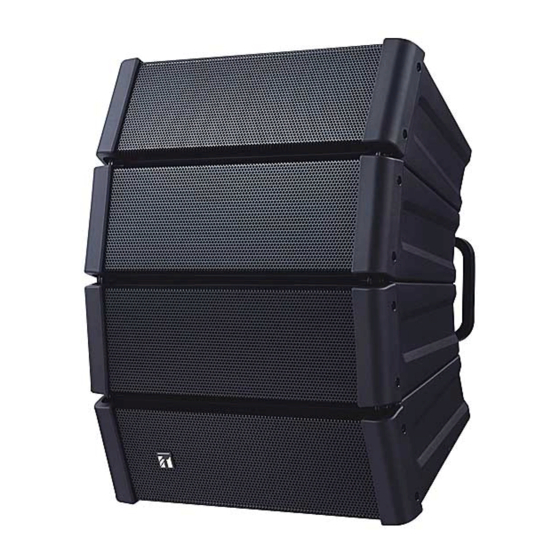
Toa HX-5B-WP EB-Q Operating Instructions Manual
Hide thumbs
Also See for HX-5B-WP EB-Q:
- Operating instructions manual (16 pages) ,
- Specifications (10 pages) ,
- Brochure & specs (4 pages)
Table of Contents
Advertisement
Quick Links
SPEAKER SYSTEMS
TABLE OF CONTENTS
1. SAFETY PRECAUTIONS ...................... 2
2. GENERAL DESCRIPTION ................... 3
3. FEATURES ......................................... 3
PROTECTION CIRCUITRY ................... 3
5. INSTALLATION PRECAUTIONS .......... 4
REAR PLATE ...................................... 5
DIRECTIVITY ANGLE .......................... 5
Manufacturer:
TOA Corporation
7-2-1, Minatojima Nakamachi, Chuo-ku, Kobe, Hyogo,
Japan
................................ 4
1438
Traceability Information for Europe
OPERATING INSTRUCTIONS
HX-5B-WP EB-Q
HX-5W-WP EB-Q
Thank you for purchasing TOA's Speaker
System.
Please carefully follow the instructions in this
manual to ensure long, trouble-free use of
your equipment.
MATCHING TRANSFORMER ........... 12
14.
15.
EN 54-24: 2008
12
Authorized representative:
TOA Electronics Europe GmbH
Suederstrasse 282, 20537 Hamburg,
Germany
............ 7
.............. 10
................... 11
......... 12
................................. 12
................ 13
............................ 13
Advertisement
Table of Contents

Summary of Contents for Toa HX-5B-WP EB-Q
-
Page 1: Table Of Contents
OPERATING INSTRUCTIONS HX-5B-WP EB-Q HX-5W-WP EB-Q SPEAKER SYSTEMS Thank you for purchasing TOA's Speaker System. Please carefully follow the instructions in this manual to ensure long, trouble-free use of your equipment. TABLE OF CONTENTS 1. SAFETY PRECAUTIONS ...... 2 9. SUSPENDED INSTALLATION .... -
Page 2: Safety Precautions
1. SAFETY PRECAUTIONS • Before installation or use, be sure to carefully read all the instructions in this section for correct and safe operation. • Be sure to follow all the precautionary instructions in this section, which contain important warnings and/or cautions regarding safety. -
Page 3: General Description
2. GENERAL DESCRIPTION The HX-5B-WP EB-Q and HX-5W-WP EB-Q are 2-way compact speaker system that permits both constant directivity control over a wide frequency range and changes in directivity. It is ideal for reproducing clear sound in spaces with longreverberation times or high background noises. -
Page 4: Installation Precautions
Tilt down from the horizontal. Tilt down from the horizontal. • Both the HX-5B-WP EB-Q and HX-5W-WP EB-Q employ a splash-proof construction that allows them to be installed outdoors, but they should only be installed in locations where the ambient temperature is within the range of –15°C to +50°C. -
Page 5: Changing The Orientation Of Rear Plate
7. CHANGING THE ORIENTATION OF REAR PLATE The orientation of the speaker system's rear plate can be changed as follows. [Factory-preset mounting] Rear plate Rear plate 8. CHANGING THE SPEAKER'S DIRECTIVITY ANGLE The speaker system's directivity angle mode is factory-preset to 60°, but this mode can be changed to 45°, 30°, or 15°... - Page 6 Step 2. Reposition the 4 bolts to the desired directivity angle, then retighten them securely. The sound coverage area can also be made asymmetrical by shifting the position of each bolt to different directivity angle. 15° mode [60° mode (factory-preset)] Example of independent angle adjustment Angle adjustment section...
-
Page 7: Suspended Installation
9. SUSPENDED INSTALLATION The speaker systems may be suspended either vertically or horizontally. Step 1. For vertical suspension: Remove the speaker grill on the module to be suspended. (Below, upper) For horizontal suspension: Remove the speaker grills on the modules at both ends of the speaker system. - Page 8 Step 2.For vertical suspension: Remove the 2 front bar fixing bolts. (Below, upper) For horizontal suspension: Remove the 4 front bar fixing bolts. (Below, lower) Place the speaker system on a workbench when doing this work. [Vertical suspension] [Horizontal suspension] Front bar fixing bolts Front bar Step 3.Fix the suspension bracket and the front bar with the bolts removed in step 2.
- Page 9 Step 4. For vertical suspension: Step 5. Replace the removed speaker grill. Be sure to use the supplied hex head wrench Turn the speaker system upside down. to tighten the fixing screws. Then, mount the suspension bracket in the same manner as described in steps 2 and 3.
-
Page 10: Direct Wall Mounting
4-12 x 41 Note For outdoor use, install the HX-5B-WP EB-Q or HX-5W-WP EB-Q in conjunction with the HY-WM1WP Speaker Mounting Bracket so that all speaker modules point downward from the horizontal. Failure to do so could adversely affect their water-resistant capability, leading to malfunction. -
Page 11: Mounting On A Pole
11. MOUNTING ON A POLE The speaker can be mounted on a pole using the optional SP-131 Speaker Mounting Bracket in conjunction with the YS-60B Mounting Band and HY-WM1WP Speaker Mounting Bracket. Before installing the SP-131 on a pole, attach it to the rear plate of the speaker system. For the mounting procedures on a pole, refer to the instruction manuals attached to the SP-131 and YS-60B. -
Page 12: Mounting Bracket Types
HY-CN1W-WP 13. COMBINATION WITH THE MT-200 MATCHING TRANSFORMER HX-5B-WP EB-Q and HX-5W-WP EB-Q are certified to EN 54-24 by using the MT-200. Using the optional MT-200 matching transformer allows the speaker system to be connected to a high- impedance amplifier. This matching transformer is best for use when the distance between the amplifier and speaker is very long, or when multiple speaker systems are parallel-connected to a single amplifier. -
Page 13: Frequency Response
IPX4 (Install with the every speaker module downward) Cable Polarity Hot: Black, Com: White Finish Enclosure: Polypropylene, black (HX-5B-WP EB-Q), white (HX-5W-WP EB-Q) Punched net: Steel, black (HX-5B-WP EB-Q), white (HX-5W-WP EB-Q) Dimensions 408 (w) x 546 (h) x 342 (d) mm Weight 16 kg Option Suspension bracket ..2, Hex head wrench ..1...


