Epson TM-L90 User Manual
Hide thumbs
Also See for TM-L90:
- Technical reference manual (212 pages) ,
- Service manual (148 pages) ,
- Developer's manual (140 pages)
Table of Contents
Advertisement
Available languages
Available languages
Quick Links
Advertisement
Table of Contents

Related Manuals for Epson TM-L90


Summary of Contents for Epson TM-L90
- Page 1 TM-L90 User's Manual 401381102...
-
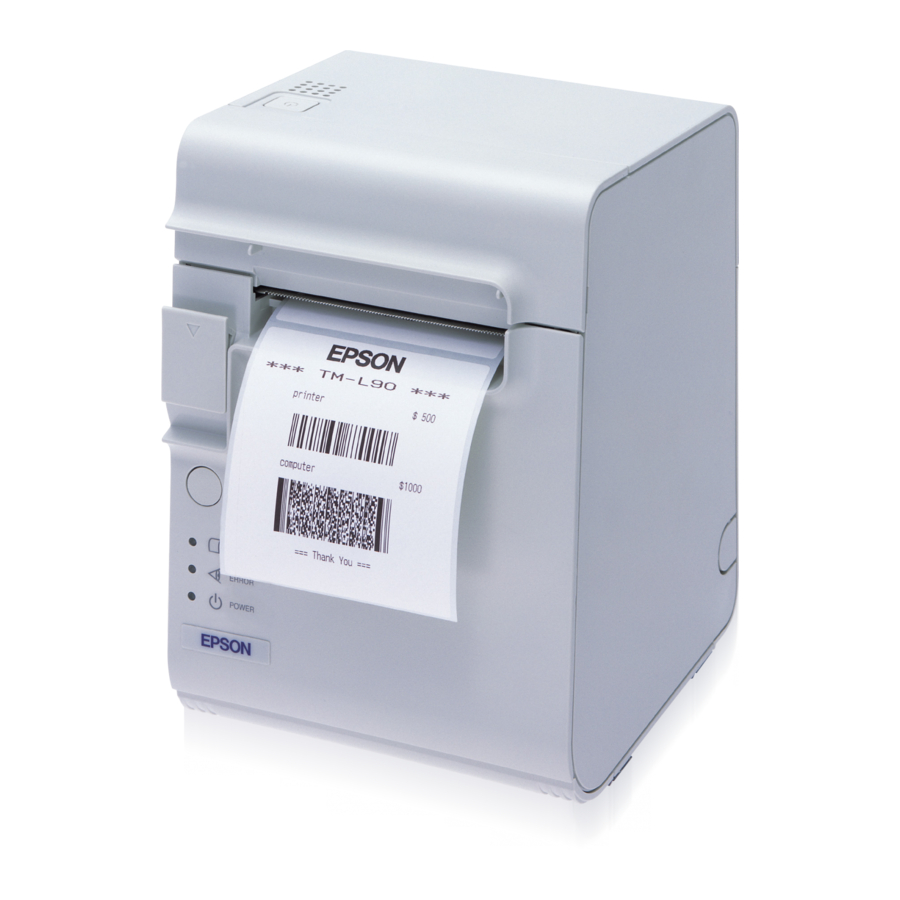
Page 2: Printer Parts
Printer Parts power switch cutter cover cover open paper roll lever cover control panel DIP Switch Tables Serial Parallel SW Function Function 1-1 Power switch function Disabled Enabled Power switch func- Disabled Enabled tion 1-2 Interface condition selec- by DIP by mem- tion switch... -
Page 3: Safety Precautions
Neither Seiko Epson Corporation nor its affiliates shall be liable to the purchaser of this product or third parties for damages, losses, costs, or expenses incurred by purchaser or third parties as a result of: accident, misuse, or abuse of this product or unauthorized modifications, repairs, or alterations to this product, or (excluding the U.S.) failure to strictly comply with Seiko Epson Corporation’s operating and maintenance instructions. -
Page 4: Caution Labels
To ensure safety, unplug this product before leaving it unused for an extended period. Caution Labels WARNING: Do not connect a telephone line to the drawer kick-out connector; otherwise, the printer and the telephone line may be damaged. CAUTION: The thermal head is hot. 2 TM-L90 User’s Manual... -
Page 5: Control Panel
Power Switch Cover You can use the enclosed power switch cover to make sure that the power switch is not accidentally pressed. Peel off the backing tape and press the cover into place to install it. TM-L90 User’s Manual 3... - Page 6 ❏ Control panel label used for horizontal installation ❏ Paper roll spacer ❏ Paper exit guide for horizontal installation ❏ Screw for installation of the paper roll spacer ❏ Hexagonal lock screws (2 pieces) (only for the serial interface) 4 TM-L90 User’s Manual...
-
Page 7: Installing Horizontally Or Vertically
A. Secure the screw and make sure the lever moves smoothly. Note: To hang the printer on the wall, see the Wall Hanging Bracket Set screw Installation Manual provided with the WH-10 for instructions. TM-L90 User’s Manual 5... -
Page 8: Installing The Paper Roll
Open the paper roll cover, using the cover open lever. Insert a paper roll and pull out a small amount of paper, aligning the paper with the guide, as shown below. Close the paper roll cover; then tear off the roll paper. 6 TM-L90 User’s Manual... -
Page 9: Troubleshooting
Turn on the printer and remove the cutter cover. To remove the cover, use a tool such as a screwdriver, and insert it into one of the slots indicated by a circle in the illustration below and push the cover TM-L90 User’s Manual 7... -
Page 10: Cleaning The Print Head
(generally every three months) to maintain receipt print quality. Using Different Paper Widths The TM-L90 accommodates 80 mm wide paper rolls with no adjustments. For rolls from 38 mm to 70 mm wide you use the spacer included with the printer. (If the rolls are from 61 to 70 mm wide, you break two tabs off the spacer. - Page 11 Slide the roll paper spacer to the appropriate width, as shown above. You can use the measurement printed inside the printer, aligning the inside edge of the spacer with the desired measurement. TM-L90 User’s Manual 9...
- Page 12 Insert the screw included with the spacer into the hole indicated below and tighten it. (Even if you can see two holes, this is the only one to put the screw in.) hole for screw 10 TM-L90 User’s Manual...
-
Page 13: Connecting Cables
To place cables, first break off by hand any of the three portions indicated by circles in the illustration (the other portion is on the right). Then put the cables through the holes and replace the bottom of the cover. TM-L90 User’s Manual 11... - Page 14 Humidity 10 to 90% Reliability MTBF: 360,000 hours, MCBF: 70,000,000 lines 203 × 140 × 148 mm Overall dimensions Weight (Mass) Approximately 1.9 kg lps: lines per second, dpi: dots per 25.4 mm (dots per inch) 12 TM-L90 User’s Manual...
- Page 15 TM-L90 ® ® ©...
- Page 18 ❏ ❏ ❏ ❏ ❏ ❏ ❏ ❏ × ∼...
- Page 19 ❏ ❏ ❏ ❏ ❏...
- Page 20 ❏...
- Page 22 × × × × × × × × × × × × × × × × × × × × × × × × × × × × × × × × × × × × × × × × ×...
- Page 23 7. ×Ø^ÏÐÑ 3. SÕ°Ù 8. ÐÚ 4. °ÔÛ 5. ÜYGÝ HIJK LM Seiko Epson Corporation NO%GPQ :QRST UV =W XYZR[\]^_[ \`^=Y ab>cdefgZhi&'(5[\,) jk!"lmno5pq r:st[\uvw [ >xyl'(z Seiko Epson Corporation {M|}~• €lj?g5•‚Zƒ„:st[\w[ … zj[\†k!"lmno5pq‡ˆ‰5Š‹r:st[\w[ †kŒ• ‚" ZŽ••‘&’“ R”LM•I‡j’“–—˜™ š› Z˜ˆ&’“ Z œ•ž...
- Page 24 OFF OFF 78/9:; l,)Þß•KÙàaáâ_Kã!"&’“5<äpq åæçèél ,) êë•aì <= íîlïyðñ Z’¸òó5ôõ Zö÷:øù5úû üýþÙÿïy5 SÕ !"!"rA#$%& åýþØ'SÕ×( )*+M,ÀZ SEIKO 5¥šg-.e EPSON :ä/30—š›&’“ :øà5š›r¿¶ù125 :ä3°Zš˜&’“ &’“5Š-rQ #$4567 %& à8!"u"5SÕ !":øà5SÕÏÐQ A9:%&ZS; :Qr•<=>ïyg •<=>Q A#$%&ZS; íîK?Z?@@5A>&ïy üýþØ'SÕ×( )*+M,ÀZ SEIKO 5¥šg-.e !"!"A#$%&ZS; EPSON !"#$% 22 TM-L90...
- Page 25 :ä!">&'(gZK[\5`]ÏÐS^ :…5ÏÐ`]Q A#$ï yŠ-Z_` à8r&ïyab>cY c85?dGe íîfg r#$hiZ9$6 :ä>jkUZlmno5pqg!" lm5kô_noA#$ïyŠ- : %ZS; :ä>&’“eab<< r:äs>Zt>&’“e ïyQ AfgZu v ˆ‰hi_Q 9$67 *àaáâ >wÌzx:!"yüØ'×( /9:;.FG <= :QrSz{ÏÐ\×Ø^ÏÐÑZ|4}~ÏÐÑe •€ÎWU_Sz{ Q AŠ- •‚,ƒ5•‚(¶ù‚ HIJK L-MNOP QRL-M SÕ°Dz„… SÕÙÿz†‡ STL-M ˆÎWUmk.U‰Šz†‡ ˆÎWU‹Uz„… R”ˆö¸•‚z Œ• !"#$% 23 TM-L90...
- Page 26 QR2+X •QR!"–—SÕ°ÙÔ Ra˜SÕ°Ù:A™Œ•£' š'›œ 5•E í'3J4rÔ£'!?á™\N V1 4 Fe5#$ <= ˆá™SÕ°ÙÔzíî÷žŒ• üýþŸ' Ô…zØ'SÕ{R¡¢‹ Y2Z[ Áx§¢5ÎWUünoR'<“ íîK[\<“Š- å+•5M, À.e ❏ ÎWU ❏ Á£ÒÓ ❏ SÕ°ÙÔ ❏ "k?dá™5ÜYGÝÁ£ ❏ ÒÓ±¤Ñ ❏ "k?dá™5÷Ò#¥ ❏ "ká™ÒÓ±¤Ñ5¦§ ❏ ¨©]ª«¦§ ( ¬"k-—ÐÚ ) !"#$% 24 TM-L90...
- Page 27 ÄrÎWUµ³>´e VÞ WH-10 [ß5´àµ³±¶·ºá™ '(e5#$ 7[Vb ˆá?d!"ÎWUz åš'÷Ò#¥5›Ò ‘í'3J4r? ¸e RâÒ™0ÆãÒÑÖ÷5Ò®=gÎWU íî•!"Kä5ÒÓ ‡ÒÓ5ä姢#$5*æ ÂçÌÍ * 25.4 èé •çÌÍ* 31.4 èé åà8ZK™e÷Ò#¥ •€A÷ž×Ò5êë åà8!"5ÒÓìí§¢ 1. !"°ÔÛ Î°ÒÓÔ 2. rÒÓ×>êî÷Íï5Ò® rÒ®+#¥jð V1 6 Fe 3. ÙÿÒÓÔ )*š=2ÀÒÓ £'Ô5gñ,)RàarÔ~âÙÿ V1 7 Fe5#$ !"#$% 25 TM-L90...
- Page 28 ¿•„… íKõä €ÙÿÒÓÔZöJÒÓ ❏ íîÎWU{MÌzxÎW €ÎW(A¶ù‚ ÷ø²\ÎW (ùú ÎWr0Æû= ❏ íî0ÆÖÒÑ™×’ ÙÿÎWU)*<ü°D ❏ íîÒÓÔ: ΰ V*G5,) ❏ ÙÿÎWU)*<ü°D íîó4ôýŒ• å+ì›þZ¥ š4þ.e ÙÿÎWU)*ΰÒÓÔcÚ¿•KÿÒ íîKÿÒ €!÷ÿ’5 Ò®ê£á™ÒÓ,)g5#$xyÎWUR–—ÎW VbXl?m2 °DÎWUêŸ'0ÆÖÒÑÔ Ä"!'lÔ ü!"í¦§#2Æ5 ÈÉ rÈÉ×>1 8 F×3g$%gó45×&g52+ êÖeÐÔ >Ÿ'0ÆÖÒÑÔ* !"'((Z)T£Õ(ó45`ÖËÆÙ*² \>°Úg+V2+¬,] !"#$% 26 TM-L90...
- Page 29 >ÎW* ÎW(Q A¶ù‚ åæ-:ä-. >/0ÎW(y!?ù ú ÙÿÎWU ΰÒÓÔ ê!"1K234@ ( 56 76Z IPA) 58 £/0ÎW(5‚9:º V1 8 Fe5#$ EPSON Ð;8</0‚9( ( Èù¿- 3 +=/02Î ) Ra˜>LÎW ?ï %&lrsC.Vt Û™> 80 èé@5ÒÓ‘:õä–—[\AB ˆ™> 38 è TM-L90 é\ 70 èé@5ÒÓz áõä!"ÎWU[ß5±¤Ñ...
- Page 30 •‘ : 5 \ 45 , ab –10 \ 50 žC 10 \ 90% Ÿ ¡ MTBF:360,000 æz , MCBF:70,000,000 — 203 × 140 × 148 èé ¢$£¤ ¥¦ hp 1.9 qr RSTU -”—K VSWU - XYZ[ èé5„K -\]5„K !"#$% 28 TM-L90...
- Page 31 擔任何責任,亦不為使用本手冊中所含之資料而造成之損壞負擔任何賠償責任。 本產品之購買人或第三者因意外、誤用或濫用本產品,或對本產品進行未經授權之修改、修理、或以任何形式 更改本產品,或 (美國除外)沒有嚴格遵守 Seiko Epson Corporation 之操作及維修指示,而對購買人或第三 者所造成之損害、損失、費用、或支出,Seiko Epson Corporation 及其附屬機構皆不須負責。 Seiko Epson Corporation 不須為使用 Epson 原廠產品或由 Seiko Epson Corporation 認可之 Epson 產品以外之 選購品或耗材所造成之損害或問題負責。 EPSON 及 ESC/POS 為 Seiko Epson Corporation 之註冊商標。 注意:本使用手冊內容將隨時加以編修更動,恕不另行通知。 版權所有 © 2001 年,Seiko Epson Corporation,日本長野。...
- Page 32 傳輸速度 ( 位元 / 秒 ) 2400 4800 OFF ON 9600 19200 OFF OFF 安全注意事項 本節詳述如何安全且有效使用本產品的重要資料,故請仔細閱讀本節內 容,並將之妥善存放於易取得之地點。 警告: 若本產品有冒煙、異味或怪聲等情形發生時,請立即關閉其電源。若繼續使用, 可能會導致火災 。 因此 , 請即刻拔出本產品之電源線 , 並洽詢您的經銷商或 SEIKO 服務中心。 EPSON 切勿自行嘗試維修本產品。不當的維修作業可能會造成危險。 切勿拆解或修改本產品。擅自改動本產品之結構,可能對人體造成傷害,或導致 火災。 務必使用專用的電源,便用不正確的電源連接可能會引起火災或電擊。 請勿讓外物掉入本產品中,否則可能會導致火災或電擊。 若水或其他液體潑灑至本產品,請即刻將電源線拔出,並洽詢您的經銷商或 服務中心。若繼續使用,可能會導致火災或電擊。 SEIKO EPSON 使用說明書 30 TM-L90...
- Page 33 中文 ( 繁體 ) 注意: 請勿以本使用手冊所述以外之方式連接線路。不同的線路連接方式可能會對設備 造成損害或引發火災。 務必將本產品置放於穩固之平面上。若掉落,可能導致產品碎裂或對人體造成傷 害。 請勿在潮濕或多塵處使用本產品。過重的濕氣或過多的灰塵,可能對本產品造成 損壞或引發火災或電擊。 請勿將重物置放在本產品之上。切勿站立或依靠在本產品上,否則本產品可能會 掉落或倒下,進而導致產品碎裂,可能對人體造成的傷害。 為了安全起見,若長時間不使用本產品,請先將電源插頭拔出。 注意事項的標籤 警告: 請勿將電話線連接至插拔式連接器或顯示模組連接器上,否則可能導致印表機及 電話線受損。 注意: 感熱區的感熱頭溫度很高。 控制面板 指示燈與按鈕 電源指示燈 電源開啟時會亮起,關閉時會熄滅。 錯誤指示燈 印表機上線時會熄滅,離線時會亮起,發生錯誤時會閃爍。 使用說明書 31 TM-L90...
- Page 34 當紙筒幾乎用完時,指示燈會亮起。 送紙按鈕 送入紙筒。 電源開關與電源開關外蓋 電源開關位於本機前方。按該開關即可開啟電源,持續按 3 秒鐘即可關閉 電源。 電源開關外蓋 您可用本機附贈的電源開關外蓋來確保不致在無意間按到電源開關。請撕 掉背面膠帶,如下圖所示將外蓋按在定位,即可安裝。請見第 4 頁的圖示。 警告: 如果在安裝電源開關外蓋後發生意外,請立刻取出底蓋,並拔掉電源線,以避免 失火。 拆開包裝 標準規格的印表機包括下列項目。如果某些項目受損,請聯絡經銷商。 ❏ 印表機 ❏ 標籤紙筒 ❏ 電源開關外蓋 ❏ 水平安裝用控制面板標籤 ❏ 紙筒支撐架 ❏ 水平安裝用出紙導板 ❏ 安裝紙筒支撐架用螺釘 ❏ 六角固定螺釘 (2 只) (序列界面用) 使用說明書 32 TM-L90...
- Page 35 2. 輕輕推按桿,直到無法再推下為止。 3. 當推按桿時,轉動凸片 (按圖示的箭頭方向)直到桿扣入 A 孔。 4. 旋緊螺絲,並檢查桿能夠順暢滑動。 註: 如欲將本機掛在牆上,說明請見 WH-10 的牆面掛架套件安裝手冊。 安裝紙筒 當你水平使用印表機時,請撕掉出紙導板的背紙,並如下圖所示將其 貼上,以防止被自動裁紙器切出的紙張跌入印表機內。 註: 如果您使用有芯的紙筒,而紙筒的芯比規格說明的為小 (內徑最少 為 25.4 毫米;外徑最少為 31.4 毫米) ,請確定沒有裝上紙張出口導 板。否則會出現夾紙的情況。請確定使用符合規格的紙筒。 1. 使用外蓋開啟推桿,開啟紙筒外蓋。 2. 插入紙筒,拉出少量的紙,將紙張對準導板。見第 6 頁的圖示。 3. 關閉紙筒外蓋;再撕掉一些的紙筒的紙張。 註: 按下外蓋的中央部分以確保外蓋完全關閉。見第 7 頁的圖示。 使用說明書 33 TM-L90...
-
Page 36: Paper Out
中文 ( 繁體 ) 故障排除 錯誤指示燈亮起或閃爍。 ❏ 檢查紙筒外蓋是否關閉與PAPER OUT(缺紙)指示燈 。 視情況關閉 外蓋或更換紙筒。 ❏ 如果本機列印數量甚多,列印頭可能過熱。請等列印頭冷卻。本 機會自動繼續列印。 ❏ 如果自動裁紙機發生夾紙,請關閉電源再打開。 ❏ 如果紙筒外蓋無法開啟,請見下一節。 ❏ 關閉電源再打開。如果指示燈還在閃爍,請詢問管理人員或服務 人員。 夾紙。 關閉電源,開啟紙筒外蓋,檢查是否夾紙。如果發生夾紙,請取出夾住的 紙張,並遵照安裝紙筒一節的說明,準備繼續列印。 紙筒外蓋無法開啟。 接通電源,開啟紙筒外蓋。如欲取下外蓋,請用螺絲起子一類的工具,將 它插入第 8 頁插圖中以圓圈指示的槽口,將外蓋向上推。取下外蓋後,請 用原子筆或鑷子順著箭頭方向轉動轉盤鈕,直到您在開孔中看到一個三角 形。 使用說明書 34 TM-L90... - Page 37 中文 ( 繁體 ) 清潔列印頭 注意: 列印後,列印頭可能非常熱。請勿碰觸並讓它冷卻後再清潔。為避免損害列印 頭,請勿用手指或硬物碰觸它。 關閉電源,開啟紙筒外蓋,用沾有酒精溶劑 (乙醇、甲醇或 IPA)的棉花 棒清潔列印頭的感熱組件。見第 8 頁的圖示。 EPSON 建議定期 (通常為每三個月)清潔感熱頭,以確保列印品質。 使用不同寬度的紙張 TM-L90能夠裝入80mm寬的紙筒而不需要作任何調整 。 當裝入38mm 至 70mm 寬的紙筒時,你需使用印表機提供的支撐架。 (如果紙筒寬 度為 61 至 70mm,請拆斷支撐架上的兩塊凸片。見下面寬度註釋。) 1. 插入紙筒支撐架,並如第 9 頁的圖示將前端穿過凹口,然後拉 下至軸。 2. 推入紙筒支撐架直到卡在軸上定位。見第 9 頁。 註: 請檢查紙筒支撐架能否順暢地左右滑動。 3. 將紙筒支撐架如上圖所示滑動至適當的寬度。你可以利用印在...
- Page 38 耗電量 普通:約 1.7 A 溫度 操作時 : 5 到 45℃,存放時:-10 到 50℃ 濕度 10 到 90% 可靠度 MTBF:360,000 小時,MCBF:70,000,000 行 外型尺寸 203 × 140 × 148mm 重量 約 1.9 公斤 lps: 每秒列印行數 dpi: 每 25.4mm 的點數 (每英寸的點數) 使用說明書 36 TM-L90...
- Page 40 Printed in China 2001.01...