Table of Contents
Advertisement
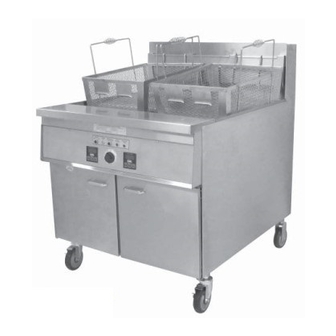
NUMBERS OF THIS INSTANT RECOVERY
ELECTRIC FRYER IN THE SPACES PROVIDED.
IMPORTANT:
Keep a copy of your bill of sale. The date on the bill establishes the warranty period should
service be required. If service is performed, it is in your interest to obtain and keep all receipts. Keating
commercial fryers are not intended for household use.
The Owner's Guide provides specific operating instructions for your model. Use the Instant
Recovery
®
Electric Fryer only as instructed in this Owner's Guide.
CONTENTS:
GENERAL . . . . . . . . . . . . . . . . . . . . . . . . . . . . . . . . . . . . . . . . . . . . . . .1
STANDARD FEATURES . . . . . . . . . . . . . . . . . . . . . . . . . . . . . . . . . . . .1
MODEL VARIATIONS . . . . . . . . . . . . . . . . . . . . . . . . . . . . . . . . . . . . . .1
SAFETY PRECAUTIONS . . . . . . . . . . . . . . . . . . . . . . . . . . . . . . . . . . .1
DAMAGE DURING SHIPMENT . . . . . . . . . . . . . . . . . . . . . . . . . . . . .2
INSTALLATION . . . . . . . . . . . . . . . . . . . . . . . . . . . . . . . . . . . . . . . . . . . .2
DROP-IN INSTALLATION . . . . . . . . . . . . . . . . . . . . . . . . . . . . . . . . . . .2
POSITIONING . . . . . . . . . . . . . . . . . . . . . . . . . . . . . . . . . . . . . . . . . . . .3
LEVELING . . . . . . . . . . . . . . . . . . . . . . . . . . . . . . . . . . . . . . . . . . . . . . .3
RESTRAINING DEVICES . . . . . . . . . . . . . . . . . . . . . . . . . . . . . . . . . .3
ELECTRICAL CONNECTION . . . . . . . . . . . . . . . . . . . . . . . . . . . . . . .3
WIRE SIZE . . . . . . . . . . . . . . . . . . . . . . . . . . . . . . . . . . . . . . . . . . . . . . .4
OPERATING THE FRYER
FILLING . . . . . . . . . . . . . . . . . . . . . . . . . . . . . . . . . . . . . . . . . . . . . . . . .4
MELTING . . . . . . . . . . . . . . . . . . . . . . . . . . . . . . . . . . . . . . . . . . . . . . . .5
COOKING . . . . . . . . . . . . . . . . . . . . . . . . . . . . . . . . . . . . . . . . . . . . .5-6
SHUTDOWN . . . . . . . . . . . . . . . . . . . . . . . . . . . . . . . . . . . . . . . . . . . . .6
DRAINING . . . . . . . . . . . . . . . . . . . . . . . . . . . . . . . . . . . . . . . . . . . . .6-7
CLEANING AND BOIL-OUT . . . . . . . . . . . . . . . . . . . . . . . . . . . . . .7-8
ELECTRONIC TIMERS . . . . . . . . . . . . . . . . . . . . . . . . . . . . . . . . . . . .8
WARRANTY REPAIRS . . . . . . . . . . . . . . . . . . . . . . . . . . . . . . . . . . . . .9
PREVENTIVE MAINTENANCE . . . . . . . . . . . . . . . . . . . . . . . . . . . . . .9
Keep this manual for training new personnel.
p a r t # 0 576 4 1
Users Manual
INSTANT RECOVERY
SERIES 2006
READ AND SAVE THIS MANUAL FOR FUTURE REFERENCE.
RECORD THE MODEL AND SERIAL
®
ELECTRIC FRYER
SERIAL NO. ______________________________
®
MODEL NO. _____________________________
KEEP THESE NUMBERS FOR FUTURE REFERENCE.
OIL BREAKDOWN . . . . . . . . . . . . . . . . . . . . . . . . . . . . . . . . . . . . . . . .9
LIMITED CALIBRATION . . . . . . . . . . . . . . . . . . . . . . . . . . . . . . . . . . . .9
THERMOSTAT BULB POSITIONING . . . . . . . . . . . . . . . . . . . . . . . .9
GENERAL . . . . . . . . . . . . . . . . . . . . . . . . . . . . . . . . . . . . . . . . . . . . . .10
TROUBLE SHOOTING CHARTS . . . . . . . . . . . . . . . . . . . . . . .10-11
ORDERING PARTS . . . . . . . . . . . . . . . . . . . . . . . . . . . . . . . . . . . . . .12
WARNING AND OPERATING PLATES . . . . . . . . . . . . . . . . . . . . .12
ELECTRIC FRYER PARTS LIST . . . . . . . . . . . . . . . . . . . . . . . . . . . .13
ELECTRIC FRYER ASSEMBLY . . . . . . . . . . . . . . . . . . . . . . . . . . . .13
BB CONTROL PANEL PARTS LIST . . . . . . . . . . . . . . . . . . . . . . . .14
TS CONTROL PANEL PARTS LIST . . . . . . . . . . . . . . . . . . . . . .15-17
CPU CONTROL PANEL PARTS LIST . . . . . . . . . . . . . . . . . . . .18-19
ROLLER GUIDE & PARTS LIST . . . . . . . . . . . . . . . . . . . . . . . . .20-21
SINGLE BASKET LIFT POWER SUPPLY BOX . . . . . . . . . . . . . . .22
BB WIRING DIAGRAMS . . . . . . . . . . . . . . . . . . . . . . . . . . . . . . .23-28
TS WIRING DIAGRAMS . . . . . . . . . . . . . . . . . . . . . . . . . . . . . . .28-35
CPU WIRING DIAGRAMS . . . . . . . . . . . . . . . . . . . . . . . . . . . . .35-36
FRYER SPECIFICATIONS
BB MODELS . . . . . . . . . . . . . . . . . . . . . . . . . . . . . . . . . . . . . . . . . . . .37
TS MODELS . . . . . . . . . . . . . . . . . . . . . . . . . . . . . . . . . . . . . . . . . . . .38
WARRANTY . . . . . . . . . . . . . . . . . . . . . . . . . . . . . . . . . . . . . . . . . . . . 39
1-800-KEATING
www.keatingofchicago.com
e l e c t r i c F r y e r 2 0 0 6
0 6 / 1 2
Advertisement
Table of Contents

Related Manuals for Keating Of Chicago 2006 series


Summary of Contents for Keating Of Chicago 2006 series
-
Page 1: Table Of Contents
Keep a copy of your bill of sale. The date on the bill establishes the warranty period should service be required. If service is performed, it is in your interest to obtain and keep all receipts. Keating commercial fryers are not intended for household use. - Page 2 This operating, installation, and service manual should Keating of Chicago, Inc. (manufacturer) reserves the be given to the user. The operator of the fryer should right to change specifications at any time. be familiar with the functions and operation of the fryer.
-
Page 3: Introduction
INTRODUCTION TS Model: TS Model Fryers have the highest input of all Keating fryers. The TS Model features a melt cycle, and electric stainless steel thermostat, two electronic GENERAL timers and three indicating lights which display the status of the fryer’s operation. The 14TS Model can Instructions in this manual should be read thoroughly cook up to 90 lbs. -
Page 4: Installation
This fryer MUST be installed, inspected, calibrated and serviced by qualified and/or certified and/or licensed 2. Fryers must be located no more than 5” from service personnel - you may void your Keating counter top front. warranty if installation is not completed per local, 3. -
Page 5: Positioning
240 volts as required by ETL. If your LEVEL fryer is to be fed by a 208 or 220 volt system, consult the Keating Fryer Specifications on pages 36 and 37 to determine the full load rating of the fryer. NOTE: Fryers with Safe & Easy ®... -
Page 6: Wire Size
OPERATING WIRE SIZE Use the table below to help determine the proper wire FILLING size for electrical service hook-up. Use the largest amp value of the three conductors for 3-phase installations NOTE: Before filling the fryer make certain the fryer when using the table. -
Page 7: Melting
MELTING COOKING The Keating Melt Cycle safely melts solid shortening in Keating Instant Recovery ® Electric Fryers are designed the fryer vessel without scorching. to provide maximum production efficiency and deliver high quality food products. Low-temperature cooking, highly polished stainless steel and a true COLD ZONE mean extended oil life. -
Page 8: Shutdown
1/4 turn. separate computer instructions call 5. For units with rear drain valves, slowly pull drain valve 1-800-KEATING operating handle straight out (unhook from metal latch first). See Safe & Easy operator’s manual for instructions on how to filter. -
Page 9: Draining
9. While soaking, a natural fiber brush may be used When cleaning and boiling out your fryer use Keating Sea Powder and Keating Klenzer to keep your fryer in to scrub the inside walls of fryer. top condition. Keating Sea Powder dissolves any 10. -
Page 10: Electronic Timers
11. Spread Keating Klenzer liberally on sides of fryer ELECTRONIC CONTROL vessel. TIMERS 12. At this point, a non-abrasive scouring pad may be The electronic timers provide a clearly visible and used to remove the now softened carbonized accurate display and are very easy to use. -
Page 11: Maintenance
In the event that your fryer, under warranty, needs repairs other than routine maintenance or cleaning, Thermostat Calibration you are requested to contact Keating of Chicago (at 1-800-KEATING) before calling a local service You will need: One standard flat blade screwdriver company. -
Page 12: Service Diagnosis
A. Trouble shooting The following diagnosis is only to be used as a guide to qualified service personnel. Keating recommends that you use a qualified service company. Call 1-800-KEATING if you need assistance in locating a qualified service company. - Page 13 SERVICE DIAGNOSIS (continued) PROBLEM PROBABLE CAUSE SOLUTION Oil in fryer vessel a. Oil has begun to break down. a. Replace oil. smokes. b. High carbon content in oil. b. Filter oil completely, replace if necessary. c. Dirty fryer vessel. c. Boil-out fryer. See pages 7-8 – Cleaning and Boil-Out.
-
Page 14: Parts List
PARTS LIST ORDERING PARTS Parts may be ordered by part number by calling Keating at 1-800-KEATING or your service company. You may also order online at Keating’s Parts Store, www.keatingofchicago.com. Refer to the Keating Instant Recovery ® Electric Fryer Limited Warranty for complete service and ordering information. -
Page 15: Electric Fryer Parts List
2 PER ELEMENT ITEM DESCRIPTION MODELS PART # 10×11 34×24 ELEMENT CLAMP 004167 ELEMENT SPACER 004145 FRYER VESSEL CALL 1-800-KEATING DRAIN VALVE, FRONT, 1” BB, TS 004553 DRAIN VALVE, REAR, 1” BB, TS 016341 DRAIN VALVE, FRONT 1 ” BB, TS 004554 DRAIN VALVE, REAR, 1 ”... -
Page 16: Bb Control Panel Parts List
Figure 6-2 BB Control Panel 208/240V & 480V (Not shown to scale) CONTROL PANEL FRONT CONTACTOR TRAY (Top View) - Front Drain Unit CONTACTOR TRAY (Front View) - Front Drain Unit ITEM DESCRIPTION PART # 10×11 34×24 (Quantity Per Model) SWITCH TOGGLE SEALED ON-OFF 059141 INDICATING LIGHT CLEAR ROUND 28V... -
Page 17: Ts Control Panel Parts List
Figure 6-3 TS Control Panel 208/240V & 480V with Rocker Switches (Not shown to scale) CONTROL PANEL FRONT CONTACTOR TRAY (Front View) - Front Drain Unit CONTACTOR TRAY (Top View) - Front Drain Unit ITEM DESCRIPTION PART # 10×11 34×24 (Quantity Per Model) SWITCH ROCKER ON-OFF DPST 035030... - Page 18 Figure 6-4 TS Control Panel 208/240V & 480V with Toggle Switches (Not shown to scale) CONTROL PANEL FRONT POWER POWER MELT READY OVER MAX TO COOK TEMP. CONTACTOR TRAY (Top View) - Front Drain Unit CONTACTOR TRAY (Front View) - Front Drain Unit ITEM DESCRIPTION...
- Page 19 Figure 6-5 34X24 TS Control Panel 208/240V & 480V with Toggle Switches (Not shown to scale) CONTROL PANEL FRONT CONTACTOR TRAY (Top View) - Front Drain Unit Detail Area CONTACTOR TRAY (Front View) - Front Drain Unit ITEM DESCRIPTION PART # 34×24 SWITCH TOGGLE SEALED ON-OFF 059141...
-
Page 20: Cpu Control Panel Parts List
Figure 6-6 34X24 CPU Control Panel 208/240V with Toggle Switch (Not shown to scale) CONTROL PANEL FRONT CONTACTOR TRAY (Top View) - Rear Drain Unit CONTACTOR TRAY (Front View) - Rear Drain Unit ITEM DESCRIPTION PART # 34×24 SWITCH TOGGLE SEALED ON-OFF 059141 COMPUTER 031125... - Page 21 Figure 6-7 CPU Control Panel 208/240V with Rocker Switches (Not shown to scale) 4, 5, 6, 7 CONTACTOR TRAY (Top View) SPARK IGNITION CONTACTOR TRAY (Top View) CONTACTOR TRAY (Front View) - Rear Drain Unit SPARK IGNITION CONTACTOR TRAY (Front View) - Rear Drain Unit ITEM DESCRIPTION...
-
Page 22: Basket-Lift Housing And Roller Guide & Parts List
Figure 6-8 Basket Lift Power Supply Box Figure 6-9 Basket Lift Assembly Housing NOTES 1. A minimum distance of " and maximum distance of " should be maintained when actuator is at full downward stroke. Item 11 should never be bottomed on item 12 when in this location. 2. - Page 23 Basket Lift Power Supply Box 2007 (CPU & Non-CPU) TO LEFT BASKET TO CONTROL PANEL BACK/TRAY TO RIGHT BASKET TOP VIEW 4700Y08K18K999 COM 120 208 240 480 SEC: 24 VAC PRI: BLK WHT RED ORG BLK/RED BLU YEL 100 VA 50/60HZ PRODUCTS UNLIMITED ASM.
-
Page 24: Wiring Diagrams
WIRING DIAGRAMS NOTE: A separate wiring diagram has been included with this manual and should be saved for troubleshooting and maintaining the fryer. The wiring diagrams in this section cover standard fryers which may or may not match the diagram sent with the fryer. CPU models on pages 34 & 35. SINGLE BASKET LIFT POWER SUPPLY BOX DESCRIPTION PART #... -
Page 25: Bb Wiring Diagrams
10×11, 14, 18 & 20 BB 2000 208-240V & 480V 3 PHASE WITH REAR DRAIN AND SAFE & EASY ® FILTER REAR DRAIN HEATING ELEMENTS #5 - RED 208V #4 - BLACK COM MAGNETIC #6 - GRAY 480V #1 - WHITE 120V LOAD NEUT REED SWITCH... - Page 26 10×11 BB 2006 208-240V & 480V 1 PHASE FRONT DRAIN HEATING ELEMENTS LOAD NEUT TRANSFORMER CONNECTION CHART 26 RD 24 OR 75VA WH 18 #4 - BLACK COM 24VAC #5 - RED 208V #6 - GRAY 480V #2 - ORANGE 240V #1 - WHITE 120V CONTROL NOTCH...
- Page 27 14, 18, 20 BB 2006 208-240V & 480V 1 PHASE FRONT DRAIN HEATING ELEMENTS #4 - BLACK COM #5 - RED 208V #6 - GRAY 480V #2 - ORANGE 240V #1 - WHITE 120V NOTCH TRANSFORMER CONNECTION CHART LOAD NEUT TRANSFORMER CONNECTION CHART...
- Page 28 14, 18, 20 BB 2006 208-240V & 480V 3 PHASE WITH REAR DRAIN AND SAFE & EASY ® FILTER HEATING ELEMENTS #4 - BLACK COM #5 - RED 208V #6 - GRAY 480V #2 - ORANGE 240V #1 - WHITE 120V NOTCH TRANSFORMER CONNECTION CHART...
- Page 29 24 BB 2006 208-240V & 480V 3 PHASE WITH REAR DRAIN AND SAFE & EASY ® FILTER HEATING ELEMENTS #4 - BLACK COM #5 - RED 208V #6 - GRAY 480V TRANSFORMER CONNECTION #2 - ORANGE 240V CHART #1 - WHITE 120V NOTCH LOAD NEUT...
-
Page 30: Ts Wiring Diagrams
34×24 BB 2006 208-240V & 480V 3 PHASE WITH REAR DRAIN AND SAFE & EASY ® FILTER HEATING ELEMENTS #4 - BLACK COM #5 - RED 208V #6 - GRAY 480V TRANSFORMER CONNECTION #2 - ORANGE 240V LOAD NEUT CHART 31 BL #1 - WHITE 120V NOTCH... - Page 31 10×11 TS 2006 208-240V & 480V 3 PHASE WITH REAR DRAIN HEATING ELEMENTS #4 - BLACK COM #5 - RED 208V 34 WH #6 - GRAY 480V TRANSFORMER CONNECTION CHART LOAD NEUT #2 - ORANGE 240V #1 - WHITE 120V NOTCH TRANSFORMER WH OR...
- Page 32 14 TS 2006 WITH BASKET-LIFT 208-240V & 480V 3 PHASE FRONT DRAIN HEATING ELEMENTS WIRE COLOR CODES: #4 - BLACK COM #5 - RED 208V BL - BLACK BR - BROWN #6 - GRAY 480V B/R - BLACK/RED TRANSFORMER BU - BLUE LOAD NEUT CONNECTION...
- Page 33 14 TS 2006 WITH BASKET-LIFT 208-240V & 480V 3 PHASE WITH REAR DRAIN AND SAFE & EASY ® FILTER HEATING ELEMENTS WIRE COLOR CODES: #4 - BLACK COM BL - BLACK BR - BROWN #5 - RED 208V 37 WH B/R - BLACK/RED #6 - GRAY 480V BU - BLUE...
- Page 34 18, 20 TS 2006 208-240V & 480V 3 PHASE WITH BASKET-LIFT FRONT DRAIN HEATING ELEMENTS WIRE COLOR CODES: #4 - BLACK COM BL - BLACK #5 - RED 208V BR - BROWN B/R - BLACK/RED #6 - GRAY 480V BU - BLUE TRANSFORMER GR - GREEN LOAD...
- Page 35 18, 20 TS 2006 WITH BASKET-LIFT 208-240V & 480V 3 PHASE WITH REAR DRAIN AND SAFE & EASY ® FILTER HEATING ELEMENTS WIRE COLOR CODES: #4 - BLACK COM BL - BLACK BR - BROWN #5 - RED 208V 43 WH B/R - BLACK/RED #6 - GRAY 480V BU - BLUE...
- Page 36 24 TS 2006 208-240V & 480V 3 PHASE WITH REAR DRAIN AND ® SAFE & EASY FILTER HEATING ELEMENTS #4 - BLACK COM #5 - RED 208V 53 WH #6 - GRAY 480V TRANSFORMER CONNECTION CHART LOAD NEUT 31 BL #2 - ORANGE 240V #1 - WHITE 120V NOTCH...
-
Page 37: Cpu Wiring Diagrams
34×24 TS 2006 208-240V & 480V 3 PHASE WITH REAR DRAIN AND ® SAFE & EASY FILTER HEATING ELEMENTS #4 - BLACK COM #5 - RED 208V #6 - GRAY 480V 59 WH TRANSFORMER CONNECTION #2 - ORANGE 240V LOAD NEUT CHART 37 BL... - Page 38 34x24 CPU 2007 208-240V & 480V 3 PHASE WITH REAR DRAIN AND SAFE & EASY ® FILTER...
-
Page 39: Bb Models
KEATING FRYER SPECIFICATIONS 10×11 BB MODELS 14 BB A M P S A M P S AMPS PER LINE-THREE PHASE AMPS PER LINE-THREE PHASE VOLTS VOLTS SINGLE SINGLE PHASE PHASE 11.7 13.1 15.5 15.5 3 ELEMENTS (2500 W EACH) 3 ELEMENTS (4350 W EACH) -
Page 40: Ts Models
TS MODELS 10×11 TS 14 TS A M P S A M P S AMPS PER LINE-THREE PHASE AMPS PER LINE-THREE PHASE VOLTS VOLTS SINGLE SINGLE PHASE PHASE 17.4 10.2 19.5 11.4 13.6 23.2 13.6 23.2 3 ELEMENTS (6500 W EACH) 3 ELEMENTS (3800 W EACH) 18/20 TS 24 TS... -
Page 42: Warranty
SERVICE INFORMATION If you have a service related question call 1-800-KEATING. Please state the nature of the call; it will ensure speaking with the appropriate person. Have your serial and model number available when ordering parts. KEATING OF CHICAGO, INC.