
Related Manuals for THOMSON TG185n

Summary of Contents for THOMSON TG185n
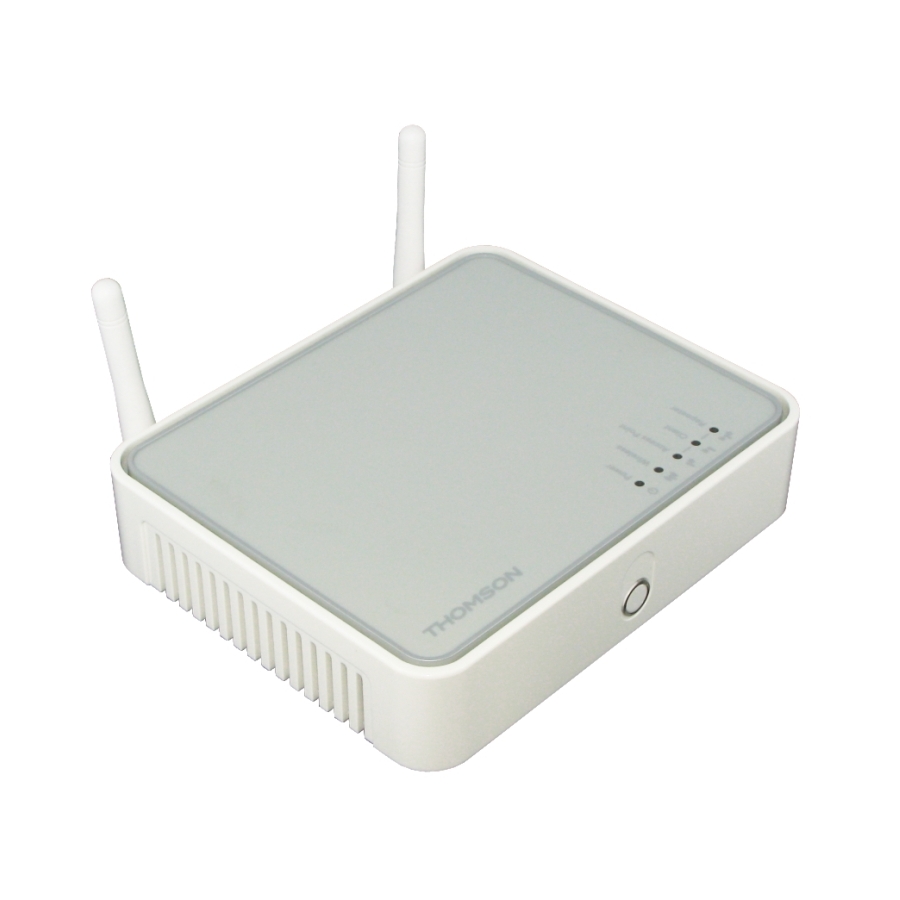
- Page 1 THOMSON TG185n Ethernet-to-WiFi Convertor/Wireless-n Repeater Setup and User Guide...
- Page 3 THOMSON TG185n Setup and User Guide...
- Page 4 Distribution and copying of this document, use and communication of its contents is not permitted without written authorization from THOMSON. The content of this document is furnished for informational use only, may be subject to change without notice, and should not be construed as a commitment by THOMSON. THOMSON assumes no responsibility or liability for any errors or inaccuracies that may appear in this document.
-
Page 5: Table Of Contents
About this Setup and User Guide ..........1 1 Introduction.................. 3 2 Installation..................5 3 The THOMSON TG185n as Wireless Access Point ....7 Configuring The THOMSON TG185n As Access Point........8 Connecting a Wireless Client via WPS ............11 3.2.1... - Page 6 Contents THOMSON TG185n Web Interface ..............40 Saving/Restoring Your Configuration ............41 7 Support..................43 Assigning a Static IP to Your Computer ............44 7.1.1 Assigning a Static IP Address On Windows Vista ................45 7.1.2 Assigning a Static IP Address On Windows XP ................. 46 7.1.3...
-
Page 7: About This Setup And User Guide
Example: On the File menu, click Open to open a file. Documentation and software updates THOMSON continuously develops new solutions, but is also committed to improving its existing products. For more information on THOMSON's latest technological innovations, documents and software releases, visit us at http://www.thomson-broadband.com. - Page 8 About this Setup and User Guide E-DOC-CTC-20080624-0009 v2.0...
-
Page 9: Introduction
Introduction Introduction Introduction This Setup and User Guide will show you how to set up your THOMSON TG185n. Supported wireless standards The THOMSON TG185n supports the following wireless standards: Standard Maximum Data Rate IEEE 802.11n 300 Mbps IEEE 802.11g 54 Mbps IEEE 802.11b... - Page 10 Introduction Wireless Repeater Use this mode to extend the coverage of an existing wireless network: Wireless Client Use this mode to connect a wired Ethernet device (for example: a laptop, a gaming console with Ethernet connectivity,...): E-DOC-CTC-20080624-0009 v2.0...
-
Page 11: Installation
THOMSON TG185n. Plug the adapter into a nearby mains socket. Plug one end of the Ethernet cable into the Ethernet port of your THOMSON TG185n. Plug the other end of the Ethernet cable in the Ethernet port on your computer. - Page 12 Installation E-DOC-CTC-20080624-0009 v2.0...
-
Page 13: The Thomson Tg185N As Wireless Access Point
The THOMSON TG185n as Wireless Access Point The THOMSON TG185n as Wireless Access Point Usage Use this mode if you are using a wired network and you now want to be able to access your network wirelessly. In this chapter... -
Page 14: Configuring The Thomson Tg185N As Access Point
The THOMSON TG185n as Wireless Access Point Configuring The THOMSON TG185n As Access Point Procedure Before you can use your THOMSON TG185n as wireless access point you have to complete following steps: Switch the THOMSON TG185n to access point mode. -
Page 15: The Thomson Tg185N As Wireless Access Point
Configure the IP settings of your THOMSON TG185n (optional) If you still want to be able to access your THOMSON TG185n after connecting it to your Internet gateway, you have to make sure that they are both using the same IP range. - Page 16 The THOMSON TG185n as Wireless Access Point Configure your wireless clients In order to connect your wireless clients to the THOMSON TG185n you must configure them with the same Network ID (SSID) and security as your wireless access point. You can do this: Automatically via WPS.
-
Page 17: Connecting A Wireless Client Via Wps
The THOMSON TG185n supports the following options: Push Button Configuration (PBC): This is the easiest way to connect your wireless client. You have to push a button both on the THOMSON TG185n and the wireless client. For more information, see “3.2.1 Push Button Configuration”... -
Page 18: Push Button Configuration
You now have two minutes to start WPS on your wireless client. If the LED does not start to blink, WPS is not enabled on your THOMSON TG185n. For more information on how to enable WPS, see “... -
Page 19: Pin Code Entry On The Wireless Client
Start WPS on your wireless client and choose to enter a PIN from your access point. For example, on the TG121n Wireless Client Utility you will see the following screen: Enter the PIN code of your THOMSON TG185n and follow the instructions. For example, on the TG121n Wireless Client Utility you will see the following screen: At the end of the installation your utility will inform you that WPS was successful. -
Page 20: Pin Code Entry On The Thomson Tg185N
TG121n Wireless Client Utility you will see the following screen: Write down the PIN code generated by the configuration utility. Enter your wireless client’s PIN code in the THOMSON TG185n web interface Proceed as follows: Open your web browser and browse to http://192.168.1.11. -
Page 21: Manually Configuring A Wireless Client
If none of your computers is connected to your network, connect a computer using a wired connection and follow the procedure above to find out what your wireless settings are. Another option is to reset your THOMSON TG185n and reconfigure it all over again. For more information, “7.4 Reset to Factory Defaults” on page Procedure Configure your computer with the same wireless settings as your THOMSON TG185n. -
Page 22: Securing Your Wireless Network
The THOMSON TG185n as Wireless Access Point Securing Your Wireless Network Introduction By using encryption, communication between the wireless clients and your THOMSON TG185n is protected by a passphrase. Only clients which use the correct network name (SSID) and passphrase can connect to your network. -
Page 23: Configuring Wpa(2)-Psk Encryption
8 to 63 alphanumeric characters or 64 hexadecimal characters (characters from 0 to 9 and from A to F). Click Apply. The THOMSON TG185n prompts you that the configuration was successful. Configure your wireless client(s) with the same settings. E-DOC-CTC-20080624-0009 v2.0... -
Page 24: Configuring Wpa Encryption
SP3 on your Windows XP. You can find the WPS IE update on http://support.microsoft.com/kb/917021. Click Apply to immediately apply your changes. The THOMSON TG185n prompts you that the configuration was successful. Configure your wireless client(s) with the same settings. E-DOC-CTC-20080624-0009 v2.0... -
Page 25: Configuring Wep Encryption
A to F). In the text box next to this selection, type the network key of your choice. Click Apply. The THOMSON TG185n prompts you that the configuration was successful. Configure your wireless client(s) with the same settings. E-DOC-CTC-20080624-0009 v2.0... - Page 26 The THOMSON TG185n as Wireless Access Point E-DOC-CTC-20080624-0009 v2.0...
-
Page 27: The Thomson Tg185N As Wireless Repeater
“4.1 Automatic Configuration (Via WPS)” on page Does not support WPS or you know if it does or not, see “4.2 Manual Configuration (Without WPS)” on page In this chapter This chapter will help your to configure your THOMSON TG185n as wireless repeater. E-DOC-CTC-20080624-0009 v2.0... -
Page 28: Automatic Configuration (Via Wps)
“4.1.2 PIN Code Entry On The Access Point” on page PIN code entry on the THOMSON TG185n: The access point generates a PIN code that you have to enter on the web interface of your THOMSON TG185n. For more information, see “4.1.3 PIN Code Entry On the THOMSON TG185n”... -
Page 29: Push Button Configuration
Shortly press the WPS button on your THOMSON TG185n: The WPS button LED starts blinking green. If the LED does not start to blink, WPS is not enabled on your THOMSON TG185n. For more information on how to enable WPS, see “... -
Page 30: Pin Code Entry On The Access Point
Proceed as follows: Open the configuration utility or web interface of your access point. Start WPS on your access point and choose to enter a PIN code. Enter the PIN code of your THOMSON TG185n and follow the instructions. E-DOC-CTC-20080624-0009 v2.0... -
Page 31: Pin Code Entry On The Thomson Tg185N
PIN Code Entry On the THOMSON TG185n Get your access point’s PIN code Check the documentation of your THOMSON TG185n to know where to find the PIN code of your access point. You may find this PIN code: On a label on the housing On the configuration utility or web interface Enter your access point’s PIN code in the THOMSON TG185n web interface... -
Page 32: Manual Configuration (Without Wps)
For more information on how to find these items, consult the documentation of your access point. Procedure Before you can use your THOMSON TG185n as a repeater you have to complete following steps: Switch the THOMSON TG185n to repeater mode. - Page 33 Configure the IP settings of your THOMSON TG185n (optional) If you still want to be able to access your THOMSON TG185n after connecting it to your access point, you have to make sure that they are both using the same IP range.
- Page 34 The THOMSON TG185n as Wireless Repeater E-DOC-CTC-20080624-0009 v2.0...
-
Page 35: Your Thomson Tg185N As Wireless Client
In the following pages we will just refer to it as your access point. Default behaviour If the THOMSON TG185n is still using its factory default settings, it will automatically repeat the strongest unsecured network. Configuring your THOMSON TG185n... -
Page 36: Automatic Configuration (Via Wps)
Your THOMSON TG185n as Wireless Client Automatic Configuration (Via WPS) Wi-Fi Protected Setup (WPS) allows you to connect the THOMSON TG185n to your access point in a swift and easy way, without the need to enter all of your wireless settings (SSID, encryption,...). -
Page 37: Push Button Configuration
Start Push Button Configuration on your access point. For more information, consult the documentation of your access point. Shortly press the WPS button on your THOMSON TG185n: The WPS button LED starts blinking green. The WPS button LED will turn solid green when the configuration has been completed. After a few seconds the LED will turn off again. -
Page 38: Pin Code From Your Access Point
PIN Code From Your Access Point Get your access point’s PIN code Check the documentation of your THOMSON TG185n to know where to find the PIN code of your access point. You may find this PIN code: On a label on the housing... -
Page 39: Manual Configuration (Without Wps)
The THOMSON TG185n lists all the access points that are within range. Select your access point and click Associate. If your access point is secured, the THOMSON TG185n will take you to the Wireless Settings page. Enter the passphrase/key used by your access point and click Apply. - Page 40 Use the DHCP client protocol to automatically get the IP address for this device if you want your access point to assign an IP address to your THOMSON TG185n. In this case you do not have to provide an IP address, IP Subnet Mask and Gateway IP Address.
-
Page 41: Thomson Tg185N Basics
THOMSON TG185n Basics THOMSON TG185n Basics In this chapter Topic Page THOMSON TG185n LED Behaviour THOMSON TG185n Web Interface Saving/Restoring Your Configuration E-DOC-CTC-20080624-0009 v2.0... -
Page 42: Thomson Tg185N Led Behaviour
THOMSON TG185n Basics THOMSON TG185n LED Behaviour Content This chapter describes the behaviour of: Status LEDs WPS Button LED Ethernet LEDs E-DOC-CTC-20080624-0009 v2.0... -
Page 43: Status Leds
THOMSON TG185n Basics 6.1.1 Status LEDs Introduction On the top panel of your THOMSON TG185n, you can find a number of status LEDs, indicating the state of the device during normal operation. Power LED Colour State Description Green Solid on... -
Page 44: Wps Button Led
THOMSON TG185n Basics 6.1.2 WPS Button LED Introduction The WPS button allows you to connect the THOMSON TG185n with other wireless devices. WPS LED Colour State Description green Solid On Client successfully registered via WPS Blinking WPS registration ongoing No WPS registration ongoing. -
Page 45: Ethernet Leds
THOMSON TG185n Basics 6.1.3 Ethernet LEDs Ethernet LED On the right of the Ethernet port, you can find a LED indicating the link integrity (or activity). LED Status Description No connection on this port Solid on Ethernet link up Blinking Data is flowing from/to this port E-DOC-CTC-20080624-0009 v2.0... -
Page 46: Thomson Tg185N Web Interface
THOMSON TG185n Web Interface appears. You can now browse through all configurable items of the THOMSON TG185n using the menu on the left. If you have protected your THOMSON TG185n with a password, the THOMSON TG185n will prompt you to enter your password. Enter your password and click Log on. -
Page 47: Saving/Restoring Your Configuration
Saving/Restoring Your Configuration Introduction Once you have configured your THOMSON TG185n to your needs, it may be a good idea to save your configuration for later use. This way you can always return to your working configuration in case of problems. - Page 48 THOMSON TG185n Basics E-DOC-CTC-20080624-0009 v2.0...
-
Page 49: Support
Topics This chapter describes the following topics: Topic Page Assigning a Static IP to Your Computer Restoring the IP Settings of Your Computer General THOMSON TG185n Troubleshooting Reset to Factory Defaults E-DOC-CTC-20080624-0009 v2.0... -
Page 50: Assigning A Static Ip To Your Computer
Configuration Protocol (DHCP) server. This server can be integrated in your (Internet) gateway or located on the Internet. But since your THOMSON TG185n is currently not connected to either of these, we will have to manually assign an address to your computer. -
Page 51: Assigning A Static Ip Address On Windows Vista
Support 7.1.1 Assigning a Static IP Address On Windows Vista Procedure Proceed as follows: On the Windows Start menu, click Network. In the top bar, click Networking and Sharing Center. In the Tasks list, click Manage network connections. Right-click Local Area Connection and click Properties. If Windows prompts you for your permission, click Continue. -
Page 52: Assigning A Static Ip Address On Windows Xp
Support 7.1.2 Assigning a Static IP Address On Windows XP Procedure Proceed as follows: On the Windows Start menu, click Control Panel. Double-click Network Connections (if needed, switch to Classic View first). Right-click Local Area Connection and click Properties. The Local Area Connection Properties window appears: In the This connection uses the following items list, select Internet Protocol (TCP/IP) and click Properties. -
Page 53: Assigning A Static Ip Address On Mac Os X
Support 7.1.3 Assigning a Static IP Address On Mac OS X Procedure Proceed as follows: In the apple menu, click System Preferences. Under Internet & Network, click Network. Select Built-in Ethernet and click Configure. In the Configure IPv4 list, select Manually. In the IP Address box, type an IP address between 192.168.1.14 and 192.168.1.63 (for example 192.168.1.20). -
Page 54: Restoring The Ip Settings Of Your Computer
Support Restoring the IP Settings of Your Computer MS Windows Use the same procedure as described in “7.1 Assigning a Static IP to Your Computer” on page 44, but select Obtain an IP address automatically instead of Use the following IP address. Mac OS X Use the same procedure as described in “7.1 Assigning a Static IP to Your Computer”... -
Page 55: General Thomson Tg185N Troubleshooting
You are using the correct power supply for your THOMSON TG185n device. The power requirements for your THOMSON TG185n are clearly indicated on the identification label on the bottom of the THOMSON TG185n. Only use the power adaptor supplied with your THOMSON TG185n. -
Page 56: Wired Connection Troubleshooting
Ethernet LED does not light up Make sure that: The Ethernet cable is securely connected to the Ethernet port on your THOMSON TG185n and your computer. You are using the correct cable type for your Ethernet equipment that is at least UTP CAT5 with RJ-45 connectors. -
Page 57: Wireless Connection Troubleshooting
Check the signal strength, indicated by the wireless client manager. If the signal is low, try repositioning the THOMSON TG185n or directing the THOMSON TG185n’s antenna(s) for optimal performance. Make sure that the wireless client adapter is enabled (message like “radio on”). -
Page 58: Reset To Factory Defaults
Reset to Factory Defaults Resetting your THOMSON TG185n If at some point you can no longer connect to the THOMSON TG185n or you want to make a fresh install, it may be useful to perform a reset to factory defaults. - Page 60 THOMSON Telecom Belgium Prins Boudewijnlaan 47 2650 Edegem www.thomson-broadband.com © THOMSON 2008. All rights reserved. E-DOC-CTC-20080624-0009 v2.0.