Table of Contents
Advertisement
Built-in Dishwasher ............11-17
Operating Instructions, Tips
Appliance Registration ...............2
Detergent Guide
Dispenser Cups ........................7
Features ..............................4-6
How to Operate .....................4-6
Loading ..............................8, 9
Operating Instructions ............4-6
Water Temperature ..................6
Care and Cleaning
Winter Storage ........................10
ADD ONE LITRE OF WATER
You must add one litre of water into the
dishwasher to facilitate the first start.
RECYCLED PAPER
RECYCLABLE
Use and Care Guide
Electronic Dishwasher
www.GEappliances.ca
............3
.....................7
...........................6
BEFORE INITIAL START
We care about our environment
Consumer Services
Model and Serial Numbers .........2
Repair Service ........................2
For service please call
1-800-361-3400
TRY
FOR DEEP CLEANING POWER
IMPORTANT
............18, 19
.....................20
500A200P054
K
rev. 1
Advertisement
Table of Contents

Related Manuals for GE Max Profile


Summary of Contents for GE Max Profile
-
Page 1: Table Of Contents
Use and Care Guide Electronic Dishwasher www.GEappliances.ca Safety Instructions Problem Solver …………3 …………18, 19 Installation Instructions Consumer Services Built-in Dishwasher …………11-17 Model and Serial Numbers ………2 Repair Service ……………………2 Camco Service …………………20 Operating Instructions, Tips Appliance Registration ……………2 For service please call Detergent Guide …………………7 1-800-361-3400... - Page 2 A NOTE TO CONSUMERS We’d like to thank you and congratulate you for making the wise decision in purchasing your dishwasher. This User Guide is designed to be kept near your dishwasher at all times for quick and easy reference. Features may vary on some dishwasher models.
-
Page 3: Important Safety Instructions
IMPORTANT SAFETY INSTRUCTIONS Read all instructions before using this appliance. • Do not operate your dishwasher unless all WARNING - When using this enclosure panels are properly in place. appliance, always exercise basic safety precautions, including the following. • Do not abuse, sit on, or stand on the door or dish rack of the dishwasher., •... -
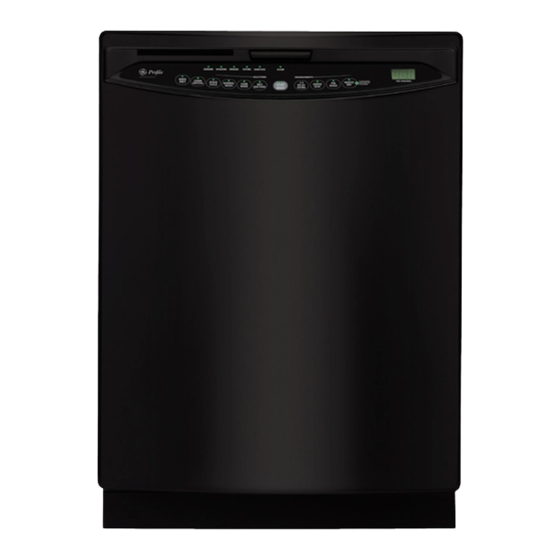
Page 4: How To Operate Your Dishwasher
HOW TO OPERATE YOUR DISHWASHER You can locate your model number on the tub wall just inside the door. Throughout this manual, features and appearances may vary from your model. Control Settings Status Indicator Lights The status display tells you what’s happening while the dishwasher is in operation and may flash, indicating a malfunction (see page 6). - Page 5 HOW TO OPERATE YOUR DISHWASHER SPEED CYCLE Heavy 7.7 gal., 35.2 litre, 36 min. Medium 6.0 gal., 27.3 litre, 36 min. Light 4.7 gal., 21.6 litre, 33 min This cycle is for everyday dishes and glassware. CHINA CRYSTAL Heavy 8.3 gal., 37.8 litre, 49 min. Medium 6.0 gal., 27.3 litre, 36 min.
-
Page 6: Flashing Display Lights
HOW TO OPERATE YOUR DISHWASHER Start If the door is closed the indicator lights will turn Close the dishwasher door and select the off if the START/RESET pad is not selected within cycle and desired enhancements. Touch the two minutes. To activate the display, open and START/RESET pad to begin the cycle. -
Page 7: Using The Dishwasher
Automatic Dishwashing Detergent has been approved 2. Fill the Main Wash section with detergent. for use in all GE dishwashers. Keep your detergent fresh and dry. Don’t put detegent 3. Fill the Pre-Wash section if needed. into the dispenser until you’re ready to wash 4. -
Page 8: Upper Rack
HOW TO LOAD YOUR DISHWASHER For best dishwashing results follow these loading guidelines. Features and appearance of racks and silverware baskets may vary from your model. Upper Rack Although the upper rack is for glasses, cups and saucers, pots and pans can be placed in this rack for effective cleaning. -
Page 9: Loading Place Settings
HOW TO LOAD YOUR DISHWASHER Loading place settings… Follow these guidelines for loading 12 place settings. Features and appearance of racks and silverware baskets may vary from your model. Upper Rack – 12 place settings Lower Rack – 12 place settings About optional accessories About optional accessories You can change the appearance of your... -
Page 10: User Maintenance Instructions
CARE AND CLEANING USER MAINTENANCE INSTRUCTIONS Clean the control panel with a lightly dampened system), you may also use citric acid. Fill both cloth. Dry thoroughly. Do not use abrasive or detergent cups completely with citric acid and run sharp objects on the panel. They can damage it. dishwasher through a full cycle without any dishes. -
Page 11: Installation Instructions
BUILT-IN DISHWASHER INSTALLATION INSTRUCTIONS ALL ROUGH-IN PLUMBING AND ELECTRICAL MUST BE COMPLETED BEFORE THE DISHWASHER IS PLACED IN THE UNDERCOUNTER OPENING ALL ELECTRICAL AND PLUMBING WORK MUST BE IN ACCORDANCE WITH LOCAL CODES DISHWASHER SHOULD NOT BE INSTALLED IN AREA WHERE FREEZING OF WATER MAY OCCUR WARNING TO REDUCE THE RISK OF ELECTRIC SHOCK, FIRE, OR INJURY TO PERSONS, THE INSTALLER MUST ENSURE THAT THE DISHWASHER IS COMPLETELY ENCLOSED AT THE TIME OF... -
Page 12: Prepare Drain Plumbing
PREPARE DRAIN PLUMBING DRAIN REQUIREMENTS • Follow local codes and ordinances. 1. A suggested method of connecting the drain hose • If dishwasher is not adjacent to sink, horizontal drain line to a WASTE TEE or a Y branch tailpiece on the should not be longer than 10 feet and should not contain existing sink trap is shown in Figure C. -
Page 13: Prepare Electrical Wiring
PREPARE ELECTRICAL WIRING GROUNDING INSTRUCTIONS (FOR THE APPLIANCES SOLD WITHOUT A CORD SET) This appliance must be connected to a grounded metal, permanent wiring system or an equipment- grounding conductor must be run with the circuit conductors and connected to the equipment- grounding terminal or lead on the appliance. - Page 14 INSTALLATION INSTRUCTIONS Step 3. Remove toekick CAUTION Remove the two screws. Do not remove the wood base until you are ready to install the dishwasher. The dishwasher will tip over when the door is opened. Check door balance before wood base is removed Locate the 2 Phillips head countertop mounting screws wrapped with yellow tape and stuck to the top or side of the dishwasher.
- Page 15 INSTALLATION INSTRUCTIONS Step 6. Insert drain hose through cabinet Step 10. Position dishwasher and fasten to cabinet Upright dishwasher and position in front of the cabinet opening. Insert the drain hose into the Important Installation Guidelines hole previously drilled in the cabinet wall. If a power cord is used, guide the end through a 1.
- Page 16 INSTALLATION INSTRUCTIONS Cutting Lines Cut Lines Do not cut corrugated portion of hose Door Fits Door Catches and Swings on Cabinet Back Behind 3/4" 1" 5/8" Frame Cabinet Frame Incorrect Alignment Figure Q Correct Alignment 2. Test Door Swing If the location requires a longer drain hose, add up The edges of the dishwasher door should be behind to 42”...
- Page 17 INSTALLATION INSTRUCTIONS Ñ Check for leaks under the dishwasher. If a leak Check to be sure that wiring is not WARNING CAUTION is found, turn off power supply, tighten pinched or in contact with the door connections and restore power. springs.
-
Page 18: Loading
Electrasol Dishwashing Degergent has been approved for use in all GE dishwashers. • To remove suds from the tub, open the dishwasher and let suds dissipate. Add 1 gallon of cold water to the tub. Close the door until it locks into place. Pump out water by pressing START/RESET, then after waiting 10 seconds press START/RESET again. -
Page 19: Rinse Agent
® because it may cause foaming or sudsing. Electrasol Dishwashing Degergent has been approved for use in all GE dishwashers. Dishes don’t dry. Low inlet water • Make sure inlet water temperature is correct (see pg. 6). -
Page 20: Repair Service
CAMCO SERVICE CAMCO Service Telephone Numbers QUESTIONS? If you have any questions concerning your appliance, please write to: Director, Consumer Relations CAMCO, Inc. 1 Factory Lane Suite 310, Moncton, N.B. E1C 9M3 IN-HOME REPAIR SERVICE 1-800-361-3400 Expert CAMCO repair service is only a phone call away. SERVICE CONTRACTS 1-800-461-3636 Purchase a CAMCO service contract while your warranty is still in effect and you will receive a substantial...