Edimax IC-3010 User Manual
Wire/ wireless 11b/g ip camera
Hide thumbs
Also See for IC-3010:
- User manual (109 pages) ,
- Quick instillation manual (28 pages) ,
- User manual (2 pages)

Related Manuals for Edimax IC-3010


Summary of Contents for Edimax IC-3010
-
Page 1: User Manual
IC-3010 / IC-3010Wg Wire/ Wireless 11b/g IP Camera User Manual Version 1.0 April 2008... -
Page 2: Table Of Contents
C A T A L O G Chapter I: Familiar with your Internet IP Camera...............3 1.1 Package Contents ....................3 1.2 Basic Introduction .....................4 1.3 Product features......................5 1.4 Familiar with Key Components................6 1.5 Descriptions for LED Indicators................9 1.6 Camera Installation ....................10 1.7 Locate the IP Address of this IP Camera............ - Page 3 3.1 Install Windows-based Utility ................57 3.2 Locate Camera on Local Network and Network Setting ........61 3.3.1 Network Settings ..................65 3.3.2 Wireless Settings..................67 3.3.3 E-Mail Settings.....................71 3.3.4 PPPoE Settings ...................73 3.3.5 FTP Settings....................75 3.3.6 Date / Time Settings..................77 3.3.7 Advanced Settings ..................79 3.3.8 Users ......................81 3.3.9 Tools ......................83 3.3.11 About ......................85...
-
Page 4: Chapter I: Familiar With Your Internet Ip Camera
Chapter I: Familiar with your Internet IP Camera 1.1 Package Contents Thank you for purchasing this IP camera! Before you start to use this IP camera, please check the package contents. If anything is missing, please contact the dealer of purchase and return the package to claim for missing contents. One Internet Camera One Power Adapter One Camera Stand... -
Page 5: Basic Introduction
1.2 Basic Introduction Thank you for purchasing this Internet IP camera! This IP camera is an ideal product for all kinds of video-surveillance purposes, like home/office safety, kid/pet monitoring, and remote video acquire etc. Unlink conventional close-circuit vide camera, you’re not limited to the length of cable! Once this IP camera is connected to Internet, you can receive video from anywhere in the world where Internet access is available. -
Page 6: Product Features
1.3 Product features Complies IEEE 802.3/802.3u standards Complies IEEE802.11b/g standards ( for IC-3010Wg only) Supports dual video compression formats (MJPEG and MPEG4). Supports VGA (640 x 480), QVGA (320 x 240), and QQVGA (160 x 120) video resolution. Supports 2-way audio transmission, with speaker output and built-in microphone. -
Page 7: Familiar With Key Components
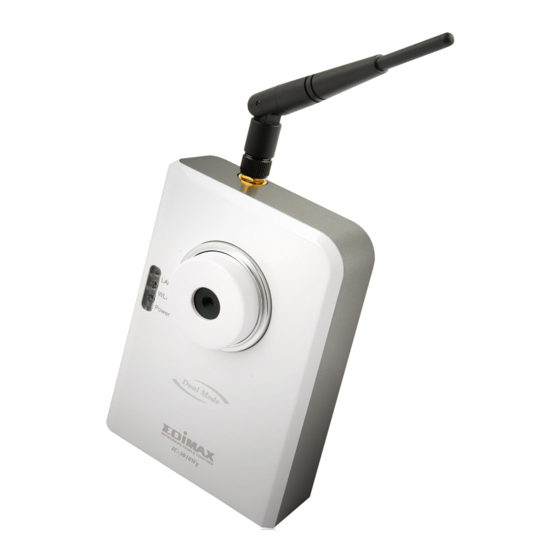
1.4 Familiar with Key Components Front View LAN LED Camera WLAN LED Focus Ring Power LED LAN LED: Indicates LAN activity WLAN LED: Indicates Wireless LAN activity Power LED: Indicates power status Camera: Video camera with lens Focus Ring: Adjusts focus Descriptions for LAN / WLAN / Power LED will be giver later. -
Page 8: Top View
Top View Antenna Base Antenna Base: Connect to antenna Bottom View Reset Button Power Jack LAN Jack Speaker Out Microphone Reset Button: Press and hold for 5 seconds to reset the camera settings to factory default value. Power Jack: Connect to power adapter for power supply. LAN Jack: Connect to your local area network by network cable. -
Page 9: Back View
Back View Tripod Connector MAC Address Label Tripod Connector: Connects to any standard tripod / camera wall holder. MAC Address Label: Shows the MAC address of this IP camera. Useful when you can’t locate the camera on the network. -
Page 10: Descriptions For Led Indicators
1.5 Descriptions for LED Indicators LED Name Status Description Network cable is disconnected Network cable is connected Flash Transferring data via LAN port WLAN No wireless LAN activity Transferring data via wireless LAN Power Camera is not powered (camera off) Camera is correctly powered (camera on) -
Page 11: Camera Installation
1.6 Camera Installation Please follow the following instructions to set your IP camera up. 1. Unpack the product package and check if anything’s missing. 2. Connect the antenna to the antenna base, which is located at the top of this IP camera. -
Page 12: Locate The Ip Address Of This Ip Camera
1.7 Locate the IP Address of this IP Camera Default IP address of this IP camera is 192.168.2.3. If you wish to assign another IP address to this IP camera, you have to log onto the web configuration interface of the camera first. - Page 13 2. Double-click ‘Network Connections’ icon. 3. Right-click ‘Local Area Connection’, and click ‘Properties’.
- Page 14 4. Select ‘Internet Protocol (TCP/IP)’, then click ‘Properties’.
- Page 15 5. In ‘IP address’ field, please fill in any IP address begins with ‘192.168.2’, and ends with a value greater than 2 and less than 254 (You can use the example in the picture ‘192.168.2.239’). In Subnet mask field, please fill ‘255.255.255.0’. Please keep all other fields empty, and click ‘OK’.
-
Page 16: Log Onto Web Management Interface
1.8 Log Onto Web Management Interface Make sure the IP camera is correctly powered (Power LED is on), and then launch Internet Explorer and type the IP address of the IP camera in address bar of Internet Explorer. You should be prompted to input the user name and password: Default user name is ‘admin’... - Page 17 After logged on, you should see the following messages at the top of Internet Explorer: This IP camera requires a special ActiveX control (A.K.A. ‘Plugin’) to work. Please click on the message, and select ‘Install ActiveX Control…’: When you’re prompted, click ‘Install’ to continue.
- Page 18 You should be able to see the image from camera now: Note: If you see one of these messages (or both): Your computer may not have the display capability that this IP camera requires, or you don’t have Microsoft DirectX® installed. Please download Microsoft DirectX® from Microsoft’s website (http://www.microsoft.com), and try again.
-
Page 19: Chapter Ii: Using Web Management Interface
Chapter II: Using Web Management Interface 2.1 Camera Settings The first menu after you logged onto web management interface is ‘Camera’, and this is the only menu you can see the real-time image from camera. You can always back to this menu by clicking ‘Camera’ on the top of web management interface. - Page 20 The descriptions of every setting in this menu will be given below: Item Description Video Format Specifies video encoding format. You can choose MPEG4 or MJPEG (Motion-JPEG). MPEG4 mode also supports motion detection (see chapter 2.2.1). Speak to IPCam If your computer is equipped with a microphone, you can press and hold this button and speak to the microphone.
-
Page 21: Motion Detection
2.2.1 Motion Detection When you’re using ‘MPEG4’ encoding format, you can use motion detection function. When a motion is detected, the IP camera will take a picture automatically. To setup motion detection, please select ‘MPEG4’ as encoding format, and right-click on the image. - Page 22 Please click ‘Motion Detection’ in pop-up menu, and a new setup menu will appear: The IP camera will display the image of the area that IP camera points to at the left. The motion detection area must be rectangle, and cover the area you want to use motion detection function.
- Page 23 The descriptions of every setting in this menu will be given below: Item Description Region List Lists all existing motion detection regions. You can define up to three pre-defined region. Region Name When you define a new region by mouse cursor, a default region name will appear here automatically (named by the size of the region you defined).
-
Page 24: Mute Audio
2.2.2 Mute Audio This IP camera will transmit all sound received by built-in microphone to your computer by default. If you don’t want to hear it, you can mute audio for a while. To mute audio, please select ‘MPEG4’ as encoding format, and right-click on the image. -
Page 25: About
2.2.3 About This function will provide you with the version number of current IP camera plugin, which is useful when you need online support. To see version information, right-click on the image. A pop-up menu will appear: Select ‘About’ and the version information will appear:... -
Page 26: Lan Settings
2.2 LAN Settings All network-related settings can be found in this menu, and you have to specify TCP/IP parameters in this menu if you want to change IP address, use PPPoE, Dynamic DNS, and activate UPnP function. You can access this menu by clicking ‘LAN’ on the top of web management interface. 2.2.1 IP Address You can define IP address and select the port number you wish to use here. - Page 27 The descriptions of every setting in this menu will be given below: Item Description Network Type This camera can obtain the IP address from DHCP server automatically (if you have one), or set a fixed IP address. Select ‘DHCP’ to obtain IP address automatically or ‘Static IP Address’...
- Page 28 2.2.2 PPPoE If the ISP requires you to connect to the Internet by PPPoE, you can specify PPPoE username and password here. The descriptions of every setting in this menu will be given below: Item Description Enable PPPoE Select ‘Enable’ to activate PPPoE function of this IP camera, select ‘Disable’...
-
Page 29: Dynamic Dns
2.2.3 Dynamic DNS If your ISP does not give you a fixed Internet IP address (i.e. the Internet address you’re using when you access the Internet is not always the same – ask your ISP for detailed information), you can use this function to help you locate the IP address of this IP camera when you’re away from home or office. -
Page 30: Upnp
2.2.4 UPnP When UPnP function is activated, all UPnP-compatible computers / network devices will be able to discover this IP camera automatically (only those in the same local network). This function is useful and you don’t have to remember the IP address of this IP camera. - Page 31 Click the message to open ‘My Network Places’, and you’ll see the IP camera: You can double-click the icon to launch Internet Explorer and log onto IP camera’s web management interface directly.
-
Page 32: Loginfree
2.2.5 LoginFree You can specify a filename here, and everyone who know this filename can gain access to the picture captured by the IP camera with this name with .jpg file extension. For example, if the filename you specified here is ‘loginfree’ and your IP camera’s IP address is ‘192.168.2.3’, then everyone on the network can access to the picture taken by the IP camera at ‘http://192.168.2.3/loginfree.jpg’. - Page 33 2.3 WLAN Parameters (For IC-3010Wg only) If you wish to use wireless network instead of wired network connection, you have to set wireless LAN parameters here. You can access this menu by clicking ‘WLAN’ on the top of web management interface.
- Page 34 The descriptions of every setting in this menu will be given below: Item Description Wireless Select ‘Enable’ to activate wireless network function of Connection this IP camera, select ‘Disable’ to disable it. Network Type Select the network type of wireless connection. Available options are ‘Infrastructure’...
- Page 35 MAC Address: If you there are many wireless access points in proximity or some wireless access point hides it’s SSID, you can use MAC address to distinguish them. Signal: Shows the radio signal strength in percent. Channel: Shows the radio channel of this wireless access point.
- Page 36 Authentication Select the wireless authentication here, and this setting must be the same with the wireless access point you selected. When you select a wireless access point from the list, it’s authentication type will be selected automatically, and you should not modify it or you will not be able to connect to the wireless access point you selected.
- Page 37 If the key length is 64-bit, you should input 10 HEX characters or 5 ASCII characters, like 112233aabb (HEX) or MYWEP (ASCII). If the key length is 128-bit, you should input 26 HEX characters or 13 ASCII characters, like 11223344556677889900abcdef (HEX) or myweppassword (ASCII).
- Page 38 2.4 Audio/ Video You can specify the video and audio parameters of this IP camera here.
-
Page 39: Dual Mode
2.4.1 Dual Mode This IP camera supports two video encoding formats: MPEG4 and MJPEG. You can select the encoding format from one of them. The descriptions of every setting in this menu will be given below: Item Description Default Video Specify default video encoding format of this IP camera Format here. -
Page 40: Mpeg4
2.4.2 MPEG4 If you selected ‘MPEG4’ as the video encoding format of this IP camera, you can specify the parameters of MPEG4 video encoder here. The descriptions of every setting in this menu will be given below: Item Description Video Resolution Specify video resolution of MPEG4 video encoder. -
Page 41: Mjpeg
2.4.3 MJPEG If you selected ‘MJPEG’ as the video encoding format of this IP camera, you can specify the parameters of MPEG4 video encoder here. The descriptions of every setting in this menu will be given below: Item Description Video Resolution Specify video resolution of MJPEG video encoder. -
Page 42: Audio
2.4.4 Audio This IP camera supports audio function, that is, when external speaker is connected to this IP camera, you can talk to the people in front of the IP camera like using a telephone, when your computer is equipped with speaker and microphone. -
Page 43: Email & Ftp
2.5 Email & FTP This IP camera is capable to send an Email or perform FTP upload with captured image, when a motion is detected. This is very convenient since IP camera will guard the environment automatically for you, and you don’t have to look at the monitor all the time. - Page 44 The descriptions of every setting in this menu will be given below: Item Description Recipient E-Mail Input the email recipient’s Email address here. Address SMTP Server Input the IP address or host name of the SMTP server (the server that delivers the Email for you) here. If you don’t know, please refer to the SMTP server you’re using in your Email software (like Outlook, Outlook Express etc.), or ask your network administrator or ISP.
-
Page 45: Ftp Settings
2.5.2 FTP Settings These settings are used to send the captured picture by FTP:... - Page 46 The descriptions of every setting in this menu will be given below: Item Description FTP Server Input the IP address or host name of the FTP server you wish to use here. FTP Port Input the port number of the FTP server you wish to use here.
-
Page 47: Motion Detection
2.6 Motion Detection Motion detection function makes this IP camera become your non-stop guard. You don’t have to waste all the time monitoring the images from the camera, and camera will detect all motions for you. Once motion is detected, a captured image will be sent to you by Email or via FTP. - Page 48 The descriptions of every setting in this menu will be given below: Item Description Enable Motion Select ‘Enable’ to start motion detection, and select Detection ‘Disable’ to disabled it. Next Event Specify the time interval between two motion detections Detected Interval in seconds.
-
Page 49: System
2.7 System The system menu allows you to set some system-specific parameters, like password and time setting. You can also upgrade the firmware of this IP camera, to make new functions available on this IP camera. You may also clear all settings or reboot the IP camera here. -
Page 50: Camera Information
2.7.1 Camera Information Camera information allows you to set the name and administrator’s password of this camera. The descriptions of every setting in this menu will be given below: Item Description Camera Name Please specify the name of this IP Camera here. This can be used to identify your camera on the network when you have more than one IP camera in the same network. -
Page 51: Date / Time Setting
2.7.2 Date / Time Setting This setting allows you to change the date and time of the real time clock in this IP camera. You can set the time manually, or use network time protocol (NTP) to set the time automatically. The descriptions of every setting in this menu will be given below: Item Description... -
Page 52: Utilities
2.7.3 Utilities This menu allows you to upgrade firmware, clear all settings, reboot the IP camera, and switch LED lights on/off. The descriptions of every setting in this menu will be given below: Item Description Upgrade If you downloaded latest firmware file from our website, Firmware you can click ‘Browse’... - Page 53 you don’t want other people know the camera is transferring data. You can click this button again to switch LED lights on again.
-
Page 54: Status
2.8 Status This menu provides all information about this IP camera, like firmware version, system uptime, date / time, and network information. You can access this menu by clicking ‘Status’ on the top of web management interface. -
Page 55: Users
2.9 Users If you wish to allow other people to view the image captured by this camera, but don’t want to allow them to modify system settings, you can give them user-level user name and password, so they can only view the image and can not change any system setting. - Page 56 Please note: only one user (including administrator) will be able to view the image of IP camera at the same time. The descriptions of every setting in this menu will be given below: Item Description User (1 - 4) Select ‘Enable’ to enable this user (allow him / her to login), and select ‘Disable’...
- Page 57 2.10 Log All activities of this IP camera will be logged, and you and enter ‘Log’ menu to view these logs. You can access this menu by clicking ‘Log’ on the top of web management interface. Click ‘Refresh’ to get latest update.
-
Page 58: Chapter Iii: Windows-Based Utility
Chapter III: Windows-Based Utility 3.1 Install Windows-based Utility To install windows-based Utility of this IP camera, please put the supplied CD-ROM into the CD-ROM drive of your computer. The following message should appear within 1 minute: **missing autorun capture If the autorun function of your computer is not enabled, or nothing appears after CD-ROM has been loaded, you can click ‘My Computer’... - Page 59 Click ‘Install’ to install utility to the folder selected in previous step:...
- Page 60 Setup procedure may require several minutes, please be patient. When you see this message, the setup procedure is completed. Click ‘Finish’ to exit.
- Page 61 If you have Windows Defender (Windows XP) or other 3 party firewall software, you may see the following (or similar) message: Please click ‘Unblock’ (or similar option) to let IP camera Utility pass the firewall, or the IP camera utility may not be able to function properly. A new folder named ‘IP Camera’...
-
Page 62: Locate Camera On Local Network And Network Setting
3.2 Locate Camera on Local Network and Network Setting Admin utility will launch automatically after installation is complete. If not, please launch ‘IP Camera Admin’ from ‘IP Camera’ group in ‘All Programs’ by yourself. If the IP camera is correctly installed and connected to your network, you should see something similar like this: All found cameras will be displayed at the left of admin utility, which begins with ‘IC-‘... - Page 63 ‘N’ indicates the camera is newly found and not configured; ‘D’ indicates the camera is disconnected, and ‘M’ indicates the camera is connected. Please select a camera, and the camera’s current setting will be displayed at ‘Information of Camera’ section (right). You can click the ‘+’ sign at the left of ‘Network Information’...
- Page 64 The descriptions of every setting in this menu will be given below: Item Description Internet Camera The name of this IP camera. If you have more than one IP Name camera, it’s suggested to use the place’s name where camera is located, so you can identify the camera easily, like ‘Garden’...
- Page 65 The following message will appear after few seconds, if you wish to connect to the IP camera and see the images captured by IP camera, click ‘OK’; otherwise click ‘Cancel’ to exit. Please refer to section ** for detailed instructions of Camera Viewer.
-
Page 66: Network Settings
3.3 Detail Setting Please click ‘Detail Setting’ in admin software for detailed IP camera setting, and you’ll be prompted to input user name and password: The default user name is ‘admin’ (you can not change it), and the default password is ‘1234’, and then click ‘OK’... - Page 67 The descriptions of every setting in this menu will be given below: Item Description DHCP Select ‘Enable’ to use DHCP to configure the IP address of this IP camera via DHCP server automatically; select ‘Disable’ to configure the IP address manually. Camera Name The name of this IP camera.
-
Page 68: Wireless Settings
3.3.2 Wireless Settings The ‘Wireless Settings’ tab lets you to configure the wireless network settings of the IP camera. - Page 69 The descriptions of every setting in this menu will be given below: Item Description Wireless Connection Select ‘Enable’ to enable the wireless interface of this IP camera; select ‘Disable’ to switch wireless interface off. If the wireless interface is disabled, all setting items in this tab will be grayed out.
- Page 70 Profile Name: Give the profile a name so you can distinguish from others. SSID: Please specify the SSID of the wireless device you wish to connect; you MUST know the SSID of wireless device you wish to connect. Channel: Select the radio channel number of this profile, must be the same with the wireless device you wish to connect.
- Page 71 Encryption Type: Select the encryption type required by the network device you wish to connect here, the content of drop down menu will vary depend on the authentication type you selected above. WPA Pre-Shared Key: Input the WPA pre-shared key of the wireless device you wish to connect here.
-
Page 72: E-Mail Settings
3.3.3 E-Mail Settings The ‘E-Mail Settings’ tab lets you to configure the E-mail alert settings of the IP camera. An E-mail will be sent to the address you specified here when the IP camera detects motion, so you can be alerted by E-mail anywhere & anytime. - Page 73 The descriptions of every setting in this menu will be given below: Item Description Send a Test Email After the settings in this page is complete and saved (by clicking ‘OK’), you can click this button to send a test E-Mail to verify if these settings are correct and working.
-
Page 74: Pppoe Settings
3.3.4 PPPoE Settings The ‘PPPoE Settings’ tab lets you to setup the PPPoE account required to build a PPPoE (Point-to-Point Protocol over Ethernet) connection, primarily used by ADSL. - Page 75 The descriptions of every setting in this menu will be given below: Item Description Enable PPPoE Select ‘Enable’ to activate PPPoE function of this IP camera, select ‘Disable’ to disable it. User Name Input the PPPoE username assigned by your ISP here.
-
Page 76: Ftp Settings
3.3.5 FTP Settings When the IP camera detects motion, besides E-Mail, it can send the captured file via FTP also. If you have a FTP server or has a FTP account with write permission, you can use FTP server to keep captured image. The descriptions of every setting in this menu will be given below: Item Description... - Page 77 Remote Folder Input the remote folder name on the FTP server here. If nothing is specified here, all uploaded image files will be placed in FTP server’s root directory. Please ask FTP server’s administrator to know which folder you should use. Certain user name may have restrictions and therefore can not place the file in the directory not owned by the user.
-
Page 78: Date / Time Settings
3.3.6 Date / Time Settings You can set the internal calendar / clock of the IP camera, so the camera can keep correct timestamp when recording the video / capturing the image. - Page 79 The descriptions of every setting in this menu will be given below: Item Description Set Date/Time Select this option to input date and time by yourself, and manually you have to set date and time manually here. Date / time format is MM / DD / YYYY HH:MM:SS Time is in 24-hour format.
-
Page 80: Advanced Settings
3.3.7 Advanced Settings You can set advanced network settings like UPnP and DDnS here. - Page 81 The descriptions of every setting in this menu will be given below: Item Description UPnP Select ‘Enable’ to activate UPnP (Universal Plug-and-Play) function, so the IP camera can be located by UPnP-compatible computers / devices. Select ‘Disable’ to disable it. DDNS Select ‘Enable’...
-
Page 82: Users
3.3.8 Users You can change IP camera administrator’s password here. You can also create up to 4 users which only have permission to view the image captured by IP camera, but can not modify the settings of the IP camera. - Page 83 The descriptions of every setting in this menu will be given below: Item Description Login Name The login name of administrator. This field is grayed out and can not be modified. Current Specify current password here. If current password is not Password correct, administrator’s password can not be modified.
-
Page 84: Tools
3.3.9 Tools Here provides several tools to upgrade the firmware of this IP camera, clear all settings, or switch LED notification off. - Page 85 The descriptions of every setting in this menu will be given below: Item Description Upgrade If you downloaded latest firmware file from our website, Firmware you can click this button to start to upload the firmware file to the IP camera, and you’ll be prompted to provide the location of firmware file.
-
Page 86: About
3.3.11 About This menu shows the information about the admin software itself. Click ‘Cancel’ or ‘OK’ to exit. -
Page 87: Camera Viewer
3.4 Camera Viewer The camera viewer is the utility to view the video / image captured by IP camera. Up to 4 cameras can be connected simultaneously. You can also use this utility to capture still images / record videos, and store them in the hard disk of your computer. Before you can connect to any IP camera, you must collect the following information: IP Camera’s IP address Video port number... - Page 88 The user inteface of camera viewer utility looks like this, and consists two parts: Video Viewer Windows Dashboard 1) Real-time camera video viewer: Displays live video from IP camera, up to 4 videos from different 4 cameras can be displayed in the same viewer window. Cameras are arranged in the following order: If any camera is not connected, nothing will be displayed in the corresponding area.
- Page 89 capture image, and record video. When you’re playing video, you can control the video playing by dashboard also.
-
Page 90: Connecting To Ip Camera
3.4.1 Connecting to IP Camera Before you can view the image captured by IP camera, you need to input camera information, so viewer utility can connect to IP camera and display the image for you. Please follow the following instructions to input camera information: 1. - Page 91 The descriptions of every setting in this menu will be given below: Note: Detailed descriptions of other tabs in this window (AV Setting, Recording, Status, General, and About will be given in section 3.5 ‘Advanced Camera Settings’). Item Description Name Specify the name of this camera, so you can distinguish every camera from each other.
- Page 92 Discover Click this button to launch camera discover utility: All found camera will appear on the left, select it, then click ‘Apply’ and discover utility will to input the information of selected IP camera for you; if you click ‘Close’, the information of selected camera will not be inputted.
-
Page 93: Select The Camera To View And Control
3.4.2 Select the Camera to View and Control The status of every camera will be shown in the dashboard (the color bar above the camera’s number): Where: Blue indicates the video camera is connected, Red indicates the camera is recording now. Pink indicates the video camera’s information has been set already, but unable to connect to selected camera, or the camera is being stopped or paused, and... - Page 94 The description of other camera controls on dashboard in single-camera mode will be given below: Item Description Camera Setup Click this button to setup selected camera. Detailed instructions will be given in next section. Quad View Back to 4-camera view mode. Reduce View Reduce the size of camera view window (resolution 320 x Window...
- Page 95 Pause Capture Stop Play Record Capture Save current image as an JPEG image file, you’ll hear the sound of camera shutter release when you click this button. The filename of captured file will be named as the time when you hit this button. Stop Stop getting image from camera.
-
Page 96: Advanced Camera Setting
3.5 Advanced Camera Setting By clicking camera setup button or the number of camera, the advanced setup menu of selected camera will popup: The description of every setup menu will be given in this section. -
Page 97: Setting
3.5.1 Setting This menu provides basic network and username / password setting of selected camera, as described in section 3.4.1. Please note that when a camera is connected, all settings in this menu will be grayed out and you can not modify any setting. -
Page 98: A/V Setting
3.5.2 A/V setting If you wish to mute the IP camera sound out while you record video or you want to recode video only without voice, you can use this function to option the A/V recording. These 2 functions could be selected at one time or alone for each function. Item Description Mute Audio... -
Page 99: Recording (Scheduling)
3.5.3 Recording (scheduling) If you wish to record video at certain time period, you can use this function to make a scheduled recording list. Please note that computer must switch on and connected to the IP camera you wish to perform scheduled recording by camera viewer utility. Remark: Recording for Motion-JEPG is fixed via port 80 and MPEG4 is via port 4321 could be manual set. - Page 100 The recording schedule consists two parts: one-time schedule (only executes once), and weekly schedule (executes at specified time and weekday every week). The descriptions of every setting of one time schedule in this menu will be given below: Item Description Cycle Recording If the remaining space of hard disk you used to store recorded video is not enough, and this check box is...
- Page 101 Edit You can select an existing schedule and click ‘Edit’ to change its start / end time. Delete You can delete an existing schedule. Please select a schedule, then click ‘Delete’. You’ll be prompted to confirm the delete.
- Page 102 The descriptions of every setting of weekly schedule in this menu will be given below: Item Description Create a new weekly recording schedule. After you click this button, you’ll be prompted to specify the recording schedule: Sun - Sat: Check the weekday(s) that recording should be executed for this schedule.
-
Page 103: Status
3.5.4 Status This menu shows the statistics of this IP camera since it’s connected: The descriptions of every item in this menu will be given below: Item Description Connected Shows if this camera is connected. Stream Started At Shows the total elapsed time since the camera is connected, in second. - Page 104 Number of Users Shows how many users are connected to this camera. Click ‘OK’ or ‘Cancel’ to exit.
-
Page 105: General
3.5.5 General In this menu, you can set various parameters of image capturing / video recording, like set the directory used to store image and video file, and set the limit of disk usage. The descriptions of every item in this menu will be given below: Item Description Snap Shot... - Page 106 Size recording video file exceeds this limit, viewer utility will open a new file and continue recording on the new file. Large video files will take more time to open, so you can use this function to set the max video file size to a smaller value.
-
Page 107: About
3.5.6 About This menu provides the version number of viewer utility. Click ‘OK’ or ‘Cancel’ to exit. -
Page 108: Play Recorded Video
3.6 Play Recorded Video If you need to play recorded video file, please follow the following instructions to select video file to play. Click open file button on dashboard, and select the video file to play. Open File A new video playback window will appear, you can use mouse to resize the window. - Page 109 When a video file is opened, you can use these controls to control video playback: Play Pause Fast Stop Forward Play The video file will play automatically when it loads. If you paused video playback, you can click this button to resume playing.
-
Page 110: Chapter Iv: Appendix
Chapter IV: Appendix 4.1 Specification Max Resolution: 640 x 480 pixels Sensor: 300K pixels 1/4" color CMOS sensor Gain control: Automatic Exposure: Automatic White Balance: Automatic Focal Length: 4.8 mm Aperture: F=1.8 Image (Video Setting) Image compression: MJPEG Image Video Digital 24-bit Color Frame rate: 30fps@QVGA, 20fps@VGA Video resolution: 176 x 144, 320x240, 640x480... -
Page 111: Troubleshooting
4.2 Troubleshooting If the IP camera is not working properly, before you contact the dealer of purchase for help, please check the troubleshooting list here, this may help you to solve the problem by yourself and therefore saves your valuable time. Scenario Possible Solution I can not connect to... - Page 112 c. If you’re connecting this camera from Internet, it could be caused by a slow Internet connection, and it’s not a problem caused by camera. However, when the network connection is slow, you should use lower frame rate / resolution. d.
- Page 113 I set the IP camera a. If the image is send by Email, please make sure it’s to send image by not blocked by any anti-spam mechanism. Email or FTP, but nothing is received b. Please make sure you have enough permission for FTP uploading (You can try this by clicking ‘Upload a test file’...
-
Page 114: R&Tte Compliance Statement
Netherlands, Portugal, Spain, Sweden, and the United Kingdom. The ETSI version of this device is also authorized for use in EFTA member states: Iceland, Liechtenstein, Norway, and Switzerland. EU Countries not intended for use None A declaration of conformity is available on www.edimax.com...