HTC HD2 User Manual
Htc cell phone quick start guide
Hide thumbs
Also See for HD2:
- User manual (310 pages) ,
- Quick start manual (44 pages) ,
- Repair manual (4 pages)
Table of Contents
Advertisement
Quick Links
Download this manual
See also:
User Manual
OVERVIEW
This guide provides you with everything
you need to get started. If you need
additional information on features and
services, please select one of these
helpful options:
Refer to your online User Manual
n
at www.t-mobile.com.
On your phone, tap Start
n
> My Account.
On your phone, tap Start
n
> T-Mobile Help.
On your phone, tap Start > Help.
n
Visit the T-Mobile forums at
n
www.forums.t-mobile.com.
Call Customer Care
n
by dialing 611.
Advertisement
Table of Contents

Related Manuals for HTC HD2


Summary of Contents for HTC HD2
- Page 1 OVERVIEW This guide provides you with everything you need to get started. If you need additional information on features and services, please select one of these helpful options: Refer to your online User Manual at www.t-mobile.com. On your phone, tap Start >...
-
Page 2: Table Of Contents
TablE Of COnTEnTs Introducing Your Phone ... 1 Service Activation ... 2 SIM Card ... 3 Memory Card ... 5 Battery ... 7 Power ... 9 Setup Wizard ... 10 Home Screen... 13 Touch Screen Navigation ... 15 On-Screen Keyboard ... 16 Wireless Controls ... -
Page 3: Introducing Your Phone
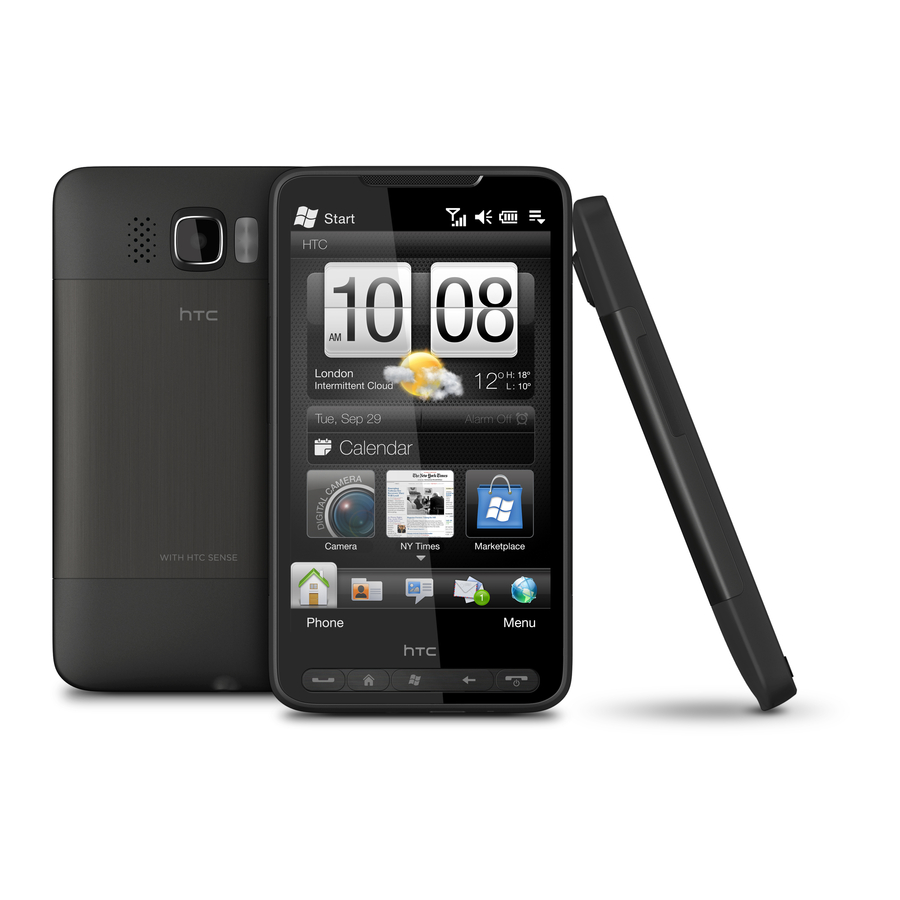
InTROduCIng yOuR phOnE HTC HD2 Ambient light/ Proximity sensors Volume keys Home key Press to go to Home screen. Send key Press to make and answer calls. Press and hold to launch voice command. Headset port Sync Connector/ Charger port... -
Page 4: Sim Card
sIm CaRd Your Subscriber Identity Module (SIM) card identifies you to the wireless network. Your phone will not work without the SIM card. To insert the SIM card and battery: 1. Detach your SIM card. 2. Insert your fingernail into the slot on the left side of the battery cover and lift the cover off of the phone. -
Page 5: Memory Card
mEmORy CaRd Your phone ships with a preinstalled microSD memory card where you can store multimedia files such as video clips, music tracks, sound files, images, and messaging data. Many entertainment applications are already installed on the card. NOTE: Do not remove the memory card from the phone. -
Page 6: Battery
baTTERy Charge using a computer Plug the small end of the USB cable into the Sync Connector on the bottom of your phone. Plug the other end of the USB cable into a USB port on your computer. Charge using a wall outlet Plug the small end of the USB cable into the Sync Connector on the bottom of your phone. -
Page 7: Power
Reduce the backlight brightness 1. From the Home screen, touch and hold the active tab and slide right or left to the Settings tab. 2. Tap Sound & Display. 3. Scroll and Tap Backlight. 4. Tap Automatically adjust backlight to clear the check box. 5. - Page 8 8. Enter your e-mail address and password. 9. Tap Next. 10. If necessary, enter additional information. 11. Tap Next. 12. If desired, tap to select or clear the check box for Send/Receive email automatically. 13. If you will receive e-mail automatically, tap the drop-down menu and select a time period for sending and receiving e-mail.
-
Page 9: Home Screen
Home Screen From the Home screen, you can quickly access applications and settings through quick links, the Start menu, status icons, and navigation tabs. NOTE: Screen images are simulated and may differ from your actual screen. Start menu Tap to access all programs and settings. -
Page 10: Touch Screen Navigation
TOuCh sCREEn naVIgaTIOn Tap an item to open or activate it. Touch and slide your finger up or down the screen to scroll through lists of menu items. Flick the screen in an upward or downward motion to quickly scroll through a list. On-sCREEn kEybOaRd You can enter text using the on-screen keyboard in either profile or landscape... -
Page 11: Wireless Controls
Entering text with Swype Swype provides a faster and easier way to enter text. Input any word with one continuous finger motion across the on- screen keyboard. Enter text 1. From a text entry screen, tap the up arrow to the right of the Keyboard icon. -
Page 12: Call Functions
Call funCTIOns Make a call 1. From the Home screen, press the Send key. 2. Enter the phone number. 3. Tap Talk or press the Send key. Answer a call Touch and drag the slider to Answer or press the Send key. End a call Tap End Call or press the End key. -
Page 13: Voicemail
Add new contact 1. From the Home screen, press the Send key. 2. Enter the phone number. 3. Tap Save to People. 4. Tap New Contact. 5. Tap the First field and enter the contact’s first name. 6. Tap the Last field and enter the contact’s last name. -
Page 14: Microsoft ® My Phone
Check Visual Voicemail 1. Tap Start. 2. Tap Visual Voicemail. 3. Tap Play All New or tap a specific voicemail message. 4. Do any of the following: Tap the Play icon to listen to a voicemail. Tap the Pause icon to pause a voicemail. -
Page 15: Synchronize With Activesync
8. Tap the Select a synchronization method drop-down menu and tap Automatic or Manual. 9. Tap Next. 10. Tap Finish. 11. If necessary, tap Yes and then OK to install updates and restart your phone. 12. When your phone has finished restarting, tap Start. - Page 16 Install ActiveSync on your computer 1. Insert the CD that came with your phone into your computer’s CD- ROM drive. 2. If not already installed on your computer, follow the instructions on the CD to install ActiveSync and Microsoft Outlook. Connect the phone to your computer 1.
-
Page 17: Bluetooth
bluETOOTh ® Your phone comes with Bluetooth technology, which is a wireless technology that enables a data connection between your phone and a Bluetooth wireless headset and other Bluetooth devices (sold separately). Prepare Bluetooth headset To pair your phone with a Bluetooth headset, make sure that your headset is fully charged and that you put the headset into pairing mode. -
Page 18: Text Messaging
Text messaging Your phone supports three text modes: Predictive (XT9 ) mode analyzes ® the keys you tap and attempts to finish the word you are entering. Words are also predicted based on words you entered previously. ABC mode does not predict the word you are entering. -
Page 19: Instant Messaging
Instant messaging Access and send instant messages 1. Tap Start. 2. Tap Instant Messaging . 3. Tap the desired instant messaging provider. 4. Tap Yes to enable. 5. Sign in to your account to send IM messages to your contacts. NOTE: Tap Options >... -
Page 20: Email
E-mail Access your e-mail from Outlook, AOL Yahoo! , Windows Live™, Gmail™ , and ® other popular e-mail providers. Set up internet e-mail 1. From the Home screen, tap the Mail tab. 2. Tap the large Envelope icon to add a new account. 3. - Page 21 Send e-mail 1. From the Home screen, tap the Mail tab. 2. If you have multiple accounts, tap the Envelope icon for the account you want to use. NOTE: Touch and hold the icon to see the associated e-mail account. 3.
-
Page 22: Social Networking
social networking Your phone comes with Facebook Twitter social networking applications. Now you can update your status and view your friend’s updates right from your phone. Facebook Login 1. Tap Start. 2. Tap Facebook. 3. Enter your e-mail address and password. -
Page 23: Camera
Camera Take picture 1. Tap Start. 2. Tap Camera. 3. Frame your subject and tap the Shutter icon to capture. 4. Tap the Album icon to view the picture in the photo album. Send picture 1. Tap Start. 2. Tap Camera. 3. -
Page 24: Video
Video Record video 1. Tap Start. 2. Tap Camcorder. 3. Frame your subject and tap the Shutter icon to start recording. 4. Tap the Shutter icon again to stop recording. 5. Tap the Play icon to play the video. Separate charges may apply to send/receive domestic/ international video messages. -
Page 25: Location
location TeleNav GPS Navigator™ Sign up 1. Tap Start. 2. Tap TeleNav. 3. Read the Terms of Service and tap Accept. 4. Tap First Name and enter your first name. 5. Tap Last Name and enter your Last Name. 6. If desired, tap Email and enter your e-mail address. - Page 26 Google Maps™ Find a location 1. Tap Start. 2. Tap Google Maps. 3. Read the Terms of Service and tap Accept. 4. Tap OK. 5. Tap Search. 6. Enter the search term and tap OK. 7. If there are multiple results, tap See List to view a list of search results.
-
Page 27: Web Browsing
Web browsing Experience the mobile Web like never before with T-Mobile’s web2go experience. New features include a phone browser optimized for the Web, a customizable start page for easy, one-click access to information, a powerful built-in Web search engine, and the ability to manage your account right from your phone. -
Page 28: Windows ® Marketplace
Windows marketplace ® It’s easy to download and install new applications to your phone. Choose from a wide range of free and premium applications including games and powerful business programs. Download and install 1. Tap Start. 2. Tap Marketplace. 3. Tap Yes to download and install Windows Marketplace. -
Page 29: Accessories For Your Phone
accessories for your phone Whether you are looking for a charger, a fashionable carrying case, a Bluetooth headset or just want to browse for fun extras for your phone, T-Mobile is the place to shop for accessories. Here are a few examples… Screen Protector Bluetooth Headset... -
Page 30: Tips For Safety
TIps fOR safETy Check with your doctor if you have a pacemaker or hearing aid in order to ensure that cell phone usage is safe with your phone. If you have questions about the interaction of cellular radio frequency and any other electronic equipment, ask... -
Page 31: Additional Information
additional Information Data: Use of some features or services may require a qualifying data plan. You will be charged for all data sent by or to you through the network, regardless of whether received. Character length/file size of messages/ attachments may be limited. T-Mobile is not liable for content of messages/attachments or for any failures, delays or errors in any T-Mobile generated alerts or notifications.