Table of Contents
Advertisement
Available languages
Available languages
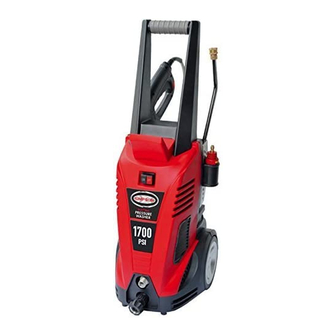
ELECTRIC PRESSURE WASHER
ITM/ART 708276
INSTRUCTION
MANUAL
MANUAL DE
INSTRUCCIONES
If your pressure washer is not working properly or if there are parts missing or broken,
please DO NOT RETURN IT TO THE PLACE OF PURCHASE. Contact our customer service
department at 1-877-362-4271 (8:00 am to 5:00 pm CST, Mon-Fri, excluding Holidays)
www.simpsoncleaning.com.
Si
su
lavadora
tes rotas ófaltantes, por favor NO LA REGRECE AL LUGAR DONDE LA COMPRO.
Contáctese
con
1-877-362-4271 (8:00 am to 5:00 pm CST Lunes-Viernes, excepto festivos)
www.simpsoncleaning.com.
IMPORTANT: Please make certain that the person who is to use this equipment
carefully reads and understands these instructions before operating.
IMPORTANTE: Aségurese por favor de que la persona que vaya a utilizar este
equipo lea con cuidado y comprenda estas instrucciones antes de operar.
VEA EL ESPAÑOL EN LA CONTRAPORTADA. INSTRUCTIVO DE OPERACIÓN,
CENTROS DE SERVICIO Y PÓLIZA DE GARANTÍA. ADVERTENCIA:
LÉASE ESTE INSTRUCTIVO ANTES DE USAR EL PRODUCTO.
SAVE THIS MANUAL FOR FUTURE REFERENCE
Part No. XXXXXXX Rev. 0 NOV 2012
a
presión
no
nuestro
Departamento
MODELS
MODELO
13SIE-170
trabaja
correctamente
de
Servicio
1700
1.3
ó
encuentra
al
Cliente
llamando
PSI
GPM
par-
al
Advertisement
Table of Contents

Related Manuals for Simpson 13SIE-170


Summary of Contents for Simpson 13SIE-170
- Page 1 MODELS MANUAL MODELO MANUAL DE 13SIE-170 INSTRUCCIONES If your pressure washer is not working properly or if there are parts missing or broken, please DO NOT RETURN IT TO THE PLACE OF PURCHASE. Contact our customer service department at 1-877-362-4271 (8:00 am to 5:00 pm CST, Mon-Fri, excluding Holidays) www.simpsoncleaning.com.
-
Page 2: Installation
EASY INSTALLATION WARNING: CAREFULLY READ THE OPERATORS INSTRUCTIONS BEFORE USING THE PRESSURE WASHER FOR THE FIRST TIME. ALWAYS STORE YOUR PRESSURE WASHER IN A LOCATION WHERE THE TEMPERATURE WILL NOT FALL BELOW 40 °F (4 °C) . FREEZE DAMAGE IS NOT COVERED BY THE WARRANTY. - Page 3 CONNECT THE gARDEN HOSE (y) TO THE CONNECTOR (D) ON THE FRONT OF THE MACHINE. CONECTE LA MANguERA DEL jARDíN (y) AL CONECTOR (D) CORRESPONDIENTE ACOPLADO A LA ENTRADA DE LA MáquINA. INSERT THE SPRAy WAND (b) INTO THE guN (A). TWIST SPRAy WAND 90° TO SECuRELy LOCk IN PLACE.
- Page 4 SquEEzE HOLD TRIggER uNTIL WATER FLOW IS STEADy. RELEASE THE TRIggER. MANTENgA PuLSADO ACCIONADOR HASTA quE EL CAuDAL DE AguA SE VuELVA CONSTANTE. SuELTE EL ACCIONADOR. TuRN SWITCH TO ON POSITION (I) AND SquEEzE TRIggER TO START MOTOR AND WATER FLOW. NOTE: motor only runs when trigger is depressed and water is spraying.
- Page 5 SAFETY GUIDELINES - DEFINITIONS This manual contains information that is important for you to know and understand. This information relates to protecting YOUR SAFETY and PREVENTING EQUIPMENT PROBLEMS. To help you recognize this information, we use the symbols below. Please read the manual and pay attention to these symbols. DANGER: Indicates an imminently hazardous situation which, if not avoided, will result in death or serious injury.
- Page 6 Follow the maintenance instructions specified in the manual. This product is provided with a Ground Fault Circuit Interrupter built into the power cord plug. If replacement of the plug or cord is needed, use only identical replacement parts. 10. Do not touch plug or outlet with wet hands. 11.
- Page 7 30. Use only hoses and accessories rated for pressure higher than your pressure washer's psi. Never use with any other manufacturer’s accessories or components. 31. Never defeat the safety fea tures of this product. 32. Do not op er ate machine with missing, broken or un au tho rized parts. 33.
- Page 8 NOTE: The power supply must be 120 V, 60 Hz and a minimum 15 amp dedicated circuit. Inspect cord before using. Do not use if cord is damaged. B. Keep all connections dry and off the ground. C. Do not touch plug with wet hands. D.
-
Page 9: Pressure Washer Parts List
GET TO KNOW THE pRESSURE WASHER NOTE: Photographs and line drawings used in this manual are for reference only and do not represent a specific model. Compare the illustrations with your unit to familiarize yourself with the location of various controls and adjustments. Save this manual for future reference. Spray Gun Shipping Plug B. - Page 10 ASSEMBLY INSTRUCTIONS (FIG. 3) Locate and remove all loose parts from the carton. With handle oriented as shown, align grooves in carry handle (P) with rails on top of pressure washer and slide into place. Push as shown to further lock carry handle into place. ON OFF Remove and discard the shipping plug (L) from the outlet (K) on the front of the machine.
- Page 11 • Your washer operates at fluid pressures and velocities high enough to penetrate human and animal flesh, which could result in amputation or other serious injury. Leaks caused by loose fittings or worn or damaged hoses can result in injection injuries. DO NOT TREAT FLUID INJECTION AS A SIMPLE CUT! See a physician immediately! pRESSURE WASHER OpERATING FEATURES HOW TO USE SpRAY WAND...
- Page 12 TURBO SpRAY NOzzLE (FIG. 5) CAUTION: Do not attempt to move the nozzle to adjust pressure. The turbo nozzle is NOT adjustable. The high pressure turbo nozzle (R) is intended for maximum cleaning effect. Keep the spray wand a minimum of 6–8 in (15–20 cm) away from the cleaning surface at all times.
- Page 13 Apply the solution to a DRY work surface. NOTE: WETTING THE SURFACE FIRST IS NOT RECOMMENDED, AS IT DILUTES THE DETERGENT AND REDUCES ITS CLEANING ABILITY. On a vertical surface, apply soap horizontally from side to side starting from ON OFF the bottom to avoid streaking.
- Page 14 Plug GFCI (C) into power receptacle. Firmly press and release the TEST button (X), then press and release the RESET button (W). The light on the GFCI should be illuminated. Ensure the gun safety is unlocked and squeeze the trigger until the air has escaped and a steady flow of low pressure water is coming from the nozzle.
- Page 15 Remove the wand from the gun. Clear the nozzle by forcing a stiff wire or straightened out paper clip (small size) through the center hole of each nozzle. Backflush the nozzle with water from both ends. Reconnect the wand to the gun. Restart the pressure washer and depress the trigger on the spray gun.
- Page 16 NOTICE: The use of any other accessory not recommended for use with this tool could be hazardous. Use only accessories rated equal to or greater than the rating of the pressure washer. SpECIFICATIONS Model 13SIE-170 Rated Pressure* 1700 psi Rated Water Flow* 1.3 gpm...
- Page 17 SERVICE INFORMATION Do not return this product to your retailer. Please contact our customer service department at www.simpsoncleaning.com. LIMITED WARRANTY LIMITED WARRANTY This product is warranted against defects in material and workmanship for a period of one year on all components excluding the spray gun, high pressure hose, wands, nozzles, and ground fault circuit interrupter (GFCI) which are only covered for 90 days;...
- Page 18 date of retail purchase and is not transferable. This warranty excludes incidental/ consequential damages and failures due to misuse, abuse or normal wear and tear. This warranty applies only to products used in consumer (home) applications. This warranty does not apply to commercial or rental applications. This warranty gives you specific rights, and you may also have other rights, which vary from state to state.
- Page 19 OPERATIONAL POSSIbLE SOLUTION ISSuE CAuSE For GFCI reset procedure see ground-fault GFCI Plug Circuit Interrupter Protection paragraph under Malfunction Power Supply & Electrical Info in this manual. To order a replacement GFCI or for GFCI installation instructions, please contact our customer service department at www.simpsoncleaning.com.
- Page 20 OPERATIONAL POSSIbLE SOLUTION ISSuE CAuSE No water Nozzle is Clean the nozzle according to the instructions provided in the Nozzle paragraph under coming out clogged of nozzle Maintenance section of this manual. Water inlet Remove the filter screen (O) from the filter screen water inlet (M) and clean it thoroughly.
- Page 21 OPERATIONAL POSSIbLE SOLUTION ISSuE CAuSE Motor stops Extension We do not recommend the use of extension working cord is too cords with your pressure washer. If you must during normal long or wire use an extension cord, verify that it meets operation gauge is the minimum requirements listed in the...
- Page 22 DEFINICIONES DE NORMAS DE SEGURIDAD Este manual contiene importante información para que usted sepa y comprenda. Esta información se relaciona con la protección de SU SEGURIDAD Y LA PREVENCIÓN DE PROBLEMAS AL EQUIPO. Para ayudarlo a reconocer esa información, utilizamos los símbolos indicados más abajo. Sírvase leer el manual y prestar atención a dichos símbolos.
- Page 23 Mantenga la zona de trabajo despejada de personas. No se extralimite ni se coloque sobre un soporte inestable. Adopte siempre una posición de estabilidad y equilibrio. Respete las instrucciones de mantenimiento que se detallan en este manual. Este producto es suministrado con un interruptor de circuito con conexión a tierra insertado en el enchufe del cable de alimentación.
- Page 24 26. Para reducir al máximo la cantidad de agua que podría entrar en la máquina de lavar a presión, durante el uso, colóquela lo más lejos posible de la zona que debe ser limpiada. 27. Con el fin de evitar escapes accidentales, cuando no está en uso, la pistola rociadora debe estar asegurada.
- Page 25 MANUTENCIÓN DE UN EqUIpO CON DOBLE AISLAMIENTO Un equipo con doble aislamiento está dotado de dos sistemas de aislamiento en lugar de la puesta a tierra. No es montada ninguna puesta a tierra sobre un artículo de doble aislamiento, ni puede ser añadida a la hidrolimpiadora.
- Page 26 del uso, revise la extensión y si está dañada sustitúyala. Utilice el alargador correctamente y no tire del cable para desconectar el aparato. Mantenga las extensiones lejos de fuentes de calor y de ángulos cortantes. Antes de desconectar el equipo de la extensión, desconecte siempre esta última de la toma corriente.
- Page 27 Compare las ilustraciones con su unidad para familiarizarse con la ubicación de sus controles y regulaciones. Conserve este manual para referencias futuras. Pistola rociadora N. Fundas de accesorias a bordo del almacenaje B. Varilla atomizadora de conexion rapida de profesional O.
- Page 28 INSTRUCCIONES DE OpERACIÓN TERMINOLOGÍA DE LA LAVADORA A pRESIÓN PSI: (Libras por pulgada cuadrada) Es una unidad de medida para la presión del agua. También se usa para medir la presión neumática, presión hidráulica, etc. gPM: (Galones por minuto) La unidad de medida para la velocidad de circulación del agua.
- Page 29 NOTA: La presión que ejerce el pulverizador sobre la superficie que está limpiando aumenta a medida que acerca la varilla a la superficie. *AVISO: La pulverización a alta presión de su lavadora puede dañar superficies como madera, vidrio, pintura, calcomanías y terminaciones de automóviles;...
- Page 30 Llene los depósitos (J) con la solución de limpieza ade-cuada. Cambie a la boquilla de 40˚ (blanca). Esta boquilla libera un flujo de agua potente y un patrón de pulverización más ancho. Consulte la sección boquillas para la varilla pulverizadora. NOTA: Los detergentes no sifón cuando el tubo rociador está...
- Page 31 Enjuague con agua limpia y con alta presión. Sobre las superficies verticales, ON OFF comience a enjuagar antes desde la parte baja hacia la parte alta y luego viceversa. Tenga la boquilla a 15–20 cm (6–8 pulg.) de la superficie de trabajo con un ángulo de 45°...
- Page 32 Enchufe el GFCI (C) a un tomacorriente. Presione con firmeza y suelte el botón de prueba (TEST) (X), y luego presione y suelte el botón de reinicio (RESET) (W). Se debe encender la luz del GFCI. Asegure la seguridad de la pistola se abre y exprimen el disparador hasta que el aire se ha escapado y un flujo constante del agua de la presión baja está...
- Page 33 BOqUILLA Las boquillas aerosol se debe limpiar regularmente. El estorbar las boquilla causa funcionamiento disminuido y la presión de la bomba de ser también colmo y limpieza se requiere inmediatamente. Quite la varita de la pistola. Despeje la boquilla forzando un alambre tieso o un clip de papel (pequeño) enderezado a través del agujero de centro de cada la boquilla.
- Page 34 ALMACENAjE ATENCIÓN: Antes de mover la unidad, desconecte siempre la manguera del jardín vía el conectador de la manguera del jardín. ATENCIÓN: Almacene la máquina de lavar a presión en un local cuya temperatura no descienda por debajo de los 4° C (40.). En el caso de congelamiento, la bomba de este equipo está...
- Page 35 ESpECIFICACIONES Modelo 13SIE-170 Presión pPresión nominal* 1700 psi Flujo de agua nominal* 1,3 gpm Requisitos eléctricos 120V, 13 A, 60 Hz Cable eléctrico 10,67 m (35 pies) Manguera de alta presión 7,0 m (23 pies) Amperaje mínimo de la fuente de energíae 15 A Presión del agua...
- Page 36 Si tiene alguna consulta acerca, contáctese con nuestro Departamento de Servicio al Cliente llamando al www.simpsoncleaning.com. La garantía cubre: piezas de repuesto y mano de obra. Tenga en cuenta que nos reservamos el derecho de decidir si reparar o reemplazar el producto según lo consideremos pertinente.
- Page 37 GUÍA DE DIAGNÓSTICO DE pROBLEMA CAUSA CORRECCIÓN El detergente no El detergente Utilice solamente los detergentes, los está dispensando no es aprobado desengrasadores, las ceras y otras para la maquina soluciones de la limpieza, que se diseñan específicamente para las arandelas de la presión.
- Page 38 pROBLEMA CAUSA CORRECCIÓN Para el procedimiento del reajuste de funcionamiento GFCI vea el párrafo de la protección del Protección de interruptor de circuito de el Enchufe de detección de falla conectado a tierra bajo Información sobre suministro y sistema eléctricos en este manual. Para pedir un reemplazo GFCI o para las instrucciones de instalación de GFCI, entre en contacto con por favor...
- Page 39 pROBLEMA CAUSA CORRECCIÓN Ninguna agua Boquilla esta Limpie la boquilla según las que sale de obstruida instrucciones proporcionadas en el párrafo las boquilla bajo sección del la boquiolla Mantenimiento de este manual. Se estorba la Quite la pantalla de filtro (O) de la pantalla de filtro entrada del agua (M) y limpíela a fondo.
- Page 40 pROBLEMA CAUSA CORRECCIÓN El motor para el La cuerda de No recomendamos el uso de las cuerdas trabajar durante la extensión de la extensión con su arandela de la es demasiado presión. Si usted debe utilizar una cuerda NOTA: de larga o la galga de la extensión, verifique que resuelva la operación...
- Page 42 FNA Group, Inc Elk Grove Village, IL 60007 Patent Pending www.simpsoncleaning.com Internet Address: Warranty Registration via Internet www.simpsoncleaning.com Sitio Address: Registro Garantía mediante Internet Copyright. All Rights Reserved. Copyright. Todos los derechos reservados MADE IN CHINA FABRICADO EN CHINA...