
Related Manuals for Advent LCDM40


Summary of Contents for Advent LCDM40
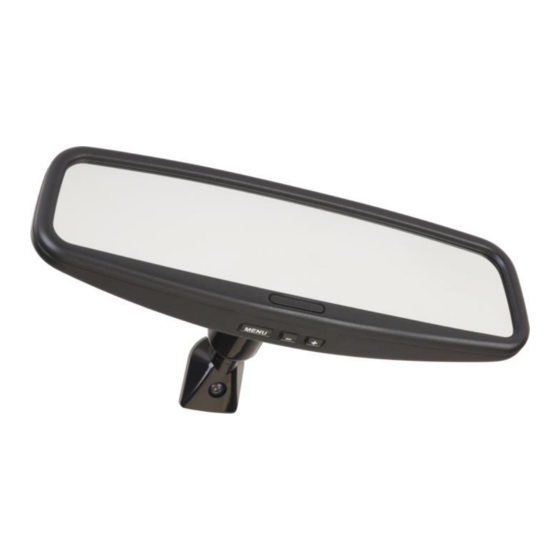
- Page 1 Model: LCDM40 4.0” LCD Rear Vision Mirror Monitor Installation Manual Features Mirror with built in 4.0” LCD Monitor Low Profile, Slim Design High Resolution TFT LCD Built in Speaker Two video inputs Fully Adjustable Auto screen brightness adjustment...
-
Page 2: Table Of Contents
Table of Contents Warnings ..................3 Product Description ..............4 Packing List ................. 4 Monitor Installation ..............5 Monitor Wiring Diagram ............. 8 Specifications ................8 Troubleshooting ................9... -
Page 3: Warnings
Warnings The product is intended to assist in safe driving and to allow the driver to have a broader rear view while the vehicle is in reverse. You, as the driver, are solely responsible for the safe operation of your vehicle and the safety of your passengers according to local traffic regulations. -
Page 4: Product Description
The LCD is perfect for use in any vehicle with a rear vision mirror This Monitor is designed for use with an Advent camera but is compatible with most video sources and other cameras and can be connected using a standard RCA connector. -
Page 5: Monitor Installation
Order Audiovox Part# 30262410 if a second RCA adapter is required. Note: When using an Advent Camera with your Advent Monitor the signal and power for the camera will be supplied through the monitor extension cable. Please also note that... - Page 6 7. Follow the installation and wiring instructions for the camera you are using. 8. Connect the LCDM40 Monitor to the harness. 9. Power up and adjust on screen settings. In order to see an image you must be in Reverse gear.
- Page 7 Wiring the Camera to the Vehicle’s Reverse Lamp 1. Locate the reverse lamp in the tail light assembly. 2. Using the tap connector supplied, perform the following steps: Place the un-stripped positive lead from the tail lamp in the run channel, which runs completely through the connector.
-
Page 8: Monitor Wiring Diagram
Monitor Wiring Diagram Note: If used with an Advent camera – the power and signal will be provided through a single cable from the monitor. NOTE: The Blue wire will not be used, Tape off and do not connect. Specifications 1. -
Page 9: Troubleshooting
Image is mirrored or requires 1. All settings are adjusted by adjustment pressing on the MENU button. Sound can not be heard from 1. Increase volume through Advent camera MENU button. 2. Ensure Camera is connected using supplied extension cable cable.