Table of Contents
Advertisement
Operating Instructions
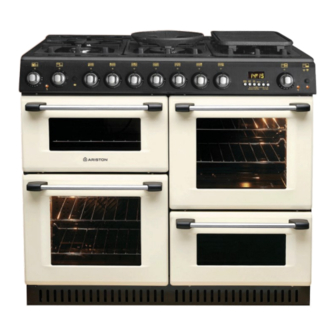
Freestanding Cooker
Contents
AUS
Introduction, 2
AUS
For Your Safety, 3-4
English, 1
Oven Timer Operation, 5-8
Hotplate, 9-10
Griddle, 11
Twin Grill, 13
Fan Oven, 14
CX109SV6 AUS
Care and Cleaning, 19-20
Something Wrong with your cooker?, 21-22
Installation Instructions, 23-28
Electrical Connection, 29-30
Service schedule, 32
Installer - Ensure you test the operation of the
cooker before leaving.
Please ensure these instructions remain with the
consumer.
Advertisement
Table of Contents

Related Manuals for Ariston CX109SV6 AUS


Summary of Contents for Ariston CX109SV6 AUS
-
Page 1: Table Of Contents
Griddle, 11 Some Recipe ideas for your Griddle, 12 Twin Grill, 13 Fan Oven, 14 Conventional Oven, 15 CX109SV6 AUS Oven Cooking Chart - Meat, 16 Oven Cooking Chart - Baking, 17 The Slow Cook Setting, 18 Care and Cleaning, 19-20... -
Page 2: Introduction
Introduction To help you make the best use of your cooker, PLEASE READ THIS BOOKLET CAREFULLY. Your new cooker is guaranteed and will give lasting service. The guarantee is only applicable if the cooker has been installed in accordance with the Installation Instructions. -
Page 3: For Your Safety
For your Safety example, heating the room) constitutes improper General Appliance Warnings " Read the recommendations in this instruction use of the cooker and is dangerous. The booklet carefully, as they give important advice manufacturer shall not be held responsible for any regarding safe installation, use and maintenance. - Page 4 If you have any doubts, do not use the appliance and contact your nearest Ariston Service Centre. " There are no user serviceable parts within this appliance. For any service, contact the place of purchase or the nominated service agent.
-
Page 5: Oven Timer Operation
Oven Timer Operation The oven timer (only ventilated Oven) offers you the CLOCKFACE following features: The timer incorporates a 24 hour 0 0 0 clock. 1. Time of Day Ensure the correct time of day is 2. Automatic Cooking always set, before using your 3. - Page 6 Oven Timer Operation TIMER FUNCTION BUTTONS Step 4 Press & hold in both the 0 0 0 Cook Period & End Time buttons together. Minute Minder Button Step 5 With the Cook Period & Here you can set a time period of up to 23 hours 59 End Time buttons still held in, minutes, that will count down.
- Page 7 Oven Timer Operation AUTO COOKING PROGRAMMES The 'Auto' symbol will remain lit There are two Auto Cooking programmes that can be to signify that an Auto Cooking selected using your timer:- Programme has been set. The 'cookpot' symbol will go out. (a) To set the timer to switch the oven(s) On and Off Automatically Step 7 Turn the oven control(s)
- Page 8 Release all buttons. Step 5 OTHER NOTES ON TIMER OPERATION 1. When cooking Automatically the Cook Period can The timer display will revert to be checked at any time simply by pressing the Cook Period button. the time of day with the 'Auto' 2.
-
Page 9: Hotplate
Hotplate The hotplate has one dual control wok burner, one 2. Turn the control knob anti-clockwise to the desired large high speed burner, three normal simmering setting. Only turn the control knob between the large flame symbol and the small flame symbol for burners and one small simmering burner. - Page 10 Models with Hob Gas Burner Safety Devices to SAFETY REQUIREMENTS FOR DEEP FAT Prevent Leaks (only available on certain models) FRYING 1. Never fill chip pans more than one third full with oil or fat. These models can be identified by the presence of 2.
-
Page 11: Griddle
Griddle A non-stick griddle is supplied for use over the two burners on the right hand side of the hob. The griddle is made of cast iron and the surface is covered with a special nonstick finish. To protect the non-stick coating never use metal cooking utensils as they may scratch the surface. -
Page 12: Some Recipe Ideas For Your Griddle
Some Recipe ideas for your Griddle DROPPED SCONES METHOD 1. Rub the fat into the flour. 4oz (100g) plain flour 2. Beat in the remaining ingredients. 1/4 tsp salt 3. When a smooth batter has been obtained, drop 1 level tsp (5ml) cream of tartar spoonfuls on to the pre-heated griddle plate. -
Page 13: Twin Grill
Twin Grill CAUTION - ACCESSIBLE PARTS MAY BECOME TO USE THE GRILL 1. Open the top grill door HOT WHEN THE GRILL IS USED. 2. Turn the grill control knob clockwise to 4 for full YOUNG CHILDREN SHOULD BE KEPT AWAY. width grilling or anticlockwise for half width grilling. -
Page 14: Fan Oven
Fan Oven The heating of the oven is achieved by turning the NB. Recipes in cookery books give times and control knob clockwise to the required temperature temperatures for cooking in ordinary ovens. The fan as recommended in the temperature charts. The oven makes it possible in most cases to: Reduce the recommended temperatures 25°C pilot light will immediately come on and will... -
Page 15: Conventional Oven
Conventional Oven OVEN CONTROL TIMES AND TEMPERATURES FOR ROASTING Heating of the oven is achieved by turning the The secret of succulent, tender meat, is not to roast control clockwise to the required oven temperature it too quickly at too high a temperature. scale on the control panel, as recommended in the Best results are obtained when roasting is carried temperature charts. -
Page 16: Oven Cooking Chart - Meat
Oven Cooking Chart - Meat It is not necessary to pre-heat the fan oven before roasting. Note: Where times are stated, they are approximate only. Conventional Oven Position in Oven Meat Pre-heat Temperature °C Time (approx.) from bottom Beef 190/200 25-30 mins per 450g (1lb) +25 mins over. -
Page 17: Oven Cooking Chart - Baking
Oven Cooking Chart - Baking Fan Oven Cooking Food Pre-heat Temperature and Time Position in Oven Scones 210/220°C approx. 8 - 10 mins. Runner 3 Small Cakes 160/170°C approx. 15 - 20 mins. Runner 3 Victoria Sandwich 160/170°C approx. 20 - 25 mins. Runner3 Sponge Sandwich (fatless) 160/170°C approx. -
Page 18: The Slow Cook Setting
The Slow Cook Setting 8. Cover casseroles with foil and then the lid to prevent With the fanned oven thermostat set to 90° the oven loss of moisture. can be used for slow cooking - The 'Slow Cook' 9. Always thaw frozen food completely before cooking. setting. -
Page 19: Care And Cleaning
" If the seals are damaged, please contact your will slide in and out of position easily. nearest Ariston Service Centre. We recommend Movement of your cooker is most easily achieved as that the oven is not used until worn seals have follows: been replaced. - Page 20 Care and Cleaning COOKER FINISH CLEANING METHOD Clean the enameled parts with soapy water when cold and wipe Vitreous Enamel off with a clean, dry cloth. The enamel could dull if cleaned while Hotplate (Traditional), pan supports, burner caps, still hot. roasting dish, grill pan, oven base, rear and roof, door inner panels, grill and warming Never use abrasives, scouring pads or sharp objects.
-
Page 21: Something Wrong With Your Cooker
Something Wrong with your Cooker Before contacting your Service Centre or Installer, check the problem guide below, there may be nothing wrong with your cooker. PROBLEM CHECK Slight odour or small amount of smoke This is normal and should cease after a short period. when grill/oven used for first time. - Page 22 Disposal of your product To minimise the risk of injury to children please dispose of your product carefully and safely. Remove all doors and lids. Remove the mains cable (where fitted) by cutting off flush with the appliance and always ensure that no plug is left in a condition where it could be connected to the electricity supply.
-
Page 23: Installation Instructions
Installation (d) Into an underfloor space ventilated to outside. Compliance with standards This cooktop must be installed by a licensed (e) Into a roof space ventilated to outside. gasfitter in accordance with the requirements of local NOTE 2 The two openings may be combined gas and electrical authorities, as well as the latest provided that the top and bottom of the opening published versions of the following standards:... -
Page 24: Technical Data
TECHNICAL DATA DIMENSIONS Height 900 - 915 mm Widht 1000 mm Depth 600 mm (excluding door handles) GENERAL Gas connection 1/2" BSP female Location of gas inlet Rear of upright cooker 433 mm C/L from LH side (as viewed from front) 700 mm from base Pressure test point Hotplate burner injector... - Page 25 Gas Consumption Natural Gas (1.0 kPa) ULPG (2.75 kPa) Injector Gas Input Injector Gas Input Diameter Diameter Auxiliary Burner 0.90 mm 4.0 MJ/hr 0.55 mm 4.0 MJ/hr Semi Rapid Burner 1.10 mm 6.0 MJ/hr 0.70 mm 6.5 MJ/hr Rapid Burner 1.50 mm 10.8 MJ/hr 0.85 mm...
- Page 26 Installation CONVERSION FOR USE ON LPG " Minimum clearance from burner to overhead cabinetry must be 600 mm. Each hob burner requires the injector to be replaced Note: The rear wall clearance need not be observed and each burner gas tap to have the by-pass screw if the wall behind the cooker, 50mm below and adjusted according to the following procedure: 450mm above, and the width of the cooker are lined...
- Page 27 Installation LEVELLING NOTE: If the cooker is to be placed on a base, Your cooker is heavy, so it would be advisable for precautions must be taken to prevent it from two people to move it. The cooker is fitted with rear slipping off the base.
- Page 28 with the appliance installed. " The inner diameters of the pipe are as follows: 8 mm for LPG; 13 mm for Natural Gas. Upon completion of installation, check the gas circuit, the internal connections and the taps for leaks using a soapy solution (never a flame). Also check that the connecting pipe cannot come into contact with moving parts which could damage or crush it.
-
Page 29: Electrical Connection
Electrical Connection WARNING - THIS APPLIANCE MUST BE Disconnecting the cable EARTHED Ensure that the means for disconnection of the The cooker must be connected to the mains power power cable is incorporated into the fixed wiring in by a licensed electrician. accordance with local wiring rules. - Page 30 Low flame setting Check the low flame setting for each hob burner to ensure that the minimum flame will not be extinguished by air draughts. " Light the burner. " Turn the control until it engages in the minimum position. "...
-
Page 32: Service Schedule
Service and spare parts are available on the numbers below. Please have the following information handy: " The appliance model (Mod.). " The serial number (S/N). This information can be found on the data plate located on the appliance and/or on the packaging. ARISTON GENUINE ACCESSORIES PRIORITY SERVICE & SPARE PARTS...