
Related Manuals for Fisher Gold Strike


Summary of Contents for Fisher Gold Strike
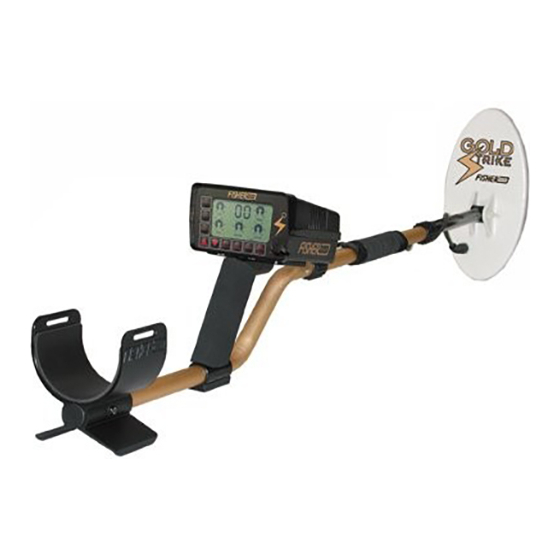
- Page 1 GOLD STRIKE Gold Prospecting Metal Detector Operating Manual F I S H E R R E S E A R C H L A B O R A T O R Y...
-
Page 2: Table Of Contents
CONTENTS About Your Detector ............. pg. 1 Setting Up ................pg. 2 Body/Chest Mounting ............. pg. 5 Control Panel ................pg. 6 Quick Start Guide ..............pg. 10 2 Tone Audio System .............. pg. 12 LCD Identification Sysytem ............. pg. 13 Ground Balancing/Tracking .......... -
Page 3: About Your Detector
Throughout this operations manual, we are going to explain to you the controls and LCD Display Panel of the new Gold Strike as well as give you a few tips to get you prospecting. As with any new detector, we strongly encourage that you read the entire operations manual and call your local dealer with any questions. -
Page 4: Setting Up
SETTING UP Your Fisher Gold Strike is built to last for years. However, it's a sophisticated electronic instrument containing state-of-the-art components. Handle it carefully, care for it regularly, and it will give you years of dependable service. The Gold Strike requires little assembly. - Page 5 SETTING UP holes in the center stem. The coil angle is adjusted by loosening the nylon wing nut on top of the search coil. NOTE: Remember, the longer the shaft, the more you'll have to bend your elbow to keep the coil off the ground and the sooner your arm will get tired.
- Page 6 SETTING UP 5. Reconnect the coil cable to the control housing. Be careful not to cross thread it and make sure it’s snug, but hand tightened only. 6. With the shaft length and coil angle properly adjusted, you should be able to move into your search position by leaning forward very slightly and raising the angle so the coil rests flat on the ground about 6 to 12 inches in front of your arm.
-
Page 7: Body/Chest Mounting
4. Reconnect the cable to the control housing. 5. The control housing can then be mounted on your belt or on the optional Fisher Chest Harness. It is especially important that the cable connector be installed tightly to prevent false signals during body-mount use. Tight, but... -
Page 8: Control Panel
DISC 1. The POWER button turns the unit ON and OFF. One of the first things you will notice when you turn on your Gold Strike is the battery level display. Fresh batteries will show 9 volts; when the battery level is down to 6 volts, you have a little more than an hour of battery life left. - Page 9 0 and +4. This will allow your Gold Strike to react to the tiniest targets in a low mineralization environment. (2) However, if you plan to utilize the fast automatic ground tracking feature of the Gold Strike, set the threshold to a –5...
- Page 10 Memory Control Section of this manual. Also, please note that your Gold Strike has a last-setting memory feature, which means that the control settings you last were using when you turned OFF your detector will be there when you turn it back on.
- Page 11 CONTROL PANEL 7. The ALL METAL/DISC button enables you to toggle between two operating modes: a “true” all metal detecting mode or, with an advanced iron discrimination system activated.
-
Page 12: Quick Start Guide
However, we can provide a few quick suggestions that can help you get started. To begin hunting with your new Gold Strike, you will at least need to be familiar with the control panel (see page 6). - Page 13 GROUND button down, lift the coil about 6 inches off the ground, hold for a second, and release the button. The Gold Strike will give you a brief tone to let you know the ground balance has been achieved. 10. Begin your search, using the method described on page 20.
-
Page 14: Tone Audio System
We encourage you to adjust the DISC control to an optimum setting for your surroundings and hunting preferences — take some time to learn how the Gold Strike responds to the targets you want to recover. -
Page 15: Lcd Identification Sysytem
LCD IDENTIFICATION SYSTEM The LCD will also show you an indication of the type of target you have found, independently of the audio tones, by showing you a number preceded by a “-” or “+” sign. The target identification system works as follows: When in either search mode (ALL METAL or DISC), a target will produce a number between 0 and 99 depending on how strong that target is (either due to its size or depth). - Page 16 LCD IDENTIFICATION SYSTEM 3. To summarize: ALL METAL mode: - = ferrous target or positive hot rock + = nonferrous target DISC mode: - = discriminated target (incl. positive hot rock) + = “good” target And in either mode, no sign = negative hot rock...
-
Page 17: Ground Balancing/Tracking
AUTO GROUND button down, lift the coil about 6 inches off the ground, hold for a second, and release the button. The Gold Strike will give you a brief tone to let you know the ground balance has been achieved. It is worth noting that a corresponding... -
Page 18: Fishertrak Afs
2 seconds, then lifting the search coil about 6 inches and waiting for the tone to signal completion of the automatic balancing. It is very helpful to set the controls of your Gold Strike for the most... - Page 19 We also suggest setting the Sensitivity control to 5, 4, or lower. If you experience unstable tracking performance, please adjust these controls accordingly. And remember that the Gold Strike still has excellent performance with these lower settings — you will recover good targets with smooth, trouble-free operation —...
-
Page 20: Setting Memory Control
Please note that the VOLUME level will not be stored and will remain at your current setting at all times. At this point, we would also like to remind you that your Gold Strike has a last-setting memory feature. This means that the unit will maintain the control settings when it is turned OFF, saving the same settings for you when you turn your Gold Strike back ON. -
Page 21: Additional Features
CONSTANT CONTROL READOUT: Unlike many digital detectors, the Gold Strike LCD shows you the control settings at all times while in the search mode. The control icons are similar to the knobs of older detectors, constantly showing where the settings are at one easy glance. -
Page 22: Searching
SEARCHING Good search techniques are every bit as important as having a good detector. 1. Once your controls are properly set, press and release the P/P touch pad, and move into your search position. Begin your search by walking slowly and sweeping the search coil in a tight semicircle. - Page 23 Unlike other metal detectors, the discrimination settings have little if any effect on the depth capability of he Gold Strike. Depth is also determined by the size, shape and conductivity of the target as well as the sensitivity setting of the...
-
Page 24: Battery Replacement
"+" polarity markings inside the battery compartments. If either or both of the batteries are installed incorrectly, the Gold Strike will simply not turn on. The detector will not be damaged. Remember your search coil must be connected to... -
Page 25: Target Recovery
TARGET RECOVERY Once you have identified and pinpointed your target, your objective is to recover it quickly and neatly, leaving virtually no trace of your excavation. There are almost as many ways to do this as there are Treasure Hunters. Whatever works for you is good enough as long as you don't break any laws, damage vegetation, or leave uncovered holes. -
Page 26: Maintenance
MAINTENANCE Your Gold Strike doesn't require a lot of care. It's built with high- quality materials and it's splashproof and dustproof. But there are a few things you should do to keep it in peak operating condition. 1. If you're not going to be using it for a while, take the batteries out. -
Page 27: Specifications
SPECIFICATIONS Length Extended ....................52” Collapsed....................41” Weight Control Housing ................. 1.2 lbs. Handle and Coil ................2.3 lbs. Complete ................... 3.5 lbs. Frequency Search ....................30 kHz Audio ................. All metal tone 500 Hz Good Target Tone ................1 kHz Search Modes True All Metal Mode .... - Page 28 R E P U T A T I O N Fisher produced the first patented metal detector in 1931. For over 70 years, the Fisher logo has been a mark of excellence. L I F E T I M E W A R R A N T Y...