Table of Contents
Advertisement
Operating Instructions
GB
English
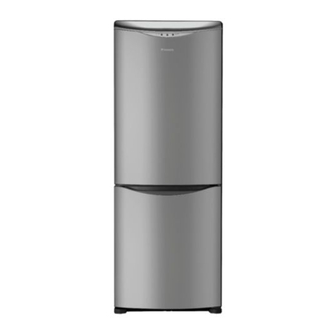
FF7190EP
FF7190EX
FF7190AEX
FF7190AEP
REFRIGERATOR/FREEZER COMBINATION
Contents
Installation, 2
Accessories, 5
Start-up and use, 6-7
Troubleshooting, 10
Guarantee, 11
GB
GB
Advertisement
Table of Contents

Related Manuals for Hotpoint FF7190EP


Summary of Contents for Hotpoint FF7190EP
-
Page 1: Table Of Contents
Using the refrigerator to its full potential Using the freezer to its full potential Maintenance and care, 8 Switching the appliance off Cleaning the appliance FF7190EP Avoiding mould and unpleasant odours FF7190EX Replacing the light bulb FF7190AEX Precautions and tips, 9... -
Page 2: Installation
Installation ! The cable must not be bent or compressed. ! Before placing your new appliance into operation ! The cable must be checked regularly and replaced by please read these operating instructions carefully. They authorised technicians only (see Assistance). contain important information for safe use, for installation ! ! ! ! ! The manufacturer declines any liability should these and for care of the appliance. - Page 3 WARNING: To avoid a shock hazard do not insert the discarded plug into a socket anywhere else. Fitting a new plug IMPORTANT: : : : : WIRES IN THE MAINS LEAD ARE COLOURED IN ACCORDANCE WITH THE FOLLOWING CODE... Green and Yellow - Earth Blue - Neutral...
- Page 4 Reversing the Doors plug I food into insulated containers whist carrying out this operation. Lay down the appliance on its back.You may require assistance to carefully lay the appliance on to s t i a t i i t c l a i .
- Page 5 Top Hinge Arm Top Hinge Pin Door header cover Fig.1 Fig.2 Step 5 Step 16 Fig.3 Fig.4 Step 6 Fig.5 Fig.6 PLEASE PHONE US TO REGISTER YOUR APPLIANCE AND ACTIVATE YOUR 5 YEAR PARTS GUARANTEE ON 08448 24 24 24...
-
Page 6: Description Of The Appliance
Description of the appliance Control panel POWER Indicator light FREEZER REFRIGERATOR SUPER FREEZE SUPER COOL OPERATION OPERATION Indicator light Indicator light Knob Knob SUPER COOL SUPER FREEZE Button Button • REFRIGERATOR OPERATION Knob • SUPER FREEZE button (rapid freezing) to freeze fresh to regulate the temperature of the refrigerator food. -
Page 7: Overall View
Overall view The instructions contained in this manual are applicable to different model refrigerators. The diagrams may not directly represent the appliance purchased. For more complex features, consult the following pages. Control panel LAMP ( see Maintenance ) Removable SHELVES• multipurpose •... -
Page 8: Accessories
Accessories Refrigerator compartment Freezer compartment SHELVES: with or without grill. ICE CARE tray Due to the special guides the The fact that they are situated on the top part of the shelves are removable and the freezer drawers ensures greater cleanliness: the ice no height is adjustable ( see longer comes into contact with the food placed inside diagram ), allowing easy storage... -
Page 9: Start-Up And Use
Start-up and use Starting the appliance FRUIT and VEGETABLE bin The salad crispers fitted inside the fridge have been ! Before starting the appliance, follow the installation specially designed for the purpose of keeping fruit and instructions ( see Installation ). vegetables fresh and crisp. -
Page 10: Maintenance And Care
Maintenance and care Switching the appliance off Replacing the l Odour filter The filter should be replaced after approximately 6-8 During cleaning and maintenance it is necessary to months from when it is activated. This period may vary disconnect the appliance from the electricity supply: depending on the type of food that is stored. -
Page 11: Precautions And Tips
Precautions and tips Disposal ! The appliance was designed and manufactured in compliance with international safety standards. The following warnings are provided for safety reasons and • Observe local environmental standards when must be read carefully. disposing packaging material for recycling purposes. •... -
Page 12: Troubleshooting
Troubleshooting Malfunctions: Possible causes / Solutions: • The plug has not been inserted into the electrical socket, or not far enough The green POWER indicator light does to make contact, or there is no power in the house. not illuminate. •... -
Page 13: Guarantee
NON-DOMESTIC PREMISES. 5 Year Parts Guarantee Hotpoint also offers you a free 5 year parts guarantee. This additional guarantee is conditional on you registering your appliance with us and the parts being fitted by one of our authorised engineers. There will be a charge for our engineer's time. -
Page 14: After Sales Service
After Sales Service No one is better placed to care for your Hotpoint appliance during the course of its working life than us - the manufacturer. Essential Contact Information Hotpoint Service We are the largest service team in Europe offering you access to 400 skilled telephone advisors and 1000 fully qualified engineers on call to ensure you receive fast, reliable, local service. - Page 15 PLEASE PHONE US TO REGISTER YOUR APPLIANCE AND ACTIVATE YOUR 5 YEAR PARTS GUARANTEE ON 08448 24 24 24...
- Page 16 195071867.04 03/2012 - Xerox Business Services PLEASE PHONE US TO REGISTER YOUR APPLIANCE AND ACTIVATE YOUR 5 YEAR PARTS GUARANTEE ON 08448 24 24 24...