HP iPAQ hx2000 User Manual
Ipaq hx2000 series pocket pc
Hide thumbs
Also See for iPAQ hx2000:
- User manual (177 pages) ,
- Additional information (151 pages) ,
- Frequently asked questions manual (67 pages)

Related Manuals for HP iPAQ hx2000


Summary of Contents for HP iPAQ hx2000
- Page 1 User’s Guide HP iPAQ hx2000 Series Pocket PC Document Part Number: 366426-001 August 2004 Note: Not all models described are available in all regions. Model shown in illustrations is iPAQ hx2700 Series Pocket...
- Page 2 © 2004 Hewlett-Packard Development Company, L.P. HP, Hewlett Packard, and the Hewlett-Packard logo are trademarks of Hewlett-Packard Company in the U.S. and other countries. iPAQ is a trademark of Hewlett-Packard Development Company, L.P. in the U.S. and other countries. Microsoft, Windows, the Windows logo, Outlook, and ActiveSync are trademarks of Microsoft Corporation in the U.S.
-
Page 3: Table Of Contents
1 Getting to Know Your iPAQ Pocket PC Using the Stylus ....... . 1–1 Aligning the Screen . - Page 4 Charging with the AC Adapter ....3–6 Charging with the HP Desktop Cradle and AC Adapter ........3–8 Charging with the HP Desktop Cradle and USB Cable .
- Page 5 Using TodayPanel Lite......6–10 Using HP Image Zone ......6–12 Viewing Thumbnail Photos .
- Page 6 Contents Using the Fingerprint Reader (not available on all models) ........7–13 Learning to Enroll a Fingerprint .
- Page 7 Working with Bluetooth Settings....9–5 Opening Bluetooth Settings....9–5 Setting Accessibility Properties.
- Page 8 Contents 12 Troubleshooting Common Problems......12–1 ActiveSync ........12–5 Expansion Cards.
-
Page 9: Getting To Know Your Ipaq Pocket Pc
Getting to Know Your iPAQ Congratulations on purchasing your HP iPAQ hx2000 Series Pocket PC. Use this guide to help you set up your Pocket PC and to learn how it works. Note: Press and hold the iTask button ( iPAQ Pocket PC to switch between the current application and the last application you were running. -
Page 10: Aligning The Screen
If you lose or break your stylus, you can order extras at www.hp.com/go/ipaqaccessories Aligning the Screen When the iPAQ Pocket PC is turned on for the first time, you are guided through a screen alignment process. -
Page 11: Adjusting Text Size
Note: The Wi-Fi antenna for the HP iPAQ is located in the top of the device. If you cover up the top of the HP iPAQ after you have turned on Wi-Fi, signal strength may be affected. Setting the Date and Time When you turn on your iPAQ Pocket PC for the first time, you are requested to select your time zone. -
Page 12: Setting The Time For Home And Locations You Are Visiting
Setting the Time for Home and Locations You Are Visiting From the Start menu, tap Settings > System tab > Clock & Alarms icon. Shortcut: From the Today screen, tap the Clock icon to set the time. 1. Tap either Home or Visiting. 2. -
Page 13: Entering Owner Information
You need to reset your time zone, time, and date if: ■ The location time (Home or Visiting) needs to be changed. ■ All power to the iPAQ Pocket PC is lost, which removes all saved settings. ■ You perform a full reset of your iPAQ Pocket PC. Shortcut: From the Today screen, tap the Clock icon to set the time zone, time, and date. -
Page 14: Resetting The Device
Resetting the Device Sometimes there is a need to reset your Pocket PC. Resetting the device is known as performing a “soft” or “hard” reset. Performing a Soft Reset A soft reset stops all running applications, but does not erase any programs or saved data. -
Page 15: Performing A Hard Reset
Performing a Hard Reset Perform a hard reset only when you want to clear all user-installed settings, applications, and data from RAM (Random Access Memory), where data and applications you have loaded are stored. Ä CAUTION: If you perform a hard reset, your Pocket PC loses all data and programs not saved in iPAQ File Store. -
Page 16: Removing/Replacing The Flip Cover
3. When the Pocket PC screen begins to fade, release the Calendar and iTask buttons first, and then remove the stylus from the Reset button. Note: If you simultaneously push and hold the Reset, Calendar, and iTask buttons for more than two seconds, the battery disconnects. -
Page 17: Routine Care
Note: HP is not responsible for damage that occurs as a result of your failure to follow the instructions that came with the HP branded product. Refer to the warranty document inlcuded with your iPAQ Pocket PC for more information. -
Page 18: Traveling With Your Pocket Pc
■ When not in use, close the flip cover on your iPAQ Pocket PC and store it in a case. You can select from a wide variety of case options at www.hp.com/go/ipaqaccessories or www.casesonline.com. ■ Do not place anything on top of your Pocket PC. - Page 19 ■ Keep your Pocket PC in a protective case and keep it in your carry-on luggage. ■ For air travel, be sure to turn off the Phone, Bluetooth, and Wi-Fi. To turn off all wireless features, from the Today screen, tap Start > iPAQ Wireless > All Off. ■...
-
Page 20: Synchronizing With Your Computer
Synchronizing with Your Using Microsoft ActiveSync Your device can be connected to a computer so you can transfer files back and forth. In this way, you only have to input data once. Microsoft ActiveSync is a synchronization program you install on your desktop or laptop computer to: ■... - Page 21 Plug the AC Adapter into an electrical outlet 1 and connect the other end of the AC Adapter to the AC connector on the HP Desktop Cradle 2. b. Slide the bottom of your Pocket PC into the HP iPAQ Cradle 3 and push firmly to seat it. Ä...
- Page 22 a. Plug the AC Adapter into an electrical outlet 1, then connect the other end of the AC Adapter to the AC connector on the Autosync Cable 2. b. Connect the 22-pin connector on the Autosync Cable to the universal sync connector on the bottom of your iPAQ Pocket PC 3.
-
Page 23: Synchronizing Your Pocket Pc With Your Computer
Synchronizing Your Pocket PC with Your Computer With ActiveSync installed on your computer, you can: ■ Use it any time to create an additional partnership so you can synchronize information with up to two computers. ■ Add or delete the type of data (Contacts, Calendar, Messaging, Tasks, Favorites, Files, Notes, and AvantGo) you want synchronized with your Pocket PC. - Page 24 To change synchronization settings: 1. From the Start menu on your computer, click Programs > Microsoft ActiveSync > Tools > Options. a. On the Sync Options tab, select the files and information to synchronize with your computer. b. On the Schedule tab, select when your iPAQ Pocket PC synchronizes with your computer.
-
Page 25: Copying Files
4. Initiate a connection by tapping Start > Programs > ActiveSync > Tools > Connect via IR. Synchronization begins on your device. 5. To disconnect, move the devices away from each other or tap X in the upper right of the screen to turn off. Copying Files You can copy files to and from your host computer using Explore in ActiveSync and Windows Explorer. -
Page 26: Installing Programs
Installing Programs To install programs on your iPAQ Pocket PC from your computer using ActiveSync: 1. Connect your iPAQ Pocket PC to your computer using the sync cable. 2. Follow the instructions on the screen. 3. Check the screen of your iPAQ Pocket PC to see if any further steps are necessary to complete the installation. -
Page 27: Sending And Receiving E-Mail
Sending and Receiving E-mail You can send and receive e-mail messages by synchronizing your iPAQ Pocket PC with your computer using ActiveSync. If you are using ActiveSync to send and receive e-mail messages, the name of the folder you are using is displayed at the bottom of the screen. -
Page 28: Managing The Battery
CAUTION: Use only an HP approved battery for your iPAQ Pocket PC. Inserting a battery that does not comply with HP requirements might cause the Pocket PC to malfunction and will void the HP iPAQ limited warranty. The iPAQ Pocket PC also has a small internal backup battery that... -
Page 29: Installing The Battery
Installing the Battery To install the removable/rechargeable battery: 1. To remove the battery cover, press the battery release latch down 1, then swing the battery door up and remove it from the device 2. User’s Guide Managing the Battery 3–2... - Page 30 Managing the Battery 2. Insert the right side of the battery into the right side of the battery compartment, then press the left side of the battery into place 3. User’s Guide 3–3...
- Page 31 3. Insert the top of the battery cover into the top of the battery compartment 4. 4. Press the bottom of the battery cover into place until it clicks Ä CAUTION: The cover must be in place for the Pocket PC to operate. If the battery cover is not in place when you press the Power button, the Pocket PC will not power on.
-
Page 32: Removing The Battery
CAUTION: Before removing the battery, use iPAQ Backup or ActiveSync to back up data on your Pocket PC. Note: If you remove or replace the battery, your HP iPAQ will perform a soft reset. Be sure to close all applications and save data before removing the battery. -
Page 33: Charging With The Ac Adapter
3. Lift the left side of the battery up and remove it from the Pokcet PC. Ä CAUTION: Because most of the applications and data you install on your Pocket PC are held in memory (RAM), you will need to reinstall them if the battery completely discharges or if the battery is removed from the device for more than a few minutes. - Page 34 To purchase an optional Automobile Adapter, refer to the HP Web site at: Ä CAUTION: Use only HP recommended AC adapters. To charge your Pocket PC using the AC Adapter: 1. Insert the AC Adapter plug into the AC Charger adapter 1.
-
Page 35: Ac Adapter
1. Plug the AC Adapter into an electrical outlet 1 and connect the other end of the AC Adapter to the AC connector on the HP Desktop Cradle 2. 2. Slide the bottom of your Pocket PC into the HP iPAQ cradle 3 and push firmly to seat it. Ä... -
Page 36: Usb Cable
(i.e., laptop), you must enable USB charging on the Pocket PC before you can charge the device. To charge your Pocket PC using the HP Desktop Cradle and USB Cable: 1. Turn on USB charging by tapping Start > Settings > System tab >... -
Page 37: Manually Checking The Battery Charge Level
2. Tap Power > Battery tab. If the battery charge level is low, connect to AC power using the HP Desktop Cradle and the AC Adapter, or change the battery. For information on purchasing an optional standard or extended battery, visit the HP Web site at www.hp.com/go/ipaqaccessories. -
Page 38: Power Saving Tips
To use a shortcut to view your battery charge level, tap the Battery icon located in the TodayPanel Lite on the Today screen plug in. Battery Saving Tip: Tap Start > Settings > System tab > Power > Advanced tab, then tap the Turn off device if not used for checkbox and set it to turn your iPAQ Pocket PC off after a short time of not being used. -
Page 39: Changing The Backlight Settings
Standard Battery or Extended Battery. These batteries can be charged in the optional battery charger. To purchase an extra battery and/or a battery charger, visit the HP Web site at www.hp.com/go/ipaqaccessories. Changing the Backlight Settings Your new Pocket PC comes with an automatic brightness control feature that saves up to 25% battery life. -
Page 40: Disabling Buttons
To change the Backlight settings: 1. Tap Start > Settings > System tab > Backlight. 2. On the Battery Power tab, select the Turn off backlight if device is not used for checkbox and enter the time duration you want to pass before the backlight turns off. 3. -
Page 41: Learning The Basics
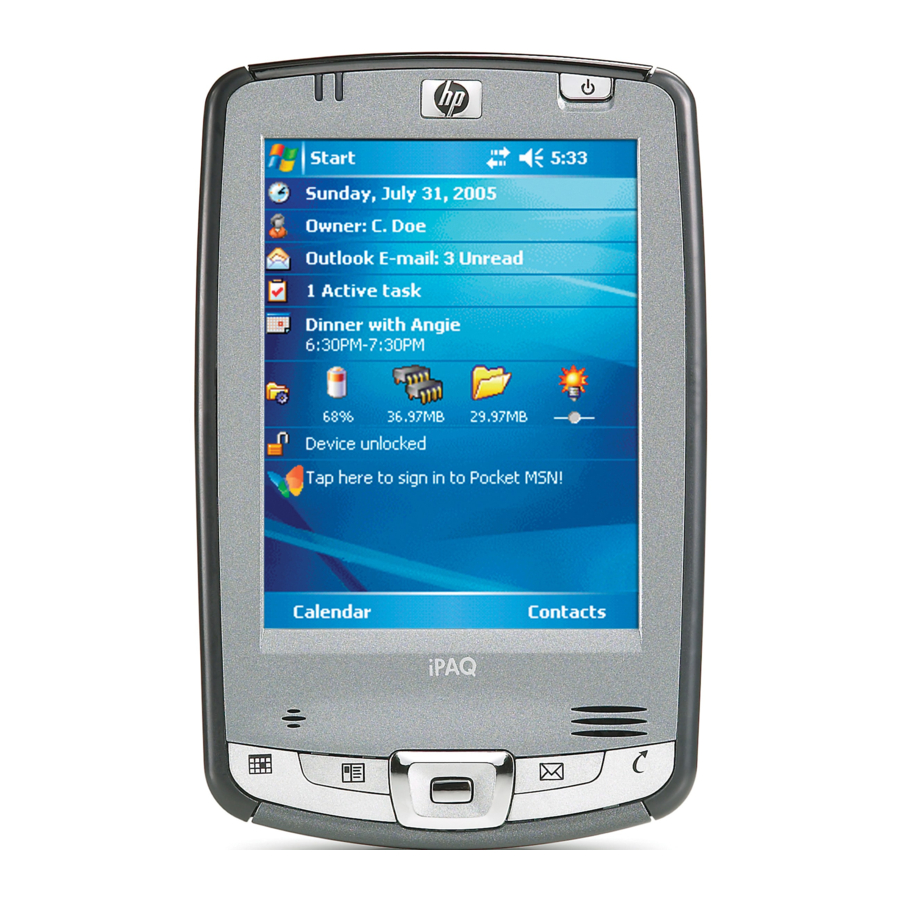
Using the Today Screen When you first turn on your iPAQ Pocket PC, the Today screen displays. You can also display it by tapping Start > Today. Use the Today screen to view: ■ Owner information ■ Upcoming appointments ■ Unread and unsent messages ■... -
Page 42: Navigation Bar And Command Bar
Navigation Bar and Command Bar The Navigation Bar is located at the top of the screen. It displays the Start button, active notifications (such as new e-mail, Wi-Fi connection status, speaker status) and current time. Use the Start menu to select a program. The Command bar is located at the bottom of the screen. -
Page 43: Status Icons
Status Icons You may see the following status icons displayed on the Navigation or Command bar. Tap the icon on the screen to view more information related to the item. Icon Active connection to computer or wireless network. Inactive connection to computer or wireless network. Microsoft ActiveSync is synchronizing. -
Page 44: Pop-Up Menus
(Continued) Icon iPAQ Pocket PC is connected with the desktop cradle. This icon appears only when there is an active connection. iPAQ Wireless icon—Tap to display Wireless screen. Provides a control center to turn all wireless activities on and off, and to configure their settings. Pop-Up Menus Pop-up menus allow you to quickly perform an action. -
Page 45: Creating Information
Creating Information From the Today screen, you can create new information, including: ■ Appointments ■ Contacts ■ Messages ■ Excel Workbook ■ Notes ■ Tasks ■ Word documents 1. From the Start menu, tap Today > New at the bottom of the screen. - Page 46 Learning the Basics 1. Tap Start > Settings > Personal tab > Today. 2. Select Use this picture as the background checkbox. 3. Tap Browse to select a picture from File Explorer. 4. Tap the Items tab to select or reorder the information on the Today screen.
-
Page 47: Changing The Screen Orientation
6. Tap Move Up or Move Down to change the order of items on the Today screen. Note: You cannot change the placement of the Date on the Today screen. 7. Tap the down arrow associated with Today timeout checkbox to determine how many hours must pass before the Today screen displays. -
Page 48: Opening And Closing Applications
Opening and Closing Applications Open any application on your iPAQ Pocket PC from the Start menu. Note: You can also open an application by assigning it to an Application Button. To assign Application Buttons, from the Today screen, tap Start > Settings > Personal tab > Buttons. To open an application: 1. -
Page 49: Installing Applications
.exe or .cef extension. To install more applications on your Pocket PC: 1. Use the HP Desktop Cradle to connect your Pocket PC to your personal computer. 2. Follow the instructions in the Installation Wizard provided with the program you want to install. -
Page 50: Backing Up Information
Ä CAUTION: If you have HP ProtectTools enabled and forget your PIN or password, resetting the device will result in loss of data stored in iPAQ File Store. For more information on HP ProtectTools, refer to “Using Security Features.”... - Page 51 To save to iPAQ File Store or High Speed File Store: 1. Copy the files to be saved to the iPAQ File Store folder. 2. Tap Start > Programs > File Explorer > My Device > iPAQ File Store. 3. Paste the selected files. Ä...
-
Page 52: Learning Input Methods
Learning Input Methods Using Input Software To input information to your Pocket PC, you can tap the on-screen keyboard or write with the Letter Recognizer, Microsoft Transcriber, or Block Recognizer in any application. You can use the stylus to draw and write on the screen in the Notes application and from any Notes tab in the Calendar, Contacts, and Tasks applications. - Page 53 To change settings for word suggestions: 1. Tap Start > Settings > Personal tab > Input. 2. Tap the Word Completion tab. 3. Tap the down arrow associated with letters and select the number of letters you want to type before a word is suggested.
- Page 54 4. Tap the down arrow associated with words and select the number of words you want suggested. 5. Tap OK. Note: If you do not want any words suggested, remove the checkmark by tapping the checkbox next to Suggest Words When Entering Text.
-
Page 55: Using The On-Screen Keyboard
Using the On-Screen Keyboard Use the stylus to tap letters, numbers, and symbols on the on-screen keyboard to enter typed text directly onto the screen. 1. From any application, tap the up arrow next to the Input Panel icon. 2. Tap Keyboard to display a keyboard on the screen. Note: To see symbols, tap the 3. -
Page 56: Writing With The Stylus And The Letter Recognizer
Writing with the Stylus and the Letter Recognizer Use the stylus and Letter Recognizer to write letters, numbers, and symbols on the screen. Create words and sentences by writing in uppercase (ABC), lowercase (abc), and symbols (123) as instructed here. To write with the stylus and Letter Recognizer: 1. -
Page 57: Writing With The Stylus And Microsoft Transcriber
Writing with the Stylus and Microsoft Transcriber Use the stylus and Microsoft Transcriber to write words, letters, numbers, and symbols anywhere on the screen. 1. From any application, tap the up arrow next to the Input Panel icon. 2. Tap Transcriber to display the Transcriber Intro screen. 3. -
Page 58: Drawing And Writing On The Screen
3. Write a word, letter, or symbol between the hatch marks. ❏ To type text, write a letter between the hatch marks labeled “abc.” ❏ To type numbers or symbols, write a number or symbol between the hatch marks labeled “123.” What you write will be converted to text. -
Page 59: Converting Writing To Text
Converting Writing to Text You can convert your writing to text when you write with the stylus in the Notes program or from the Notes tab in: ■ Calendar ■ Contacts ■ Tasks To convert writing to text: 1. From the Start menu, tap Notes or tap the Notes tab in Calendar, Contacts, or Tasks. -
Page 60: Applications
Software Available on the HP iPAQ Pocket PC The software programs described below are preinstalled on your iPAQ Pocket PC. You can find detailed information for using this software in the Help files located on your iPAQ Pocket PC. To access these Help files, tap Start >... - Page 61 To access the following programs, tap Start, then the name of the program, or tap directly on the Today screen. Application Microsoft Calendar Microsoft Contacts Microsoft Messaging Microsoft Pocket Internet Explorer Microsoft Tasks TodayPanel Lite User’s Guide Function Schedules appointments, meetings, and other events, and sets an alarm to remind you of the appointments.
- Page 62 To access the following programs, tap Start > Programs, then the name of the program. Application Microsoft ActiveSync Microsoft Calculator Microsoft File Explorer Microsoft Find How Do I...? HP Image Zone HP Mobile Printing Games iPAQ Backup iTask User’s Guide Function Synchronizes the information between your Pocket PC and computer so you have the latest information in both locations.
- Page 63 (Continued) Application Microsoft MSN Messenger Microsoft Notes Microsoft Pocket Excel Microsoft Pocket MSN Microsoft Pocket Word Print Manager Microsoft Terminal Services Client Microsoft Windows Media Player 9 Series User’s Guide Function Provides a chat environment which allows you to see who is online, send and receive instant messages, have an instant message conversation with a group of contacts, tell contacts that you are unavailable, and block...
- Page 64 To access the following programs, tap Start > Settings > Personal tab, then tap the name of the program. Application Buttons HP ProtectTools Input Menus Owner Information Sounds & Notifications Today User’s Guide Function Allows you to program the application buttons...
- Page 65 Allows you to select time zones, times, and dates for a home and a visiting location and set up alarms. The HP Certificate Enroller allows you to download certificates from the HP Web site if you have proper authorization. Lists detailed information about your system and its configuration.
- Page 66 (Continued) Application Memory Power Regional Settings Remove Programs Screen Self-Test User’s Guide Function Review how much memory is available on your device or on a storage card. Also allows you to review which programs are currently running and stop or activate them. See how much main and backup battery power is remaining on your device, define when the device will turn off after not being used, and...
- Page 67 To access the following programs, tap Start > Settings > Connections tab, then the name of the program. Application Beam Bluetooth Bluetooth Phone Manager Microsoft Connections iPAQ Wireless LEAP Network Cards User’s Guide Function Allows you to determine whether or not to automatically receive all incoming infrared beams.
-
Page 68: Installing Applications
.exe or .cef extension To install more applications on your Pocket PC: 1. Use the HP Desktop Cradle to connect your Pocket PC to your personal computer. 2. Follow the instructions in the Installation Wizard provided with the program you want to install. -
Page 69: Using Todaypanel Lite
Using TodayPanel Lite TodayPanel Lite is a Today screen plug in that allows you to quickly view and change a variety of options. The options you can change are: Icon Name TodayPanel Lite Battery power Main memory Storage card memory Backlight User’s Guide Description... - Page 70 Applications To use TodayPanel Lite, from the Today screen, tap the icon of your choice, make the appropriate changes, and tap OK. TodayPanel Lite also has the flexibility to change the icons to compact mode, as shown here, which allows more space on the Today screen.
-
Page 71: Using Hp Image Zone
2. Uncheck the TodayPanel checkbox and tap OK. Using HP Image Zone When you use HP Image Zone you can review and share images from your iPAQ Pocket PC. You can also print, send, record, and e-mail images directly from your Pocket PC, or create slideshows to share your pictures with friends and family. - Page 72 When you launch the HP Image Zone, the following icons are displayed on the bottom of the screen. Icon Definition Tap to view the photo in full screen. Tap to start slideshow mode. Tap to change folders. Tap to delete photo.
-
Page 73: Viewing Thumbnail Photos
Note: To view photos in HP Image Zone, be sure your scroll bar has been moved all the way to the left. Otherwise, you might not be able to see other photos in the thumbnail view. -
Page 74: Viewing A Photo Full-Screen
Viewing a Photo Full-Screen To view a photo full-screen and zoom in or out: 1. Tap Start > Programs > HP Image Zone. 2. Select the photo by tapping on its thumbnail. 3. Tap on the preview window or tap Tools > View Image. -
Page 75: Printing Photos
Start > Programs > HP Image Zone > Help. E-mailing Photos Using HP Image Zone, you can e-mail photos to all of your family and friends. To send photos as e-mail attachments: 1. Tap Start > Programs > HP Image Zone. -
Page 76: Attaching A Sound File To A Photo
Attaching a Sound File to a Photo To add sound to a photo: 1. Tap Start > Programs > HP Image Zone. 2. Select the photo to which you want to attach a sound file by tapping on its thumbnail. -
Page 77: Backing Up And Restoring
4. Select your audio options. ❏ Codec settings: PCM or GSM 6.10. ◆ ◆ ❏ Format: Select sound quality. Higher sound quality recordings take up more storage space. 5. Tap OK to exit this menu. Backing Up and Restoring Use iPAQ Backup or Microsoft ActiveSync Backup to back up and restore information on your iPAQ Pocket PC. -
Page 78: Using Activesync To Backup/Restore
Using ActiveSync To Backup/Restore Use Microsoft ActiveSync Backup to back up and restore information on your HP iPAQ. To help reduce the chance of data loss, perform a backup on a regular schedule. Note: Before using ActiveSync Backup, you must first install ActiveSync from the Companion CD. - Page 79 Applications Tap on a task to bring the current program into the foreground or tap and hold to bring up the Task Menu. To start iTask, tap Start > Programs > iTask. User’s Guide 6–20...
-
Page 80: Using Security Features
My Documents folder. It can also be used to encrypt data stored on expansion cards. When you enable HP ProtectTools, you have the option of enrolling a fingerprint or entering a PIN and/or password to access the Pocket PC. -
Page 81: Setting Up Security
Refer to Security Settings” To set up security on your iPAQ Pocket PC: 1. Tap Start > Settings > Personal tab >HP ProtectTools. 2. The security configuration screen displays the message “Do you want to configure HP ProtectTools security on your device?”... - Page 82 ❏ Strong alphanumeric password—enter a minimum of eight characters including at least one uppercase letter, one lowercase letter, and one number ❏ Fingerprint—successfully enroll a fingerprint ❏ Fingerprint OR PIN—successfully enroll a fingerprint OR enter a minimum 4-digit PIN ❏ Fingerprint AND PIN—successfully enroll a fingerprint AND enter a minimum 4-digit PIN ❏...
- Page 83 7. From the Fail-Safe Settings screen: ❏ Select the number of attempts you have to answer your hint question correctly. ❏ Select what the device should do if you fail to answer your hint question correctly after the associated number of attempts.
- Page 84 ❏ Select whether you want the encryption status displayed. Selecting this option allows you to monitor the encryption/decryption process. Refer to “Encrypting/Decrypting Data” more information. 10. Tap Next. 11. From the Security Configuration Complete screen, tap Continue to enroll your fingerprint, create your PIN or password, and answer your hint question.
- Page 85 14. If requested, swipe two fingers until you are told both are enrolled successfully. Note: The Fingerprint Reader is not available on all models. For more information on enrolling fingerprints, refer to the Fingerprint Reader” that you follow the instructions in the section Fingerprint Reader”...
-
Page 86: Using Your Ipaq Pocket Pc With Hp Protecttools
After the device has completed the reset process, you are asked for your fingerprint, PIN, and/or password before you can begin using it again. Using Your iPAQ Pocket PC with HP ProtectTools Unlocking Your Pocket PC The authentication method for unlocking your Pocket PC is as follows: ■... - Page 87 You can monitor the decryption process in two ways: ■ If you selected Display encryption status on the Encryption Settings screen during setup, the HP ProtectTools window displays the decryption status. ■ If you choose not to display this status, the encryption/decryption process proceeds in the background, allowing you to use your Pocket PC for other purposes.
- Page 88 Mobile Schedule to automatically initiate synchronization. Since authentication and decryption are necessary when the Pocket PC is turned on, automatic synchronization does not work properly when HP ProtectTools is enabled. The same problem may also arise when using other server-based synchronization products.
-
Page 89: Changing Your Hp Protecttools Settings
Changing Your HP ProtectTools Settings If you want to change any of your security information, you can do so easily. Tap the yellow lock icon in the Taskbar at the bottom of the Today screen. Five options are displayed: ■... - Page 90 Logoff Selecting this option allows you to manually log off your Pocket PC, requiring authentication to access the device. Data and files are encrypted. Change Passwords To change your fingerprint, PIN or Password: 1. Tap Change Passwords. 2. Swipe your finger or enter your current PIN or password to authenticate yourself.
- Page 91 6. Tap OK. Note: You cannot encrypt existing folders. For more information on managing encrypted folders, refer to HP ProtectTools Help. To access encryption Help, from the Today screen, tap the Yellow Lock icon > Yellow Lock icon in upper-left corner of the HP ProtectTools screen > Help >...
-
Page 92: Using The Fingerprint Reader
You can tap OK at the top of the screen at anytime to exit the training. To learn to enroll fingerprints: 1. During the HP ProtectTools setup process, when the Fingerprint screen displays, tap the Training button. 2. Read the Training -- Swiping Tips screen. - Page 93 6. Tap the double arrows button to continue to the Self-test. 7. Perform seven out of eight successful finger swipes in the Self-test to complete the training. 8. Tap Finish to end the training and return to the Fingerprint screen in HP ProtectTools setup. User’s Guide Using Security Features 7–14...
-
Page 94: Working With Fingerprints
Working with Fingerprints HP ProtectTools suggests fingers for you to use during the swiping activity. You can select a different finger at any time. To select a different finger, tap the finger you want to swipe in the Hand icon. The new finger is highlighted in light blue. - Page 95 Using Security Features To enroll a fingerprint: 1. On the Fingerprint screen, use the diagram to tap the finger that you are going to enroll. 2. Swipe the selected finger, as instructed. User’s Guide 7–16...
- Page 96 4. Repeat steps 2 and 3 to continue enrolling your fingerprint. 5. When that fingerprint is enrolled successfully, repeat steps 1 through 4 to enroll a second fingerprint. 6. When both fingerprints are successfully enrolled, tap OK twice to continue setting up HP ProtectTools. User’s Guide Using Security Features 7–17...
-
Page 97: Using Wi-Fi (Not Available On All Models)
With wireless access, you do not need to use cables to connect your HP iPAQ to the Internet. Instead, access points transmit data to and from your wireless device. Your HP iPAQ can connect to an 802.11b WLAN or connect directly to other WLAN-enabled devices. -
Page 98: Powering Wi-Fi On Or Off
Powering Wi-Fi On or Off To use Wi-Fi on your HP iPAQ, you need to turn on Wi-Fi and set up your device. Note: The Wi-Fi antenna for the HP iPAQ is located in the top of the device. If you cover up the top of the HP iPAQ after you have turned on Wi-Fi, signal strength may be affected. -
Page 99: Automatically Connecting To A Network
Automatically Connecting to a Network 1. If one or more broadcast networks are present, the Network Indicator icon ( network you want to connect to, and then tap whether the network connects to the Internet (does not use proxy settings) or Work (uses proxy settings). - Page 100 6. Select Add New... in the list box on the General tab to start configuring wireless networks. Note: If a network was detected in step 3, the SSID is automatically entered and cannot be changed. 7. Enter a SSID into the Network Name box. 8.
-
Page 101: Searching For Networks To Access
Wireless screen > Settings > Wireless Networks list box. You can choose whether to connect only to preferred networks or to have your HP iPAQ search for and connect to any available network (preferred or not). -
Page 102: Deleting A Wireless Network
4. Tap Remove Settings. Monitoring Signal Strength and Status To view the signal strength between your HP iPAQ and an access point Wi-Fi connection: 1. Tap the Connections icon ( 2. When the Connectivity box displays, you will be able to... -
Page 103: Advanced Network Settings
Advanced tab. Advanced Network Settings Use the next few sections to learn how to set up and change network configuration settings so your HP iPAQ can communicate with other networks. Wi-Fi Terms It is recommended that you become familiar with the following terms as you begin to use Wi-Fi technology. - Page 104 (Continued) Term Encryption Hotspots Infrastructure Internet Protocol (IP) Address Media Access Control (MAC) Address User’s Guide Using Wi-Fi (not available on all models) Definition An alphanumeric (letters and/or numbers) conversion process of data primarily used for protection against any unauthorized person(s).
- Page 105 (Continued) Term Security Set Identifier (SSID) Wi-Fi Protected Access (WPA) Windows Internet Naming Service (WINS) Wired Equivalent Privacy (WEP) Wireless Access Point Wireless Fidelity (Wi-Fi) User’s Guide Using Wi-Fi (not available on all models) Definition A sequence of 32 characters uniquely defining (naming) a WLAN.
-
Page 106: Looking Up An Ip Address
Looking Up an IP Address To find the IP address the wireless network is using: 1. Be sure Wi-Fi is powered on. 2. Connect to a network by tapping the Connections icon ( ) > Settings > Advanced tab > Select Networks button. -
Page 107: Changing Dns And Wins Settings
If you are connecting to your ISP at home, tap The Internet. If you are connecting to a private network, such as a corporate network at work, tap Work. 5. In the Tap an adapter to modify settings box, tap HP iPAQ Wi-Fi Adapter. 6. Tap the IP Address tab. -
Page 108: Setting Up Vpn Server Connections
Internet. If you are connecting to a private network such as a corporate network at work, you should tap Work. 5. In the Tap an adapter to modify settings box, tap HP iPAQ Wi-Fi Adapter. 6. Tap the Name Servers tab and enter the requested information. -
Page 109: Changing Vpn Server Connections
3. Under My Work Network, tap Add a new VPN server connection. 4. Follow the instructions on the Make New Connection screen. Note: For online Help for any screen in the New Connection wizard or while changing settings, tap the Changing VPN Server Connections 1. -
Page 110: Starting Vpn Server Connections
Setting Up Proxy Server Settings If you are connected to your ISP or private network during synchronization, your HP iPAQ should download proper proxy settings from your computer. If these settings are not on your computer or need to be changed, you will need to set them up manually. -
Page 111: Wi-Fi Security Protocol Utilities
802.1X Certificate Enroller This utility allows you to request a user certificate from a certificate server. Once the certificate has been received and stored on your HP iPAQ, you can access the network using one of the 802.1X protocols. Refer to Settings”... -
Page 112: Leap Registration Utility
Use of the LEAP registration utility is required to log on to a LEAP-authenticated network. Most of the other types of secure networks are set up automatically by the HP iPAQ Wi-Fi connection software. However, accessing a LEAP-authenticated network requires initial registration using this utility. Once you... - Page 113 3. Tap Edit to make changes to the selected LEAP profile from the Wireless LEAP list. Changes to the LEAP profile can also be made by tapping on an entry in the Wireless LEAP list. 4. Tap Delete to delete the selected LEAP profile from the Wireless LEAP list.
-
Page 114: Using Bluetooth
Your iPAQ Pocket PC comes with built-in Bluetooth technology that allows short-range connections and provides fast, reliable, and secure wireless communication. With Bluetooth powered on, you can send information or perform the following tasks wirelessly between two Bluetooth devices, within a range of approximately 30 feet (10 meters): ■... -
Page 115: Getting Acquainted With Bluetooth
■ Create a personal area network (PAN) to chat, play games, etc. Note: Use of dial-up and wireless Internet, e-mail, corporate networks, and other wireless communications, such as Bluetooth-enabled devices, might require separately purchased additional hardware and other compatible equipment, in addition to a standard Wi-Fi infrastructure and a separately purchased service contract. -
Page 116: Understanding Terms
Understanding Terms The following Bluetooth terms are used throughout this chapter. The Term... Authentication Authorization Bonding (Paired devices) Device address Device discovery Device name Data Encryption Link key Passkey Personal Information Manager (PIM) Profiles Service discovery User’s Guide Means... Verification of a numeric passkey before a connection or activity can be completed Approval of a connection or activity before it can be completed... -
Page 117: Supported Services
Supported Services The functions that Bluetooth supports are called services. You can communicate only with Bluetooth devices that support at least one of the following services: ■ Basic Printer profile (BPP) ■ Dial-up Networking (DUN) profile ■ File Transfer Protocol (FTP) ■... -
Page 118: Working With Bluetooth Settings
Working with Bluetooth Settings From the tabs in Bluetooth Settings, you can: ■ Turn Bluetooth on and off ■ Enter or change your iPAQ Pocket PC Bluetooth name ■ Set your connection preferences ■ Enable Bluetooth services ■ Specify security settings ■... -
Page 119: Enabling Bluetooth Services
4. Select Allow other devices to connect. 5. Select either All devices or Paired devices only. Ä CAUTION: Selecting All devices allows any device, even those unknown to you, to connect to your Pocket PC. After they are connected, security settings for specific services apply as specified in the Bluetooth Settings. - Page 120 Automatically Enabling Service To automatically enable service: 1. From the Today screen, tap the iPAQ Wireless icon in the Command bar. 2. Tap Bluetooth > Settings > Services tab. 3. In the Services box, select the service you want to enable: File Transfer, Information Exchange, Serial Port, Personal Network Server, Hands free, or Dial-up Networking Server.
- Page 121 Information Exchange Advanced Settings If you selected Information Exchange and tapped the Advanced button, the following screen displays. 1. Tap the My business card (vCard) icon. 2. Select your business card information from the Contact Information List and tap OK to save the settings. 3.
- Page 122 Hands Free Advanced Settings If you selected Hands Free and tapped on the Advanced button: The hands-free settings are automatically set. 1. Tap the checkboxes to select or deselect any settings. 2. Tap OK to save the settings and exit the screen. 3.
-
Page 123: Setting A Shared Folder
To require a passkey or bond: 1. From the Today screen, tap iPAQ Wireless > Bluetooth > Settings > Services tab. 2. Tap the tab for the service you want to enable: File Transfer, Information Exchange, Serial Port, Personal Network Server, Hands free, or Dial-up Networking Server. -
Page 124: Understanding Profiles
5. Tap the Folder icon and locate a desired file folder. 6. Tap OK. Understanding Profiles Use profiles to quickly enable selected personal settings in multiple environments. Creating a Profile To create a profile: 1. From the Today screen, tap the iPAQ Wireless icon in the Command bar. -
Page 125: In A Profile
Saving Bluetooth Configuration Settings in a Profile To save the Pocket PC Bluetooth configuration settings to any profile: 1. From the Today screen, tap the iPAQ Wireless icon in the Command bar > Bluetooth > Settings. 2. From the General tab, tap the Profile icon. 3. -
Page 126: Working With Bluetooth Manager
4. Tap the Delete button. 5. Tap Yes to confirm you want to delete the profile. 6. Tap OK. Working with Bluetooth Manager Use Bluetooth Manager to: ■ Establish connections ■ Exchange business cards ■ Control the on-screen display ■ Display shortcuts Opening Bluetooth Manager From the Today screen, tap the iPAQ Wireless icon in the... -
Page 127: Unpairing Devices
To pair devices: 1. From the Today screen, tap the iPAQ Wireless icon in the Command bar > Bluetooth > Manager. 2. Tap Tools > Paired devices. 3. Tap Add. 4. Tap the Lookup 5. Tap a device. 6. Enter a password in the Passkey field. 7. -
Page 128: Connecting To Other Devices
Connecting to Other Devices Use ActiveSync, serial and dial-up connections to communicate with other Bluetooth devices, establish a partnership with a cell phone, and set up the Bluetooth services it offers. Identifying the Communications Port You can identify the virtual COM ports used to create a serial port connection. - Page 129 To establish an ActiveSync connection on your Pocket PC: 1. From the Today screen, tap iPAQ Wireless > Bluetooth > Manager. 2. Tap New > ActiveSync via Bluetooth > Next. 3. Follow the connection wizard instructions. Note: Be sure the ActiveSync COM port setting on your Pocket PC is the same as the COM port setting used for Bluetooth on your computer.
-
Page 130: Establishing A Serial Connection
4. From the Bluetooth Browser screen, select the computer you want to synchronize with. Tap Next. 5. Under Serial Port Selection, select the name of the serial port for the computer selected above, and then tap Next > Finish. Establishing a Serial Connection Use the wireless Bluetooth serial port connection just as you would a physical serial cable connection. -
Page 131: Dial-Up Networking
Dial-Up Networking When you use dial-up networking (DUN), the remote device providing the dial-up networking service and the remote computer to which you are connecting must both have telephone access. Devices that can provide dial-up networking include Bluetooth: ■ Mobile phones ■... -
Page 132: Joining A Personal Area Network
To connect to the Internet and use Pocket Internet Explorer, you must first connect to a Bluetooth phone from Bluetooth Manager. To make this connection the default dial-up connection for Pocket Internet Explorer: IMPORTANT: All Bluetooth default connections are made using the following procedure. -
Page 133: Creating A File Transfer Connection
■ Create new folders. ■ Send and receive files from a remote device. ■ Delete and rename files on a remote device. Creating a File Transfer Connection 1. From the Today screen, tap iPAQ Wireless > Bluetooth > Manager. The first screen that displays is My Shortcuts. 2. -
Page 134: Using Business Card Exchange
Receiving a File from a Remote Device 1. Tap and hold a file transfer shortcut icon, and tap Connect. 2. Navigate to the file location on the remote device. 3. Tap the file. 4. Tap File > Get. 5. Tap OK. Deleting a File from a Remote Device 1. -
Page 135: Setting Up Your Business Card Information
Setting Up Your Business Card Information To set up your business card information: 1. Create a contact in the Contacts program that includes your name, title, and other relevant information. 2. From the Today screen, tap iPAQ Wireless > Bluetooth > Settings >... -
Page 136: Opening A Connection
4. Tap the device from which you want to request a business card. 5. Tap OK. Exchanging Business Cards You can exchange business card information with another device. If available, the device’s information will be sent directly into your Contacts list in Pocket Outlook. To exchange business cards: 1. -
Page 137: Closing A Connection
To view the connection status: 1. From the Today screen, tap the iPAQ Wireless icon in the Command bar > Bluetooth > Manager. 2. Tap and hold the connection icon or list name. 3. Tap Properties from the menu. 4. Tap OK. Closing a Connection 1. -
Page 138: Deleting A Shortcut
Deleting a Shortcut 1. From the Today screen, tap the iPAQ Wireless icon > Bluetooth > Manager. 2. Tap and hold the connection icon or list name to be deleted. 3. Tap Delete from the menu. 4. Tap Yes to verify the selected shortcut should be deleted. 5. -
Page 139: Connecting To The Internet
Connecting to the Internet Use your iPAQ Pocket PC to connect to the Internet or your Work network. To send and receive e-mail with Messaging and to view Web sites with Pocket Internet Explorer, you must set up a remote connection with devices such as a Secure Digital Input/Output (SDIO) modem card, Ethernet card, or the wireless 802.11b internal radio. -
Page 140: Connecting To A Private Network
Connecting to a Private Network 1. Before you start, be sure to have your server phone number, user name, and password. This information can be obtained from your network administrator. 2. Tap Start > Settings > Connections tab > Connections icon. 3. -
Page 141: Using A Favorites List
Using a Favorites List With Pocket Internet Explorer and a connection to the Internet, you can view Web sites on your iPAQ Pocket PC by selecting one from your Favorites list. To select a Web site from your Favorites list: 1. -
Page 142: Expansion Cards
Viewing the content of Secure Digital and Multimedia Memory Cards (SD/MMC) Note: Expansion cards must be purchased separately and are not included with your iPAQ Pocket PC. To locate information about expansion cards, visit the HP Web site at www.hp.com/go/ipaqaccessories. User’s Guide Expansion Cards... -
Page 143: Installing A Secure Digital (Sd) Expansion Card
Installing a Secure Digital (SD) Expansion Card Note: You install an SD card the same way you install a CF card into the expansion slot. To install a Secure Digital (SD) card into the expansion slot on the iPAQ Pocket PC: 1. -
Page 144: Removing A Secure Digital (Sd) Expansion Card
Removing a Secure Digital (SD) Expansion Card Note: You remove an SD card the same way you remove a CF card from the expansion slot. To remove a Secure Digital (SD) expansion card from the expansion slot on the iPAQ Pocket PC: 1. -
Page 145: Installing A Compact Flash (Cf) Expansion Card
Installing a Compact Flash (CF) Expansion Card Note: You install a CF card the same way you install an SD card into the expansion slot. To install a CF card into the expansion slot on the iPAQ Pocket 1. Locate the CF Type II slot on the top of the iPAQ Pocket PC. 2. -
Page 146: Removing A Compact Flash (Cf) Expansion Card
Removing a Compact Flash (CF) Expansion Card Note: You remove a CF card the same way you remove an SD card from the expansion slot. To remove a CF expansion card from the Compact Flash Type II expansion slot on the iPAQ Pocket PC: 1. -
Page 147: Troubleshooting
Use the following suggestions to troubleshoot problems with the iPAQ Pocket PC. Common Problems Problem Solution I cannot see anything on the screen. I cannot keep my battery charged. The backlight keeps turning off. User’s Guide Troubleshooting ■ Be sure the iPAQ Pocket PC is powered on. ■... - Page 148 (Continued) Problem Solution I want to travel with my iPAQ Pocket PC. I want to travel Be sure you have the plug adapter appropriate for the internationally country you are visiting. with my iPAQ Pocket PC. I want to turn off To turn off all wireless features, tap Start >...
- Page 149 (Continued) Problem Solution I cannot connect to a network. I want to see the The current date is displayed at the top of the Today current date. screen. I cannot Be sure the appointment you created is in the selected see all my category.
- Page 150 (Continued) Problem Solution My device is Tap Start > Settings > Personal tab > HP ProtectTools to always asking be sure the password settings are configured as you want. me for a password. I cannot find Check My Documents, which is the default save location files sent to me used to receive files.
-
Page 151: Activesync
ActiveSync Use the following suggestions to troubleshoot problems with ActiveSync on your iPAQ Pocket PC. For more detailed information on Microsoft ActiveSync, refer to “Synchronizing with Your Computer.” Problem Solution I cannot connect to my computer using the Desktop Cradle. I connected my iPAQ Pocket PC before installing... - Page 152 ■ Be sure all cables are securely connected. ■ Remove your iPAQ Pocket PC from the HP Desktop Cradle or disconnect it from the Autosync Cable, power on the device by pressing the Power button, then put it back in the synchronization cradle or connect it to the cable.
-
Page 153: Expansion Cards
Expansion Cards Use the following suggestions to troubleshoot problems with expansion cards on your iPAQ Pocket PC. For more information on expansion cards, refer to Problem Solution I cannot get my iPAQ Pocket PC to recognize the expansion card. I cannot insert my card. -
Page 154: Wi-Fi
Wi-Fi Use the following suggestions to troubleshoot problems with Wi-Fi issues and your iPAQ Pocket PC. For more information on Wi-Fi, refer to Problem Solution I cannot connect to an access point. I am connected If the wireless network you are connected to connects to to an access Work, the network may require a proxy. - Page 155 (Continued) Problem Solution I cannot connect It is likely that the network is a “hidden” or non-SSID to an available broadcast network. You must know the network name network that (SSID) to be able to connect. shows in the list of networks without a name.
-
Page 156: Bluetooth
Bluetooth Use the following suggestions to troubleshoot problems with Bluetooth on your iPAQ Pocket PC. For more information on Bluetooth, refer to Problem Solution I cannot discover another device. I can see other devices, but I cannot connect or exchange data with them. - Page 157 (Continued) Problem Solution Other devices do not receive my correct business card information. The iPAQ Pocket PC cannot find my Bluetooth- enabled Mobile phone. User’s Guide ■ Be sure you have correctly set up your business card information in Bluetooth Settings. ■...
-
Page 158: A Regulatory Notices
Consult the dealer or an experienced radio or television technician for help This PDA has been tested and demonstrated compliance when Bluetooth and WLAN are transmitting simultaneously. This PDA must not be co-located or operating in conjunction with any other antenna or transmitter. -
Page 159: Declaration Of Conformity For Products Marked With The Fcc Logo-United States Only
Modifications The FCC requires the user to be notified that any changes or modifications made to this device that are not expressly approved by Hewlett-Packard Company may void the authority to operate the equipment. Cables Connections to this device must be made with shielded cables with metallic RFI/EMI connector hoods in order to maintain compliance with FCC Rules and Regulations. -
Page 160: Canadian Notice
This product complies with the following EU Directives: ■ Low Voltage Directive 73/23/EEC ■ EMC Directive 89/336/EEC CE Compliance of this equipment is valid only if powered Note: with an HP-provided and CE marked AC adapter. User’s Guide Regulatory Notices A–3... - Page 161 Regulatory Notices If this product has telecommunication functionality, it also complies with the essential requirements of: ■ R&TTE Directive 1999/5/EC. Compliance with these directives implies conformity to harmonized European standards (European Norms) which are listed on the EU Declaration of Conformity issued by Hewlett-Packard for this product or product family.
-
Page 162: Battery Warning
To reduce the risk of fire or burns, do not disassemble, crush, puncture, short external contacts, or dispose of in fire or water. Replace only with the HP spare. Ä CAUTION: Risk of explosion if battery is replaced by an incorrect type. -
Page 163: Equipment Warning
Because of the type of battery used in your iPAQ Pocket PC, follow local regulations regarding the safe disposal of the battery. Your vendor can advise you on local regulations, and/or the existence of any battery disposal programs in operation. Equipment Warning Å... -
Page 164: Airline Travel Notice
This PDA has been tested and demonstrated compliance when Bluetooth and WLAN are transmitting simultaneously. This PDA must not be co-located or operating in conjunction with any other antenna or transmitter. -
Page 165: Japanese Regulatory Wireless Notice
Japanese Regulatory Wireless Notice Brazilian Regulatory Wireless Notice Este equipamento opera em caráter secundário, isto é, não tem direito a proteção contra interferência prejudicial, mesmo de estações do mesmo tipo, e não pode causar interferência a sistemas operando em caráter primário. User’s Guide Regulatory Notices A–8... -
Page 166: System Specifications
System Specifications Note: Not all models described are available in all regions. For more information on specifications for your particular model, on your iPAQ Pocket PC, tap Start > Settings > System tab > HP Asset Viewer. System Feature Description Processor... - Page 167 (Continued) System Feature Description External Power 10 watt maximum output AC Adapter Bluetooth Class II device; typical 10 meters (30 feet) range Indicators Radio LED indicator: (Left LED) (Right LED) Charge/Notification LED indicator: 4-mode alarm notification: Battery Slim Series: Removable/rechargeable 920-1440 mAh, 3.6 Volt, Lithium ion battery with internal backup battery to maintain data during main battery replacement.
-
Page 168: Physical Specifications
Physical Specifications Note: Weight varies on different models. Length without flip cover with flip cover Width without flip cover with flip cover Depth without flip cover with flip cover Weight without flip cover with flip cover Operating Environment Environment Temperature Relative Humidity Maximum Altitude User’s Guide...