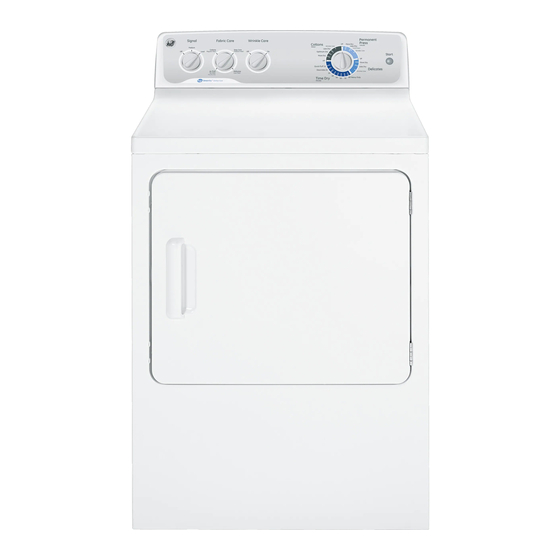
GE Dryer Use And Care Manual With Installation Instructions
Hide thumbs
Also See for Dryer:
- Owner's manual and installation instructions (68 pages) ,
- Use and care manual (36 pages) ,
- Use and care manual with installation instructions (25 pages)
Table of Contents
Advertisement
Available languages
Available languages
This product was verified to be in excellent condition when it left our manufacturing facility. If it has been
damaged during transit or installation, please report that damage immediately to the Retail Outlet where it
was purchased. Although your warranty covers manufacturing defects in material or workmanship, it does
not include coverage for delivery damage. Please refer to your warranty section for specific information
about warranty terms and conditions.
RECYCLED PAPER
RECYCLABLE
Exhaust ............................................6, 7
Electric Dryer.......................................8
Gas Dryer ........................................8, 9
Reversible Door Instructions .............5
Operating Instructions,Tips
Automatic Drying..............................13
Color Logic.........................................11
Drying Selection Guide ..............12, 13
Electronic Sensor Control ................13
Extra Care Program ....................10, 12
Knits Drying Tips .........................11, 12
Lint Filter ............................................11
Loading ........................................11, 16
Operating the Dryer..........10, 11, 12, 13
Drying Tips ................................11, 16
Sorting Clothes............................11, 12
Special Instructions ..........................12
Timed Drying ..............................12, 13
End Cycle Signal ...............................10
Note to Consumer:
We care about our environment.
Use and Care Guide
With Installation Instructions
Dryer
................. 3, 4
Drum Stainless Steel ........................14
Dryer Exhaust....................................15
Exterior...............................................11
Light Bulb Replacement ...................13
Lint Filter ............................................11
........................ 16
Consumer Services
Model and Serial Numbers................2
Repair Service .....................................2
Warranty ............................................18
www.geappliances.ca
For service call:
1-800-561-3344
280P018
500A
Advertisement
Chapters
Table of Contents

Related Manuals for GE Dryer


Summary of Contents for GE Dryer
-
Page 1: Table Of Contents
Warranty ..........18 Extra Care Program ....10, 12 Knits Drying Tips ......11, 12 Lint Filter ..........11 Loading ........11, 16 www.geappliances.ca Operating the Dryer..10, 11, 12, 13 Permanent Press Drying Tips ........11, 16 Sorting Clothes......11, 12 Special Instructions ......12 For service call: Timed Drying ......12, 13... - Page 2 Should your appliance require service after the Your new dryer is a well designed and engineered product. warranty has expired, a Mabe Service Contract takes Before it left the factory, it went through rigorous tests, care of any repairs your appliance needs –...
-
Page 3: Safety Instructions
– Locate where the temperature is above 50˚F. (10˚C.) for put in your dryer. satisfactory operation of the dryer control system. Do not install or store the dryer where it will be • Do not wash or dry articles that exposed to the water and/or the weather. -
Page 4: Safety Instructions
• If yours is a gas dryer, it is equipped with an carefully. automatic electric ignition and does not have a pilot light. DO NOT ATTEMPT TO LIGHT WITH A MATCH. -
Page 5: Dryer Door
9. Reinsert the plastic plugs on the side from which the removed the filler plugs). door was removed. 4. Loosen the remaining top screw from each hinge on the dryer front, half way. 5. With one hand holding the top of the door, and... -
Page 6: Exhaust
NOTE: The WARNING and IMPORTANT instructions appearing in this manual are not meant to cover all possible conditions and situations that may occur. It must be understood that common sense, caution, and carefulness are factors that CANNOT be built into the dryer. These factors MUST BE supplied by the person(s) installing, maintaining, or operating the dryer. -
Page 7: Electric Dryer
* Do not use non metallic flexible duct. ALTERNATE EXHAUST DIRECTIONS This dryer comes ready for rear exhausting. If space is limited, use the following instructions to exhaust directly from the side or bottom of the cabinet. GAS DRYER CAN NOT BE EXHAUSTED DIRECTLY THROUGH THE RIGHT SIDE OF THE CABINET. -
Page 8: Gas Dryer
• The exhaust duct material MUST BE METAL. • If yours is a gas dryer, the closet should be vented to • Do not connect the exhaust duct with sheet metal the outdoors to prevent gas pocketing in case of a gas screws or other fastening devices which extend to the leak in the supply line. -
Page 9: Gas Dryer
• Supply line is to be 12.7 mm (1/2 in) rigid pipe. Some local codes restrict installation of gas appliances (9.53 mm (3/8 in) copper tubing may be used if the dryer is in garages. They must be 45 cm (18”) off the ground operated on propane gas) and equipped with an accessible and protected by a barrier from vehicules. -
Page 10: Control Panel
OPERATING YOUR DRYER WARNING – To reduce the risk of fire, electric shock, or injury to persons when using your appliance read the IMPORTANT SAFETY INSTRUCTIONS before operating this appliance. Features and appearances may vary. NOTE: Drying times will vary according to the type of heat used (Electric, Natural gas or LP gas), size of load, types of fabrics, wetness of clothes, and condition of exhaust ducts. -
Page 11: Color Logic
(Opening the door polyester knits or permanent press items which should during operation stops the dryer. To restart, be removed as soon as the dryer stops to help prevent close the door and follow above directions.) setting of wrinkles. -
Page 12: Suggested Fabric And Drying Selections
Feather pillows dry very slowly and must be dried completely to prevent mildew. DO NOT tumble dry pillows containing kapok. Add 2 or 4 dry towels to the blanket in the dryer. Set timer for 20-25 minutes. DO NOT set control **Blankets for more than 25 minutes. -
Page 13: Drying Selections For Automatic Cycles
Electronic Sensor Control continually senses the temperature wish the dryer to run and it turns system continually senses the of the air in the dryer drum. Wet off at the end of this time period. -
Page 14: Cleaning
STAINLESS STEEL (Available on MAINTENANCE TIPS some models) Some simple everyday household appliances can be used to maintain the finish of stainless steel surfaces. They include: Vinegar: To clean and polish stainless steel, moisten a soft cloth with undiluted white or cider vinegar and wipe the surface clean. -
Page 15: Cleaning Lint From Your Dryer
CLEANING LINT FROM YOUR DRYER Combustible lint may collect on the inside of the dryer cabinet. CLEAN EVERY 2 TO 3 YEARS OR MORE OFTEN DEPENDING ON USAGE. Cleaning should be done by a qualified service person. -
Page 16: Lint Filter
• Improper sorting. Do not mix heavy, hard-to-dry items with lightweight articles. • Too many items in dryer. Dry only one washer load at a time. Do not combine loads. • Too few items in dryer. If drying only one article, add two more similar articles, even if dry, to ensure proper tumbling. -
Page 17: Mabe Service Telephone Numbers
MABE SERVICE TELEPHONE NUMBERS Questions? If you have any questions concerning your appliance, please write to: Director, Consumer Relations, Mabe Canada Inc., 1 Factory Lane, Suite 310, Moncton, N.B., E1C 9M3. 1-800-561-3344 In-Home Repair Service Expert Mabe repair service is only a phone call away. 1-800-261-2133 Service Contracts Purchase a Mabe service contract while your warranty is still in effect and you will receive a... -
Page 18: Warranty
We Will Replace: One Year Any part of the dryer which fails due to a defect in materials or workmanship. During this From the date of the limited one-year warranty, Mabe will also provide, free of charge, all labor and related service original purchase costs to replace the defective part. - Page 19 Guide d’utilisation et d’entretien et directives d’installation Sécheuse Entretien et nettoyage Mesures de sécurité ....3, 4 Évacuation de la sécheuse....15 Extérieur..........11 Filtre à charpie ........11 Directives d’installation Remplacement de l’ampoule...13 Directives d’inversion de la porte ..5 Tambour en acier inoxydable ..14 Évacuation........6, 7 Sécheuse électrique......8 Sécheuse à...
- Page 20 Mabe vous permettra d’éviter tous les frais que possible. De plus, une garantie protège votre appareil de réparation dont votre appareil pourrait avoir besoin, tant contre tout vice de fabrication pendant la période de les pièces que la main-d’oeuvre.
-
Page 21: Mesures De Sécurité
MESURES DE SÉCURITÉ IMPORTANTES Veuillez lire toutes les directives avant d’utiliser l’appareil. Mise en garde - Il est extrêmement important de lire et de suivre les directives ci-dessous, afin d’éviter les blessures ou les dommages matériels que pourrait causer un incendie. Pour réduire les risques d’incendie •... - Page 22 MESURES DE SÉCURITÉ IMPORTANTES • Avant chaque séchage, nettoyez le • Gardez tous les produits de lessive filtre à charpie afin de prévenir (comme les détersifs, les javellisants, les l’accumulation de charpie à l’intérieur assouplissants, etc.) hors de la portée de la sécheuse ou dans la pièce.
-
Page 23: Directives D'inversion De La Porte
DIRECTIVES D’INVERSION DE LA PORTE Les directives qui suivent permettent de transférer du côté Si vous désirez retransférer les charnières du côté droit, gauche les charnières situées du côté droit. suivez les mêmes directives (en remplaçant simplement le mot « gauche » par le mot « droit » et vice versa). Outils nécessaires Tournevis Phillips standard n˚... -
Page 24: Évacuation
DIRECTIVES D’INSTALLATION ÉVACUATION L’installation et les réparations doivent être confiées à un installateur qualifié, à une entreprise de réparation ou au fournisseur de gaz. IMPORTANT : Faites installer correctement votre sécheuse. REMARQUE : Les MISES EN GARDE et les directives IMPORTANTES données dans le présent manuel ne couvrent pas toutes les conditions et situations possibles qui peuvent survenir. -
Page 25: Sécheuse Électrique
DIRECTIVES D’INSTALLATION ÉVACUATION Tableau 1: LONGUEUR MAXIMALE RECOMMANDÉE SÉCHEUSES ÉLECTRIQUES SÉCHEUSES À GAZ Type d’évent mural Type d’évent mural Pour les conduits d’évacuation Pour les conduits d’évacuation Recommandé Recommandé courts seulement courts seulement ⁄ ⁄ 4 po 4 po (6,35 cm) (6,35 cm) (10,16 cm) (10,16 cm) - Page 26 INSTALLATION IMPORTANT - SE CONFORMER À TOUS LES CODES EN VIGUEUR La sécheuse doit être de niveau et stable sur le plancher. EXIGENCES D’INSTALLATION SPÉCIALES INSTALLATION DANS UNE ALCÔVE OU UN PLACARD DÉGAGEMENTS MINIMUMS POUR LES AUTRES TYPES D’INSTALLATION • L’air de la sécheuse DOIT être évacué à l’extérieur. Voir la section «...
- Page 27 INSTALLATION – SÉCHEUSE À GAZ IMPORTANT - SE CONFORMER À TOUS LES CODES EN VIGUEUR La sécheuse doit être de niveau et stable sur le plancher. L’air de la sécheuse doit être évacué à l’extérieur. POUR VOTRE SÉCURITÉ Si vous remarquez une odeur de gaz : •...
-
Page 28: Avertisseur
FONCTIONNEMENT DE VOTRE SÉCHEUSE MISE EN GARDE – Avant de faire fonctionner cet électroménager, veuillez lire les MESURES DE SÉCURITÉ IMPORTANTES afin de réduire les risques d’incendie, de chocs électriques ou de blessures. REMARQUE : Les durées de séchage peuvent varier selon le type de chaleur utilisé REMARQUE : Il est possible que l’apparence ou certaines caractéristiques diffèrent sur votre modèle. -
Page 29: Chargement
Mise en marche. Pour mettre la sécheuse en Réglez toujours l’avertisseur lorsque vous faites sécher des tricots en polyester ou des articles avec apprêt permanent, marche, tournez le bouton START (démarrage). qui doivent être sortis dès que la sécheuse s’arrête afin La sécheuse s’arrête lorsque vous ouvrez la d’éviter la formation de faux plis. -
Page 30: Programmes Suggérés
PROGRAMMES SUGGÉRÉS SELON LES TISSUS Programme suggéré Pour une brassée de vêtements/tissus comme : Température de séchage Automatique-cotons • Cotons et toiles Régulière Automatique-apprêt • Tissus sans repassage avec coton Moyenne permanent • Vêtements à bourre de duvet, si le lavage et le (Perma Press ou Easy Care)v séchage sont recommandés •... -
Page 31: Séchage Automatique
FONCTIONNEMENT DE VOTRE SÉCHEUSE Différence entre le séchage minuté et le séchage automatique Séchage automatique (capteur Séchage automatique Séchage minuté électronique) Lorsque vous utilisez un programme Lorsque vous utilisez un programme (sur certains modèles seulement) automatique, le système de séchage minuté, vous choisissez le nombre de Lorsque vous utilisez un programme automatique mesure continuellement la... - Page 32 CONSEILS D’ENTRETIEN (Disponible sur POUR L’ACIER INOXYDABLE certains modèles) Quelques produits d’entretien ménager peuvent être utilisés afin de préserver le fini de surface de l’acier inoxydable. Parmi ceux-ci on retrouve: Vinaigre: Pour nettoyer et polir l’acier inoxydable, imprégner un linge doux de vinaigre blanc non-dilué ou de vinaigre de cidre et nettoyer la surface.
- Page 33 MAXIMISEZ L’EFFICACITÉ DE VOTRE SÉCHEUSE EN GARDANT LE CONDUIT D’ÉVACUATION PROPRE 1. Débranchez le cordon d’alimentation de la prise de courant ou coupez l’alimentation électrique de la sécheuse en déclenchant le disjoncteur ÉVENT MURAL RACCORDÉ À LA SÉCHEUSE 2. Débranchez le conduit de la sécheuse. Vérifiez si de la charpie s’est 3.
-
Page 34: Filtre À Charpie
DES QUESTIONS ? CONSULTEZ CE GUIDE DE DÉPANNAGE PROBLÈME CAUSES PROBABLES LA SÉCHEUSE • La sécheuse n’est pas branchée. Assurez-vous que le cordon d’alimentation est bien NE FONCTIONNE PAS branché. • Pas de courant à la sécheuse. Vérifiez les fusibles et les disjoncteurs pour vous assurer que la sécheuse est alimentée en courant. -
Page 35: Numéros De Service Mabe
NUMÉROS DE SERVICE MABE Questions ? Si vous avez des questions au sujet de votre électroménager, écrivez au : Directeur, Relations avec les consommateurs, Mabe Canada Inc. 1 Factory Lane, bureau 310, Moncton (N.B.) E1C 9M3. 1-800-561-3344 Réparations à domicile Pour faire réparer votre électroménager Mabe, il suffit de nous téléphoner. - Page 36 Garantie de votre sécheuse GE (pour les clients du Canada seulement) Toutes les réparations sous garantie seront effectuées par nos Agrafez votre facture ici. Pour centres de réparation ou par un technicien Customer Care bénéficier de réparations sous garantie, il est nécessaire de authroisé.