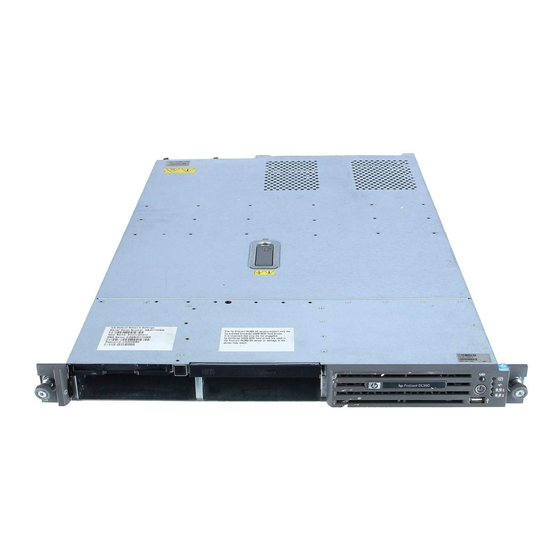
HP ProLiant DL360 Generation 4 Maintenance And Service Manual
Hp proliant dl360 generation 4 server
Hide thumbs
Also See for ProLiant DL360 Generation 4:
- Reference and troubleshooting manual (246 pages)

Related Manuals for HP ProLiant DL360 Generation 4


Summary of Contents for HP ProLiant DL360 Generation 4
- Page 1 HP ProLiant DL360 Generation 4 Server Maintenance and Service Guide September 2004 (Second Edition) Part Number 373553-002...
- Page 2 The information in this document is provided “as is” without warranty of any kind and is subject to change without notice. The warranties for HP products are set forth in the express limited warranty statements accompanying such products. Nothing herein should be construed as constituting an additional warranty.
-
Page 3: Table Of Contents
Contents Illustrated Parts Catalog Mechanical Components........................7 System Components..........................9 Removal and Replacement Procedures Required Tools........................... 13 Safety Considerations ........................14 Preventing Electrostatic Discharge..................14 Server Warnings and Cautions ....................14 Preparation Procedures ........................15 Powering Down the Server ..................... 16 Extending the Server from the Rack.................. - Page 4 HP ProLiant DL360 Generation 4 Server Maintenance and Service Guide Battery..............................45 System Board ............................. 46 Re-Entering the Server Serial Number and Product ID ..............47 Server Cabling Cabling Overview ..........................49 Server Cable Routing ......................... 50 SATA Cable Routing ......................... 51 Diagnostic Tools SmartStart Software ...........................
- Page 5 Contents Specifications Server Specifications.......................... 79 Environmental Specifications ......................80 Hot-Plug Power Supply Calculations....................80 DDR SDRAM DIMM Specifications ....................80 1.44-MB Diskette Drive Specifications ..................... 81 CD-ROM Drive Specifications ......................82 Ultra320 SCSI Hard Drive Specifications ..................83 Serial ATA Hard Drive Specifications....................83 Acronyms and Abbreviations Index...
-
Page 7: Illustrated Parts Catalog
Illustrated Parts Catalog In This Section Mechanical Components ........................7 System Components ........................9 Mechanical Components Item Description Spare Part Number Access panel 361400-001... - Page 8 HP ProLiant DL360 Generation 4 Server Maintenance and Service Guide Item Description Spare Part Number Plastics kit 361396-001 a) Optical drive ejector assembly 30545-001 b) PCI card guide * c) Diskette blank * d) Optical device blank * Hardware kit 361397-001 a) Screws, 6-32X0.25, T10 (4) *...
-
Page 9: System Components
Illustrated Parts Catalog System Components Item Description Spare Part Number System Components Power supply fan assembly 361399-001 Processor fan assembly 361390-001 Hot-plug power supply, 460 W 361392-001 PCI riser bracket, with PCI riser boards 361387-001... - Page 10 HP ProLiant DL360 Generation 4 Server Maintenance and Service Guide Item Description Spare Part Number Processor/heatsink assembly a) Intel® 3.00-GHz Xeon™ 1-MB L2 cache 371751-001 b) Intel® 3.40-GHz Xeon™ 1-MB L2 cache * 361381-001 c) Intel® 3.60-GHz Xeon™ 1-MB L2 cache * 361382-001 a) 3.6 volt, 500 mAh NiMh battery *...
- Page 11 Illustrated Parts Catalog Item Description Spare Part Number SCSI Ultra320 universal hot-plug hard drive a) 36.4-GB 15K rpm 289241-001 b) 72.8-GB 10K rpm * 289042-001 c) 72.8-GB 15K rpm * 289243-001 d) 146.8-GB 10K rpm * 289044-001 SATA hot-plug hard drive a) 80-GB 7.2K rpm * 353042-001 b) 160-GB 7.2K rpm *...
-
Page 13: Removal And Replacement Procedures
Removal and Replacement Procedures In This Section Required Tools ..........................13 Safety Considerations ........................14 Preparation Procedures .........................15 Hard Drive Blank .........................19 Hard Drive ............................21 Diskette Drive Blank ........................22 Diskette Drive..........................23 Optical Device Blank........................24 Optical Device ..........................25 Optical Device Ejector........................26 Hot-Plug AC Power Supply ......................27 Power Supply Fan Assembly......................28... -
Page 14: Safety Considerations
HP ProLiant DL360 Generation 4 Server Maintenance and Service Guide • T-15 Torx screwdriver • Diagnostics Utility Safety Considerations Before performing service procedures, review all the safety information. Preventing Electrostatic Discharge To prevent damaging the system, be aware of the precautions you need to follow when setting up the system or handling parts. -
Page 15: Preparation Procedures
Extend the server from the rack ("Extending the Server from the Rack" on page 17). If you are performing service procedures in an HP, Compaq branded, telco, or third-party rack cabinet, you can use the locking feature of the rack rails to support the server and gain access to internal components. -
Page 16: Powering Down The Server
HP ProLiant DL360 Generation 4 Server Maintenance and Service Guide If you must remove a server from a rack or a non-hot-plug component from a server, power down the server. • Remove the server from the rack. If the rack environment, cabling configuration, or the server location in the rack creates awkward conditions, remove the server from the rack. -
Page 17: Extending The Server From The Rack
Removal and Replacement Procedures Extending the Server from the Rack NOTE: If the optional cable management arm option is installed, you can extend the server without powering down the server or disconnecting peripheral cables and power cords. These steps are only necessary with the standard cable management solution. -
Page 18: Removing The Access Panel
HP ProLiant DL360 Generation 4 Server Maintenance and Service Guide b. Secure the server by tightening the thumbscrews. 6. Reconnect the peripheral cables and power cords. Removing the Access Panel WARNING: To reduce the risk of personal injury from hot surfaces, allow the drives and the internal system components to cool before touching them. -
Page 19: Hard Drive Blank
Removal and Replacement Procedures To open the arm: To close the arm: Hard Drive Blank CAUTION: To prevent improper cooling and thermal damage, do not operate the server unless all bays are populated with either a component or a blank. - Page 20 HP ProLiant DL360 Generation 4 Server Maintenance and Service Guide 1. Remove one of the following: − Remove the SCSI hard drive blank. − Remove the SATA hard drive blank. To replace the blank, slide the blank into the bay until it locks into place.
-
Page 21: Hard Drive
Removal and Replacement Procedures Hard Drive CAUTION: Always power down the server if the boot partition resides on the drive you are replacing or if you are replacing the only drive in the server. CAUTION: To prevent improper cooling and thermal damage, do not operate the server unless all bays are populated with either a component or a blank. -
Page 22: Diskette Drive Blank
HP ProLiant DL360 Generation 4 Server Maintenance and Service Guide − Remove the SATA hard drive. IMPORTANT: When SATA hard drives are installed, SATA LED functionality and SATA hot-plug capability are not supported currently. To replace the drive, slide the drive into the bay until the latch mechanism engages the server chassis, then close the latch handle to lock the drive in the server chassis. -
Page 23: Diskette Drive
Removal and Replacement Procedures 5. Remove the diskette drive blank. To replace the component, reverse the removal procedure. Diskette Drive 1. Power down the server ("Powering Down the Server" on page 16). 2. Extend the server from the rack. ("Extending the Server from the Rack" on page 17) 3. -
Page 24: Optical Device Blank
HP ProLiant DL360 Generation 4 Server Maintenance and Service Guide 5. Remove the diskette drive. To replace the component, reverse the removal procedure. Optical Device Blank IMPORTANT: The ejector button is recessed to prevent accidental ejection; it may be helpful to use a pen or similar shaped object to access the button. -
Page 25: Optical Device
Removal and Replacement Procedures 2. Remove the optical device blank. To replace the blank, slide the blank into the bay until it locks into place. Optical Device 1. Power down the server ("Powering Down the Server" on page 16). IMPORTANT: The ejector button is recessed to prevent accidental ejection;... -
Page 26: Optical Device Ejector
HP ProLiant DL360 Generation 4 Server Maintenance and Service Guide 3. Remove the optical device. To replace the drive, slide the drive into the bay until it clicks. Optical Device Ejector 1. Power down the server ("Powering Down the Server" on page 16). -
Page 27: Hot-Plug Ac Power Supply
Removal and Replacement Procedures 8. Remove the optical device ejector. To replace the component, reverse the removal procedure. Hot-Plug AC Power Supply This procedure assumes that the server is configured with two power supplies. CAUTION: To prevent improper cooling and thermal damage, do not operate the server unless all bays are populated with either a component or a blank. -
Page 28: Power Supply Fan Assembly
HP ProLiant DL360 Generation 4 Server Maintenance and Service Guide 3. Press the power supply release lever, then pull the power supply from the server. To replace the component, reverse the removal procedure. Power Supply Fan Assembly CAUTION: Do not operate the server for long periods without the access panel. -
Page 29: Processor Fan Assembly
Removal and Replacement Procedures 6. Remove the component from the server. CAUTION: When replacing the component, be sure the power converter module is properly seated in the server chassis. To replace the component, reverse the removal procedure. Processor Fan Assembly CAUTION: Do not operate the server for long periods without the access panel. -
Page 30: Optical Device And Diskette Drive Interface
HP ProLiant DL360 Generation 4 Server Maintenance and Service Guide 5. Remove the component from the server. To replace the component, reverse the removal procedure. Optical Device and Diskette Drive Interface 1. Power down the server ("Powering Down the Server" on page 16). -
Page 31: Scsi Backplane
Removal and Replacement Procedures 9. Slide the board toward the front edge of the server, lift up, then slide the board toward the rear of the server to remove the component. To replace the component, reverse the removal procedure. SCSI Backplane 1. -
Page 32: Sata Backplane
HP ProLiant DL360 Generation 4 Server Maintenance and Service Guide 7. Remove the component from the server. To replace the component, reverse the removal procedure. SATA Backplane 1. Power down the server ("Powering Down the Server" on page 16). 2. Remove all SATA hard drives ("Hard Drive" on page 21). -
Page 33: Pci Riser Board Assembly
Removal and Replacement Procedures 8. Remove the component from the server. To replace the component, reverse the removal procedure. PCI Riser Board Assembly CAUTION: To prevent damage to the server or expansion boards, power down the server and remove all AC power cords before removing or installing the PCI riser cage. -
Page 34: Pci Expansion Slot Definitions
HP ProLiant DL360 Generation 4 Server Maintenance and Service Guide c. Lift the front of the assembly slightly and unseat the riser boards from the PCI riser board connectors. To replace the component, reverse the removal procedure. PCI Expansion Slot Definitions... -
Page 35: Pci Riser Board
Removal and Replacement Procedures 2. Remove any expansion board installed in the assembly. To replace the component, reverse the removal procedure. PCI Riser Board 1. Remove the PCI Riser Board Assembly ("PCI Riser Board Assembly" on page 33). 2. Remove any expansion board installed in the assembly ("PCI-X or PCI Express Expansion Board"... -
Page 36: Power Converter Module
HP ProLiant DL360 Generation 4 Server Maintenance and Service Guide a. Remove the riser board with the slot for full-length expansion boards. b. Repeat the previous step for the riser board with the slot for half-length expansion boards, if needed. - Page 37 Removal and Replacement Procedures 5. Disconnect all internal power cables. 6. Remove the fan module ("Processor Fan Assembly" on page 29). 7. Slide the power converter module toward the back of the server, then lift the power converter module from the server. NOTE: Cables are removed for clarity.
-
Page 38: Battery-Backed Write Cache Enabler
HP ProLiant DL360 Generation 4 Server Maintenance and Service Guide Battery-Backed Write Cache Enabler The Battery-Backed Write Cache Enabler, also called the battery pack, works with the cache module to provide transportable data protection, increase overall controller performance, and maintain any cached data for up to 72 hours. The NiMH batteries in the battery pack are continuously recharged through a trickle- charging process whenever the system power is on. - Page 39 Removal and Replacement Procedures 4. Disconnect the battery module cable from the BBWCE and from the Smart Array 6i memory connector on the system board. 5. Remove the battery module cable from the cable clip on the system board. 6. Remove the Smart Array 6i memory module. 7.
-
Page 40: Memory Options
HP ProLiant DL360 Generation 4 Server Maintenance and Service Guide Memory Options You can expand server memory by installing PC2700 DDR SDRAM DIMMs. The system supports up to four ECC Registered DDR SDRAM DIMMs. NOTE: The Advanced Memory Protection option in RBSU provides additional memory protection beyond Advanced ECC. - Page 41 CAUTION: Be sure to install DIMMs in the proper configuration. Refer to the Documentation CD. CAUTION: Use only Compaq branded or HP DIMMs. DIMMs from other sources may adversely affect data integrity. IMPORTANT: DIMMs do not seat fully if turned the wrong way.
-
Page 42: Processor
HP ProLiant DL360 Generation 4 Server Maintenance and Service Guide Processor CAUTION: To prevent thermal instability and damage to the server, do not separate the processor from the heatsink. The processor, heatsink, and retaining clip make up a single assembly. - Page 43 Removal and Replacement Procedures 5. Release the processor retaining clips and processor locking lever. 6. Lift the heatsink and processor from the server. To install the processor in the server: 1. Remove the protective cover from the processor. 2. Align the holes in the heatsink with the guiding pegs on the processor cage.
- Page 44 HP ProLiant DL360 Generation 4 Server Maintenance and Service Guide CAUTION: To prevent possible server malfunction or damage to the equipment, be sure to align the processor pins with the corresponding holes in the socket. 3. Install the processor and close the processor locking lever and processor retaining clips.
-
Page 45: Battery
Removal and Replacement Procedures Battery If the server no longer automatically displays the correct date and time, you may need to replace the battery that provides power to the real-time clock. Under normal use, battery life is 5 to 10 years. WARNING: The computer contains an internal lithium manganese dioxide, a vanadium pentoxide, or an alkaline battery pack. -
Page 46: System Board
HP ProLiant DL360 Generation 4 Server Maintenance and Service Guide 5. Remove the battery. IMPORTANT: Replacing the system board battery resets the system ROM to its default configuration. After replacing the battery, reconfigure the system through RBSU. To replace the component, reverse the removal procedure. -
Page 47: Re-Entering The Server Serial Number And Product Id
Removal and Replacement Procedures 6. Remove the BBWCE ("Battery-Backed Write Cache Enabler" on page 38). 7. Remove any DIMMs ("DIMM" on page 40). 8. Remove the processors ("Processor" on page 42). 9. Disconnect all cables connected to the system board. For additional information, refer to "Server Cabling"... - Page 48 HP ProLiant DL360 Generation 4 Server Maintenance and Service Guide 4. Press the Enter key to clear the warning. 5. Enter the serial number. 6. Select Product ID. The following warning is displayed. Warning: The Product ID should ONLY be modified by qualified service personnel.
-
Page 49: Server Cabling
Cabling Overview This section provides guidelines that help you make informed decisions about cabling the server and hardware options to optimize performance. For information on cabling peripheral components, refer to the white paper on high-density deployment at the HP website (http://www.hp.com/products/servers/platforms). -
Page 50: Server Cable Routing
HP ProLiant DL360 Generation 4 Server Maintenance and Service Guide Server Cable Routing CAUTION: When routing cables, always be sure that the cables are not in a position where they can be pinched or crimped. -
Page 51: Sata Cable Routing
Server Cabling SATA Cable Routing CAUTION: When routing cables, always be sure that the cables are not in a position where they can be pinched or crimped. -
Page 53: Diagnostic Tools
Diagnostic Tools In This Section SmartStart Software........................53 SmartStart Scripting Toolkit......................54 HP Instant Support Enterprise Edition ..................55 Option ROM Configuration for Arrays ..................55 HP ROM-Based Setup Utility ......................56 ROMPaq Utility..........................56 System Online ROM Flash Component Utility................56 Integrated Management Log......................57 Integrated Lights-Out Technology ....................58... -
Page 54: Smartstart Scripting Toolkit
Enabling access to the Array Configuration Utility, Array Diagnostics Utility, and Erase Utility SmartStart is included in the HP ProLiant Essentials Foundation Pack. For more information about SmartStart software, refer to the HP ProLiant Essentials Foundation Pack or the HP website (http://www.hp.com/servers/smartstart). -
Page 55: Hp Instant Support Enterprise Edition
(http://www.hp.com/hps/hardware/hw_enterprise.html). To download HP ISEE, visit the HP website (http://www.hp.com/hps/hardware/hw_downloads.html). For installation information, refer to the HP ISEE Client Installation and Upgrade Guide (ftp://ftp.hp.com/pub/services/hardware/info/isee_client.pdf). Option ROM Configuration for Arrays Before installing an operating system, you can use the ORCA utility to create the first logical drive, assign RAID levels, and establish online spare configurations. -
Page 56: Hp Rom-Based Setup Utility
• Configuring memory options • Language selection For more information on RBSU, refer to the HP ROM-Based Setup Utility User Guide on the Documentation CD or the HP website (http://www.hp.com/servers/smartstart). ROMPaq Utility Flash ROM enables you to upgrade the firmware (BIOS) with system or option ROMPaq utilities. -
Page 57: Integrated Management Log
Automatically checks for hardware, firmware, and operating system dependencies, and installs only the correct ROM upgrades required by each target server To download the tool and for more information, refer to the HP website (http://h18000.www1.hp.com/support/files/index.html). Integrated Management Log The IML records hundreds of events and stores them in an easy-to-view form. -
Page 58: Integrated Lights-Out Technology
ASR increases server availability by restarting the server within a specified time after a system hang or shutdown. At the same time, the HP SIM console notifies you by sending a message to a designated pager number that ASR has restarted... -
Page 59: Hp Systems Insight Manager
HP SIM provides device management capabilities that consolidate and integrate management data from HP and third-party devices. IMPORTANT: You must install and use HP SIM to benefit from the Pre- Failure Warranty for processors, hard drives, and memory modules. -
Page 60: Internal Usb Functionality
• • Operating environments which do not provide native USB support For more information on ProLiant USB support, refer to the HP website (http://h18004.www1.hp.com/products/servers/platforms/usb-support.html). Internal USB Functionality An internal USB connector is available for use with USB drive keys only. The... -
Page 61: Server Component Identification
Server Component Identification In This Section Front Panel Components ......................62 Front Panel LEDs and Buttons .....................63 Rear Panel Components........................64 Rear Panel LEDs and Buttons ......................65 System Board Components ......................67 System Maintenance Switch......................68 NMI Switch ..........................68 System Board LEDs ........................69 System LEDs and Internal Health LED Combinations ..............70 Internal USB Connector .......................72... -
Page 62: Front Panel Components
HP ProLiant DL360 Generation 4 Server Maintenance and Service Guide Front Panel Components Item Description Diskette drive bay Optical device bay Front USB port Hard drive bay 0 Hard drive bay 1... -
Page 63: Front Panel Leds And Buttons
Server Component Identification Front Panel LEDs and Buttons Item Description Status Power On/Standby button Green = System is on. and system power LED Amber = System is shut down, but power is still applied. Off = Power cord is not attached, power supply failure has occurred, no power supplies are installed, facility power is not available, or the DC-to-DC converter is not installed. -
Page 64: Rear Panel Components
HP ProLiant DL360 Generation 4 Server Maintenance and Service Guide Item Description Status NIC 1 link/activity LED Green = Network link exists. Flashing green = Network link and activity exist. Off = No link to network exists. If power is off, view the LEDs on the RJ-45 connector for status by referring to the rear panel LEDs ("Rear Panel LEDs and... -
Page 65: Rear Panel Leds And Buttons
Server Component Identification Item Description PCI-X expansion slot 2, 64-bit/133-MHz 3.3V (optional PCI Express slot 2, x8) Power supply bay 2 Power supply bay 1 (populated) Rear USB connector 10/100/1000 NIC 2 10/100/1000 NIC 1 iLO management port Mouse connector Keyboard connector Video connector Serial connector... - Page 66 HP ProLiant DL360 Generation 4 Server Maintenance and Service Guide Item Description Status iLO activity Green = Activity exists. Flashing green = Activity exists. Off = No activity exists. iLO link Green = Link exists. Off = No link exists.
-
Page 67: System Board Components
Server Component Identification System Board Components Item Description Item Description DIMM slots (1-4) Power supply connector NMI switch Power supply signal connector System maintenance Smart Array 6i memory switch (SW2) module connector* Processor 1 socket Remote management connector Processor 2 socket SATA connectors (SATA model only) Processor zone fan... -
Page 68: System Maintenance Switch
HP ProLiant DL360 Generation 4 Server Maintenance and Service Guide System Maintenance Switch Position Default Function Off = iLO security is enabled. On = iLO security is disabled. Off = System configuration can be changed. On = System configuration is locked. -
Page 69: System Board Leds
Server Component Identification System Board LEDs Item LED Description Status DIMM 4B failure Amber = DIMM has failed. Off = DIMM is operating normally. DIMM 3B failure Amber = DIMM has failed. Off = DIMM is operating normally DIMM 2A failure Amber = DIMM has failed. -
Page 70: System Leds And Internal Health Led Combinations
HP ProLiant DL360 Generation 4 Server Maintenance and Service Guide Item LED Description Status PPM 2 failure Amber = PPM has failed. Off = PPM is operating normally. Processor 2 failure Amber = Processor has failed. Off = Processor is operating normally. - Page 71 Server Component Identification The front panel health LEDs indicate only the current hardware status. In some situations, HP SIM may report server status differently than the health LEDs because the software tracks more system attributes. System LED and Internal Health...
-
Page 72: Internal Usb Connector
HP ProLiant DL360 Generation 4 Server Maintenance and Service Guide System LED and Internal Health Status Color LED Color Power converter The power converter module is not seated. module interlock (Amber) Fan module (Amber) Amber A redundant fan has failed. -
Page 73: Scsi Ids And Sata Device Numbers
Server Component Identification SCSI IDs and SATA Device Numbers Hot-Plug SCSI Hard Drive LEDs... -
Page 74: Hot-Plug Scsi Hard Drive Led Combinations
HP ProLiant DL360 Generation 4 Server Maintenance and Service Guide Item LED Description Status Activity status On = Drive activity Flashing = High activity on the drive or drive is being configured as part of an array. Off = No drive activity... -
Page 75: Optional Battery-Backed Write Cache Enabler Leds
Either (1) the drive is part of an array being selected by an array configuration utility; (2) Drive Identification has been selected in HP SIM; or (3) drive firmware is being updated. The drive has failed and has been placed offline. -
Page 76: Battery-Backed Write Cache Enabler Led Statuses
HP ProLiant DL360 Generation 4 Server Maintenance and Service Guide For LED status information, refer to "Battery-Backed Write Cache Enabler LED Statuses (on page 76)." Battery-Backed Write Cache Enabler LED Statuses Server Status LED Status Battery Module Status Server is on and has normal run... -
Page 77: Fan Module Locations
Server Component Identification Fan Module Locations Item Description Power supply zone fan module Processor zone fan module Processor Zone Fan Module LED... - Page 78 HP ProLiant DL360 Generation 4 Server Maintenance and Service Guide Status Amber = One fan in this module has failed. Red = Multiple fans in this module have failed. Off = All fans in this module are operating normally. For power supply zone fan module LED information, refer to System Board...
-
Page 79: Specifications
Specifications In This Section Server Specifications ........................79 Environmental Specifications.......................80 Hot-Plug Power Supply Calculations ...................80 DDR SDRAM DIMM Specifications...................80 1.44-MB Diskette Drive Specifications..................81 CD-ROM Drive Specifications ....................82 Ultra320 SCSI Hard Drive Specifications..................83 Serial ATA Hard Drive Specifications ..................83 Server Specifications Dimension Specification Height 4.32 cm (1.70 in) -
Page 80: Environmental Specifications
(113°F). Altitude maximum for storage corresponds to a pressure minimum of 70 KPa. Hot-Plug Power Supply Calculations For hot-plug power supply specifications and calculators to determine electrical and heat loading for the server, refer to the HP Enterprise Configurator website (http://h30099.www3.hp.com/configurator/). DDR SDRAM DIMM Specifications NOTE: Use only 256-, 512-MB, 1-GB, or 2-GB;... -
Page 81: 1.44-Mb Diskette Drive Specifications
Specifications 1.44-MB Diskette Drive Specifications Item Description Dimensions Height 12.7 mm (0.5 in) Width 96 mm (3.8 in) Depth 130 mm (5.1 in) LEDs (front panel) Green = On Read/write capacity per diskette High density 1.44 MB Low density 720 KB Drives supported Drive height One-third height... -
Page 82: Cd-Rom Drive Specifications
HP ProLiant DL360 Generation 4 Server Maintenance and Service Guide CD-ROM Drive Specifications Item Description Applicable disk CD-ROM (modes 1 and 2); mixed mode (audio and data combined); CD-DA; Photo CD (single/multiple-session), CD-XA ready; CDi ready Capacity 550 MB (mode 1, 12 cm) -
Page 83: Ultra320 Scsi Hard Drive Specifications
Specifications Item Description Wave length 700 ± 25 nm Divergence angle 53.5° ± 1.5° Output power 0.14 mW Operating conditions Temperature 5°C to 45°C (41°F to 118°F) Humidity 5% to 90% Ultra320 SCSI Hard Drive Specifications Item 36.4-GB Ultra320 72.8-GB Ultra320 72.8-GB Ultra320 146.8-GB Ultra320 SCSI Drive... - Page 84 HP ProLiant DL360 Generation 4 Server Maintenance and Service Guide Item 80-GB SATA Drive 160-GB SATA Drive 250-GB SATA Drive Height 1.028 in 1.028 in 1.028 in Width 4.0 in 4.0 in 4.0 in Interface Serial ATA Serial ATA Serial ATA Transfer rate 1.5 GB/s...
-
Page 85: Acronyms And Abbreviations
Acronyms and Abbreviations ABEND abnormal end Array Configuration Utility Automatic Server Recovery BBWC battery-backed write cache double data rate driver update Extended Feature Supplement International Electrotechnical Commission... - Page 86 HP ProLiant DL360 Generation 4 Server Maintenance and Service Guide Integrated Lights-Out Integrated Management Log initial program load interrupt request multi-processor specification NEMA National Electrical Manufacturers Association NFPA National Fire Protection Association network interface controller NVRAM non-volatile memory ORCA Option ROM Configuration for Arrays...
- Page 87 Acronyms and Abbreviations PCI Express peripheral component interconnect express PCI-X peripheral component interconnect extended power distribution unit POST Power-On Self-Test Processor Power Module ProLiant Support Pack preboot eXecution environment RBSU ROM-Based Setup Utility RILOE II Remote Insight Lights-Out Edition II SATA serial advanced technology attachment...
- Page 88 HP ProLiant DL360 Generation 4 Server Maintenance and Service Guide SCSI small computer system interface SDRAM synchronous dynamic RAM Systems Insight Manager SIMM single inline memory module system power module support software diskette TMRA recommended ambient operating temperature unit identification...
- Page 89 Acronyms and Abbreviations VHDCI very high density cable interconnect Wake-on LAN...
-
Page 91: Index
LEDs 63, 73 CD-ROM drive blank 24 HP Insight Diagnostics 59 component identification 62, 63, 64, 65, 67, 68, HP ProLiant Essentials Foundation Pack 59 HP Systems Insight Manager, overview 59 components 61 connectors 61 crash dump analysis 68... - Page 92 HP ProLiant DL360 Generation 4 Server Maintenance and Service Guide Power On/Standby button 16, 62, 63 power requirements 80 keyboard connector 64 power supplies 64, 65, 80 power supply LEDs 65 power supply output 80 power supply signal connector 67...
- Page 93 Index specifications 79 specifications, server 79, 80, 81, 82, 83 static electricity 14 support packs 53 switches 67 system board 46 system board battery 45 system board components 67 system board LEDs 69, 70 system maintenance switch 68 system power connector 67 system power LED 63 Systems Insight Manager 59 telco racks 15...