Table of Contents
Advertisement
Advertisement
Table of Contents
Troubleshooting

Related Manuals for Electrolux ESE6107


Summary of Contents for Electrolux ESE6107
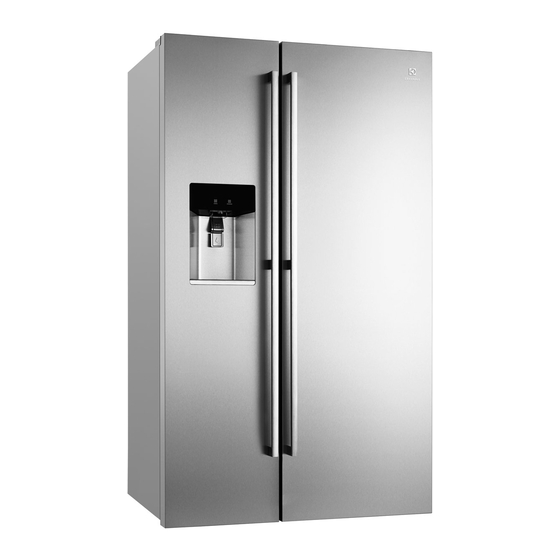
- Page 1 User manual Side by side refrigerators ESE6107 ESE6977 ESE7007 ESE6077...
-
Page 2: Table Of Contents
16 using your refrigerator – general these meanings: 17 Food compartment features 19 ice & Water features Warning! 20 Electronic display panel - ESE6107, ESE7007 This symbol indicates information concerning your 22 Electronic display panel - ESE6077, ESE6977 personal safety 25 ice and water dispenser... -
Page 3: Important Safety Instructions
BEfoRE uSING YouR aPPLIaNCE ImPoRTaNT SafETY INSTRuCTIoNS Before you use the refrigerator, we recommend that you Warning! read through the relevant sections of this manual, which • This appliance is not intended for use by persons provides the description of your appliance and (including children) with reduced physical, sensory its functions. -
Page 4: General Warnings
GENERaL WaRNINGS Read the following carefully to avoid damage or injury For ice & water models only This symbol indicates never to do this Check for water leaks at all water connection points in This symbol indicates always do this the first two or three hours after installation. -
Page 5: Ese6107
ESE6107 WITh STaNDaRD fEaTuRES freezer lighting fridge lighting Twist ice & serve drawer adjustable door bin Slide out glass shelves Sensor & deodoriser freezer temperature sensor Deli compartment Bottle caddy Crisper bins freezer baskets with clear fascia Bottle twist holder... -
Page 6: Ese6977
ESE6977 WITh ICE aND WaTER fEaTuRES Ice maker unit adjustable door bins freezer lighting fridge lighting Removable ice bin freezer temperature sensor Slide out glass shelves Sensor & deodoriser Bottle caddy Deli compartment Telescopic freezer bin Telescopic crisper bin adjustable door bins Bottle twist holder Dairy compartment Bottle bins... -
Page 7: Ese7007
ESE7007 WITh STaNDaRD fEaTuRES freezer lighting fridge lighting Twist ice & serve drawer adjustable door bins Slide out glass shelves Sensor & deodoriser freezer temperature sensor Deli compartment Bottle caddy Telescopic Crisper bins Telescopic freezer bins Bottle twist holder adjustable door bins Bottle bins Electronic temperature controls humidity controls... -
Page 8: Ese6077
ESE6077 WITh ICE aND WaTER fEaTuRES Ice maker unit adjustable door bins freezer lighting Sensor & deodoriser Removable ice bin Deli compartment Slide out glass shelves Crisper bins Bottle caddy Bottle twist holder freezer basket with clear fascia Bottle bins adjustable door bins humidity controls Locker compartment... - Page 9 INSTaLLaTIoN When correctly installed, your refrigerator should: The refrigerator should arrive with the front rollers wound down. We recommend that the appliance be tilted • have adequate clearance to the back, sides and backwards by about 10 to 15 millimetres, this will allow top for air circulation the doors to self close providing a consistent door seal.
-
Page 10: Internal Packaging
INSTaLLaTIoN 3. If the cabinet is level, then the side walls should be plumb or vertical. If the cabinet is built in or partly built in check the alignment of the cabinet side against the cupboard. aligned to cupboard – even gap Spanner Top of refrigerator... -
Page 11: Ice And Water Installation
Replacement water filters are available from Electrolux home Products Spare Parts Centres and can be posted to you for your convenience (refer to back page 1 x 1/2" tap fitting for contact details). - Page 12 ICE & WaTER INSTaLLaTIoN Step 4. CauTion! Install brackets for filter close to tap. Plan to leave as much never install the water filter in an area of direct tubing as possible behind the refrigerator to enable it to sunlight. be moved easily for cleaning or service.
- Page 13 ICE & WaTER INSTaLLaTIoN Step 8. Step 12. Push shorter tube into tap fitting past insertion mark. Turn on water and check all joints and tubes for leaks. Step 9. Push other end into filter INLET. water flow direction Step 13. Reconnect the power.
- Page 14 ICE & WaTER INSTaLLaTIoN Step 15. Tips and useful information using a large container run the water dispenser to clear Ensure that taps are turned off when replacing and air from lines. This may take a few minutes. Purge and fitting filters.
-
Page 15: Initial Start Up
ICE & WaTER INSTaLLaTIoN INITIaL STaRT-uP refrigerator/freezer operation CauTion! a light frosting will occasionally occur on the interior of the Connect to potable water supply only. Do not freezer when the door is opened frequently. This is normal put fingers into ice crusher. Surfaces there may and will disappear after a few days in most climates. -
Page 16: Using Your Refrigerator - General
uSING YouR REfRIGERaToR – GENERaL Temperature Sensors EnVironmEnT! avoid loading food against your freezer temperature Eco and holiday modes minimise defrosting to save energy, sensor. Doing so may adversely affect freezer while maintaining your temperature settings. temperatures. If warm food is inadvertently loaded against the sensor, it may also set off the freezer temperature alarm for up to 50 minutes after the food is loaded against other electronic features... -
Page 17: Food Compartment Features
fooD ComPaRTmENT fEaTuRES Door storage bins • horizontal – when the bottle twist holder ring is horizontal, any item that fits within the ring can simply Both the refrigerator and freezer have door storage bins. be placed inside it. You can adjust the door bins to meet different storage needs. - Page 18 fooD ComPaRTmENT fEaTuRES open the bin to access the finger tabs at the ends of Bottle caddy the telescopic slides, on each side of the bin. using your thumb and forefinger, lift the bin over the end of the slide and clip in place.
-
Page 19: Ice & Water Features
ICE & WaTER fEaTuRES (WhERE fITTED) Twist ice & Serve Bottle filling function To use, remove the tray, fill with water and place back in The bottle filling function facilitates the flow of water the freezer. once ice has formed (approximately 3 hours) directly into the mouth of a bottle, minimising splashing simply twist the knob at the front clockwise until the ice and spillage. -
Page 20: Electronic Display Panel
ELECTRoNIC DISPLaY PaNEL ESE6107 and ESE7007 models Fast freeze function The electronic display panel consists of an LCD display use the fast freeze function when you add a large amount with backlighting and 6 buttons. When the power is first of food to the freezer compartment. - Page 21 ELECTRoNIC DISPLaY PaNEL Drinks chill timer manually: Touching the ‘eco/vacation’ button once will activate eco mode. If eco mode is entered manually The drinks chill timer is used to quickly chill a bottle. opening the door will not cause the appliance to revert Place the bottle in the freezer and the timer can be set back to normal mode.
- Page 22 ELECTRoNIC DISPLaY PaNEL ESE6077 and ESE6977 models • Eco mode When the power is first turned on the default settings are Eco mode is a more efficient mode than normal mode -18°C, 3°C with the ‘cubed ice’ icon on and ‘icemaker and will activate automatically or can also be manually off’.
- Page 23 ELECTRoNIC DISPLaY PaNEL icemaker off Door alarm The automatic ice maker can be turned on and off by If the freezer or fridge door is left open for longer than 2 pressing and holding the ‘ice off’ icon for 5 seconds. minutes a buzzer will sound and an icon will flash.
- Page 24 ELECTRoNIC DISPLaY PaNEL use the ‘fridge temp.’ button to change the ice cube size from medium, large, extra large, small with each button press. The display will return to medium with the next button touch. To confirm or oK the setting press ‘lock’ button, then display returns to normal temperature display.
-
Page 25: How The Water Dispenser Works
hoW ThE WaTER DISPENSER WoRKS hoW ThE ICE DISPENSER WoRKS The water dispenser water tank is located behind the The ice maker is located in the top section of the freezer upper crisper bin in the refrigerator compartment. compartment. after installation, switch the ice maker on at the controls on the door to begin making ice. -
Page 26: Cleaning The Ice Dispenser
CLEaNING ThE ICE DISPENSER Clean the dispenser and ice container at regular intervals, CauTion! particularly before you take a holiday or move, also clean When removing or replacing the ice bin do not rotate the dispenser if it sticks. the stirrer in the ice bin. if the stirrer is accidentally To clean the dispenser: turned, you may need to realign the stirrer until the 1. -
Page 27: Changing The Water Filter
ChaNGING ThE WaTER fILTER If you purchased a refrigerator with a water filter (ice Tube supplied with Collet (blue ring). filter installation kit. and water models), please read the following care and There is a collet at Cut to fit as per your both ends. -
Page 28: Cleaning Your Refrigerator
CLEaNING YouR REfRIGERaToR Cleaning the interior Warning! You should clean the refrigerator interior regularly. It will BEForE CLEaning: Turn the refrigerator off at the be easiest to clean when the food supply is low. Wash power point and unplug the cord to prevent any the interior with a soft cloth and use an unscented mild chance of electrocution. -
Page 29: Helpful Hints
hELPfuL hINTS foR SToRING fooD • If you keep the freezer compartment filled to capacity, never do this your food mass will help maintain the freezer Never use electric heaters, dryers or other mechanical temperature when you open the door devices to defrost the freezer because you can • Do not block air vents. -
Page 30: Troubleshooting
TRouBLEShooTING If you think something may be wrong with your refrigerator, you can carry out some easy checks before calling for service. You may locate the problem, sparing yourself any inconvenience and saving time and money. problem solution When your • Check that the power cord is plugged into the power outlet properly and that the outlet appliance is is switched ‘oN’... - Page 31 TRouBLEShooTING problem solution If the temperature • Check that the appliance has enough clearance at the sides, back and top in the refrigerator (refer to the installation instructions at the front of this booklet) is too warm • Refer to ‘Controlling the temperature’ • You may have kept the door open too long or too frequently • food containers or packaging may be holding a door open If the temperature...
-
Page 32: Ice And Water Troubleshooting
ICE + WaTER TRouBLEShooTING problem possible causes Solution automatic ice-maker The ice maker is not • Ice maker is in the off position • See Ice maker section in user manual: turn making any ice switch to oN position • Water tap is turned off • Turn on the water tap • The freezer is not cold enough • See the Problem section: ‘If the temperature... - Page 33 NoTES...
- Page 34 NoTES...
-
Page 35: Warranty
Electrolux authorised representative, the Appliance is transported at the warranties for Electrolux Appliances. It is an important document. owner’s cost and risk while in transit to and from Electrolux or its ASC. Please keep it with your proof of purchase documents in a safe place 6. - Page 36 Do you remember the last time you opened a gift that made you say “oh! how did you know? That’s exactly what I wanted!” That’s the kind of feeling that the designers at Electrolux seek to evoke in everyone who chooses or uses one of our products. We devote time, knowledge, and a great deal of thought to anticipating and creating the kind of appliances that our customers really need and want.