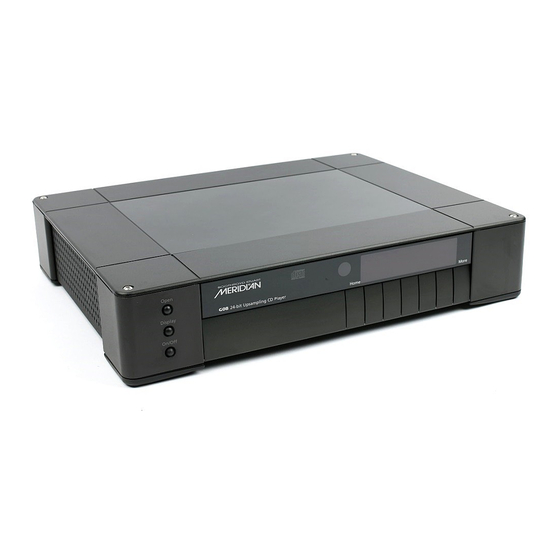
Meridian G Series User Manual
Power amplifier
Hide thumbs
Also See for G Series:
- Installation manual (67 pages) ,
- User manual (46 pages) ,
- Installation manual (24 pages)
Table of Contents
Advertisement
Quick Links
Advertisement
Table of Contents

Related Manuals for Meridian G Series


Summary of Contents for Meridian G Series
- Page 1 G Series Power Amplifier User Guide...
-
Page 2: Important Safety Instructions
On a soft surface, such as a carpet, which would APPARATUS TO RAIN OR MOISTURE. obstruct the ventilation holes in the base. The sides, base, and top of the G Series Power This apparatus has been designed with Class 1 Amplifier case contain venting holes for the internal construction and must be connected to a mains socket heatsinks which should not be obstructed. -
Page 3: Table Of Contents
Contents Contents Introduction General features Specifications Installing the power amplifier Unpacking Inputs Outputs Troubleshooting Maintenance Service and guarantee Index... -
Page 4: Product Registration
Sales and service in the USA http://www.interface.co.uk Meridian America Inc. Product Registration 110 Greene Street, Suite #407 New York Register your Meridian power amplifier product at: NY 10012 www.meridian-audio.com/support Tel (646) 66 0140 and receive Exclusive Meridian News and discover Fax (646) 66 0152 more about the Meridian Collection. -
Page 5: Introduction
300W into 8Ω 200W into 8Ω, 330W into 4Ω 620W into 8Ω The G Series power amplifiers provide unbalanced and balanced inputs and are bridgeable. This guide provides full information about unpacking the power amplifier, and connecting it to the other equipment in the system. -
Page 6: General Features
Introduction General features Each of the G Series power amplifiers is based on easy reference and capable of handling large-diameter modules that feature a symmetrical design with high-quality loudspeaker cables. The output terminals fully electronically-balanced inputs. Both balanced are connected to the amplifiers by Van Den Hul silver- and unbalanced inputs are provided, but in fact the strand cable to avoid signal losses. -
Page 7: Specifications
2 high-quality smoothing capacitors per side (40,000µF used in total). Characteristics • Distortion less than 0.01%. • Signal/noise better than -100dB. Control signals • Trigger input: 5-30VDC. • Fan control output for connection to a Meridian rack mount kit. - Page 8 Introduction...
-
Page 9: Installing The Power Amplifier
Installing the power amplifier Installing the power amplifier This chapter explains how to install the power amplifier. It describes what you should find when you unpack the product, and how you should connect it to the other equipment in the system. You should not make any connections to the product or to any other component in the system while the AC power supply is connected and switched on. -
Page 10: Unpacking
Installing the Unpacking power amplifier Trigger input The power amplifier is supplied with the following accessories: The TRIGGER INPUT can be used to bring the power • Power cord. amplifier out of standby by applying a signal from a • Bridge-mode links (G55: 2, G57: 1). -
Page 11: Inputs
A mono 3.5mm jack plug input (centre pin hot) that can be supplied with 5-30V AC or DC to bring the power amplifier out of standby. Can be connected to the trigger output on a G Series control unit or digital surround controller. - Page 12 Installing the power amplifier To connect the G55 to an unbalanced preamplifier (eg Meridian Prime Headphone Amplifier) G55 5-Channel Power Amplifier Meridian Prime Headphone Amplifier ANALOGUE Phono leads • Switch the BRIDGE MODE selectors to the OFF position. • Connect the UNBALANCED sockets on the power amplifier to the outputs from the preamplifier.
- Page 13 Installing the power amplifier To connect the G55 to a balanced preamplifier (eg Meridian 818 Reference Audio Core) G55 5-Channel Power Amplifier 818 Reference Audio Core BALANCED AUDIO OUT XLR leads • Switch the two BRIDGE MODE selectors to the OFF position.
- Page 14 Installing the power amplifier To connect the G55 to a G65 Digital Surround Controller G55 5-Channel Power Amplifier G65 Digital Surround Controller ANALOGUE ANALOGUE OUTPUTS OUTPUTS XLR leads • Switch the two BRIDGE MODE selectors to the OFF position. • Connect the LEFT, RIGHT, and CENTRE balanced outputs from the G65 to the channel 1, 2, and 3 BALANCED inputs on the G55.
- Page 15 A mono 3.5mm jack plug input (centre pin hot) that can be supplied with 5-30V AC or DC to bring the INPUT power amplifier out of standby. Can be connected to the trigger output on a G Series control unit or digital surround controller.
- Page 16 Installing the power amplifier To connect to an unbalanced preamplifier (eg Meridian Prime Headphone Amplifier) G57 2-Channel Power Amplifier Meridian Prime Headphone Amplifier ANALOGUE ANALOGUE Phono leads • Switch the BRIDGE MODE selector to the OFF position. • Connect the UNBALANCED sockets on the power amplifier to the outputs from the preamplifier.
- Page 17 Installing the power amplifier To connect to a balanced preamplifier (eg Meridian 818 Reference Audio Core) G57 2-Channel Power Amplifier 818 Reference Audio Core BALANCED AUDIO OUT XLR leads • Switch the BRIDGE MODE selector to the OFF position. •...
- Page 18 Installing the power amplifier To connect to each channel of a G65 Digital Surround Controller G57 2-Channel Power Amplifier G65 Digital Surround Controller ANALOGUE ANALOGUE OUTPUTS OUTPUTS XLR leads 2 x G57 2-Channel Power Amplifiers Three G57 Two-channel Power Amplifiers can be used in bridge mode for each of the front channels of a G65 Digital Surround Controller, which are provided as balanced outputs.
-
Page 19: Outputs
CHANNEL 1 to CHANNEL Loudspeakers of 2Ω to 15Ω, using either plug or bare wire connections. FAN OUTPUT A Meridian rack mount kit. This is a proprietary Meridian connection. The recommended assignment of channels, to make independently to the power amplifier, for optimum best use of the capacity of each power supply, is as sound quality. - Page 20 Installing the power amplifier To connect to passive loudspeakers Loudspeaker Loudspeaker G55 5-Channel Power Amplifier • Set the BRIDGE MODE selectors to the OFF amplifier to the red and black terminals on the position. corresponding loudspeaker. • Connect one of each pair of the red and black terminals from the appropriate channel of the power To bi-wire to passive loudspeakers G55 5-Channel Power Amplifier...
- Page 21 Installing the power amplifier To wire to passive loudspeakers in bridge mode G55 5-Channel Power Amplifier Loudspeaker Loudspeaker Input Input You can wire channels 1/2 and 4/5 in bridge output mode, to obtain more than twice the power output. • Switch the BRIDGE MODE selectors to the ON position.
- Page 22 Installing the power amplifier To bi-amp to two passive loudspeakers G55 5-Channel Power Amplifier Loudspeaker Loudspeaker Input Input Extremely high sound quality can be achieved using two separate channels of the power amplifier to drive the LF and HF units in each loudspeaker. •...
- Page 23 Installing the power amplifier To connect two G55s to a seven-channel surround system G55 5-Channel Power Amplifier G55 5-Channel Power Amplifier Main right input Side right input Main left input Rear right input Rear left input Side left input Centre input Main right Side right Main left...
- Page 24 Loudspeakers of 2Ω to 16Ω, using either plug or bare wire connections. FAN OUTPUT A Meridian rack mount kit. This is a proprietary Meridian connection. Each channel of the G57 Two-channel Power Amplifier provides twin outputs for bi-wiring. This allows separate...
- Page 25 Installing the power amplifier To connect to passive loudspeakers G57 2-Channel Power Amplifier Loudspeaker Loudspeaker • Set the BRIDGE MODE selector to the OFF position. G56/G57 to the red and black terminals on the loudspeakers. • Connect one of each pair of the red and black terminals from the appropriate channel of the To bi-wire to passive loudspeakers G55 2-Channel Power Amplifier...
- Page 26 Installing the power amplifier To wire to a passive loudspeaker in bridge mode G57 2-Channel Power Amplifier Loudspeaker Input You can use the G57 as a mono power amplifier, to obtain more than twice the power output, by wiring it in bridge mode.
- Page 27 Installing the power amplifier To bi-amp to two passive loudspeakers G57 2-Channel Power Amplifier Loudspeaker G57 2-Channel Power Amplifier Loudspeaker Extremely high sound quality can be achieved using two • Connect the red and black terminals from the LF and separate G57 Two-channel Power Amplifiers, one to HF units on one loudspeaker to the red and black drive each loudspeaker.
- Page 28 Installing the power amplifier...
-
Page 29: Troubleshooting
We expect you to achieve superb results with the power amplifier. If, however, you encounter any problems, either when installing it, or during operation, please check the following pages for suggested solutions. If these suggestions fail to cure the problem, please contact your Meridian dealer for further assistance. - Page 30 The amplifier can then be taken out of standby using the front-panel button or the TRIGGER INPUT. The G Series power amplifiers also include a power circuit breaker to protect the loudspeakers. This is triggered by excessive DC on the input, extreme thermal overload, or if the mains supply is interrupted.
-
Page 31: Maintenance
To clean the case • Disconnect the power cord before cleaning the unit. The exterior surfaces of Meridian G Series products are made from solid anodised aluminium, powder coated steel, thermoplastic rubber, and glass. They are designed to be easily wiped clean with a dry, lint free cloth. -
Page 32: Service And Guarantee
Troubleshooting Service and guarantee Service Guarantee The Meridian G Series of hi-fi components has been The product is guaranteed against defects in material carefully designed to give years of untroubled service. and workmanship for two years from the date of There are no user-serviceable parts inside the case, nor purchase. -
Page 33: Index
15, 20 G57 21–23 to 8 G55 Five-channel Power Amplifier 1 mains fuse, changing 27 bi-amping 18 Meridian 818 Reference Audio Core, bi-wiring 16 connecting to bridge mode 17 G55 9 connecting to speakers 16 G57 13... - Page 34 Index...
- Page 35 Index...
- Page 36 Index...