
Related Manuals for Beko D4 9101 E


Summary of Contents for Beko D4 9101 E
-
Page 1: Washing Machine
D4 9101 E Washing Machine User’s Manual Document Number 2820523452_EN/ 230313.0923... - Page 2 Please read this user manual first! Dear Customer, Thank you for prefering an Beko product. We hope that you get the best results from your product which has been manufactured with high quality and state-of-the-art technology. Therefore, please read this entire user manual and all other accompanying documents carefully before using the product and keep it as a reference for future use.
-
Page 3: Table Of Contents
TABLE OF CONTENTS 1 Important instructions for safety and 5.9 Spin speed selection....22 environment 5.10 Programme and consumption table..23 5.11 Auxiliary function selection . -
Page 4: Important Instructions For Safety And Environment
Important instructions for safety and environment This section contains safety instructions that will • Unplug the product when not in use. help protect from risk of personal injury or property • Never wash the product by spreading or pouring damage. Failure to follow these instructions shall water onto it! There is the risk of electric shock! void any warranty. -
Page 5: Children's Safety
Important instructions for safety and environment 1.3 Children's safety 1.6 Compliance with WEEE Directive • Packaging materials are dangerous to children. This appliance’s packaging material is Keep packaging materials in a safe place away recyclable. Help recycle it and protect from reach of the children. the environment by dropping it off in • Electrical products are dangerous for the the municipal receptacles provided for... -
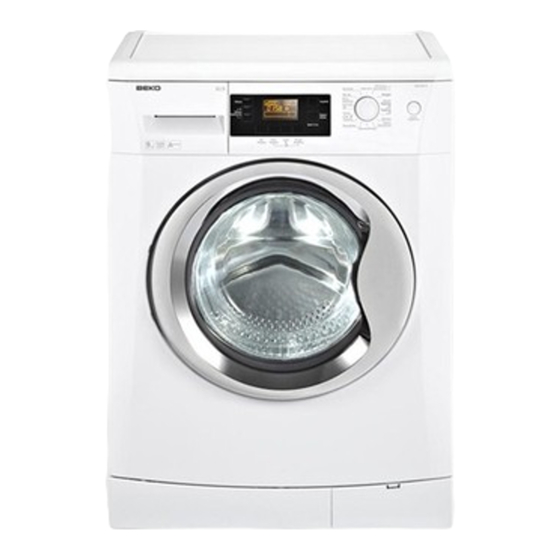
Page 6: Your Washing Machine
Your washing machine 2.1 Overview 1- Power cable 5- Adjustable feet 2- Top panel 6- Loading door 3- Control panel 7- Detergent drawer 4- Filter cap 8- Drain hose 6 / 36 EN Washing Machine / User‘s Manual... -
Page 7: Package Contents
Your washing machine 2.2 Package Contents 1- Power cable 2- Drain hose 3- Transportation safety bolts * 4- Mains water inlet hose (One of the following filter types is used for the mains hose connection.) a- Electronical water shut-off a- Mechanical water shut-off c- Standard 5- Liquid detergent container** 6- User Manual... -
Page 8: Technical Specifications
Your washing machine 2.3 Technical specifications Models (EN) D4 9101 E Maximum dry laundry capacity (kg) Height (cm) Width (cm) Depth (cm) Net weight (±4 kg.) Electrical input (V/Hz) 220-240 V / 50Hz Total current (A) 2000-2350 Total power (W) 1000 Spin speed (rpm max.) -
Page 9: Installation
Installation 3.2 Removing packaging Refer to the nearest Authorised Service Agent for installation of the product. To make the product reinforcement ready for use, review the information in the user Tilt the machine backwards to remove the manual and make sure that the electricity, tap packaging reinforcement. -
Page 10: Connecting Water Supply
Installation 3. Attach the plastic covers supplied in the User 1. Connect the special hoses supplied with the Manual bag into the holes on the rear panel. (P) product to the water inlets on the product. Red hose (left) (max. 90 ºC) is for hot water inlet, blue hose (right) (max. -
Page 11: Connecting To The Drain
Installation 3.5 Connecting to the drain 3.6 Adjusting the feet • The end of the drain hose must be directly WARNING: In order to ensure that connected to the wastewater drain or to the the product operates more silently and washbasin. vibration-free, it must stand level and balanced on its feet. Balance the machine WARNING: Your house will be flooded by adjusting the feet. -
Page 12: Electrical Connection
Installation Transportation of the product 1. Loosen the lock nuts on the feet by hand. 1. Unplug the product before transporting it. 2. Remove water drain and water supply connections. 3. Drain all water that has remained in the product. See 7.5 4. -
Page 13: Preparation
Preparation 4.1 Sorting the laundry • Sort laundry according to type of fabric, colour, and degree of soiling and allowable water temperature. • Always obey the instructions given on the garment tags. LAUNDRY WASH SYMBOLS Machine Wash Symbols WASH Maximum Water Temperatures Symbol(s) Drying Suitable for No Iron Do not dry- Sensitive / Do not dry Do not dry Symbols dryer clean Delicate dry with dryer DRYING Drying... -
Page 14: Preparing Laundry For Washing
Preparation 4.2 Preparing laundry for washing 4.3 Things to be done for energy saving • Laundry items with metal attachments such as, underwired bras, belt buckles or metal buttons Following information will help you use the product will damage the machine. Remove the metal in an ecological and energy-efficient manner. pieces or wash the clothes by putting them in a • Operate the product in the highest capacity laundry bag or pillow case. -
Page 15: Correct Load Capacity
Preparation 4.7 Using detergent and softener Some water might have remained in the product due to the quality control When using detergent, softener, starch, processes in the production. It is not fabric dye, bleach or limescale remover harmful for the product. read the manufacturer's instructions on the package carefully and follow the suggested 4.5 Correct load capacity... - Page 16 Preparation Choosing the detergent type • If the liquid detergent has lost its fluidity, dilute it with water before putting in the detergent cup. The type of detergent to be used depends on the type and colour of the fabric. • Use different detergents for coloured and white laundry. • Wash your delicate clothes only with special detergents (liquid detergent, wool shampoo, etc.) used solely for delicate clothes.
- Page 17 Preparation Using starch • Add liquid starch, powder starch or the fabric dye into the softener compartment. • Do not use softener and starch together in a washing cycle. • Wipe the inside of the machine with a damp and clean cloth after using starch. Using bleaches • Select a programme with prewash and add the bleaching agent at the beginning of the prewash. Do not put detergent in the prewash compartment.
-
Page 18: Tips For Efficient Washing
Preparation 4.8 Tips for efficient washing Clothes Light colours and Delicates/Woolens/ Colours Dark colours whites Silks (Recommended (Recommended (Recommended (Recommended temperature range temperature range temperature range temperature range based based on soiling level: based on soiling based on soiling level: on soiling level: cold-40ºC) 40-90ºC) level: cold-40ºC) -
Page 19: Operating The Product
Operating the product 5.1 Control panel Spin Speed Adjustment button On / Off button Display Delayed Start buttons (+ / -) Temperature Adjustment button Auxiliary Function buttons Programme Selection knob Start / Pause / Cancel button 5.2 Display symbols - Spin Speed indicator - Temperature indicator - Spin symbol - Temperature symbol... -
Page 20: Programme Selection
Operating the product 5.4 Programme selection For curtains and tulle, use the Synthetic 40˚C programme with prewash and anti-creasing 1. Select the programme suitable for the type, functions selected. As their meshed texture causes quantity and soiling degree of the laundry excessive foaming, wash the veils/tulle by putting in accordance with the "Programme and little amount of detergent into the main wash... -
Page 21: Special Programmes
Operating the product • Express 14 • Sıkma+Pompa (Spin + Drain) Use this programme to wash your little amount of Use this programme to apply an additional spin lightly soiled cotton clothes in a short time. cycle for your laundry or to drain the water in the •... -
Page 22: Spin Speed Selection
Operating the product Economy symbol can not be selected in Intensive and Hygiene programmes since washing is performed in long times and at high temperatures in order to provide hygiene. Similarly, Economy symbol can not be selected in Baby, Refresh, Drum Cleaning, Spin and Rinse programmes as well. -
Page 23: Programme And Consumption Table
Operating the product 5.10 Programme and consumption table Auxiliary functions Selectable Programme (°C) temperature range °C Pamuklu 2.70 1600 • • • • • • 90-Soğuk Pamuklu 1.80 1600 • • • • • • 90-Soğuk Pamuklu 1.00 1600 • •... -
Page 24: Auxiliary Function Selection
Operating the product 5.11 Auxiliary function selection times and also the number of rinsing steps for lightly soiled laundry. Select the desired auxiliary functions before F2 appears on the display when you select this starting the programme. Furthermore, you may function (b). -
Page 25: Time Display
Operating the product The programme resumes. Water is drained, symbol flashes. laundry is spun and the programme is completed. 4. Press Start / Pause / Cancel button. Delayed • Pet hair removal start countdown starts. Delayed Start symbol illuminates steadily. Start symbol appears. “:” This function helps to remove pet hair that remain sign in the middle of the delayed start time on on your garments more effectively. -
Page 26: Progress Of Programme
Operating the product 4. The symbol of the step from which the Symbol disappears when the door is ready to programme has started appears on the display open. You can open the door when the symbol (Prewash, Main Wash, Rinse, Softener and Spin). disappears. -
Page 27: Cancelling The Programme
Operating the product You can switch on and off the machine If you want to open the loading door after with On / Off button when the Child you have cancelled the programme but it Lock is active. When you switch on the is not possible to open the loading door machine again, programme will resume since the water level in the machine is... -
Page 28: Quick User Guide
Quick User Guide 6.1 Preparing the machine 6.7 Child Lock 1. Make sure that the hoses are connected tightly. Use Child Lock function to prevent children from 2. Plug in your machine. tampering with the machine. Thus you can avoid 3. -
Page 29: Maintenance And Cleaning
Maintenance and cleaning 7.2 Cleaning the loading Service life of the product extends and frequently faced problems decrease if cleaned at regular door and the drum intervals. Residues of softener, detergent and dirt may 7.1 Cleaning the detergent drawer accumulate in your machine in time and may cause unpleasant odours and washing complaints. -
Page 30: Cleaning The Body And Control Panel
Maintenance and cleaning 7.3 Cleaning the body In addition, prior to transporting the machine and control panel (e.g., when moving to another house) and in case of freezing of the water, water may have to be Wipe the body of the machine with soapy water or drained completely. - Page 31 Maintenance and cleaning 3. Some of our products have emergency draining Discharging the water when the product does not hose and some does not have. Follow the steps have an emergency draining hose: below to discharge the water. Discharging the water when the product has an emergency draining hose: a.
-
Page 32: Troubleshooting
Troubleshooting Programme cannot be started or selected. • Washing machine has switched to self protection mode due to a supply problem (line voltage, water pressure, etc.). >>> Press and hold Start / Pause / Cancel button for 3 seconds to reset the machine to factory settings. Water in the machine. • Some water might have remained in the product due to the quality control processes in the production. >>> This is not a failure; water is not harmful to the machine. There is water leaking from the bottom of the washing machine. - Page 33 Troubleshooting Washing takes longer time than specified in the manual.(*) • Water pressure is low. >>> Machine waits until taking in adequate amount of water to prevent poor washing quality due to the decreased amount of water. Therefore, the washing time extends. • Voltage might be low. >>> Washing time is prolonged to avoid poor washing results when the supply voltage is low.
- Page 34 Troubleshooting Washing performance is poor: Oily stains appeared on the laundry. • Regular drum cleaning is not applied. >>> Clean the drum regularly. For this, please see 7.2. Washing performance is poor: Clothes smell unpleasantly.(**) • Odours and bacteria layers are formed on the drum as a result of continuous washing at lower temperatures and/ or in short programmes. >>> Leave the detergent drawer as well as the loading door of the machine ajar after each washing.
- Page 35 Troubleshooting There is detergent left on the laundry. (**) • Excessive laundry was loaded in. >>> Do not load the machine in excess. • Wrong programme and temperature were selected. >>> Select the proper programme and temperature for the laundry to be washed. • Wrong detergent was used. >>> Select the proper detergent for the laundry to be washed. Too much foam forms in the machine.(**) • Improper detergents for the washing machine are being used. >>> Use detergents appropriate for the washing machine.
-
Page 36: Product Fiche
PRODUCT FICHE Complying Commission Delegated Regulation (EU) No 1061/201 Supplier name or trademark Beko Model name D4 9101 E Rated capacity (kg) Energy efficiency class A+++ Annual Energy Consumption (kWh) Energy consumption of the standard 60°C cotton programme at full load (kWh) 1.076...