Advertisement
Quick Links
Advertisement

Related Manuals for Edimax HP-2002APn


Summary of Contents for Edimax HP-2002APn
- Page 2 Copyright© by Edimax Technology Co, LTD. all rights reserved. No part of this publication may be reproduced, transmitted, transcribed, stored in a retrieval system, or translated into any language or computer language, in any form or by any means, electronic, mechanical, magnetic, optical, chemical,...
-
Page 3: Product Introduction
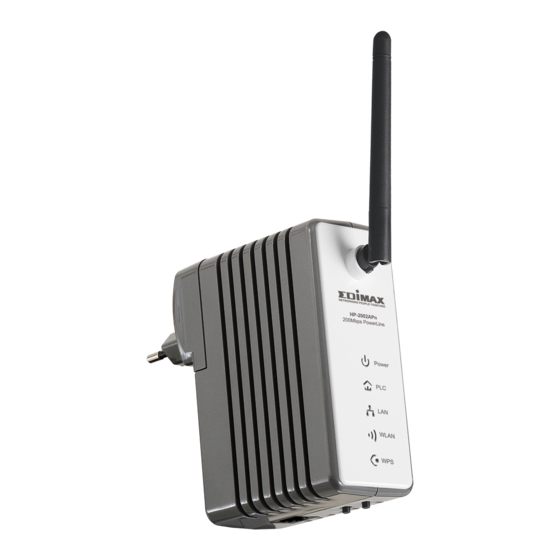
1. Product Introduction Thank you for purchasing and using Edimax HP-2002APn 200Mbps PowerLine Ethernet Adapter with wireless Access Point. This device allows you to use your home or office’s existing electrical wiring to create a network for multiple computers to share files or connecting DVR, X-Box or Set-top Box device to join the network. -
Page 4: Product Package
2. Product Package This package contains the following components: One HP-2002APn PowerLine 200Mbps Ethernet Adapter One RJ-45 Cable (100cm) One Quick Installation Guide One CD-ROM (Including all the software utilities, drivers, Multi-languages Quick Installation Guide and User’s Manual) If any item is missing or damaged, please contact your local resellers for service. -
Page 5: Led Definitions
3. LED Definitions Color Status Description Indicator Power is on. Green The device runs normally. Power is off or the device is down. WLAN Green Radio switch is turned on. Green Blink Data is being transmitted. Radio switch is shut off. Green Connection succeeds... -
Page 6: Hardware Installation Procedure
Wi-Fi Protected Setup is disabled. Green On/Blink When PLC rate﹥100Mbps, see note 1 Orange On/Blink When PLC rate in 80-100Mbps, see note 1 On/Blink When PLC rate﹤100Mbps, see note 1 Green Connection succeeds. Green Blink Data is being transmitted. No LAN connection. Note: The PLC LED indicator turns “ON”... - Page 7 The following is the architecture of various applications of the HomePlug products. Picture 1 :...
-
Page 8: Software Installation Procedure
The Utility could help you to manager all of the HomePlug devices in the LAN. The Utility is not necessary when you use the internet via HP-2002APn. Please follow the procedures below to install the utility. Please note that the following procedures are running in Windows XP, for other Windows operating systems, the procedures are similar. - Page 9 2. The following screen will be displayed. Click “Next”. 3. Click “Next” to install the utility in the default folder or assign the destination folder where you would like to install the HomePlug utility.
- Page 10 4. Click “Finish” to complete the installation.
- Page 11 6. Edimax PowerLine Utility Click “Start” and select “All Programs\Edimax PowerLine Utility” in your computer, you will find the HomePlug utility. Please refer to the following sections for the descriptions of how to use the utility. Note : The Utility can help you to find all (14Mbps / 85Mbps / 200Mbps) Powerline devies.
- Page 12 Upper Panel The upper panel shows all local HomePlug devices connected to the computer’s NIC (Network Interface Card). In most cases, only one device will be seen. In situations where there are more than one local device being connected, such as a USB or an Ethernet adapter, the user can select the local device by clicking on it and then click the “Connect”...
- Page 13 The “DAK” code is the password. Quality: the status of the connection quality will be shown here. Rate (Mbps): show the current data rate of the HomePlug device. MAC Address: the device’s MAC address will be shown here. Add Button: it is used to add a remote device to the existing network by entering the device password of the device.
- Page 14 Scan Button: the button is used to perform an immediate search of the HomePlug devices connected to the Powerline network. By default, the utility automatically scans every few seconds and updates the display screen. 6.2 Privacy The Privacy screen provides the user with an option to maintain security for their logical network and also to select the devices that has to be included in the network.
- Page 15 Private Network Name: All HomePlug devices are shipped using a default logical network (network name), which is normally “HomePlug”. If you wan to set a privacy network, change the network name. Use Default (Public Network): The user can always reset to the HomePlug network (Public) by entering “HomePlug”...
- Page 16 6.3 Diagnostics The Diagnostics screen shows System information and a history of all remote devices seen over a period of time. Upper Panel The Upper panel shows technical data concerning software and hardware present on the host computer which were used to communicate over HomePlug on the Powerline network.
- Page 17 Device Password Device Last known rate Device Last Known Network name HomePlug chipset manufacturer name Date device last seen on the network MAC Firmware Version. (Turbo Only) The diagnostics information displayed may be saved to a text file for later use, or can be printed for reference for a technical support call.
-
Page 18: Wireless Access Point Configuration
Wizard in the CD-ROM provided in the package. The wizard provides quick setup for the SSID, wireless security of WPA-PSK and changing password of HP-2002APn. When you start the Setup Wizard, you will get the following Welcome screen. Please choose the language to start with and follow the easy steps in the Wizard. - Page 19 (where XXX=10~253), then click ‘OK’. Note : If your original setting of computer is “Obtain an IP address automatically “ & “Obtain DNS server address automatically“ , you should reset to original settings when you finish the following HP-2002APn configuration.
- Page 20 Manual to configure the HP-2002APn Note : If your original setting of computer is “Obtain an IP address automatically “ & “Obtain DNS server address automatically“ , you should reset to original settings when you finish the following HP-2002APn configuration.
- Page 21 7.3 Wireless configuration via Web Setup If you prefer the traditional web setup, please follow the procedures in this Manual to configure the HP-2002APn. The default IP address of HP-2002APn is “ 192.168.2.8 “ . Please input ‘admin’ in ‘User name’ field, and ‘1234’ in ‘Password’ field, and click ‘OK’...
- Page 22 Device Info – This page shows you “Firmware Version / MAC address / IP address and Wireless information” For you to setup HP-2002APn’s IP address, enable/disable DHCP, IGMP and IP address pool. Wireless You can setup SSID, wireless security and ACL here.
- Page 23 7.3.1 LAN configuration The default IP address of HP-2002APn is “192.168.2.8”, if you would like change the default settings. You can assign a new one here. Please note if new IP address is not in same segment with current IP address of your desktop, you will not configure HP-2002APn unless you change computer’s IP...
- Page 24 Field Description interface. The default setting is Disable. LAN 2 IP The second IP address of the LAN interface. This IP Address address should not collide with the IP address of the interior network. The subnet mask of the second IP address of the LAN Subnet interface.
- Page 25 7.3.1 Wireless Settings This page is for you to setup wireless settings. The parameters of Wireless Network are described as follows: Field Description Radio Enable or disable wireless LAN interface. On/Off Network You may select a proper network mode in the drop down Mode list.
- Page 26 Field Description Name characters. The legal characters include letter, number (SSID) underline or the combination of these characters. Multiple Accessional network SSID. Each SSID can use wireless SSID1~7 security setting independently. Broadcast Whether to broadcast SSID. After enabling this function, Network AP will broadcast its SSID.
- Page 27 HP-2002APN to accord with the peer AP. 2) Bridge Mode In the bridge mode, you can use the HP-2002APN to connect to your router, for extending wireless coverage. Meanwhile, it can also decrease the working load of the AP that accesses the Internet. In that case, the wireless card does not directly communicate with the wireless device that accesses the Internet, but it directly communicates with the HP-2002APN.
- Page 28 HP-2002APn to accord with the peer AP. 3) Repeater Mode In the Repeater mode, you can use the HP-2002APN to connect to the primary router, for extending the wireless coverage. 4) Click Wireless Settings --> Basic to display Basic Wireless Settings...
- Page 29 AP, and then enter the MAC address of the peer AP. After finishing the settings, click the Apply button to apply the settings. The HP-2002APN will work in the Repeater Mode.
- Page 30 Click Wireless Settings --> Security to display the Wireless Security/Encryption Settings page. On this page, set the security mode of the HP-2002APN to accord with the peer AP. Note: In the WDS mode, don’t set any mixed modes, for example, WPA-PSK/WPA2-PSK.
- Page 31 HT Physical Mode The parameters of HT Physical Mode are described as follows: Field Description Operation You may select Mixed Mode or Green Field. The default Mode operation mode is Mixed Mode. Channel You may select 20 or 20/40. The default channel BandWidth bandwidth is 20/40.
- Page 32 Field Description secondary bandwidth. When data is being transmitted, it can act as 40MHz bandwidth, and it can also acts as 20 MHz bandwidth independently. In this way, the data rate is doubled. Aggregation Enable or disable A-MSDU. MSDU MSDU is the aggregation of multiple MSDUs by using (A-MSDU) certain method and the multiple MSDUs forms a greater load.
- Page 33 7.3.1 Advanced Wireless Settings On this page, you may configure advanced wireless parameters, such as beacon interval, data beacon rate, and Tx power. Note: The advanced wireless setting is only for advanced user. For the common user, do not change any setting on this page. Advanced Wireless The parameters of Advanced Wireless are described as follows:...
- Page 34 Field Description BG Protection You may select On, Off, or Auto. The default BG Mode protection mode is Auto. Beacon By default, wireless beacon signal sends data to Interval station every other 100 ms. The range is 20~999. Data Beacon The default DTIM is 1ms.
- Page 35 1) WMM Access Categories At present, WMM defines traffic into 4 access categories. AC_VO: Voice (highest priority) AC_VI: Video (high priority) AC_BE: Best effort (medium priority) AC_BK: Background (low priority) 802.11 uses DCF (Distributed Coordination Function) scheme of the CSMA/CA (Carrier Sense Multiple Access / Collision Avoidance) protocol to reduce the chances of packets collision while one more devices access the wireless media at the same time.
- Page 36 2) Set WMM Parameters Click the WMM Configuration button, the following page appears. On this page, you can configure WMM parameters of access point and station.The parameters are described as follows: Field Description Aifsn Aifsn (Arbitrary Inter-Frame Space Number). This parameter influences the delay time of WMM access category.
- Page 37 WMM. If this value is 1, AP generates the response to the request. Note: HP-2002APN provides standard WMM settings. If you want to modify the parameters above, please refer to the WMM settings of your WMM products. 3) DLS (Direct Link Setup) HP-2002APN provides DLS function.
- Page 38 If DLS succeeds, you can view the MAC address of wireless card A on Step 4 the WMM page of wireless card B, and vice versa. Multicast-to-Unicast Converter Enable or disable Multicast-to-Unicast. After enabling this function, the transmission quality of wireless multicast stream can be improved. 7.3.2 Security Click Wireless...
- Page 39 This page allows you to configure wireless security modes and set the encryption keys, to prevent unauthorized access and monitoring. Select SSID SSID choice: select SSID that you want to configure. Security Mode This page provides 10 types of security modes, including OPEN, SHARED, WEPAUTO, WPA, WPA-PSK, WPA2, WPA2-PSK, WPAPSKWPA2PSK, WPA1WPA2, and 8021.X.
- Page 40 1) OPEN The parameters of OPEN mode are described as follows: Field Description Security Select OPEN. Mode Default Key Select a key as the default key. WEP Keys Set 64-bit or 128-bit key. The key format is Hex or ASCII. (WEP Key1/2/3/4) 2) SHARED...
- Page 41 Field Description Encrypt You may select WEP or None. Type Default Key Select a key as the default key. WEP Keys Set 64-bit or 128-bit key. The key format is Hex or ASCII. (WEP Key1/2/3/4) 3) WEPAUTO The parameters’ description of WEPAUTO mode, please refer to OPEN mode.
- Page 42 4) WPA The parameters of WPA mode are described as follows: Field Description Security Select WPA. Mode You may select TKIP or AES. Algorithms Set the key renewal interval. Renewal Interval WEP Keys Set 64-bit or 128-bit key. The key format is Hex or ASCII. (WEP Key1/2/3/4) IP Address...
- Page 43 Field Description Session If this value is 0, it indicates that there is no session time Timeout limit. Idle Set the idle timeout. Timeout 5) WPA-PSK The parameters of WPA-PSK mode are described as follows: Field Description Security Mode Select WPA-PSK. WPA Algorithms Select TKIP or AES.
- Page 44 6) WPA2 The parameters of WPA2 are described as follows: Field Description Security Mode Select WPA2. WPA Algorithms You may select TKIP, AES, or TKIPAES Key Renewal Set the key renewal interval. Interval PMK Cache Set the PMK (Pairwise Master Key) cache period. Period PMK scheme allows the roaming users that pass through the 802.11X/EAP handshake protocol...
- Page 45 Field Description IP Address The IP address of RADIUS server. Port The default port number is 1812. You may change it according to the server setting. Shared Secret The shared key that RADIUS server needs to authenticate. Session Timeout If this value is 0, it indicates that there is no session time limit.
- Page 46 8) WPAPSKWPA2PSK The parameters’ description of WPAPSKWPA2PSK mode, please refer to WPA2-PSK.
- Page 47 9) WPA1WPA2 ameters of WPA1WPA2 are described as follows: The par Field Description Security Mode Select WPA1WPA2. You may select TKIP, AES, or TKIPAES. Algorithms Key Renewal Set the key renewal interval. Interval IP Address The IP address of RADIUS server. Port The default port number is 1812.
- Page 48 10) 802.1X The parameters of 802.1X mode are described as follows: Field Description Security Select 802.1X. Mode IP Address The IP address of RADIUS server. Port The default port number is 1812. You may change it according to the server setting. Shared shared that...
- Page 49 Access Policy The parameters of Access Policy are described as follows: Field Description Policy Disable: Stop the access control to the wireless devices in the MAC list. Allow: Allow the access control to the wireless devices in the MAC list. Reject: Reject the access control to the wireless devices in the MAC list.
- Page 50 On this page, you can modify the WPS settings. WPS can make your client automatically synchronize with the AP setting, and establish connection. WPS Config...
- Page 51 WPS: enable or disable WPS. After enabling WPS, you can configure the parameters related to WPS. WPS summary displays the preset WPS information, such as WPS current status, WPS authentication mode, and WPS encryption type. Click the Reset OOB button to display the WPS default settings. WPS Progress WPS modes include PIN and PBC modes, At present, WPS supports three operation modes, including Enrollee mode, Registrar mode, and PBC mode.
- Page 52 Step 1 click the Apply button. You may also press the WPS button on the rear panel. Enable the PBC function on the wireless client. In that case, Step 2 HP-2002APN and wireless client will automatically establish connection. WPS Status...
- Page 53 Click Wireless Settings --> Station List to display the Station List page. On this page, you can view the wireless networks that connect to the HP-2002APN. If there is any wireless network connects to HP-2002APN, refresh this page and the connection information of the wireless network is displayed.
- Page 54 7.3.2.3 Administration Click Administration --> Management to display the System Management page. This page provides administration settings, NTP settings, and DDNS settings. Administrator Settings The parameters of Administrator Settings are described as follows: Field Description Account Enter the account that you want to change. Password Enter the password for the new username.
- Page 55 Click Administration --> Upload Firmware to display the Upload Firmware page. If you want to upload the firmware of the HP-2002APN, click the Browse… button to choose the correct new firmware, and then click the Apply button. System begins to upgrade firmware.
- Page 56 7.3.2.5 Setting Management Click Administration --> Settings Management to display the Settings Management page. The parameters on this page are described as follows: Field Description Click the Export button to save the settings on your local Export Settings Import Settings Click the Browse…...
- Page 57 Warning (1) Simply plug into a power outlet and do not use a power strip or UPS with the wall mount device (2)This is a class A product. In a domestic environment this product may cause radio interference in which case the user may be required to take adequate measures.
- Page 58 service personnel for the following conditions : # If liquid has been spilled into the product # If the product has been exposed to rain or water # If the product does not operate normally when the operating instructions are followed # If the product exhibits a distinct change in performance.