Table of Contents
Advertisement
Advertisement
Table of Contents

Related Manuals for Edimax HP-5102


Summary of Contents for Edimax HP-5102
- Page 1 HP-5102 User Manual 01-2013 / v1.0...
- Page 2 COPYRIGHT Copyright Edimax Technology Co., Ltd. all rights reserved. No part of this publication may be reproduced, transmitted, transcribed, stored in a retrieval system, or translated into any language or computer language, in any form or by any means, electronic, mechanical, magnetic, optical, chemical, manual or otherwise, without the prior written permission from Edimax Technology Co.,...
-
Page 3: Table Of Contents
Contents Chapter 1: Introduction ............................. 3 1.1 Product Features ..........................3 1.2 Application ............................3 1.3 Compatibility ............................4 1.4 System Requirements .......................... 4 Chapter 2: Interfaces ............................5 2.1 LEDs ..............................5 2.2 Button ..............................5 2.3 Fast Ethernet Port ..........................6 Chapter 3:Utility Software Installation ...................... -
Page 4: Chapter 1: Introduction
Chapter 1: Introduction 1.1 Product Features Easy plug-n-play setup and 128-bit AES security Max. powerline speed up to 500Mbps Backward compatible with 200Mbps powerline adapters Features energy saving mode to reduce power consumption Utilizes existing electrical wires to transmit network data ... -
Page 5: Compatibility
1.3 Compatibility 500Mbps powerline devices (HomePlug AV standard) are incompatible and cannot be used with 14Mbps and 85Mbps powerline devices (HomePlug 1.0 and 1.1 standards). 1.4 System Requirements Operating System Utility supports Windows XP/Vista/7/8 Intel Pentium III 1.0GHz (or above) 256MB (or above) Free Disk Space 100MB (or above) -
Page 6: Chapter 2: Interfaces
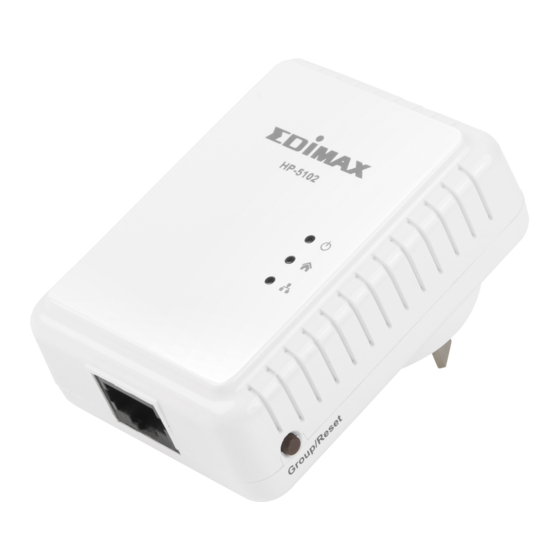
Chapter 2: Interfaces 2.1 LEDs Status Description Green LAN port connected Blinking LAN activity (transferring data) LAN port not connected The green indicator turns on and the red indicator turns blinks slowly when the device is detecting a powerline link. Green/Red The green indicator turns on and the red indicator turns blinks quickly to indicate data is... -
Page 7: Fast Ethernet Port
Leaves an encrypted powerline network group (press the button for 5~8 seconds). Restores the powerline adapter to factory defaults (press the button for 10~15 seconds). 2.3 Fast Ethernet Port You can connect the powerline adapter to a router, a computer, or any network device via this Fast Ethernet port. -
Page 8: Chapter 3:Utility Software Installation
Chapter 3:Utility Software Installation 3.1 Win 8 Step 1 Before installing the utility software, make sure that no other powerline utility is installed on your computer. If any other utility software is installed, uninstall it and reboot the computer. Step 2 Insert the CD into your CD-ROM drive. When the following EZmax Wizard appears, select your model. - Page 9 Step 4 Click right button on WinPCap4.1.2 then click “Properties”. Step 5 Click Compatibility tab and check “Run this program in compatibility mode for:", then select Windows 7, then click “Apply”.
- Page 10 Step 6 Then click “WinPcap_4_1_2”. The wizard will guide you through the setup process. Step 7 When the following WinPcap Compatibility Assistant appears, select Run the program without getting help.
- Page 12 Step 8 After the installation is complete, click “Finish”.
- Page 13 Step 9 Click the “Edimax PowerLine Utility”, the “PLC 500Mbps Utility” appears, click “Next” to continue. Step 10 Select where you want to install the utility software, and then click “Next”.
- Page 14 Step 11 After the installation is complete, click “Close”.
- Page 15 Step 12 An icon will appear on your desktop. Click the icon to open the utility software. Note: You can manage all the connected powerline adapters with the utility software. However, installing the utility software is optional.
-
Page 16: Win Xp/Vista / 7
3.2 Win XP/Vista / 7 Step 1 Before installing the utility software, make sure that no other powerline utility is installed on your computer. If any other utility software is installed, uninstall it and reboot the computer. Step 2 Insert the CD into your CD-ROM drive. When the following EZmax Wizard appears, select your model. - Page 17 Step 4 If you have not installed WinPcap version 4.1.2 (or higher) on your computer before. The wizard will guide you through the setup process.
- Page 19 Step 5 When the “Edimax PowerLine Utility” setup wizard appears, click “Next” to continue. Step 6 In the “License Agreement” screen, please select “I Agree” and then click “Next” to continue.
- Page 20 Step 7 Select where you want to install the utility software, and then click “Next”. Step 8 If you confirm to install the utility, click “Next”.
- Page 21 Step 9 After the installation is complete, click “Close”. Step 10 An icon will appear on your desktop. Click the icon to open the utility software. Note: You can manage all the connected powerline adapters with the utility software. However, installing the utility software is optional.
-
Page 22: Chapter 4: Using The Utility Software
Chapter 4: Using the Utility Software 4.1 Main Tab The “Main” tab provides a list of powerline adapters connected to the network. The upper panel displays local powerline adapters. The lower panel displays remote powerline adapters in the network. Set Name Select a device and click “Set Name”... -
Page 23: Diagnostics Tab
4.2 Diagnostics Tab The “Diagnostics” tab displays the system information and history of all remote devices. The upper panel displays technical data concerning the software and hardware on the host computer and the lower panel displays the history of all remote devices. -
Page 24: About Tab
4.3 About Tab The “About” tab contains some basic information about the software. You can also enable or disable the autoscan function under “Preferences”. -
Page 25: Chapter 5: Group Button
Chapter 5: Group Button This section demonstrates how to add or remove devices from a HomePlug AV network with the “Group” button. 5.1 Forming a HomePlug AV Logical Network When two devices with different group keys are connected to the same powerline and you want them to form a logical network, follow the following procedures: Step 1 Press and hold the “Group”... -
Page 26: Joining A Network
5.2 Joining a Network If you want to add a new powerline device to an existing network, follow the following procedures: Step 1 Press the “Group” button on an adapter in the existing network (adapter A or B) for less than 3 seconds. The Power LED will start to blink. Step 2 Within 120 seconds after the Power LED starts blinking on adapter A or B, press the “Group”... -
Page 27: Leaving A Network & Joining Another Network
5.3 Leaving a Network & Joining another Network If you want to remove a powerline device from an existing network and add it to another network, follow the following procedures: Step 1 Press the “Group” button on the adapter to be removed (adapter B) for at least 10 seconds. -
Page 28: Chapter 6: Troubleshooting
Chapter 6: Troubleshooting If your powerline adapters have difficulty communicating with each other, try the following procedures: Try power cycling the unit by unplugging it from the electric outlet for 10 seconds and plugging it in again. Use a pin to hold the reset button down for 2 seconds on each unit you are trying to connect. - Page 29 Federal Communication Commission Interference Statement This equipment has been tested and found to comply with the limits for a Class B digital device, pursuant to Part 15 of FCC Rules. These limits are designed to provide reasonable protection against harmful interference in a residential installation.
- Page 30 EU Declaration of Conformity English: This equipment is in compliance with the essential requirements and other relevant provisions of Directive 2004/108/EC, 2009/125/EC. Français: Cet équipement est conforme aux exigences essentielles et autres dispositions de la directive 2004/108/EC, 2009/125/EC Čeština: Toto zařízení je v souladu se základními požadavky a ostatními příslušnými ustanoveními směrnic 2004/108/EC, 2009/125/EC.