Table of Contents
Advertisement
Advertisement
Table of Contents

Related Manuals for HP CA350


Summary of Contents for HP CA350
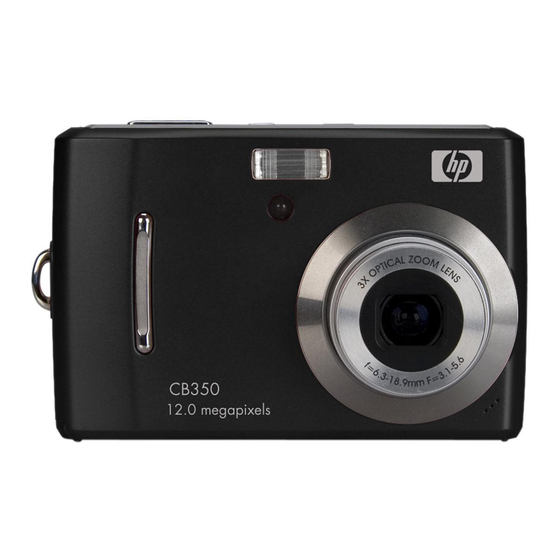
- Page 1 HP CA350/CB350 Digital Camera User Manual...
-
Page 2: Table Of Contents
Table of Contents Preface...v About this Manual...v Copyright...v Federal Communications Commission (FCC) Compliance...v Declaration of Conformity...vi Trademark Recognition...vi Safety and Handling Precautions Camera Information...vi Battery Information...vii Camera & battery recycle notice...vii Camera on operating notice...vii Using this Menu...viii Photography Terms and Defi nitions...viii Package Contents...1 Getting Started...2 Attaching the Wrist Strap...2... - Page 3 Modes...10 Shooting mode...10 Playback mode...10 Switching between Shooting mode and Playback Mode...10 Selecting the Shooting mode options...11 LCD Monitor Layout and Icon Descriptions...12 Shooting Mode Screen Layout...12 Playback Mode Screen Layout...14 Playback mode display of still images...14 Playback mode of videos...15 Playback mode of audio clips...15 Changing the LCD Monitor Display...17 Using Shooting Functions...19...
- Page 4 - Using Intelligent Scene Mode...33 - Using Blink Detection Mod...36 - Using Aperture Priority Mode...37 - Using Shutter Priority Mode...37 - Using Manual Exposure Mode...38 Setting the Self-Timer/Burst...39 Setting the AEB...40 Setting the AF Area...40 Setting the AF Lamp...41 Setting Sharpness...41 Setting Saturation...42 Setting Contrast...43 Setting the Digital Zoom...43...
- Page 5 Remove Red Eyes...58 Voice Memo...59 Modify Color...60 Crop...62 Resize...63 DPOF...64 PictBridge...65 Making Connections...66 Connecting the Camera a PC...66 Connecting the Camera to a Printer...66 Troubleshooting...67 Getting Help...68...
-
Page 6: Preface
This manual is designed to assist you in using your new digital camera. All information presented is as accurate as possible but is subject to change without notice. For the latest revision, please visit www.hp.com/support. Copyright This manual contains proprietary information protected by copyright. All rights are reserved. -
Page 7: Declaration Of Conformity
Warning: A shielded-type power cord is required in order to meet FCC emission limits and to prevent interference to radio and television reception. Use only shielded cable to connect I/O devices to this equipment. Any changes or modifi cations not expressly approved by the manufacturer may void your warranty and service agreement. -
Page 8: Battery Information
Battery Information • If batteries are already installed, make sure to power off camera before removing and inserting new batteries. • When using batteries in this product, ensure that they are inserted correctly. Inserting the batteries upside down can cause damage to the product and possibly cause an explosion. •... -
Page 9: Using This Menu
Using this Menu Symbols used in this manual are explained below: Note This indicates useful information when using your camera. Warning This indicates warning message that should be read before using the function. Photography Terms and Defi nitions Terms auto exposure bracketing (AEB) auto focus (AF) album Analog to Digital Converter (A/D... - Page 10 auto white balance (AWB) Charge Coupled Device (CCD) compression Digital Print Order Format (DPOF) digital still camera (DSC) dynamic range Exif/JPEG exposure index ISO speed With auto white balance, the camera attempts to determine the color temperature of the light and automatically adjust for that color temperature.
- Page 11 JPEG protocol StorageID white balance Source: ISO/WE 12231 Photography-- Electronic still-picture cameras -- Terminology Joint Photographic Experts Group. An image compression method defi ned in ISO/IEC 10918-1. Defi ned mechanisms for exchanging data between devices. A device-specifi c four byte unsigned integer (UINT32) that represents a unique storage area that may contain data objects.
-
Page 12: Package Contents
Package Contents Please check the contents of your camera package. It should contain: Digital camera AA battery x 2 pcs Wrist strap USB cable Warranty Card User Manual and Software installation Quick Start guide... -
Page 13: Getting Started
Getting Started Attaching the Wrist Strap Follow these instructions to attach the wrist strap to your camera to better protect your new camera: Insert the smaller loop of the strap in the strap eyelet. Thread the larger loop of the strap though the short loop and pull tight to attach the strap to the camera. -
Page 14: Inserting An Sd/Sdhc Memory Card
Close the battery compartment. Inserting an SD/SDHC Memory Card Expand your camera’s storage by using SD or SDHC memory cards. Open the SD card compartment at the bottom of the camera. Insert the SD/SDHC card into the memory card slot with the metallic contacts facing the back side of the camera. -
Page 15: Camera Memory
SD card. Not all cards may be compatible with your camera. When purchasing additional cards, please Warning check the card specifi cations. You can ensure optimal compatibility by purchasing HP brand SD cards. Camera Views... -
Page 16: Back View
Back View LCD screen Menu button 4 # Please refer to the notes for marked item with Top View Power button Speaker Bottom View Battery compartment Zoom buttons Play button Operation Lamp OK / 4-way navigation control Quick Functions FUNC / Delete button 3 at page 6 Stabilizer button Shutter button... -
Page 17: Left/Right View
Left/Right View Strap ring Button 1: Play If the camera is turned off, press and hold to turn on camera in Playback mode. If the camera is turned on, press to toggle camera to Playback or Shooting mode. Button 2: FUNC/Delete In Shooting mode, press to enter FUNC menu. - Page 18 Button Usage Confi rm a selection when using the OSD menus. Flash/ Right In Shooting mode, press to scroll through the fl ash mode options. (Auto, Anti Red-eye, Slow Sync and Off) In Playback mode, press to view the next image, video or audio clip. In Playback Video mode, press to fast forward video playback In Menu mode, press to change submenus.
-
Page 19: Initial Settings
Initial Settings You will be prompted to set up the language and the date and time when the camera is turned on for the fi rst time. Setting the Language Press Select a language, and then press Using Setup Menu You can access the Setup menu whether you are in Shooting or Playback mode. -
Page 20: Setting Battery Type
Setting Battery Type To ensure the camera displays the battery level correctly, be sure to set the battery type in Setup Menu to match the installed battery type: Alkaline / NiMH / Lithium / Oxyride. TV Configuration NTSC Alkaline Battery Type NiMH NiMH Memory Kit... -
Page 21: Modes
Modes Your camera has two modes: Shooting mode • Set to Shooting mode to capture images and record videos and audio clips. • Shooting mode can be further set to many options such as auto, video and scene selection. See “Selecting the Shooting mode options”... -
Page 22: Selecting The Shooting Mode Options
Selecting the Shooting mode options Set the camera to Shooting mode. Press to launch Shooting mode Menu. MENU Select Shooting Mode, and then press to enter submenu. Select a mode. Press the OK button to apply selected mode. Note Use the 4-way navigation control to move through the menu selections. Shooting Mode Self-Timer/Burst AF Area... -
Page 23: Lcd Monitor Layout And Icon Descriptions
LCD Monitor Layout and Icon Descriptions Shooting Mode Screen Layout Item Shooting mode Flash Self-Timer/Burst Zoom indicator Shots remaining Battery Storage media Date & Time Imprint Auto Exposure Bracketing (AEB) 0.0EV 0.0EV F 3.0 F 3.0 1/ 30 1/ 30 Description Indicates the current mode. - Page 24 Stabilizer Saturation Contrast Histogram Displays focus area settings Shutter speed Aperture value Shake warning Macro Exposure Face tracking White balance Metering Sharpness Quality Resolution AF lamp Indicates stabilizer function is enabled. Displays saturation settings. Displays contrast settings. Dispalys the darkest and brightest values, corresponding to black and white respectively.
-
Page 25: Playback Mode Screen Layout
Playback Mode Screen Layout The Playback mode display varies depending on the type of image being viewed. Playback mode display of still images: Item Playback mode Protect Voice memo Button intro File Number Battery Storage media Recording information DPOF Resolution OK : F 3.0 F 3.0... -
Page 26: Playback Mode Of Videos
Playback mode of videos: OK : Item Playback mode Protect Video clip Button intro File Number Battery Storage media Shooting information Volume Key indicator Played time Playing status 27/27 27/27 0:00:16 / 0:00:20 2009/01/01 01:57 2009/01/01 01:57 Description Indicates playback mode. Indicates fi... - Page 27 Playback mode of audio clips: OK : Item Playback mode Protect Button intro File no. / Total no. Battery Storage media Shooting information Volume Key indicator Played time Playing status 27/27 27/27 0:00:16 / 0:00:20 2009/01/01 01:57 2009/01/01 01:57 Description Indicates playback mode.
-
Page 28: Changing The Lcd Monitor Display
Changing the LCD Monitor Display The type of information displayed on the LCD screen can be changed using the button. OSD on Guide lines on • The OSD information may vary depending on the shooting mode type. Note • The following icons, if enabled, are still displayed on the LCD even when OSD off or Guide lines on: AEB, Face tracking, AF lamp, Self-Timer/Burst, and Macro. - Page 29 In Playback mode, the LCD display can be changed into any of the following: 27/27 27/27 2009/01/01 01:57 2009/01/01 01:57 OSD on LCD display cannot be changed in the following situations: Note • Manual exposure mode • Recording video or audio clips •...
-
Page 30: Using Shooting Functions
Using Shooting Functions Shooting Image Taking Photos Turn on the camera by pressing the button. By doing this, your camera is also set to shooting mode. Frame the shot using the focus bracket on the LCD monitor. See Image 1. Press the shutter button half-way down. -
Page 31: Setting The Zoom Control
To activate Stabilizer • Press the Stabilizer button on top of your camera to enable/disable stabilizer. If Stabilizer is enabled, the stabilizer icon is displayed on the LCD monitor and the ISO setting is automatically set to Auto. Setting the Zoom Control Your camera features up to 3x optical zoom and up to 5x of digital zoom. -
Page 32: Using Flash
Press the T button again to switch to digital zoom automatically. Zooming continues. x5.0 x5.0 Note Digital zoom is not activated in recording video. Using Flash When taking pictures in diffi cult lighting conditions, use the Flash button to get correct exposure. -
Page 33: Setting The Focus Mode
Auto. The fl ash fi res automatically whenever extra lighting is needed. Red-eye reduction. The fl ash fi res twice to reduce the red-eye effect. Forced on. The fl ash fi res whenever you press the shutter button regardless of lighting conditions. - Page 34 Your camera supports the four focus modes: Normal. With normal focus, the focus range starts from .8 meters (~ 2 ½ feet). When the camera is set to normal mode, there is no icon displayed on the screen. Macro. This mode is designed for close-up photography.
-
Page 35: Using The Function Menu
Using the Function Menu The hot key of “heart” ( FUNC button) is used for a quick setup of the latest six shooting modes (You may choose Special Scene, Video, Voice REC in Shooting Mode Menu) and to adjust capturing settings in Shooting Mode. •... -
Page 36: Resolution
Note The maximum resolution option for CB350 is 12M. The maximum resolution option for CA350 is 10M. Quality The quality setting lets you adjust the quality level of your photos before you capture them. However, the higher the quality, the more memory space is required in your memory card. -
Page 37: White Balance
White Balance The White Balance setting allows you to adjust the image color temperature according to the ambient light condition when recording the still images and video. Icon Item Auto Cloudy Tungsten Fluorescent H Fluorescent L Manual Description The camera automatically adjusts the white balance. Ideally used for bright sunny conditions. -
Page 38: Iso
The ISO function lets you adjust the ISO sensitivity in recording still images depending on the lightning levels of your surroundings. • Use a higher ISO setting in dim conditions and a lower ISO setting in brighter conditions. • Available settings are: Auto, 50, 100, 200, 400, 800, 1600,3200 (3M, 16:9<2M>, VGA) Note If the Stabilizer is enabled, ISO is automatically set to Auto and cannot be adjusted. -
Page 39: Color Mode
Color Mode The Color Mode function lets you record still images or video and apply different colors or tones for a more artistic effect Tinting an images color can make them appear more vivid. • As you move through the selection, the preview on the LCD monitor changes synchronously. -
Page 40: Shooting Menu
Shooting Menu If you are in shooting mode, you can access the Shooting menu simply by pressing the MENU button on your camera. When the menu is displayed, use the 4-way navigation control and the OK button to move through menu selections and apply your desired settings. To close the menu anytime, press the menu button again. - Page 41 Shooting Mode Self-Timer/Burst AF Area AF Lamp Sharpness Icon Item Auto Program Aperture Priority Shutter Priority Manual Exposure Intelligent Scene Portrait Landscape Select Description The simplest way to shoot basic images. Settings are adjusted automatically. The camera automatically adjusts suitable shooting settings like shutter speed and aperture values.
- Page 42 Icon Item Sunset Shaded gray Kids Night Scene Fireworks Snow Sports Party Candlelight Night Portrait Soft Skin Description This feature enhances the red hue for recording sunset images. This feature is used to capture the image of a backlight object by changing the metering.
- Page 43 Icon Item Soft Flowing Water Food Building Text Auction Smile Capture Blink Detection Pre-composition Couples Portrait Video Voice REC Description This feature enhances smooth effects like water or silk. This feature is used to capture food images. The increased saturation in this mode makes the captured image more enticing.
-
Page 44: Using Smile Capture Mode
Using Smile Capture Mode The Smile Capture mode uses smile tracking to automatically capture images. This feature is most useful in capturing different angles and smiles of moving people. When capturing an image with more than one person, the camera detects the smile of the closest person on the center of the screen. - Page 45 Face tracking is automatically enabled. To activate Intelligent Scene Select from the Scene Mode submenu. Focus the camera on the subject to capture. The camera detects the shooting conditions and switches to an appropriate scene mode. Press the shutter button half-way down to focus the subject.
- Page 46 The table below shows the modes supported by Intelligent scene: Intelligent Icon Scene Description Modes Portrait This mode is set when a face is detected. This mode is set when: • There is no face detected. Landscape • The focus distance is more than 1.5 meters. •...
-
Page 47: Using Blink Detection Mod
Using Blink Detection Mode The Blink Detection mode tracks faces and determines captured image that contain subjects with closed eyes. After shooting, when the camera detects that the subject blinked an eye, a menu selection appears to ask the user whether to save the image or not. This feature saves time in managing photos to be stored or deleted from the memory. -
Page 48: Using Aperture Priority Mode
Using Aperture Priority Mode With Aperture Priority mode, users can adjust the aperture value and the camera automatically sets the shutter speed to match the brightness. Using Shutter Priority Mode With Shutter Priority mode, users can adjust the shutter speed and the camera automatically sets the aperture value to match the brightness. -
Page 49: Using Manual Exposure Mode
Using Manual Exposure Mode With Manual Exposure mode, users can manually adjust the shutter speed and the aperture value. To activate Manual Exposure Select from the Scene Mode submenu. Press OK button to enter the adjust mode. Use the speed options or Use the select the aperture value options. -
Page 50: Setting The Self-Timer/Burst
Setting the Self-Timer/Burst Your camera features a Self-Timer and Burst which can be set in the Self-Timer/Burst function in the Shooting Menu. The Self-Timer allows you to take photos after a pre-defi ned delay. While burst lets you take consecutive shots. This function is only available in recording still images. -
Page 51: Setting The Aeb
Setting the AEB AEB stands for Automatic Exposure Bracketing. This feature captures the same image with 3 different exposure settings. • The settings are recorded in the following order: standard exposure, under exposure, and over exposure. • Available settings are: [On] and [Off]. Setting the AF Area AF stands for Automatic Focus. -
Page 52: Setting The Af Lamp
The table below shows the available AF area settings. Icon Item Multi Spot Setting the AF Lamp The AF Lamp function allows the camera to better focus; even in low light conditions. If AF Lamp is set to Auto, the AF lamp located in the front of the camera, emits an red light by pressing the shutter button half-way down allowing the camera to focus easily. -
Page 53: Setting Saturation
The table below shows the available Sharpness settings. Icon Item High Medium Setting Saturation The Saturation function lets you adjust the color saturation in your photos. Use a higher saturation setting for rich colors and a lower saturation setting for more muted tones. The table below shows the available Saturation settings. -
Page 54: Setting Contrast
Setting Contrast This function allows you to adjust the contrast of your photos. Setting the Digital Zoom This feature controls the digital zoom mode of your camera. Your camera enlarges an image using the optical zoom fi rst. When the zoom scale exceeds 3x, the camera uses digital zoom. -
Page 55: Setting The Date & Time Imprint
The table below shows the available Digital Zoom settings. Icon Item Intelligent Zoom Standard Zoom Note • Digital Zoom is not available in Smile Capture, Video, and Voice Recording modes. • The maximum Intelligent zoom scale varies depending on the image type and Setting the Date &... -
Page 56: Setting Instant Review
Saturation Contrast Digital Zoom Date Date & Time Imprint Date & Time Instant Review Setting Instant Review The Instant Review function lets you view the captured image right after shooting it. If Instant Review is On, the camera will display the captured image for 1 second on the LCD monitor. -
Page 57: Setting The Video Quality
Shooting Mode Self-Timer/Burst AF Area AF Lamp Sharpness • When the maximum capacity for a single video has been reached, simple press the shutter Note button again to continue recording. • The camera will automatically stop recording when the memory capacity is full. •... -
Page 58: Youtube Mode
Image Quality Matrix The higher the image quality, the higher the amount of the data used per second(average bit rate), the smoother the playback video. YouTube Mode The YouTube Mode allows you to record videos with predefi ned video settings for easy upload to the YouTube website. -
Page 59: Recording Voices
Recording Voices From the Shooting mode menu, select The Voice Recording screen layout is displayed on the LCD monitor. Press the Shutter button to start recording. Press the Shutter button again to stop recording. Note Voice recording will automatically stop when the maximum memory capacity is full. Voice. -
Page 60: Using The Viewing Functions
Using the Viewing Functions View images, videos and audio clips through your camera’s Playback mode. Viewing in Single Navigation The single navigation mode displays the image one by one on the LCD monitor. To view images/videos/audio clips, follow the steps below. Press the Play button to set or turn on the camera to Playback mode. - Page 61 Display Thumbnail view Thumbnail icons When you view the thumbnails, some images may contain icons. These icons indicate the type of fi le or recording. Icon Item Voice Memo Video Locked File Voice Record File Error Scroll bar. If scroll bars appear, it indicates that the screen can be scrolled.
-
Page 62: Zooming Images
Zooming images The zoom view function works with still images only. • In medium view, press the • The 4 arrows on the LCD monitor indicate that the image is zoomed in. • Press the Play Playing Videos Set the camera to Playback mode. Use the navigation controls to scroll through the saved images. -
Page 63: To Capture Screenshot Image From A Video Clip
During playback, use the volume. Press the W button to decrease volume. Press the key to pause playback. Press the paused, the play info will remain on screen except Note • The play info, except the REW/FF or frame by frame modes •... -
Page 64: Playing Voice Recording
Playing Voice Recording Set the camera to Playback mode. Use the navigation controls to scroll through the saved images. When viewing a voice recording fi le, the LCD monitor displays the screen layout of Audio clips. See picture on the right. Press the key to play the voice recording. -
Page 65: Deleting An Image/Video/Audio
Press the key to play the voice recording. During playback, use the volume. Press the T button to increase volume. Press the W button to decrease volume. Press the key to pause playback. Press the key again to resume. When paused, the play info will remain on screen except Press the key to stop the playback. -
Page 66: Playback Menu
Set the camera to Playback mode. View images/videos/audio clips in Single navigation mode. Use the When the desired image/video/audio clip is displayed on the LCD monitor, press the Delete button. A confi rmation selection appears on screen. Select Delete. Press the OK button to delete. -
Page 67: View Slideshow
View Slideshow The view slideshow function allows you to view all stored photos/videos in still image format in a continuous sequence. To view slideshow: From the Playback menu, select View Slideshow. The Slideshow menu appears. Set the slideshow settings. Select Start, and then press the OK button to start the slideshow. -
Page 68: Protect
To delete a photo/video/audio clip: From the Playback menu, select The Delete submenu is displayed on the LCD monitor. Select available settings: • This image. Select one fi le to delete. • Voice Memo Only. Delete only the attached voice memo, the image is retained in the memory. -
Page 69: Remove Red Eyes
Remove Red Eyes The function is used to reduce red eye in captured images. This function is only available for still images. It can be applied to an image several times, but the quality may gradually deteriorate. Set the camera to Playback mode. Press the image. -
Page 70: Voice Memo
Voice Memo The Voice Memo function allows you to record and attach a voice memo to a saved image. You can record a maximum of 30 seconds of Voice memo per image. This function is only available in still images. To record voice memo: Set the camera to Playback mode. -
Page 71: Modify Color
Modify Color The function lets you adjust edit still images to apply different colors or tones for a more artistic effect. An edited photo in this function is saved as a new fi le. Set the camera to Playback mode. Press the Press the MENU button to launch the Playback menu. - Page 72 Negative Image appears to be the opposite of the original image. Neg. Mosaic Image is saved with mosaic tiles. Vivid Red Image is saved with reddish tint. Vivid Green Image is saved with greenish tint. Vivid Blue Image is saved with bluish tint.
-
Page 73: Crop
Crop The function allows you to trim an image to another image size. This function is only available for still images. To trim an image: Set the camera to Playback mode. Use the image to trim. Press the MENU button to launch the Playback menu. -
Page 74: Resize
Resize The Resize function allows you to change the image resolution of large images to smaller ones. This function is only available for still images. To resize an image: Set the camera to Playback mode. Use the key to scroll and select an image to resize. -
Page 75: Dpof
DPOF The Digital Print Order Format (DPOF) function allows you to mark image in your memory card for printing and allows you to specify the number of copies that you want to print at a later date. When all images to be printed are marked, take the memory card to a digital printing service, or use a DPOF compatible printer. -
Page 76: Pictbridge
PictBridge The PictBridge function allows you to print images captured by your camera without connecting the camera to a PC. Print images with a PictBridge compatible printer directly. To activate PictBridge: Connect your camera to a PictBridge compatible printer using the USB cable. See illustration below. -
Page 77: Making Connections
Making Connections Connecting the Camera a PC You can transfer photos, videos and audio fi les to your PC. Connect the camera to a PC using the USB cable. Turn on the camera. The PC detects the connection. The internal memory of camera and memory card display as removable drives in the fi... -
Page 78: Troubleshooting
Troubleshooting Problem Camera does not turn on. Camera turns off automatically. LCD turns blank. Empty battery icon is displayed on the LCD, and then the camera turns off. LCD screen displays ‘No images in memory’. LCD screen displays ‘Not available for this fi le’. LCD screen displays ‘Memory full’. -
Page 79: Getting Help
Should you have a technical support question or your HP Digital Camera require service within the warranty period, please contact the original point of purchase or an authorized HP reseller in your country. If service is not available at those locations, please contact an HP Branded Product warranty agent from the support contact list provided below. - Page 80 Contact/phone Support: Country Language Europe Region (EMEA) België Dutch and German Français French Deutschland German Ireland English Italia Italian Netherlands Dutch Espana Spanish Switzerland German/French/Italian English North America United States English Canada English and French Number + 32 2700 1724 + 33 171230454 + 49 6950073896 + 353 1850882016...
- Page 81 P/N: 7525C00078A...