Table of Contents
Advertisement
Advertisement
Table of Contents

Related Manuals for HP SB360


Summary of Contents for HP SB360
- Page 1 HP SB360 Digital Camera User Manual...
-
Page 2: Table Of Contents
Table of Contents Preface Copyright ........................iv Federal Communications Commission (FCC) Compliance ............ iv Declaration of Conformity ....................iv Trademark Recognition ....................iv Safety and Handling Precautions ..................v Camera Information ......................v Battery Information ......................v Battery safety notice ......................v Camera &... - Page 3 Shooting Image Taking Photos ........................14 Using the Stabilizer .......................14 Setting the Zoom Control ....................15 Using Flash ........................15 Setting the Focus Mode ....................16 Using the Shooting Functions ..................17 Shooting Mode ......................17 Resolution ........................17 Quality .......................... 17 EV Compensation ......................18 White Balance .......................
- Page 4 Zooming images ......................36 Playing Movies .......................36 To capture screenshot image from a movie clip ..............37 Playing Voice Recording ....................37 Playing Voice Memo ......................38 Deleting an Image/Video/Audio ................... 38 Using the Delete Button ....................38 Playback Menu ......................39 Slide Show ........................39 Delete ..........................
-
Page 5: Preface
Preface Copyright This manual contains proprietary information protected by copyright. All rights are reserved. No part of this manual may be reproduced by any mechanical, electronic or other means, in any form, without prior written permission of the manufacturer. © Copyright 2009 Federal Communications Commission (FCC) Compliance This equipment has been tested and found to comply with the limits for a Class B digital device, pursuant to Part 15 of the FCC Rules. -
Page 6: Safety And Handling Precautions
Safety and Handling Precautions Camera Information • Do not take apart or attempt to service the camera yourself. • Do not expose the camera to moisture, or extreme temperatures. • Allow the camera to warm up when moving from cold to warm temperatures. •... -
Page 7: Camera & Battery Recycle Notice
Lithium-ion Battery Warning Caution: Danger of explosion if battery is incorrectly replaced. Replace only with the same or equivalent type recommended by the manufacturer. Dispose of used batteries according to the manufacturer’s instructions. Camera & battery recycle notice In the European Union, do not discard this product and battery as unsorted municipal waste. Contact local authorities for recycling program information. -
Page 8: Using This Menu
Using this Menu Symbols used in this manual are explained below: Note This indicates useful information when using your camera. Warning This indicates warning message that should be read before using the function. Photography Terms and Definitions Terms Definitions A simple technique professional photographers use to ensure they properly auto exposure expose their pictures, especially in challenging lighting situations. - Page 9 Terms Definitions A camera incorporating an image sensor which outputs a digital signal digital still camera (DSC) representing a still picture, or records a digital signal representing a still picture on a removable medium, such as a memory card or magnetic disk. dynamic range cf.
-
Page 10: Package Contents
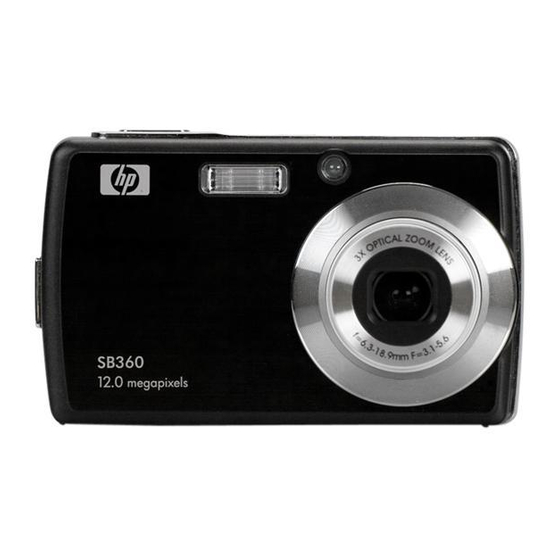
Package Contents Please check the contents of your camera package. It should contain: Digital camera Li-ion battery Battery charger Wrist strap USB cable Power cord CD-ROM Quick Start guide Warranty card Camera Views Front View 1. Flash 2. Self-timer LED /AF Assist Lamp 3. -
Page 11: Back View
Back View 7. Zoom buttons 5. LCD screen 8. Play button 9. SET button /4-way navigation control 6. Menu button 10. FUNC / Delete button Top View 11. Shutter button 12. Stabilizer button 13. LED indicator 14. Power button Bottom View 16. -
Page 12: Navigation Control
Navigation Control You can choose camera settings by pressing the 4-way control or the button. Left/Macro: • Scrolls left in menus. • Activates Macro mode or Auto Focus mode. • Scrolls up in menus. 2. Up Button Right/Flash: 5. SET Button •... -
Page 13: Inserting An Sd/Sdhc Memory Card
Insert the battery into the compartment with the terminal facing inside the camera and the battery indent next to the compartment door. Close the battery compartment. Inserting an SD/SDHC Memory Card Open the battery compartment at the bottom of the camera. Insert the SD/SDHC card into the memory card slot with the metallic part facing the front side of the camera. -
Page 14: Charging The Battery
Charging the Battery The battery that comes along with your package is not charged. You need to charge the battery before using the camera. Insert the battery into the battery charger as shown. Connect the power cord to the battery charger. -
Page 15: Setting The Date & Time
Setting the Date & Time Press to move through the selection. Press keys to change the value for the date and time. Press SET to apply. If necessary, press to close the menu. Note • Holding down the changes the values continuously. •... -
Page 16: Lcd Monitor Layout And Icon Descriptions
LCD Monitor Layout and Icon Descriptions Shooting mode Screen Layout 0.0EV 0.0EV F 3.1 F 3.1 1/ 30 1/ 30 AUTO Item Description Shooting mode Indicates the current mode. Flash Indicates flash settings. Self-Timer/Burst Indicates Self-Timer/Burst settings. Zoom indicator Displays zoom. Shots remaining Indicates the remaining shots available. -
Page 17: Playback Mode Screen Layout
Item Description Shake warning Indicates that the camera is shaking. Shutter speed Displays shutter speed settings. Aperture value Displays aperture settings. Exposure Displays exposure settings. Displays AEB settings. Macro Indicates macro is enabled. Face tracking Indicates face tracking is enabled. White balance Displays white balance settings. - Page 18 Item Description Playback mode Indicates playback mode. Protect Indicates file is protected. Voice memo Indicates voice memo is attached. Indicates the file number over the total number File no. / Total no. of files in the storage card. Battery Indicates battery level. Storage media Indicates used storage memory.
- Page 19 00:00:01 00:00:01 Item Description Playback mode Indicates playback mode. Protect Indicates file is protected. Voice memo Indicates voice memo is attached. Indicates the file number over the total number File no. / Total no. of files in the storage card. Battery Indicates battery level.
- Page 20 Playback mode of audio clips: 27/27 27/27 2009/01/01 01:57 2009/01/01 01:57 :PLAY 00:00:01 00:00:01 Item Description Playback mode Indicates playback mode. Protect Indicates file is protected. Indicates the file number over the total number File no. / Total no. of files in the storage card. Battery Indicates battery level.
-
Page 21: Changing The Lcd Monitor Display
Item Description Indicates the buttons to press on the camera to Key indicator apply the functions. Playing status Displays playing status. Volume Indicates volume settings. Changing the LCD Monitor Display The type of information displayed on the LCD screen can be changed using the SET button. In Shooting mode, the LCD display can be changed into any four of the following: 0.0EV 0.0EV... - Page 22 In Playback mode, the LCD display can be changed into any three of the following: 27/27 27/27 27/27 27/27 F 3.1 F 3.1 AUTO 0.0EV 0.0EV 1/ 30 1/ 30 2009/01/01 01:57 2009/01/01 01:57 2009/01/01 01:57 2009/01/01 01:57 :PLAY :PLAY :PLAY OSD on Full OSD on...
-
Page 23: Shooting Image Taking Photos
Shooting Image Taking Photos Turn on the camera by pressing the Power button. Frame the shot using the focus bracket on the LCD monitor. See illustration on the right. 0.0EV 0.0EV AUTO Half press the Shutter button. The camera automatically adjusts the focus and exposure. When the camera is ready to take the photo, the frame bracket turns green, the shutter speed and aperture value are displayed. -
Page 24: Setting The Zoom Control
Setting the Zoom Control Your camera features up to 3x optical zoom and up to 5x of digital zoom. Please refer to “Setting the Digital Zoom” on page 31 on how to setup digital zoom. To adjusts the optical zoom: Press to zoom in. -
Page 25: Setting The Focus Mode
Your camera is equipped with five flash modes: Auto flash is enabled. Auto flash. The flash fires automatically whenever extra lighting is needed. Red-eye reduction. The flash fires twice to reduce the red-eye effect. Forced on. The flash fires whenever you press the shutter button regardless of lighting conditions. -
Page 26: Using The Shooting Functions
Using the Shooting Functions The hot key of “heart” (FUNC button) is used for a quick setup of the latest six shotting modes (My Mode) and to adjust capturing settings in Shooting Mode. Press the FUNC button of your camera to launch My Mode Menu. Press the FUNC button again to close the menu. -
Page 27: Ev Compensation
EV Compensation In dim lighting condition, the auto exposure function of your camera may be misled into giving the wrong readings. The EV 0 EV Compensation function allows you to adjust the exposure value and correctly expose your images. Available for still images only. AUTO 0 EV •... -
Page 28: Iso
The ISO function lets you adjust the ISO sensitivity in recording still images depending on the lightning levels of your 0 EV surroundings. • Use a higher ISO setting in dim conditions and a lower ISO AUTO Auto setting in brighter conditions. AUTO •... - Page 29 Sepia Images are captured in sepia tones. B&W Images are captured in black and white. Captured image becomes reddish. Ideally used to Vivid Red record images like flowers and cars to make them more vivid. Captured image becomes greenish. Ideally used to Vivid Green record images like mountains and lawns to make them more vivid.
-
Page 30: Using The Record Menu
Using the Record Menu If you are in Shooting mode, you can access the Record menu simply by pressing the MENU button on your camera. When the menu is displayed, use the 4-way navigation control and the SET button to move through menu selections and apply your desired settings. To close the menu anytime, press the menu button again. - Page 31 The table below shows the available scene mode settings. Icon Item Description The simplest way to shoot basic images. Settings are Auto adjusted automatically. The camera automatically adjusts suitable shooting Program settings like shutter speed and aperture values. This feature lets users to adjust the aperture value and Aperture Priority the camera automatically selects the shutter speed to match the brightness.
- Page 32 Icon Item Description This feature is used to capture portrait pictures with NIght Portrait night or dark background. This feature enhances skin tone thus facial skin appears Soft Skin smooth. Soft Flowing Water This feature enhances smooth effects like water or silk. This feature is used to capture food images.
-
Page 33: Using Smile Capture Scene
Using Smile Capture Scene The Smile Capture mode uses smile tracking to automatically capture images. Pressing the shutter button will enable the camera to take 6 continuous shots whenever a smile is detected. This feature is most useful in capturing different angles and smiles of moving people. When capturing an image with more than one person, the camera detects the smile of the closest person on the center of the screen. -
Page 34: Using Intelligent Scene Mode
Using Intelligent Scene Mode With the Intelligent Scene Mode, the camera automatically detects the shooting conditions and switches to the appropriate scene and settings when aiming on a subject. This feature is most useful for novice users to capture great images even without basic knowledge of photography. Intelligent scene icon. -
Page 35: Using Blink Detection Mode
This mode is set when: • There is no face detected. Landscape • The focus distance is more than 1.5 meters. • The EV setting is greater than 11 or 10.5. This mode is set when: • There is no face detected •... -
Page 36: Using Manual Exposure Mode
Select from the Scene Mode submenu. Aperture Priority Icon Displays the aperture value. F 3.1 F 3.1 Use the keys to increase or decrease the aperture. Press the shutter button to capture the image. To activate Aperture Priority Select from the Scene Mode submenu. Shutter Priority Icon Displays the shutter speed value. -
Page 37: Setting The Self-Timer/Burst
versa. Press the shutter button to capture the image. Note When you half press the shutter button, the difference between the correct and selected exposure is displayed in red. Setting the Self-Timer/Burst Your camera features a Self-timer and Burst which can be set in the Self-Timer/Burst function in the Record Menu. -
Page 38: Setting The Aeb
Setting the AEB AEB stands for Automatic Exposure Bracketing. This feature captures the same image with 3 different exposure settings. Shooting Mode • The settings are recorded in the following order: standard Self-Timer/Burst exposure, under exposure, and over exposure. AF Area •... -
Page 39: Setting Sharpness
Setting Sharpness This function allows you to enhance or soft finer details of your photos. Shooting Mode Self-Timer/Burst High AF Area Medium AF Lamp Sharpness The table below shows the available Sharpness settings. Icon Item Description High Sharpens the image. Medium Medium sharpness. -
Page 40: Setting The Digital Zoom
The table below shows the available Contrast settings. Icon Item Description High Enhances the contrast. Normal Normal contrast. Reduces the contrast. Setting the Digital Zoom Saturation Your camera enlarges an image using the optical zoom first. When Contrast the zoom scale exceeds 3x, the camera uses digital zoom. Digital Zoom Intelligent Zoom Date Stamp... -
Page 41: Setting Auto Review
• Date • Date & Time • Setting Auto Review The Auto Review function lets you view the captured image right after shooting it. If Auto review is On, the camera will display the captured image for 1 second on the LCD monitor. Saturation Saturation Contrast... -
Page 42: Recording Movies
Recording Movies You can record movies with the camera, the available recording time depends on the capacity of the memory card. Videos can be recorded until the maximum memory capacity has been reached. Video. From the Shooting mode menu, select Focus your camera on the subject that you want to take. -
Page 43: Recording Voices
Recorded movies in the YouTube mode are stored following the DCF rule, however movies are saved in a specific folder named “_UTUBE”. • To record a YouTube movie, select from the Movie Size function. Available recording time for a YouTube movie is up to 10 minutes. Recording Voices From the Shooting mode menu, select Voice REC. -
Page 44: Using The Viewing Functions
Using the Viewing Functions View images, videos and audio clips through your camera’s Playback mode. Viewing in Single Navigation The Single navigation mode displays the image one by one on the LCD monitor. To view images/videos/audio clips, follow the steps below. Press the Play button to set or turn on the camera to Playback mode. -
Page 45: Zooming Images
Icon Item Description Voice Memo Indicates that a voice memo is attached to the image. Indicates a recorded movie. The image displayed is the Movie first frame of the movie clip. Indicates that the image has been locked. Locked files Locked File cannot be edited or deleted. -
Page 46: To Capture Screenshot Image From A Movie Clip
Press the key to pause playback. Press the key again to resume. To forward or rewind the movie frame by frame, press the key to pause playback, then press the keys. Press the key to stop the playback. The LCD monitor displays the movie frame image in Single navigation mode. -
Page 47: Playing Voice Memo
Playing Voice Memo Voice memo is separately recorded and attached to a captured image. 27/27 27/27 F 3.1 F 3.1 AUTO 0.0EV 0.0EV 1/ 30 1/ 30 2009/01/01 01:57 2009/01/01 01:57 :PLAY Deleting an Image/Video/Audio Using the Delete Button Use the Delete button on your camera to delete or mark an image/ video/audio clip for deletion. -
Page 48: Playback Menu
Playback Menu To go to Playback Menu: Set the camera to Playback mode. Press to launch the Playback Menu. Slide Show keys to move through the menu selections. Delete To select a menu, press or the SET button. Protect Change the submenu settings using the 4-way Red-eye Correction navigation control. -
Page 49: Delete
Delete To delete a photo/video/audio clip: Delete. From the Playback menu, select The Delete submenu is displayed on the LCD monitor. Slide Show Select available settings: Delete Single Single. • Select one file to delete. Protect Voice Only • Voice Only. Delete only the attached voice memo, the Red-eye Correction Multi... -
Page 50: Voice Memo
Steps 5 and 6 Step 7 Red-eye Correction Red-eye Correction Overwrite Start Save As Cancel Cancel After completing Red eye correction, a menu selection appears. Select whether to: Overwrite. • Save and replace the old file with the new one. Save As. -
Page 51: Photo Edit
Photo Edit To activate Photo Edit: Set the camera to Playback mode. Press the keys to scroll and select an image to edit. MENU button to launch the Playback menu. Press the Select Photo Edit. The Photo Edit submenu appears. Photo Edit Slide Show Delete... -
Page 52: Z-Lighting
Z-Lighting The Z-Lighting function allows you to manually adjust the exposure to compensate for inadequate lighting conditions. This function is only applicable for still images. Z-Lighting Z-Lighting Rotate Trim Resize Startup Image DPOF Rotate The Rotate function lets you change the orientation of a saved photo. Rotated images are saved as a new file. -
Page 53: Resize
Enlarged image Current image size 4-way indicator Display area SET: 5M SET: 5M Shows the approximate location of the displayed area. Use the navigation controls to move the image. Trim Press the SET button to apply changes. A menu selection appears. -
Page 54: Startup Image
Startup Image The Startup Image function allows you to setup a startup image when you turn on your camera. Startup Image System My Photo DPOF The Digital Print Order Format (DPOF) function allows you to mark image in your memory card for printing and allows you to specify the number of copies that you want to print at a later date. -
Page 55: Pictbridge
PictBridge The PictBridge function allows you to print images captured by your camera without connecting the camera to a PC. Print images with a PictBridge compatible printer directly. To activate PictBridge: Connect your camera to a PictBridge compatible printer using the USB cable. See illustration below. -
Page 56: Making Connections Connecting The Camera To A Pc
Making Connections Connecting the Camera to a PC Connect the camera to a PC using the USB cable. Turn on the camera. The PC detects the connection. The camera’s internal memory and memory card display as removable drives in the file manager. No image is displayed on the LCD monitor. -
Page 57: Troubleshooting
Troubleshooting Problem Cause and/or Action Camera does not turn on. The batteries may be exhausted. Charge or replace the batteries. Camera turns off Press any button except the Power button to turn on the camera. automatically. LCD turns blank. Press any button except the Power button to turn on the LCD. Empty battery icon is Batteries are exhausted, please replace or recharge. -
Page 58: Specifications
Specifications Sensor 12 Mega Pixels, Type: 1/2.3 Focal Length: f = 6.3 - 18.9 mm, Lens 3X optical zoom, 5x digital zoom LCD Monitor 3.0” color LCD Normal: 0.4m - Infinity Focusing Range Macro Wide: 10cm - 60cm Tele: 40 - 60cm Aperture F = 3.1 - 5.6 Type: Mechanical and Electronic Shutter... - Page 59 Effect (Preview) Normal, Vivid, Sepia, Black & White, Red, Green, Blue Effect (Playback) Normal, Sepia, Black & White, Negative, Mosaic, Red, Green, Blue Internal memory: 32MB flash memory Real size for mass storage: about 9 MB Storage External memory: SD (up to 4GB), SDHC card (up to 16GB guaranteed) English, Spanish, German, French, Italian, Portuguese, Dutch, Czech, Hungarian, Polish, Turkish, Russian, Swedish, Greek,...
-
Page 60: Getting Help
HP reseller in your country. If service is not available at those locations, please contact an HP Branded Product warranty agent from the support contact list provided below. A service agent will work with you to troubleshoot your issue and if necessary, issue a Return Material Authorization (RMA) number in order to replace your HP Branded Product. - Page 61 P/N: 7525C00060A...