Table of Contents
Advertisement
Available languages
Available languages
Quick Links
Advertisement
Chapters
Table of Contents

Related Manuals for Memorex MMP8590-BLK


Summary of Contents for Memorex MMP8590-BLK
-
Page 2: Table Of Contents
TABLE OF CONTENTS Precautions ......2 Operation–Photo Playback Mode ..37 FCC Declaration . -
Page 3: Precautions
PRECAUTIONS COPYRIGHT: • Distributing copies of MP3, WMA, WMA with DRM tracks and/or WMV files without permission is a violation of international copyright laws. SAFETY: • Vibration experienced during walking or exercising will not affect the player. However, dropping the player or dropping a heavy object on the player may result in damage or sound distortion. -
Page 4: Fcc Declaration
FCC DECLARATION This device complies with Part 15 of the FCC rules. Operation is subject to the following two conditions: 1) This device may not cause harmful interference, and 2) This device must accept any interference received, including interference that may cause undesired operation. - Page 5 Dear Customer: Selecting fine audio and video equipment such as the unit you’ve just purchased is only the start of your musical enjoyment. Now it’s time to consider how you can maximize the fun and excitement your equipment offers. This manufacturer and the Electronic Industries Association’s Consumer Electronics Group want you to get the most out of your equipment by playing it at a safe level.
- Page 6 Decibel Level Example Quiet library, soft whispers Living room, refrigerator, bedroom away from traffic Light traffic, normal conversation, quiet office Air conditioner at 20 feet, sewing machine Vacuum cleaner, hair dryer, noisy restaurant Average city traffic, garbage disposals, alarm clock at two feet THE FOLLOWING NOISES CAN BE DANGEROUS UNDER CONSTANT EXPOSURE: Subway, motorcycle, truck traffic, lawn mower Garbage truck, chain saw, pneumatic drill...
-
Page 7: Location Of Controls
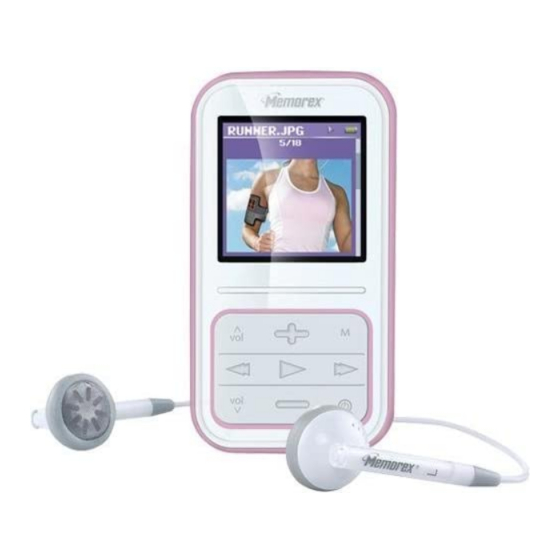
LOCATION OF CONTROLS MIC (Microphone), USB Jack and Headphones Jack (Top of Unit) (USB CABLE PNK/WHT PART NO. 337-01000-E052*, USB CABLE BLK PART NO. 337- 01000-E050*, HEADPHONES PNK/WHT PART NO. 5261- 32000-E020*, HEADPHONES BLK PART NO. 261-32000-E010*) Hold Switch Display Volume Up Button Navigation Left/Skip–Search o Button... -
Page 8: Charging The Battery
CHARGING THE BATTERY This unit has a built-in Lithium Polymer rechargeable battery. When the bars in the battery indicator (in the display) become low (see Figure 1) and especially when the bars turn red, recharge the battery as follows. Figure 1 1. -
Page 9: Installing The Software
INSTALLING THE SOFTWARE Software Installation CD General Information (PART NO. PA-563-E01*) This unit is compatible with Microsoft Windows XP (Home or Professional Edition with Service Pack 2 or higher) or Vista. For Microsoft Windows XP: Use the CD to install the MyDJ Plug-In and Windows Media Player (10 or 11). System requirements for MyDJ Plug-in: •... -
Page 10: Installing The Mydj Plug-In
INSTALLING THE MyDJ PLUG-IN Procedure to Install the MyDJ Plug-In: (for Windows Media Player 10 or 11; see requirements on the previous page): 1. Insert the installation CD-Rom into the CD Drive, then the installation screen will appear. If the installation screen doesn't automatically appear, double-click My Computer then double-click on the CD drive, then the installation... - Page 11 INSTALLING THE MyDJ PLUG-IN 4. The “Select Installation Folder” screen will appear. It is recommended to keep the folder as is. Then click “Next”. 5. At the “Confirm Installation” screen, click “Next” to start the installation. 6. When successfully completed, the “Installation Complete”...
- Page 12 WINDOWS MEDIA PLAYER 10 INSTALLATION Windows Media Player 10 is for use with Windows XP only. See page 14 for how to install Windows Media Player 11. (Windows Vista users must use Windows Media Player 11.) Once you have installed Windows Media Player 10, you can transfer MP3 files, WMA files, WMA files with DRM 9 or 10 and photos to your player using the “Sync”...
- Page 13 WINDOWS MEDIA PLAYER 10 INSTALLATION 4. Installation will continue. 5. At the Welcome screen, click NEXT. 6. Select the desired privacy options.
- Page 14 WINDOWS MEDIA PLAYER 10 INSTALLATION 7. Click on Privacy Statement to view the Statement, if desired. When finished, click “Next”. 8. Read the instructions and tick the check boxes as desired. Then click on More Options and tick the check boxes as desired. 9.
- Page 15 WINDOWS MEDIA PLAYER 11 INSTALLATION Once you have installed Windows Media Player 11, you can transfer MP3 files, WMA files, WMA files with DRM 9 or 10 and photos to your player using the “Sync” function. 1. Insert the installation CD-Rom into the CD Drive, then the installation screen will appear.
- Page 16 WINDOWS MEDIA PLAYER 11 INSTALLATION 4. Read the License Agreement, then click “I Accept”. 5. Installation will continue. 6. At the Welcome screen, it is recommended to select “Express Settings” and then click on “Finish”. The newly-installed Windows Media Player 11 will open. You may also see a pop- up window asking, “A Windows Media Player update is available.
-
Page 17: Downloading And Transferring Files
DOWNLOADING AND TRANSFERRING FILES TRANSFERRING FILES You can download digital music files from the Internet or use encoding software to convert music that you have on an audio CD into MP3 or WMA format. Once these files are stored on your computer you can easily copy them to your player. - Page 18 DOWNLOADING AND TRANSFERRING FILES (CONT.) CONVERTING AN AUDIO CD INTO MP3 OR WMA FORMAT For Windows XP, you can also utilize the previously installed Windows Media Player 10 (or 11) software to convert music from an audio CD into MP3 or WMA format as follows: Open the Windows Media Player 10 (or 11) Browser, then click on the “Rip”...
- Page 19 DOWNLOADING AND TRANSFERRING FILES (CONT.) TRANSFERRING MP3/WMA/PHOTO FILES AND WMA FILES WITH DRM 9 OR DRM 10 USING WINDOWS MEDIA PLAYER 10 (FOR WINDOWS XP ONLY) To transfer MP3/WMA/PHOTO/WMA files with DRM 9 or 10 to the player, follow the procedure described below using the previously installed WMP (Windows Media Player) 10.
- Page 20 DOWNLOADING AND TRANSFERRING FILES (CONT.) CREATING A PLAYLIST USING WINDOWS MEDIA PLAYER 10 Follow the steps below to create a playlist in the Music menu, using WMP (Windows Media Player) 10: 1. Connect your player to the USB port on your computer as shown on page 7. Open WMP 10.
-
Page 21: Using The Mydj Plug-In
USING THE MyDJ PLUG-IN The MyDJ Plug-In will open automatically when you start Windows Media Player 10 or 11 for the first time after installation. (If you don’t have any songs in your WMP [Windows Media Player] library, you will first need to add some in order to use the MyDJ Plug-In.) The first time you start the MyDJ Plug-In, you will be asked if you wish to save analysis information in your music files. - Page 22 USING THE MyDJ PLUG-IN (CONTINUED) The box that appears will display the total number of tracks you have in your WMP library, the number of tracks that are ready to be used on this unit and the number of tracks that could use further validation or extended analysis. NOTE: Selecting a “Processor Load”...
-
Page 23: General Operation
To turn the unit on, press and hold the Power At any time, press the Menu button to go back to the button; the Memorex screen will appear for a previous screen/Main menu. few moments followed by the Main menu. To... -
Page 24: Headphones Jack
GENERAL OPERATION (CONTINUED) HEADPHONES JACK VOLUME BUTTONS Plug the headphones (included) into the To control the volume, simply press the Volume Headphones jack on the top of the unit. Up 1 and/or Down 2 button during playback. NOTE: While changing the volume, the volume “pop up”... -
Page 25: Hold Switch
GENERAL OPERATION (CONTINUED) HOLD SWITCH DEFAULT/FULL SCREEN While in Photo Playback mode, press the Slide the Hold switch to the Lock position (up) to lock the buttons; “Locked” will appear briefly and Navigation Down button to toggle between then the Lock icon will appear in the upper right Default and Full Screen format. -
Page 26: Operation-Music Playback Mode
OPERATION–MUSIC PLAYBACK MODE TO LISTEN TO MP3s/WMAs This unit supports the following audio formats: MP3, MPEG 1/2/2.5 Layer 3 with a bit rate of 32- 320 kbps, WMA files or WMA with DRM 9 or 10 with a bit rate of 48-192 kbps. Turn the unit on and access the main menu Use the Navigation Up 1 and/or Down 2 as described on page 22. - Page 27 OPERATION–MUSIC PLAYBACK MODE (CONTINUED) To browse through your music, see more details below: Play Queue: “Play All”, “Clear All”, “Clear Track” and the song's names will appear in the display. Select Play All or the desired song using the Navigation Up 1 and/or Down 2 buttons then press the Enter/Play/Pause ®p button 3 to start playback.
-
Page 28: To Delete Songs From The Play Queue
OPERATION–MUSIC PLAYBACK MODE (CONTINUED) TO DELETE SONGS FROM THE PLAY QUEUE To clear one track at a time from the Enter the Play Queue submenu as described on page 26. queue, use the Navigation Up 1 and/or To clear all tracks in the queue, use the Down 2 button to select Clear Track and then press the Enter/Play/Pause ®p button Navigation Up 1 and/or Down 2 button to... -
Page 29: High-Speed Music Search
OPERATION–MUSIC PLAYBACK MODE (CONTINUED) HIGH-SPEED MUSIC SEARCH During playback, press and hold the Navigation Right/Skip–Search n 1 or Left/ o 2 button to move the player forward or backward within a file to locate a specific musical passage. The player will move forward or backward at high speed as long as the button is held. -
Page 30: Music Contextual Menu
OPERATION–MUSIC PLAYBACK MODE (CONTINUED) MUSIC CONTEXTUAL MENU–EQUALIZER While in Music Playback mode (Now Playing Scroll to the first option (Equalizer) using the screen), press the Navigation Down button to Navigation Up 1 and/or Down 2 buttons. open the Music Contextual menu. Select a desired “Equalizer”... - Page 31 OPERATION–MUSIC PLAYBACK MODE (CONTINUED) MUSIC CONTEXTUAL MENU–PLAY MODE While in Music Playback mode (Now Playing Scroll to second option (Play Mode) using the screen), press the Navigation Down button to Navigation Up 1 and/or Down 2 buttons. open the Music Contextual menu. NOTE: •...
- Page 32 OPERATION–MUSIC PLAYBACK MODE (CONTINUED) MUSIC CONTEXTUAL MENU–COLOR THEME While in Music Playback mode (Now Playing Scroll to the third option (Color Theme) using screen), press the Navigation Down button to the Navigation Up 1 and/or Down 2 buttons. open the Music Contextual menu. Select a desired “Color Theme”...
- Page 33 OPERATION–MUSIC PLAYBACK MODE (CONTINUED) MUSIC CONTEXTUAL MENU–CREATE djMix While in Music Playback mode (Now Playing Scroll to “Create djMix” using the Navigation screen), press the Navigation Down button to Up 1 and/or Down 2 buttons, followed by the open the Music Contextual menu. Enter/Play/Pause ®p button 3 to create a djMix (playlist) based on the current song with MyDJ feature.
-
Page 34: Using The Djscan Feature
OPERATION–MUSIC PLAYBACK MODE (CONTINUED) MyDJ offers an exciting, new way to enjoy your music! Your music instantly becomes more usable and fun, allowing you to make mixes on the device itself, wherever and whenever you want. By using the djScan, djMix and djMoods options described on the next four pages, you can get an amazing playlist that includes tracks from every corner of your collection—instantly. - Page 35 OPERATION–MUSIC PLAYBACK MODE (CONTINUED) NOTES: • IMPORTANT!: The unit must have at least 25 MyDJ ready songs for the MyDJ functions to work. • Maximum 20 songs will be placed into the MyDJ playlists. • Scan Mode: While in Scan mode, the unit will play a few seconds of a song, until you exit the Scan mode by pressing the Menu button or create a playlist by pressing the Enter/Play/Pause ®p button.
-
Page 36: Using The Djmix Feature
OPERATION–MUSIC PLAYBACK MODE (CONTINUED) USING THE djMix FEATURE Turn the unit on and access the main menu Scroll to djMix using the Navigation Up 1 and/or as described on page 22. Select MyDJ Down 2 buttons, followed by the Enter/Play/ Pause ®p button 3 to select it. -
Page 37: Using The Djmoods Feature
OPERATION–MUSIC PLAYBACK MODE (CONTINUED) USING THE djMoods FEATURE Turn the unit on and access the main menu Scroll to djMoods using the Navigation Up as described on page 22. Select MyDJ 1 and/or Down 2 buttons, followed by the using the Navigation Down button 1, Enter/Play/Pause ®p button 3 to select it. -
Page 38: Operation-Photo Playback Mode
OPERATION–PHOTO PLAYBACK MODE TO VIEW PHOTOS– This unit supports baseline JPEGs. Use the Navigation Up 1 and/or Down 2 buttons to select between Slideshow, Thumbnails or to Turn the unit on and access the main menu as select a particular photo. The latest added photos described on page 22. -
Page 39: Thumbnail View
OPERATION–PHOTO PLAYBACK MODE (CONTINUED) THUMBNAIL VIEW If you scrolled to Thumbnails in Step 2 on the Press the Enter/Play/Pause ®p button to view the desired photo. previous page, press the Enter/Play/Pause ®p button 1; a thumbnail view of the s will photo appear in the display. -
Page 40: Operation-Fm Radio Mode
OPERATION–FM RADIO MODE TO LISTEN TO THE FM RADIO Turn the unit on and access the main menu Select a station by pressing, or pressing and holding to search more quickly, the Navigation as described on page 22. Select Radio Right/Skip–Search 1 or Left/ 2 button. - Page 41 OPERATION–FM RADIO MODE (CONTINUED) TO ADD PRESETS (UP TO 20) TO LOAD PRESETS While in FM Playback mode, use the While in FM Playback mode, and with a desired station selected, press the Enter/ Navigation Up 1 and/or Down 2 buttons to browse to the desired preset.
-
Page 42: Operation-Recorder Mode
OPERATION–RECORDER MODE TO CREATE A VOICE RECORDING Turn the unit on and access the main menu Use the Navigation Up 1 and/or Down 2 as described on page 22. Select Recorder buttons to select Record Voice. Then press using the Navigation Down button 1, the Enter/Play/Pause ®p button 3 to select. -
Page 43: To Delete A Recording
OPERATION–RECORDER MODE (CONTINUED) TO DELETE A RECORDING Access the Recorder menu as described on Use the Navigation Up 1 and/or Down 2 buttons the previous page. Use the Navigation Up to select “Delete All” or the desired recording to 1 and/or Down 2 buttons to select Delete delete. -
Page 44: Setting The Recorder Options
OPERATION–RECORDER MODE (CONTINUED) SETTING THE RECORDER OPTIONS Turn the unit on and access the main menu Scroll to “Record Setting” using the as described on page 22. Select Recorder Navigation Up 1 and/or Down 2 buttons, using the Navigation Down button 1, followed by the Enter/Play/Pause ®p button followed by the Enter/Play/Pause ®p 3 to select it. -
Page 45: Operation-Stop Watch Mode
OPERATION–STOP WATCH MODE USING THE STOP WATCH Turn the unit on and access the main menu Press the Enter/Play/Pause ®p button to as described on page 22. Select Stop start the timer; the timer will then start Watch using the Navigation Down button counting up. -
Page 46: Settings Menu
SETTINGS MENU SETTING THE COLOR THEME Turn the unit on and access the main menu Press the Enter/Play/Pause ®p button to as described on page 22. Select Setting select “Color Theme”. using the Navigation Down button 1, followed by the Enter/Play/Pause ®p button 2. - Page 47 SETTINGS MENU (CONTINUED) SETTING THE EQUALIZER Turn the unit on and access the main menu Scroll to “Equalizer” using the Navigation Up as described on page 22. Select Setting 1 and/or Down 2 buttons, followed by the using the Navigation Down button 1, Enter/Play/Pause ®p button 3 to select it.
- Page 48 SETTINGS MENU (CONTINUED) SETTING THE PLAY MODE Turn the unit on and access the main menu as Scroll to “Play Mode” using the Navigation Up 1 described on page 22. Select Setting using the and/or Down 2 buttons, followed by the Navigation Down button 1, followed by the Enter/Play/Pause ®p button 3 to select it.
- Page 49 SETTINGS MENU (CONTINUED) SETTING THE BRIGHTNESS Turn the unit on and access the main menu Scroll to “Brightness” using the Navigation Up as described on page 22. Select Setting 1 and/or Down 2 buttons, followed by the using the Navigation Down button 1, Enter/Play/Pause ®p button 3 to select it.
- Page 50 SETTINGS MENU (CONTINUED) SETTING THE POWER SAVINGS Turn the unit on and access the main menu Scroll to “Power Savings” using the as described on page 22. Select Setting Navigation Up 1 and/or Down 2 buttons, using the Navigation Down button 1, followed by the Enter/Play/Pause ®p button followed by the Enter/Play/Pause ®p 3 to select it.
- Page 51 SETTINGS MENU (CONTINUED) SETTING THE BACKLIGHT TIMER Turn the unit on and access the main menu Scroll to “Backlight Timer” using the as described on page 22. Select Setting Navigation Up 1 and/or Down 2 buttons, using the Navigation Down button 1, followed by the Enter/Play/Pause ®p button followed by the Enter/Play/Pause ®p 3 to select it.
- Page 52 SETTINGS MENU (CONTINUED) SETTING THE TIME Turn the unit on and access the main menu Scroll to “Time Set” using the Navigation Up as described on page 22. Select Setting 1 and/or Down 2 buttons, followed by the using the Navigation Down button 1, Enter/Play/Pause ®p button 3 to select it.
- Page 53 SETTINGS MENU (CONTINUED) SETTING THE LANGUAGE Turn the unit on and access the main menu Scroll to “Language” using the Navigation Up as described on page 22. Select Setting 1 and/or Down 2 buttons, followed by the using the Navigation Down button 1, Enter/Play/Pause ®p button 3 to select it.
- Page 54 SETTINGS MENU (CONTINUED) TO VIEW THE SYSTEM INFO (“ABOUT”) Turn the unit on and access the main menu Scroll to “About” using the Navigation Up 1 as described on page 22. Select Setting and/or Down 2 buttons, followed by the using the Navigation Down button 1, Enter/Play/Pause ®p button 3 to select it.
- Page 55 SETTINGS MENU (CONTINUED) TO RESTORE THE DEFAULT SETTINGS Turn the unit on and access the main menu Scroll to “Default” using the Navigation Up as described on page 22. Select Settings 1 and/or Down 2 buttons, followed by the using the Navigation Down button 1, Enter/Play/Pause ®p button 3 to select it.
- Page 56 SETTINGS MENU (CONTINUED) TO FORMAT THE PLAYER WARNING! Do not format this player unless it stops working and you are instructed to do so by technical support personnel. Turn the unit on and access the main menu Scroll to “Format” using the Navigation Up as described on page 22.
-
Page 57: Troubleshooting Guide
TROUBLESHOOTING GUIDE If you experience a problem with this unit, check the chart below before calling for service. SYMPTOM CAUSE SOLUTION Unit will not Battery is low/empty. Recharge battery as turn on. described on page 7. Power is not See page 22 for how to turn turned on. - Page 58 TROUBLESHOOTING GUIDE (CONTINUED) SYMPTOM CAUSE SOLUTION The Lock feature is Deactivate Lock feature as No buttons work. activated. described on page 24. Unit needs to be reset Reset unit and/or or firmware needs to be update firmware, see updated. page 59. Unit acting erratically.
-
Page 59: Formatting The Player
FORMATTING THE PLAYER Formatting the Player WARNING! Do not format this player unless it stops working and you are instructed to do so by technical support personnel. 1. Use the USB cable to connect the player and the computer. 2. Double click on My Computer, then right click “Media Player”... -
Page 60: Resetting The Unit
RESETTING THE UNIT If the unit acts erratically, reset the unit by inserting a thin object (such as a paper clip) into the recessed Reset button. For the Reset button, see page 6 for the button's location. FOR FIRMWARE UPGRADE Please visit our Web site at www.memorexelectronics.com to check if there is new firmware available. -
Page 61: Specifications
SPECIFICATIONS Audio Frequency Range 20Hz–20KHz Headphones Output 5mW, 32ohm (Max Vol) S/N Ratio 90dB (MP3) File Support MPEG 1/2/2.5 Layer 3 with a Bit Rate of 32-320 kbps Windows Media Audio (WMA file with DRM 9 or DRM 10) with a Bit Rate of 48-192 kbps Picture baseline JPEGs FM Tuner... - Page 62 FOR FIRMWARE UPGRADE, PLEASE VISIT OUR WEBSITE AT WWW.MEMOREXELECTRONICS.COM TO CHECK IF THERE IS NEW FIRMWARE AVAILABLE. FOR ADDITIONAL SET-UP OR OPERATING ASSISTANCE, PLEASE VISIT OUR WEBSITE AT WWW.MEMOREXELECTRONICS.COM OR CONTACT CUSTOMER SERVICE AT 1-800-919-3647. PLEASE KEEP ALL PACKAGING MATERIAL FOR AT LEAST 90 DAYS IN CASE YOU NEED TO RETURN THIS PRODUCT TO YOUR PLACE OF PURCHASE OR IMATION ELECTRONICS PRODUCTS.
- Page 63 TABLA DE CONTENIDO Precauciones......2 • Cómo usar la función de djScan ..33 Declaración de la FCC .
-
Page 64: Precauciones
PRECAUCIONES DERECHO DE AUTOR: • La distribución de copias de pistas en formato MP3, WMA, WMA con DRM y/o archivos WMV sin premiso es una violación de las leyes internacionales de los derechos de autor. SEGURIDAD: • La vibración experimentada al caminar o hacer ejercicio no afectará al reproductor. Sin embargo, dejar caer el reproductor o dejar caer un objeto pesado sobre el reproductor puede ocasionar daños o distorsión en el sonido. -
Page 65: Declaración De La Fcc
DECLARACIÓN DE LA FCC Este aparato cumple con el Apartado 15 de las normas de la FCC. El funcionamiento está sujeto a las siguientes dos condiciones: (1) Este aparato no debe causar interferencia dañina y (2) este aparato debe aceptar cualquier interferencia que reciba, incluso aquella interferencia que pueda causar una operación indeseada. - Page 66 Estimado Cliente: En el momento en que seleccionó un equipo de tan alta tecnología como el que usted acaba de comprar, su entretenimiento musical recién comenzó. Ahora es tiempo de pensar en cómo puede optimizar el entretenimiento que su equipo le ofrece. Este fabricante y la Asociación de Industrias Electrónicas del Grupo de Consumidores Electrónicos desean que usted obtenga el mejor resultado de su equipo, usándolo a un nivel seguro como es escuchar un sonido claro y sonoro, sin distorsión y, sobre...
- Page 67 Nivel de decibeles Ejemplo Una biblioteca, susurros. Sala, refrigerador, dormitorio lejos del tráfico. Semáforo, conversación normal, oficina tranquila. Aire acondicionado a 20 pies, máquina de coser Aspiradora, secadora de pelo, restaurante bullicioso. Tráfico en la calle, triturador de basura, alarma de reloj a 60 cm. LOS SIGUIENTES RUIDOS PUEDEN SER PELIGROSOS SI SE SOMETE A ELLOS EN FORMA CONSTANTE: Metro, motocicletas, tráfico de camiones, podadora de césped.
-
Page 68: Ubicación De Los Controles
UBICACIÓN DE LOS CONTROLES MIC (micrófono), USB y Conector de audífonos (parte cima de la unidad) (CABLE USB PNK/WHT NO. DE PIEZA 337-01000-E052*, CABLE USB BLK NO. DE PIEZA 337-01000- E050*, AUDÍFONOS PNK/WHT NO. DE PIEZA 5261-32000- E020*, AUDÍFONOS BLK NO. DE PIEZA 261-32000-E010*) Interruptor de Sostener Pantalla... -
Page 69: Cargar La Batería
RECARGAR LA BATERÍA Esta unidad tiene una batería recargable integrada de polímero de litio. Cuando las barras en el indicador de la batería (en la pantalla) bajan (ver Figura 1), y en particular cuando las barras cambian a color rojo, recargue la batería de la siguiente manera. -
Page 70: Instalación Del Software
INSTALACIÓN DEL SOFTWARE CD de instalación del software Información general PA-563-E01 (NO. DE PIEZA Esta unidad es compatible con Microsoft Windows XP (Home Edition o Professional Edition con Service Pack 2 o superior) o Vista. Para Microsoft Windows XP: Use el CD para instalar el complemento MyDJ y el Reproductor de Windows Media (10 o 11). Requisitos del sistema para el complemento MyDJ: •... -
Page 71: Instalación Del Complemento Mydj
INSTALACIÓN DEL COMPLEMENTO MyDJ Procedimiento para instalar el complemento MyDJ: (para el Reproductor de Windows Media 10 o 11; vea los requisitos en la página anterior): 1. Introduzca el disco de instalación en la unidad de CD-ROM y aparecerá la pantalla de instalación. - Page 72 INSTALACIÓN DEL COMPLEMENTO MyDJ 4. Aparecerá la pantalla de “Seleccionar carpeta de instalación”. Recomendamos que conserve la carpeta como está. Luego, haga clic en “Siguiente”. 5. En la pantalla de “Confirmar instalación”, haga clic “Siguiente” para empezar instalación. 6. Cuando termine satisfactoriamente, aparecerá la pantalla de “Instalación completa”.
-
Page 73: Instalación Del Reproductor De Windows Media 10
INSTALACIÓN DEL REPRODUCTOR DE WINDOWS MEDIA 10 El Reproductor de Windows Media 10 únicamente es para utilizarse con Windows XP. Consulte la página 14 para saber como instalar Windows Media Player 11. (Los usuarios de Windows Vista deben utilizar Windows Media Player 11). Una vez instalado el Reproductor de Windows Media 10, puede transferir archivos MP3, WMA, WMA con DRM 9 ó... -
Page 74: Instalación Del Reproductor De Windows Media 11
INSTALACIÓN DEL REPRODUCTOR DE WINDOWS MEDIA 10 4. La instalación continuará. 5. En la pantalla de bienvenida, haga clic en SIGUIENTE. 6. Seleccione las opciones de privacidad deseadas. - Page 75 INSTALACIÓN DEL REPRODUCTOR DE WINDOWS MEDIA 10 7. Haga clic en la Declaración de privacidad para verla, si así lo desea. Cuando termine, haga clic en “Siguiente”. 8. Lea las instrucciones y active las casillas de verificación deseadas. Luego haga clic en Más opciones y active las casillas de verificación deseadas.
- Page 76 INSTALACIÓN DEL REPRODUCTOR DE WINDOWS MEDIA 11 Una vez instalado el Reproductor de Windows Media 11, puede transferir archivos MP3, WMA, WMA con DRM 9 ó 10 a su reproductor usando la función de “Sincronización”. 1. Introduzca el disco de instalación en la unidad de CD-ROM y aparecerá...
- Page 77 INSTALACIÓN DEL REPRODUCTOR DE WINDOWS MEDIA 11 4. Lea el Contrato de licencia, luego haga clic en “Acepto”. 5. La instalación continuará. 6. En la pantalla de Bienvenida, se recomienda seleccionar “Configuraciones rápidas” (Express Settings) y luego hacer clic en “Finalizar” (Finish).
-
Page 78: Descargar Y Transferir Archivos
DESCARGAR Y TRANSFERIR ARCHIVOS TRANSFERIR ARCHIVOS Puede descargar archivos de música digital desde Internet o utilizar un software de codificación para convertir la música que tiene un disco de audio a formato MP3 o WMA. Una vez que haya guardado estos archivos en su computadora, puede copiarlos fácilmente en su reproductor. - Page 79 DESCARGAR Y TRANSFERIR ARCHIVOS (CONT.) CONVERSIÓN DE UN CD DE AUDIO EN FORMATO MP3 O WMA Para Windows XP, puede utilizar el software Reproductor de Windows Media 10 (o 11) anteriormente instalado para convertir la música en un CD de audio a formato MP3 o WMA, del siguiente modo: Abra el explorador de Reproductor de Windows Media 10 (o 11), luego haga clic en el icono de “Copiar desde...
- Page 80 DESCARGAR Y TRANSFERIR ARCHIVOS (CONT.) TRANSFERIR ARCHIVOS MP3/WMA/FOTO Y ARCHIVOS WMA CON DRM 9 ó 10 USANDO EL REPRODUCTOR DE WINDOWS MEDIA 10 (SÓLO PARA WINDOWS XP) Para transferir archivos MP3/WMA/FOTO/WMA con DRM 9 ó 10 al reproductor, siga el procedimiento descrito a continuación usando el Reproductor de Windows Media 10 previamente instalado.
- Page 81 DESCARGAR Y TRANSFERIR ARCHIVOS (CONT.) CREAR UNA LISTA DE REPRODUCCIÓN USANDO EL REPRODUCTOR DE WINDOWS MEDIA 10 (SÓLO PARA WINDOWS XP) Siga los pasos a continuación para crear una lista de reproducción en el menú Música, usando el Reproductor de Windows Media 10: 1.
-
Page 82: Cómo Usar El Complemento Mydj
CÓMO USAR EL COMPLEMENTO MyDJ El complemento MyDJ se abrirá automáticamente cuando inicie el Reproductor de Windows Media 10 o 11 la primera vez después de la instalación. (Si no tiene canciones en la biblioteca de WMP [el Reproductor de Windows Media], primero deberá agregar algunas para poder usar el complemento MyDJ.) La primera vez que inicie el complemento MyDJ, le preguntarán si desea guardar la información de análisis en sus archivos de música. - Page 83 CÓMO USAR EL COMPLEMENTO MyDJ (CONTINÚA) El cuadro que aparece muestra el número total de pistas que tiene en la biblioteca WMP, el número de pistas que están preparadas para ser usadas con esta unidad y el número de pistas que necesitan una validación posterior o un análisis extendido. NOTA: Seleccionar una “Carga de procesador”...
-
Page 84: Operación General
En cualquier momento, presione el botón de Menú para presionado el botón de encendido/ apagado (Power); regresar a la pantalla anterior o al menú Principal. aparecerá la pantalla de Memorex durante unos NOTA: Puede presionar el botón de Navegación minutos seguida del menú Principal. Para apagar la unidad, presione y mantenga presionado el botón de... -
Page 85: Botones De Volumen
OPERACIÓN GENERAL (CONTINÚA) CONECTOR DE AUDÍFONOS BOTONES DE VOLUMEN Conecte los audífonos (incluidos) en el Para controlar el volumen, simplemente presione conector de audífonos en la parte cima de el botón de Subir 1/Bajar 2 Volumen durante la reproducción. la unidad. NOTA: Mientras cambia el volumen, el indicador emergente de volumen se sobrepondrá... -
Page 86: Interruptor De Sostener
OPERACIÓN GENERAL (CONTINÚA) INTERRUPTOR DE SOSTENER PREDETERMINADO/PANTALLA COMPLETA Mientras está en modo de Reproducción de Deslice el interruptor de Sostener a la posición de Bloqueo (arriba) para bloquear los botones; fotos, presione el botón de Navegación Abajo “Bloqueado” aparece brevemente luego para alternar entre formato Predeterminado y aparecerá... -
Page 87: Para Escuchar Música En Mp3 O Wma
OPERACIÓN–MODO DE REPRODUCCIÓN DE MÚSICA PARA ESCUCHAR MÚSICA EN MP3 o WMA Esta unidad es compatible con los siguientes formatos de audio: MP3, MPEG 1/2/2.5 Layer 3 con una velocidad en bits de 32-320 kbps, archivos WMA o WMA con DRM 9 ó 10 con una velocidad en bits de 48-192 kbps. - Page 88 OPERACIÓN–MODO DE REPRODUCCIÓN DE MÚSICA En cuanto a explorar la música, vea los detalles a continuación: Cola de reproducción: “Reproducir todo”, “Borrar todo”, “Borrar pista” y el nombre de la canción aparecerá en la pantalla. Seleccione Reproducir todo o la canción deseada usando los botones de Navegación Arriba 1 y/o Abajo 2, luego presione el botón de Entrar/Reproducir/Pausa ®p 3 para empezar la reproducción.
-
Page 89: Para Borrar Canciones De La Cola
OPERACIÓN–MODO DE REPRODUCCIÓN DE MÚSICA PARA BORRAR CANCIONES DE LA COLA DE REPRODUCCIÓN Entre al submenú Cola de reproducción Para borrar una pista a la vez en la cola, use como se describe en la página 26. el botón de Navegación Arriba 1 y/o Abajo 2 Para borrar todas las pistas en la cola, para seleccionar Borrar una y luego presione el botón de Entrar/Reproducir/Pausa ®p 3. -
Page 90: Búsqueda De Música A Alta Velocidad
OPERACIÓN–MODO DE REPRODUCCIÓN DE MÚSICA BÚSQUEDA DE MÚSICA A ALTA VELOCIDAD Durante la reproducción, presione el botón de Navegación Derecha/Brincar-Buscar n 1 o Izquierda/ o 2 y manténgalo presionado para mover el reproductor hacia adelante o atrás dentro del archivo para encontrar un pasaje musical específico. -
Page 91: Menú Contextual De Música
OPERACIÓN–MODO DE REPRODUCCIÓN DE MÚSICA MENÚ CONTEXTUAL DE MÚSICA–ECUALIZADOR Desplácese a la primera opción (Ecualizador) Mientras está en modo de reproducción de música (pantalla de Reproduciendo ahora), usando los botones de Navegación Arriba 1 presione el botón de Navegación Arriba para abrir y/o Abajo 2. - Page 92 OPERACIÓN–MODO DE REPRODUCCIÓN DE MÚSICA MENÚ CONTEXTUAL DE MÚSICA–MODO DE REPRODUCIR Desplácese a la segunda opción (Modo de Mientras está en modo de reproducción de música (pantalla de Reproduciendo ahora), reproducir) usando los botones de presione el botón de Navegación Arriba para abrir Navegación Arriba 1 y/o Abajo 2.
- Page 93 OPERACIÓN–MODO DE REPRODUCCIÓN DE MÚSICA MENÚ CONTEXTUAL DE MÚSICA–TEMA DE COLOR Desplácese a la tercera opción (Tema de Mientras está en modo de reproducción de música (pantalla de Reproduciendo ahora), color) usando los botones de Navegación presione el botón de Navegación Arriba para abrir Arriba 1 y/o Abajo 2.
- Page 94 OPERACIÓN–MODO DE REPRODUCCIÓN DE MÚSICA MENÚ CONTEXTUAL DE MÚSICA–GENERAR djMix Mientras está en modo de reproducción de Desplácese a “Crear djMix” usando los música (pantalla de Reproduciendo ahora), botones de Navegación Arriba 1 y/o Abajo 2, presione el botón de Navegación Arriba seguido del botón de Entrar/Reproducir/ para abrir el menú...
-
Page 95: Cómo Usar La Función De Djscan
OPERACIÓN–MODO DE REPRODUCCIÓN DE MÚSICA MyDJ le brinda una nueva y emocionante manera de escuchar música. En un instante, su música es más útil y divertida, permitiéndole mezclar la música en el aparato mismo, dónde y cuándo usted lo desee. Al usar las opciones djScan, djMix y djMoods descritas en las siguientes dos páginas, usted puede producir una lista de reproducción sorprendente que incluirá... - Page 96 OPERACIÓN–MODO DE REPRODUCCIÓN DE MÚSICA NOTAS: • IMPORTANTE: La unidad debe tener al menos 25 canciones preparadas para MyDJ para que operen las funciones de MyDJ. • Un máximo de 20 canciones se colocan en las listas de reproducción de MyDJ. •...
-
Page 97: Cómo Usar La Función De Djmix
OPERACIÓN–MODO DE REPRODUCCIÓN DE MÚSICA CÓMO USAR LA FUNCIÓN DE djMix Encienda la unidad y acceda el menú Desplácese a djMix usando los botones de principal como se describe en la página 22. Navegación Arriba 1 y/o Abajo 2, seguido del Seleccione MyDJ usando el botón de botón de Entrar/Reproducir/Pausa ®p 3 para seleccionar la opción. -
Page 98: Cómo Usar La Función De Djmoods
OPERACIÓN–MODO DE REPRODUCCIÓN DE MÚSICA CÓMO USAR LA FUNCIÓN DE djMoods Encienda la unidad y acceda el menú Desplácese a djMoods usando los botones de Navegación Arriba 1 y/o Abajo 2, seguido del principal como se describe en la página 22. botón de Entrar/Reproducir/ Pausa ®p 3 para Seleccione MyDJ usando el botón de seleccionar la opción. -
Page 99: Para Ver Fotos
OPERACIÓN–MODO DE REPRODUCCIÓN DE FOTO PARA VER FOTOS: Esta unidad es compatible con archivos JPEG básicos. Use los botones de Navegación Arriba 1 y/o Abajo Encienda la unidad y acceda el menú principal 2 para seleccionar entre Presentación, Miniaturas o para seleccionar una foto en particular. -
Page 100: Vista De Miniaturas
OPERACIÓN–MODO DE REPRODUCCIÓN DE FOTO VISTA DE MINIATURAS Presione el botón de Entrar/Reproducir/Pausa Si se desplazó a Miniaturas en el paso 2 de la página anterior, presione botón ®p para ver la foto deseada. Entrar/Reproducir/Pausa ®p 1; aparecerá una vista de miniatura de las FOTOS en la pantalla. Use los botones de Navegación Arriba, Abajo, Derecha/Brincar–Buscar n o Izquierda/o 2 para explorar las fotos. -
Page 101: Operación-Modo De Radio Fm
OPERACIÓN–MODO DE RADIO FM PARA ESCUCHAR LA RADIO FM Encienda la unidad y acceda el menú Seleccione una estación presionando el botón de Navegación Derecha/Brincar–Buscar principal como se describe en la página 22. Izquierda/ 2, o bien presiónelo y manténgalo Seleccione Radio usando el botón de presionado para buscar más rápido. - Page 102 OPERACIÓN–MODO DE RADIO FM (CONTINÚA) PARA AGREGAR PREDEFINIDOS (HASTA 20) PARA CARGAR LOS PREDEFINIDOS Mientras esté en el modo de reproducción FM Mientras está en modo de Reproducción de y con una estación seleccionada, e presione FM, use los botones de Navegación Arriba Aceptar/Reproducir/Pausar (Enter/Play/ 1 y/o Abajo 2 para ir al predefinido...
-
Page 103: Operación-Modo De Grabadora
OPERACIÓN–MODO DE GRABADORA PARA CREAR UNA GRABACIÓN DE VOZ Encienda la unidad y acceda el menú Use los botones de Navegación Arriba 1 y/o Abajo principal como se describe en la página 22. 2 para seleccionar Grabar voz. Luego presione el Seleccione Grabadora usando el botón de botón de Entrar/Reproducir/Pausa ®p 3 para seleccionar la opción. -
Page 104: Para Borrar Una Grabación
OPERACIÓN–MODO DE GRABADORA (CONTINÚA) PARA BORRAR UNA GRABACIÓN Acceda el menú de Grabadora como se Use los botones de Navegación Arriba 1 y/o Abajo 2 para seleccionar “Delete All” o la grabación describe en la página anterior. Use los deseada que desee borrar. Luego presione el botón botones de Navegación Arriba 1 y/o Abajo 2 de Entrar/ Reproducir/Pausa ®p 3 para seleccionar para seleccionar Borrar archivo, seguido del... -
Page 105: Configuración De Las Opciones De
OPERACIÓN–MODO DE GRABADORA (CONTINÚA) CONFIGURACIÓN DE LAS OPCIONES DE GRABADOR Desplácese hasta “Configuración de grabación” Encienda la unidad y entre al menú principal como (“Record Setting”) utilizando los botones de se explica en la página 22. Seleccione Grabador utilizando el botón de Navegación hacia abajo 1, Navegación hacia arriba 1 y/o hacia abajo 2, seguido de Aceptar/Reproducir/Pausar (Enter/ seguidos de Aceptar/Reproducir/Pausar... -
Page 106: Operación-Modo De Cronómetro
OPERACIÓN–MODO DE CRONÓMETRO UTILIZACIÓN DEL CRONÓMETRO Encienda la unidad y entre al menú principal como Presione el botón Aceptar/Reproducir/Pausar se explica en la página 22. Seleccione cronómetro (Enter/Play/Pause) para iniciar elcronómetro; utilizando el botón de Navegación hacia abajo 1, el temporizador comenzará a contar. Presione el ®p seguido de Aceptar/Reproducir/Pausar (Enter/ botón Aceptar/Reproducir/Pausar (Enter/Play/... - Page 107 MENÚ DE CONFIGURACIONES CONFIGURAR EL TEMA DE COLOR Encienda la unidad y acceda el menú Presione el botón de Entrar/ Reproducir/ principal como se describe en la página 22. Pausa ®p para seleccionar “Tema de color”. Seleccione Configuracione usando el botón de Navegación Abajo 1, seguido del botón de Entrar/Reproducir/Pausa ®p 2.
-
Page 108: Menú De Configuraciones
MENÚ DE CONFIGURACIONES (CONTINÚA) CONFIGURAR EL ECUALIZADOR Encienda la unidad y acceda el menú Desplácese a “Ecualizador” usando los principal como se describe en la página 22. botones de Navegación Arriba 1 y/o Abajo 2, Seleccione Configuracione usando el botón seguido del botón de Entrar/Reproducir/ de Navegación Abajo 1, seguido del botón Pausa ®p 3 para seleccionar la opción. - Page 109 MENÚ DE CONFIGURACIONES (CONTINÚA) SETTING THE PLAY MODE Encienda la unidad y acceda el menú principal como se describe en la página 22. Seleccione Desplácese a “Modo de reproducir” usando los Configuracione usando el botón de Navegación botones de Navegación Arriba 1 y/o Abajo 2, Abajo 1, seguido del botón de Entrar/Reproducir/ seguido del botón de Entrar/Reproducir/Pausa ®p Pausa ®p 2.
- Page 110 MENÚ DE CONFIGURACIONES (CONTINÚA) CONFIGURAR EL BRILLO Encienda la unidad y acceda el menú Desplácese a “Brillo” usando los botones de principal como se describe en la página 22. Navegación Arriba 1 y/o Abajo 2, seguido Seleccione Configuracione usando el botón del botón de Entrar/Reproducir/Pausa ®p 3 de Navegación Abajo 1, seguido del botón para seleccionar la opción.
- Page 111 MENÚ DE CONFIGURACIONES (CONTINÚA) AJUSTE DE AHORRO DE ENERGÍA Encienda la unidad y acceda el menú Desplácese a “Ahorro de energía” usando los principal como se describe en la página 22. botones de Navegación Arriba 1 y/o Abajo 2, Seleccione Configuracione usando el botón seguido del botón de Entrar/Reproducir/ de Navegación Abajo 1, seguido del botón Pausa ®p 3 para seleccionar la opción.
- Page 112 MENÚ DE CONFIGURACIONES (CONTINÚA) CONFIGURAR EL TIEMPO DE LA LUZ DE FONDO Encienda la unidad y acceda el menú Desplácese a “Tiempo de luz de fondo” principal como se describe en la página 22. usando los botones de Navegación Arriba 1 Seleccione Configuracione usando el botón y/o Abajo 2, seguido del botón de de Navegación Abajo 1, seguido del botón...
- Page 113 MENÚ DE CONFIGURACIONES (CONTINÚA) AJUSTAR LA HORA Encienda la unidad y acceda el menú Desplácese a “Ajuste de hora” usando los principal como se describe en la página 22. botones de Navegación Arriba 1 y/o Abajo Seleccione Configuracione usando el botón 2, seguido del botón de Entrar/Reproducir/ de Navegación Abajo 1, seguido del botón Pausa ®p 3 para seleccionar la opción.
- Page 114 MENÚ DE CONFIGURACIONES (CONTINÚA) SETTING THE LANGUAGE Encienda la unidad y acceda el menú Desplácese a “Idioma” usando los botones principal como se describe en la página 22. de Navegación Arriba 1 y/o Abajo 2, Seleccione Configuracione usando el botón seguido del botón de Entrar/Reproducir/ de Navegación Abajo 1, seguido del botón Pausa ®p 3 para seleccionar la opción.
- Page 115 MENÚ DE CONFIGURACIONES (CONTINÚA) PARA VER LA INFORMACIÓN DEL SISTEMA (ACERCA DE) Encienda la unidad y acceda el menú Desplácese a “Acerca de” usando los principal como se describe en la página 22. botones de Navegación Arriba 1 y/o Abajo Seleccione Configuracione usando el botón 2, seguido del botón de Entrar/Reproducir/ de Navegación Abajo 1, seguido del botón...
- Page 116 MENÚ DE CONFIGURACIONES (CONTINÚA) PARA RESTABLECER LAS CONFIGURACIONES PREDETERMINADAS Encienda la unidad y acceda el menú Desplácese a “Predeterminado” usando los principal como se describe en la página 22. botones de Navegación Arriba 1 y/o Abajo Seleccione Configuracione usando el botón 2, seguido del botón de Entrar/Reproducir/ de Navegación Abajo 1, seguido del botón Pausa ®p 3 para seleccionar la opción.
- Page 117 MENÚ DE CONFIGURACIONES (CONTINÚA) PARA FORMATEAR EL REPRODUCTOR ¡ADVERTENCIA! No formatee el reproductor a menos que deje de funcionar y se lo indique el personal de soporte técnico. Encienda la unidad y acceda el menú Desplácese a “Formatear” usando los principal como se describe en la página 22.
-
Page 118: Guía De Diagnóstico
GUÍA DE DIAGNÓSTICO Si tiene problemas con esta unidad, revise la tabla a continuación antes de llamar a servicio. SÍNTOMA CAUSA SOLUCIÓN La unidad no enciende. La batería está baja/ Recargue la batería como descargada. se describe en la pág. 7. La unidad no está... - Page 119 GUÍA DE DIAGNÓSTICO (CONTINÚA) SÍNTOMA CAUSA SOLUCIÓN La función de Bloqueo Desactive la función de Bloqueo No funcionan los está activada. como describe la pág. 24. botones. Debe reiniciar la unidad Reinicie la unidad y/o o necesita actualizar el actualice el firmware, ver firmware.
-
Page 120: Formatear El Reproductor
FORMATEAR EL REPRODUCTOR Formatear el reproductor ¡ADVERTENCIA! No formatee el reproductor a menos que deje de funcionar y se lo indique el personal de soporte técnico. 1. Use el cable USB para conectar el reproductor y la computadora. 2. Haga doble clic en Mi PC, luego haga clic con el botón secundario del mouse en “Media Player”... -
Page 121: Cómo Reiniciar La Unidad
REINICIAR LA UNIDAD Si la unidad actúa erráticamente, reinicie la unidad insertando un pequeño objeto (como un clip para papel) en el botón de Reinicio. Con respecto al botón de Reinicio, vea la página 6 en cuanto a la ubicación. ACTUALIZAR EL SOFTWARE DEL FABRICANTE Visite nuestro sitio web en www.memorexelectronics.com para revisar si existe una versión más nueva del firmware. -
Page 122: Especificaciones
ESPECIFICACIONES Audio Rango de frecuencia de 20Hz a 20KHz Salida de audífonos 5mW, 32 ohmios (vol. máx.) Relación S/N 90db (MP3) Soporte de MPEG 1/2/2.5 Capa 3 archivos con una velocidad en bits de 32-320 kbps Audio de Windows Media (archivo WMA con DRM 9 ó... - Page 123 PARA OBTENER LA ACTUALIZACIÓN DEL FIRMWARE, VISITE NUESTRO SITIO WEB EN WWW.MEMOREXELECTRONICS.COM PARA REVISAR SI HAY UN FIRMWARE NUEVO DISPONIBLE. PARA OBTENER AYUDA ADICIONAL CON RESPECTO A LOS AJUSTES O LA OPERACIÓN, VISITE NUESTRO SITIO WEB EN: WWW.MEMOREXELECTRONICS.COM O COMUNÍQUESE CON SERVICIO AL CLIENTE AL 1-800-919-3647. CONSERVE EL EMPAQUE AL MENOS DURANTE 90 DÍAS POR SI ACASO NECESITARA REGRESAR EL PRODUCTO A SU DISTRIBUIDOR O IMATION ELECTRONICS PRODUCTS.
- Page 124 5201-03190-E010...