Advertisement
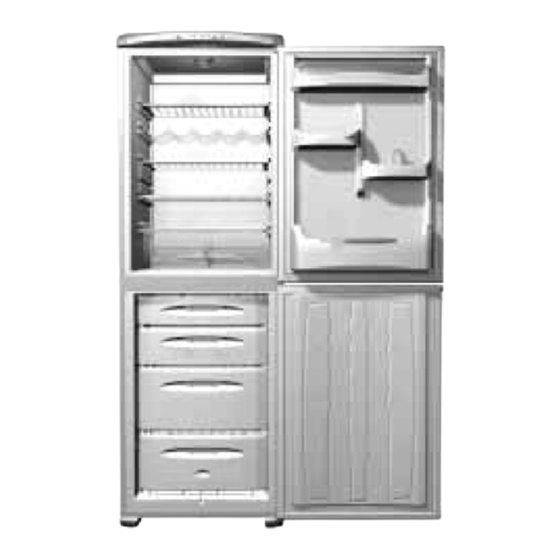
FRIDGE FREEZER - MODELS FFA80, FFA70, FFS70 & FFA60
INSTRUCTIONS FOR INSTALLATION & USE
GETTING STARTED:
STEP 1
Choose a location for your
fridge freezer, away from
any heat sources and
allow adequate
ventilation - 100mm
(4 inch) gap above.
STEP 3
Level the fridge freezer by
adjusting the front feet.
This will stop rocking or
vibration and keep the
door aligned.
NB. The spanner is for illustration
only and is not supplied with the
fridge freezer.
STEP 5
Before plugging in and
switching on, leave the
fridge freezer in its final
location for at least 15
minutes to allow it to
settle.
STEP 7
If you are freezing fresh
food, turn on fast freeze
by pressing the switch 24
hours before placing the
food inside.
Place the fresh food
inside.
Remember to turn fast freeze off
after 24 hours, however if you
forget to do so it will automatically
cancel after 48 hours.
Read the rest of these instructions to get the best from your appliance
and remember to fill in your guarantee registration.
To ensure that your fridge freezer runs reliably and efficiently follow these steps.
Keep this Book in a safe place for quick reference.
STEP 2
Move the fridge freezer
into position, using the
sides of the cabinet.
Take care to avoid
damaging the refrigerant
circuit pipe work on the
rear.
STEP 4
After the front feet have
been adjusted and the
fridge freezer is level fit
the left and right hand
bottom hinge covers
supplied.
Align with the cover plate
slots and push into
position.
STEP 6
Plug in and switch on.
Allow the fridge freezer to
cool before placing food
inside.
The high temperature
light will stay on until the
fridge freezer has cooled
down.
All food in the fridge
freezer should be
covered.
STEP 8
Your fridge freezer is now
working.
If after 24 hours your
fridge freezer is not
operating as you want,
refer to the
Troubleshooting section.
Advertisement
Table of Contents

Related Manuals for Hotpoint FFS70


Summary of Contents for Hotpoint FFS70
- Page 1 FRIDGE FREEZER - MODELS FFA80, FFA70, FFS70 & FFA60 INSTRUCTIONS FOR INSTALLATION & USE GETTING STARTED: To ensure that your fridge freezer runs reliably and efficiently follow these steps. STEP 1 Choose a location for your fridge freezer, away from...
-
Page 2: For Your Safety
Take care when installing or moving the fridge freezer to avoid damaging the pipes on the rear. If you suspect a leak, do not switch on the fridge freezer, but open the windows and doors to ventilate the room. Do not use any electrical devices inside the freezer, for instance for defrosting. -
Page 3: Installation
Minimise operating sounds caused by vibration. Minimum space required to open door The fridge freezer needs a space of 600mm (24 inches) in front to allow the door to open. When positioning the fridge freezer next to a unit, a gap of 30mm (1 be left at the hinge side of the door to allow the easy removal of furniture. - Page 4 Levelling: Level the fridge freezer when it is in its final location by adjusting the front feet, until firm contact is made with the floor. This will stop rocking or vibration and keep the door aligned which helps the fridge freezer run reliably and efficiently.
- Page 5 Changing the Mains Lead This appliance is fitted with a special mains lead. If you need to replace the mains lead due to damage, one can be bought from Hotpoint Service (see KEY CONTACTS, back page). It is strongly advised that this work is carried out by a qualified electrician.
- Page 6 The internal temperature should be 5˚C or colder although some sections such as the salad bin will be slightly warmer. The setting of the control wheel will depend on the location of the fridge freezer, the room temperature and how often the door is opened. The normal set point (marked by a 3 on the dial) is usually suitable.
- Page 7 The red food defrost alert light (Models FFA80, FFA70 & FFS70 only) will also come on when the mains power is restored to warn there has been a power cut and the freezer compartment temperature has risen to an unsafe level allowing partial defrosting of stored food.
- Page 8 However fast freeze will turn off automatically after 48 hours if you do forget. Pre-Freeze chart when selecting Fast Freeze: Load for freezing Pre-freeze time Load position Model 8 to 12kg max. 24 hours FFA70 FFS70 6 to 8kg max. 24 hours FFA60 FFA80 6 to 8kg 12 hours...
- Page 9 Holiday Function (Models FFA80, FFA70/FFS70 only) This feature allows you to set your fridge compartment to a warmer setting while you are away on holiday, to reduce running costs without affecting the freezer. To set up holiday mode: 1. Remove any food, from the fridge compartment, that will deteriorate while you are away.
-
Page 10: Useful Advice
The Rating Plate, which lists the appliance Model Number and Serial Number can be found near the bottom of fridge compartment on the interior wall. Fast Freeze Models: FFA70 / FFS70 Useful Advice Fast Freeze Fast Freeze Model: FFA80 Model: FFA60... - Page 11 Making the best use of your Fridge Freezer To ensure that your fridge freezer operates as efficiently as possible : Follow food packaging “best before/use by” instructions or your suppliers advice on a suitable maximum storage time. Keep foods tightly covered to retain moisture and prevent flavour/odour transference.
- Page 12 Commodity and Bottle Racks Commodity racks can be repositioned in the door to suit your storage requirements. The lidded commodity rack is recommended for the storage of dairy items, such as butter, margarine and cheese. To remove, lift rack vertically to release from fixing supports. To replace, align grooves on either side of the rack above fixing supports and push down until secure.
- Page 13 Microban® technology has been proven safe, durable and effective over many years of use in personal care and household consumer products. In addition, Hotpoint operate a rigorous antibacterial testing programme through approved independent testing laboratories.
- Page 14 Liquid-filled bottles or sealed fizzy drinks must not be stored in freezer, as they may burst. Lollipops and water ices should not be given to children directly from the freezer the low temperature may cause ‘freezer burns’ . Store ice cream towards the top front of the freezer and remove from freezer 15-30 minutes before serving.
- Page 15 WARNING: The freezer drawers can become heavy when fully loaded with food. Care must be taken if attempting to lift or carry a full freezer drawer. It is recommended to remove the required food, rather than the whole freezer drawer.
- Page 16 How Frost Free works The frost free system completely eliminates the need for defrosting. A fan circulates air around the freezer. This helps to remove moisture from the compartment, therefore preventing the build up of ice. It is normal to hear the fan when the freezer is cooling.
- Page 17 WARNING: Do not use abrasive powder, household cleaner, bleach or wax polish to clean the interior, they will leave a smell in the fridge freezer. Remove stored food, wrap or cover it and place into insulated containers to keep cool/frozen whilst cleaning.
-
Page 18: Maintenance
Note : Leave the doors ajar to prevent an accumulation of odours. Models FFA80, FFA70 & FFS70 only: Alternatively, if you want to keep your freezer running but want to empty the fridge you could set the holiday mode. -
Page 19: Door Reversal
Remove all door furniture and all loose items/fittings from inside the fridge freezer. If you have previously set up and used the fridge freezer and since decided to reverse the doors, you must remove stored food, wrap or cover it and place into insulated containers to keep cool/frozen whilst carrying out this operation. - Page 20 Door Reversal continued... Refit Lower Door Screw the bottom hinge pin complete with spacing washers, into the left hinge bracket. Take off the two screw covers from the left hand centre panel and remove the two screws. Fit these screws and covers over on the right hand side. Fit the centre hinge on the left hand side with the original screws, cover the screws with the original covers.
-
Page 21: Troubleshooting
However, if you forget, it will automatically cancel after 48 hours. The amber holiday indicator light is on? (Models FFA80, FFA70 & FFS70 only) Holiday mode is selected. Press the holiday button or open the... - Page 22 The holiday mode setting won’t stay on? (Models FFA80, FFA70 & FFS70 only) 1. The holiday mode setting can only be set when the door is closed. Opening the door or pressing any other button will turn holiday mode off.
- Page 23 Notes...
- Page 24 Notes...
- Page 25 Notes...
-
Page 26: Hotpoint Guarantee
All Hotpoint appliances carry a fully inclusive 12 month parts and labour guarantee as well as free replacement parts for the first 5 years (except microwaves, selected integrated appliances and cooker hoods, which have a one year guarantee) provided that they are fitted by a Hotpoint engineer. -
Page 27: After Sales Service
Hotpoint appliance than us - the manufacturer” As part of our commitment to you, all Hotpoint appliances have the added benefit of a fully inclusive parts and labour guarantee for the first 12 months. In addition to this you also have the advantage of free replacement parts for the first 5 years when fitted by a Hotpoint engineer. -
Page 28: Key Contacts
Over 1200 trained specialists, directly employed by us, ensure that you can have complete confidence in both the appliances and services we offer. Repair Service and Information Desk (Open 8 to 8 Mon - Fri, 8 to 6 Sat, 10 to 4 Sun & Bank Holidays) Note: Our operators will require the following information: See USEFUL ADVICE SECTION for rating plate position (Open 8-30 to 5-30 Mon - Fri &...