Table of Contents
Advertisement
Quick Links
Advertisement
Table of Contents

Related Manuals for NCR RealPOS 5967

Summary of Contents for NCR RealPOS 5967
- Page 1 NCR RealPOS 5967 12‐Inch Touch LCD Release 1.0 User Guide B005‐0000‐2045 Issue A ...
- Page 2 The product described in this book is a licensed product of NCR Corporation. NCR is a registered trademark of NCR Corporation. NCR RealPOS is a trademark of NCR Corporation in the United States and/or other countries. Other product names mentioned in this publication may be trademarks or registered trademarks of their respective companies and are hereby acknowledged. Where creation of derivative works, modifications or copies of this NCR copyrighted documentation is permitted under the terms and conditions of an agreement you have with NCR, NCRʹs copyright notice must be included. It is the policy of NCR Corporation (NCR) to improve products as new technology, components, software, and firmware become available. NCR, therefore, reserves the right to change specifications without prior notice. All features, functions, and operations described herein may not be marketed by NCR in all parts of the world. In some instances, photographs are of equipment prototypes. Therefore, before using this document, consult with your NCR representative or NCR office for information that is applicable and current. To maintain the quality of our publications, we need your comments on the accuracy, clarity, organization, and value of this book. Address correspondence to: Manager, Information Solutions Group NCR Corporation Discovery Centre, 3 Fulton Road Dundee, DD2 4SW Scotland Internet Address: http://www.info.ncr.com/eFeedback.cfm Copyright © 2011 By NCR Corporation Duluth, GA U.S.A. All Rights Reserved ...
-
Page 3: Safety Requirements
Preface Audience This book is written for hardware installer/service personnel, system integrators, and field engineers. Notice: This document is NCR proprietary information and is not to be disclosed or reproduced without consent. Safety Requirements The NCR RealPOS 5967 conforms to all applicable legal requirements. To view the compliance statements see the NCR RealPOS Peripherals Safety and Regulatory Statements (B005‐0000‐1701). Caution: This product does not contain user serviceable parts. Servicing should only be performed by a qualified service technician. Fuse Replacement Warning: For continued protection against risk of fire, replace only with the same type and ratings of fuse. Attention: Pour prévenir et vous protéger contre un risque de feu, remplacer la fusible avec une autre fusible de même type, seulement. Lithium Battery Warning Warning: Danger of explosion if battery is incorrectly replaced. Replace only with the same or equivalent type as recommended by the manufacturer. Discard used batteries according to the manufacturerʹs instructions. Attention: Il y a danger dʹexplosion sʹil y a remplacement incorrect de la batterie. Remplacer uniquement avec une batterie du même type ou dʹun type recommandé par le constructeur. Mettre au rébut les batteries usagées conformément aux instructions du fabricant. Battery Disposal (Switzerland) Refer to Annex 4.10 of SR814.013 for battery disposal. IT Power System This product is suitable for connection to an IT power system with a phase‐to‐phase ... - Page 4 Grounding Instructions In the event of a malfunction or breakdown, grounding provides a path of least resistance for electric current to reduce the risk of electric shock. This product is equipped with an electric cord having an equipment‐grounding conductor and a grounding plug. The plug must be plugged into a matching outlet that is properly installed and grounded in accordance with all local codes and ordinances. Do not modify the plug provided – if it will not fit the outlet, have the proper outlet installed by a qualified electrician. Improper connection of the equipment‐grounding conductor can result in a risk of electric shock. The conductor with insulation having an outer surface that is green with or without yellow stripes is the equipment‐grounding conductor. If repair or replacement of the electric cord or plug is necessary, do not connect the equipment‐grounding conductor to a live terminal. Check with a qualified electrician or service personnel if the grounding instructions are not completely understood, or if you are in doubt as to whether the product is properly grounded. Use only 3‐wire extension cords that have 3‐prong grounding plugs and 3‐pole receptacles that accept the product’s plug. Repair or replace damaged or worn cords immediately. References NCR RealPOS 5967 LCD Parts Identification Manual (B005‐0000‐2046) ...
-
Page 5: Table Of Contents
Table of Contents Chapter 1: Overview Introduction......................1‐1 Model Numbers ....................1‐1 Compatibility....................1‐1 Supported Resolutions ..................1‐1 Standard Features....................1‐2 Optional Mounts.....................1‐3 Table Top Mount....................1‐3 Integrated Mount .....................1‐3 Display Controls .....................1‐4 Power Indicator....................1‐4 Chapter 2: Site Preparation Physical Environment....................2‐1 Operating Range ....................2‐1 Storage Range ....................2‐1 Transit Range....................2‐1 Electrical Environment ..................2‐1 Power Consumption..................2‐1 Weight ........................2‐1 Dimensions......................2‐2 LCD Display .....................2‐2 LCD Display on the Standard Table‐Top Mount ........2‐2 Chapter 3: Hardware Installation Introduction......................3‐1 Connector Panel Access ..................3‐1 Mounting Options ...................3‐1 Connecting to a POS ....................3‐2 DVI Connections (Video)................3‐2 VGA Connections (Video) ................3‐3... - Page 6 Standard Integration Tray Display Mount (5964‐K022/K023)....3‐6 Standard Remote Table Top Mount (5964‐K030/K031) ......3‐6 Chapter 4: NCR Software OSD Utility Introduction......................4‐1 Supported Features..................4‐1 Running the Utility ....................4‐1 Main Menu ......................4‐2 Adjustment Procedure ..................4‐3 Chapter 5: Disassembly Procedures Removing the LCD Monitor from the Mount ............5‐1 Removing the MSR....................5‐2 Removing the Rear cover................5‐4 Removing the Personality and Video Boards ..........5‐5 Removing the Speakers...................5‐9 Removing the LCD ..................5‐10 Removing the Touch Sensor.................5‐13 Re‐installing the Touch Sensor ..............5‐14 Chapter 6: Touch Screen Calibration – Windows Installing and Calibrating the Touch Screen ............6‐1 Installing the Driver..................6‐1 Calibrating the Touch Screen .................6‐3 Calibration Procedures ................6‐6 Verifying the Calibration ................6‐9 Optional Settings....................6‐10 Chapter 6: Touch Screen Calibration ‐ Linux Calibration Procedures ..................6‐1 4‐Point Calibration Procedure................6‐4 25‐Point Linearization Procedure ..............6‐8...
- Page 7 USB ........................7‐2 Video PCB........................7‐3 Connectors ......................7‐4 VGA Video ....................7‐4 DVI.........................7‐5 Chapter 7: Maintenance Cabinet and Screen Cleaning Procedures ............7‐1 Cleaners/Solvents to Use.................7‐1 Cleaners/Solvents to NOT Use...............7‐2 Cleaning the Glass ...................7‐2 MSR Cleaning Procedures..................7‐3...
-
Page 8: Revision Record
Revision Record Issue Date Remarks A Jan 2012 First issue ... -
Page 9: Chapter 1: Overview
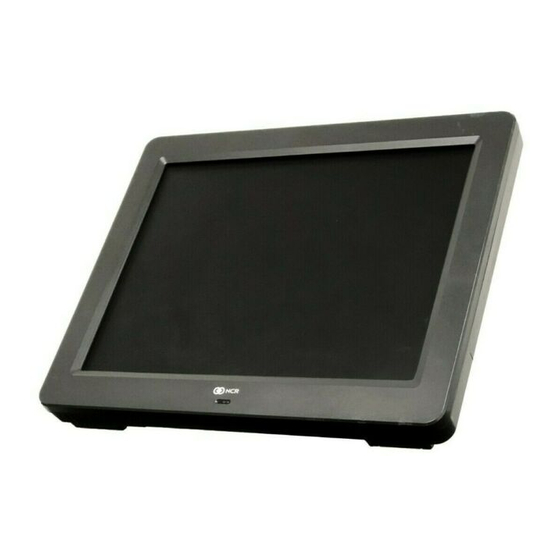
Chapter 1: Overview Introduction The NCR 5967 is a 12‐inch TFT LCD display with a capacitive Touch Screen (XGA, 1024 768). The display is powered from the terminal via +12VUSB Plus Power. It is available in two color schemes: Beige (G11) Charcoal Gray (CG1) Model Numbers Major Model Description 5967‐1000 12” led Display, No MSR, No Mount (G11) 5967‐1100 12” led Display, No MSR, No Mount (CG1) Compatibility The 5967 LCD Display is designed as an optional input/output device for the following host terminals: NCR RealPOS 80 (7458) Retail Terminal NCR RealPOS 80c (7457) Retail Terminal NCR RealPOS 80 (7459) Retail Terminal RealPOS 70 (7402) Retail Terminal NCR RealPOS 70 (7403) Retail Terminal NCR RealPOS 30 (7446) Retail Terminal NCR RealPOS 40 (7600) Retail Terminal ... -
Page 10: Standard Features
370 cd/m (typ), 300 cd/m (min) luminance to user 50K hour minimum backlight ½ life at rated luminance VESA & Industry Standards Support full screen scaling of VESA & Industry standard video modes / refresh rates thru 1024x768@75Hz Support VESA 75mm mount standards (do not recess mount plate) Support current VESA EDID / DDC standards Support VESA power management standards Retail hardened display Integrated enclosure containing an optional MSR mount points Rigid mounting attachments Latching / strain relieved cables used where possible Spill proof and sealed Dual video inputs, standard analog (DB15) video interface and DVI interface. LCD LED Backlight is controllable using soft DDC/CI UTILILTY at full or reduced brightness (no physical DDC/CI UTILILTY buttons) Flexible cable length options (compatibility with NCR 1m & 4m external cables) Clean (hidden) cable management ISO 3‐Track/JIS 2‐Track MSR (Optional) USB Port ... -
Page 11: Optional Mounts
Chapter 1: Overview Optional Mounts Table Top Mount The 5967 LCD display can be mounted on the Standard Remote Table Top Mount (5967‐K030/K031). 21151b Integrated Mount The 5967 LCD display can be mounted on the Standard Integration Tray Display Mount (5964‐K022/K023), which is used in the various terminal integration tray mounts. 21203a ... -
Page 12: Display Controls
Chapter 1: Overview Display Controls Power Indicator The LED is green while in the normal ON state and red while in the Power Save mode. Power LED Indicator ... -
Page 13: Chapter 2: Site Preparation
Site Preparation Chapter 2: Physical Environment Operating Range Condition Range Temperature 5° to 45°C Relative Humidity 10% to 90% (Non‐condensing) Storage Range Condition Range Temperature ‐10° to 50°C Relative Humidity 10% to 90% Transit Range Condition Range Temperature ‐40° to 60°C (One‐week max.) Relative Humidity 5% to 95% Electrical Environment Power is supplied to the display either from an external power supply or through a Powered USB interface. In either case, the nominal input voltage shall be +12 volts and conform to the following: Parameter Minimum Typical Maximum Input +10.8 V ... -
Page 14: Dimensions
Chapter 2: Site Preparation Dimensions LCD Display 248 mm (9.8 in.) 292 mm (11.5 in.) 329 mm 58 mm (12.9 in.) (2.3 in.) LCD Display on the Standard Table-Top Mount 292 mm (11.5 in.) 254 mm 229 mm (10.0 in.) (9.0 in.) 280 mm (11.0 in.) -
Page 15: Chapter 3: Hardware Installation
Chapter 3: Hardware Installation Introduction Caution: This device should only be powered by a power supply source which meets Safety Extra Low Voltage (SELV) and LPS (Limited Power Source) requirements per UL1950, IEC 950, and EN 60 950. The power source must be certified by the appropriate safety agency for the country of installation. Caution: Use a grounding strap when installing this feature. Connector Panel Access The 5967 peripheral cable connectors are located on the bottom of the assembly. USB +Power Audio Mounting Options The 5967 has a VESA standard 75mm mounting pattern on the back of the enclosure. The unit is shipped with mounting screws installed. ... -
Page 16: Connecting To A Pos
Chapter 3: Hardware Installation Connecting to a POS The following illustrations show the cable connections for the 5967 and a host terminal. There are two cables required. DVI or VGA cable for video Powered Universal Serial Bus (USB) for data and power Note: Optional Power Brick is available when USB power is not available on the host terminal. A special USB cable is used for data in this case. There is a standard USB port on the 5967 that can be used for an additional USB device. DVI Connections (Video) Connect the VGA Cable to the VGA connectors on both the 5967 LCD and host terminal. 497-0446721 - 1.0 m (1432-C191-0010) 497-0446722 - 4.0 m (1432-C191-0040) 30305... -
Page 17: Vga Connections (Video)
Chapter 3: Hardware Installation VGA Connections (Video) Connect the VGA Cable to the VGA connectors on both the 5967 LCD and host terminal. 497-0435044 - 1m (1416-C972-0009) 497-0435045 - 4m (1416-C972-0040) 30306... -
Page 18: Powered Usb Cable Connections (Power And Data)
Chapter 3: Hardware Installation Powered USB Cable Connections (Power and Data) Connect the Powered USB Cable to the 5967 LCD and to one of the 12V Powered USB connectors on the host terminal. USB/Power 497-0476857 - 1 m 12V USB (1432-C432-0010) 497-0445077 - 4 m (1432-C156-0040) 30307 ... -
Page 19: Power Brick And Usb Connections (Power And Data)
Chapter 3: Hardware Installation Power Brick and USB Connections (Power and Data) 1. Connect the USB Power Cable to the 5943 USB+Power connector. 2. Connect the Power Brick DC Cable to the USB Power Cable. 3. Connect the AC Power Cord to the Power Brick and an AC outlet. USB+Power 497-0442517 - 4.0 m (1432-C105-0040) Power Brick 497-0471714 (5967-K100) AC Power Cord (Country Specific) 30308 ... -
Page 20: Cable Routing
Chapter 3: Hardware Installation Cable Routing Standard Integration Tray Display Mount (5964-K022/K023) Display Cover Display Arm Display Base 21202a Standard Remote Table Top Mount (5964-K030/K031) ... -
Page 21: Chapter 4: Ncr Software Osd Utility
NCR Software OSD Utility Chapter 4: Introduction The NCRDDCCI Configuration Utility is used to adjust display parameters, such as Brightness, Contrast, and color. It also provides monitor identification information, such as the name, serial number, and manufacturer. Supported Features Note: Not all features are supported on every monitor. Brightness Contrast V Position H Position Phase Clock Red/Green/Green Video Gain Color Temperature Auto Setup Restore Default Settings V Moire H Moire V Size ... -
Page 22: Main Menu
Chapter 4: NCR Software OSD Utility Main Menu Monitors Detected Panel This panel lists all the monitors connected to the system. If more than one monitor is connected, the first monitor is selected by default. Center Panel The Center Panel displays information pertaining the the selected control. Refresh Button Use this button after connecting a new monitor to refresh the data. About Button This button displays a brief description of the utility. Help Button This button displays the Help File. Control Buttons These are the button showing the available features that can be modified. Unavaiable features are greyed out. ... -
Page 23: Adjustment Procedure
Chapter 4: NCR Software OSD Utility Adjustment Procedure The adjustment procedures are similar for the features. The Color adjustment shown below is an example. 1. Select the Colour button. 2. Drag the slider to the right to increase the value of the property or to the left to decrease it. Alternatively, you can click on the “+” and “-“ buttons to change the value. ... - Page 24 Chapter 4: NCR Software OSD Utility ...
-
Page 25: Chapter 5: Disassembly Procedures
Disassembly Procedures Chapter 5: This section explains how to disassemble the 5967 LCD Display for servicing. Caution: Power down the terminal before disassembling the unit. Removing the LCD Monitor from the Mount 1. Remove the screws (4) that secure the Mount to the 5967 Display. ... -
Page 26: Removing The Msr
Chapter 5: Disassembly Procedures Removing the MSR 1. Remove the MSR Cover (2 captive screws). MSR Cover 2. Remove the MSR Assembly (2 screws). 3. Disconnect the MSR Data Cable and Ground Cable. Note: When re‐installing the MSR you may find it easier to first remove the terminal Rear Cover to connect the MSR Data Cable. MSR Cover MSR Mounting Screws MSR Ground Cable MSR Data Cable ... - Page 27 Chapter 5: Disassembly Procedures No MSR If the unit is not configured with an MSR there is a No MSR Cover to remove (2 screws). No MSR Cover ...
-
Page 28: Removing The Rear Cover
Chapter 5: Disassembly Procedures Removing the Rear cover 1. Remove the MSR Assembly (or the No MSR Cover is there is no MSR present). 2. Remove terminal Rear Cover (4 screws). 30334 ... -
Page 29: Removing The Personality And Video Boards
Chapter 5: Disassembly Procedures Removing the Personality and Video Boards 1. Disconnect the Power LED Cable. 2. Insert a small screwdriver into the hole in the top of the PCBA EMI Cover. Press down on the connector latch to release the Touch Sensor Cable connector from the PCB connector. Latch Touch Sensor Cable Power LED Cable 30335 ... - Page 30 Chapter 5: Disassembly Procedures 3. Remove the PCBA EMI Cover screws; one screw on each side and the 3/16 Hex screws (4) from the video connectors. PCBA EMI Cover 30336 4. Slide the PCBA EMI Cover as shown to disengage it from the tabs on the chassis. 30337...
- Page 31 Chapter 5: Disassembly Procedures 5. Carefully disconnect the cables from the boards. Personality Board LED Backlight Cable Power Cable Speaker Cable 30338 Video Board LVDS Cable Power Cable 30339 ...
- Page 32 Chapter 5: Disassembly Procedures 6. Remove the screws that secure the boards. 30340 ...
-
Page 33: Removing The Speakers
Chapter 5: Disassembly Procedures Removing the Speakers Remove the speakers from the Front Bezel (no screws). Speakers 30341... -
Page 34: Removing The Lcd
5-10 Chapter 5: Disassembly Procedures Removing the LCD 1. Remove the LED Harness. Pry the LED Lens open as shown to release the harness. LED Harness LED Lens 30342 Removing the LED Lens Remove the LED Lens by pressing on the two latches and gently prying up on the bottom of the lens with a small screwdriver. Use care when doing this because the lens is easily damaged. ... - Page 35 Chapter 5: Disassembly Procedures 5-11 2. The LCD Assembly is held in place on the Bezel by plastic latches around the edges of the Bezel. Press on the latches on the bottom and side edges as you gently pry the LCD Assembly from the Bezel. Plastic Latches 30323 Caution: Use care when handling the LCD Module. These parts must be free of finger prints and foreign debris after reassembly. ...
- Page 36 5-12 Chapter 5: Disassembly Procedures 3. Remove the LCD from the LCD Bracket (4 screws). LCD Module 30324 LCD Bracket ...
-
Page 37: Removing The Touch Sensor
Chapter 5: Disassembly Procedures 5-13 Removing the Touch Sensor Remove the Touch Sensor and Molded Bezel Seal from the Front Bezel. Caution: Do not lift the Touch Sensor by the cable. Caution: Keep the Touch Sensor free from dirt and fingerprints. Touch Sensor Molded Bezel Seal Front Bezel 30343 ... -
Page 38: Re-Installing The Touch Sensor
5-14 Chapter 5: Disassembly Procedures Re-installing the Touch Sensor 1. Install the Molded Bezel Seal. Note that it is installed with the keying tab at the top and with the ridges in the gasket facing down. Keying Tab Gasket Ridge (Down) 30344 2. Install the Touch Sensor in the Molded Bezel Seal. Note that the Flat Cable is connected to the rear side (inside) of the Touch Sensor. After replacing the Touch Sensor you must perform the calibration procedure. ... -
Page 39: Chapter 6: Touch Screen Calibration - Windows
Touch Screen Calibration – Windows Chapter 6: Installing and Calibrating the Touch Screen Be sure to observe for the following Touch Screen calibration guidelines: Recalibrate the touch screen anytime the system has been disassembled for servicing. The latest calibration software can be downloaded from the NCR website. http://www.ncr.com 1. At this site, select the Support tab. → → Select Drivers and Patches Retail Support Files Retail Platform → Software 5967 3. Download the Microchip Touch Driver (version 6.43d or later). Installing the Driver Note: If you have a previous version of another touch screen driver loaded on your ... - Page 40 Chapter 6: Touch Screen Calibration – Windows 5. Use the USB Controller Interface > Next. 6. Setup is ready to install > Next > Finish At the completion of the install program the driver is loaded and functioning. You do not have to restart your system. ...
-
Page 41: Calibrating The Touch Screen
Chapter 6: Touch Screen Calibration – Windows Calibrating the Touch Screen Before performing the calibration procedure please observe the following guidelines for proper/improper methods of touching the screen. Face the monitor directly. Perform the calibration in the position (sitting or standing) that you normally expect to use the touch screen. Touch the calibration target firmly and precisely with your fingertip. During calibration, be careful to keep your fingernails and other fingers away from the touch screen as you touch each target. The hand and calibration finger should be perpendicular (straight up) from the touch‐screen during touch down and removal of the calibration finger. Keep the other fingers closed and away from the touch‐screen. 27732 Do NOT touch the display or bezel with your other hand. 27733 ... - Page 42 Chapter 6: Touch Screen Calibration – Windows Do NOT get your body too close to the display. 27734 Do NOT touch the bezel with your other fingers. 27735 ...
- Page 43 Chapter 6: Touch Screen Calibration – Windows Do NOT spread your other fingers near the touch‐screen surface. 27736 Do NOT get your hand and other fingers too close to the bezel. 27737 ...
-
Page 44: Calibration Procedures
Chapter 6: Touch Screen Calibration – Windows Calibration Procedures Note: In order to achieve an accurate calibration the touch display must in the normal operating position when AC power is applied to the terminal (45 degrees can be assumed if this not known). If this was NOT done properly then begin with Step 1. Otherwise skip to Step 2. 1. Disconnect the power cord from the power source, if possible. It is best to remove the AC power from the wall outlet to avoid having to move the head. Wait at least 10 seconds. Then, while keeping the head in the normal operating position and your hands off of the glass and bezel, plug the cord back in. The head can be touched or moved after AC power has been applied for at least two seconds. Select Start > Programs > Microchip TSHARC Control Panel. 3. Select the Calibration Tab. 4. Select 9‐Point w/Linearization. 5. Select the Begin Linearization button. ... - Page 45 Chapter 6: Touch Screen Calibration – Windows 6. Touch the center of the target. Pull your finger a few inches away from the screen when you see the Release message. 7. Repeat the process for each target location as they appear. 8. After all targets have been touched a test screen displays. Touch the screen in various locations to verify the calibration results. Select Accept if you are satisfied with the results. If not, select Cancel and repeat the process. Note: Do not touch ESC to exit from this screen. ...
- Page 46 Chapter 6: Touch Screen Calibration – Windows 9. After touching Accept you are warned to not touch the screen. Caution: Touching the screen during this time can cause the application to hang. This screen automatically closes after the touch controller has completed communicating. When complete, the system returns to the desktop with the TSHARC Control Panel displayed. ...
-
Page 47: Verifying The Calibration
Chapter 6: Touch Screen Calibration – Windows Verifying the Calibration 1. Select the Tools tab. Select the Drawing Test button. 3. Test the calibration on the draw screen. Touch the screen in various spots and trace each of the horizontal and vertical lines, including the border around the screen. In this test, all touches are persistent, including touch downs (green dots) and touch ups (red dots). After tracing the lines, review the drawn lines to make sure they closely follow the underlying pattern. Pay close attention to the edges of the display and the corners since this is where an incorrect calibration is most noticeable. If a line or point appears to be outside the pattern, try pressing the area to see how far the cursor is from the touch point. If the registered touch is greater than 7 mm away from where the touch occurred, repeat the calibration. 4. Select Exit to close this screen and to return to the Microchip TSHARC Control Panel. 5. Select the Calibration tab to repeat the calibration procedure or select Apply and then OK if you are satisfied with the results and want to close the application. ... -
Page 48: Optional Settings
6-10 Chapter 6: Touch Screen Calibration – Windows Optional Settings After the touch screen is calibrated, adjust the other features to meet your personal preferences. 1. Double‐Click Option 2. Right‐Mouse Click 3. Touch Modes 4. Touch Sounds ... -
Page 49: Chapter 6: Touch Screen Calibration - Linux
Touch Screen Calibration - Linux Chapter 6: Calibration Procedures The Touch Screen Calibration Utility is included in the NCR Linux Terminal Configurator, which gets installed when you install the NLPOS Linux software. For more information about the Terminal Configurator, see the NCR Linux Terminal Configurator Userʹs Guide, B005‐0000‐1743. 1. Start the Terminal Configurator Utility. At the prompt enter: TerminalConfig At the Main Menu, select: 2) Video. ... - Page 50 Chapter 6: Touch Screen Calibration - Linux Select: 1) Adapter. Select: 9) Calibrate Touch. ...
- Page 51 Chapter 6: Touch Screen Calibration - Linux 5. Press any key to continue. ...
-
Page 52: 4-Point Calibration Procedure
Chapter 6: Touch Screen Calibration - Linux 4-Point Calibration Procedure Note: The 25‐Point Linearization procedure should be performed first if either the Touch Screen Sensor or the Controller Board is replaced. 1. From the TouchKit window, select the Tool tab. ... - Page 53 Chapter 6: Touch Screen Calibration - Linux Select 4-Pts Cal to start the calibration. ...
- Page 54 Chapter 6: Touch Screen Calibration - Linux 3. Place a stylus in the center of the flashing target in the lower left‐hand corner of the screen and hold it until it beeps. Note: For best results, a stylus should be used to calibrate the screen rather than your finger. Not all operators use the same touching techniques and can result in poor calibration on terminals that have multiple operators. Toolkit Calibration Please Touch The Calibration Symbol (ESC to Abort) 24913 4. Repeat this procedure for the other three targets. 5. Select OK to continue. 6. Test the calibration by moving the stylus around on the screen and verifying that the cursor follows it. Also, touch all 4 Corners and verify that the cursor moves deeply into the corners. 7. If you are satisfied with the calibration results select OK to exit the TouchKit Utility. ...
- Page 55 Chapter 6: Touch Screen Calibration - Linux 8. Select OK to continue. ...
-
Page 56: 25-Point Linearization Procedure
Chapter 6: Touch Screen Calibration - Linux 25-Point Linearization Procedure The 25‐Point Linearization procedure should be performed if either the Touch Screen Sensor or the Controller Board is replaced. Note: On new terminals the display is pre‐linearized from the factory and performing the linearization procedure can result in loss of the factory settings and reduced performance Select the 25 Pts Linz button to begin the linearization process. ... - Page 57 Chapter 6: Touch Screen Calibration - Linux 2. Place a stylus in the center of the flashing target in the lower left‐hand corner of the screen and hold it until it beeps. Note: As with the Calibration Procedure for best results a stylus should be used rather than your finger. Toolkit Calibration Please Touch The Calibration Symbol (ESC to Abort) 24913 3. Repeat this procedure for the other 24 targets. 4. Select OK to continue. 5. Perform the 4‐Point Calibration procedure. ...
- Page 58 6-10 Chapter 6: Touch Screen Calibration - Linux...
-
Page 59: Chapter 7: Circuit Boards
Circuit Boards Chapter 7: Personality PCB Touch Sensor Speakers (J17) (J3) (J2) (J1) LED Backlight (J15) Audio (J6) Power (J13) (J8) USB +Power (J10) 30345... -
Page 60: Connectors
Chapter 7: Circuit Boards Connectors USB +Power Function 1 Ground 2 Ground 3 +12V 4 D+ 5 +12V 6 D‐ 7 Ground 8 Vbus Signal Color 1 VBUS Red 2 D‐ White 3 D+ Green 4 GND Black ... -
Page 61: Video Pcb
Chapter 7: Circuit Boards Video PCB DC Inr (JP1) Not Used LVDS (CN6) (CN1) (CN2) 30327... -
Page 62: Connectors
Chapter 7: Circuit Boards Connectors VGA Video Function Function 1 Red 9 +5V DDC 2 Green 10 Sync GND 3 Blue 11 Monitor ID bit 0 4 Monitor ID bit 2 12 SDA (for DDC) 5 VGA detect 13 H – Sync 6 Ground – R 14 V – Sync 7 Ground – G 15 SCL (for DDC) 8 Ground – B ... -
Page 63: Dvi
Chapter 7: Circuit Boards Function Function 1 Data2‐ 13 Data3+ 2 Data2+ 14 +5V 3 Data2/4_SHLD 15 GND 4 Data4‐ 16 H_Plug_DET 5 Data4+ 17 Data0‐ 6 DDC_CLK 18 Data0+ 7 DDC_Data 19 Data0/5_SHLD 8 A_VSYNC 20 Data5‐ 9 Data1‐ ... - Page 64 Chapter 7: Circuit Boards...
-
Page 65: Chapter 7: Maintenance
Maintenance Chapter 7: Cabinet and Screen Cleaning Procedures NCR touch screen terminals are designed for general retail applications. These products are resistant to spills and dust. However, these products are not spill proof or dust proof. To maintain proper operation, users should prevent water, beverages, or cleaning agents from being introduced into the unit during storage, operation, or cleaning. To clean your terminal, use the following procedures: 1. Disconnect the unit from the power outlet before cleaning. 2. Use a soft cloth dampened lightly with a mild non‐abrasive soap & water solution or 70% Isopropyl Alcohol. 3. Gently wipe the subject area clean. 4. Wipe the damp areas dry. Make sure the glass and touch screen edges are completely dry before using the unit. 5. Avoid getting any liquids inside the unit. If liquid does get inside, have a qualified service technician check it before you power it on again. Cleaners/Solvents to Use Use the following cleaner/solvents to clean the unit. Mild Non‐Abrasive Soap and Water Solution or 70% Isopropyl Alcohol ... -
Page 66: Cleaners/Solvents To Not Use
Chapter 7: Maintenance Cleaners/Solvents to NOT Use Do NOT use any of the following to clean the unit. They can damage the unit. Methyl Alcohol Degreasers Ethyl Alcohol Ammonia‐based Cleaners such as glass cleaners (Windex) Abrasive Cleaners Vinegar Cleaners Any Strong Dissolvent Thinner Benzene Compressed Air. Solvents Bleach Cleaning the Glass 1. Spray an ammonia‐based glass cleaner on a soft cloth and gently wipe the glass screen clean. Warning: Do not use any other types of cleaners such as vinegar, solvents, or degreasers. These can damage the screen. ... -
Page 67: Msr Cleaning Procedures
Chapter 7: Maintenance MSR Cleaning Procedures MSR Cleaning Cards and MSR Treatment Cards may be purchased from NCR or KIC Products. For details, see http://www.ncr‐direct.com or http://www.kicproducts.com. MSR Cleaning and Treatment Cards Part Part Number NCR Part Number MSR Cleaning Card, Dry 998‐0052929 MSR Cleaning Card, Wet 520522 (box of 50) 603‐9014730 MSR Treatment Card 9436‐2446 (box of 20) 497‐0453056 MSR Treatment Card The MSR Treatment Card is used to assist in protecting Magnetic Stripe Readers from Electrostatic Discharge (ESD), which can cause failures when swiping cards that have metallic hologram stripes. Swipe the card through the MSR in a smooth motion. Only swipe it down ONCE and up ONCE. Allow the device to dry for 5 minutes before swiping any other cards. Note: Each long side of the card may be used twice. Each short side of the card may be used only once. Thus, a single card can treat 6 MSR devices with one UP and one ... - Page 68 Chapter 7: Maintenance Cleaning/Treatment Frequency New MSR: Prior to placing in operation, the MSR device should be swiped with the MSR Treatment Card. Existing MSR: An existing MSR should be cleaned using an MSR Cleaning Card before treating it with a MSR Treatment Card. For low use retail establishments, the cleaning and treatment procedures should be followed at least once per month. In areas of extremely high traffic (in excess of 500 swipes per day) or an operating environment that is high in contaminants, such as found in the food service industry, a weekly cleaning and treatment should be performed. ...