Table of Contents

Related Manuals for Hotpoint BE72


Summary of Contents for Hotpoint BE72
-
Page 1: Ceramic Hob
Instructions for Installation and Use BE72 Ceramic Hob Note: Ensure that the hob unit is securely fixed to the worktop before use. To the User You must read the instructions prior to using the appliance and then retain them for future reference. -
Page 2: Table Of Contents
Hotpoint Guarantee ........ -
Page 3: Introduction
Your new appliance is guaranteed* and will give lasting service. This guarantee is only applicable if the appliance has been installed in accordance with the installation instructions detailed in this booklet. To help make best use of your cooking equipment, please read this booklet carefully. The appliance is designed specifically for domestic use and responsibility will not be accepted for use in any other installation. -
Page 4: Safety Information
When used properly your appliance is completely safe but as with any electrical product there are certain precautions that must be observed. PLEASE READ THE PRECAUTIONS BELOW BEFORE USING YOUR APPLIANCE. Always Remove all packing from the appliance before switching on for the first time. Take time to understand the controls prior to using the appliance. - Page 5 Never Never leave children unsupervised where a cooking appliance is installed as all surfaces will be hot during and even after its use. Never allow anyone to sit or stand on any part of the appliance. Never store items above the appliance that children may attempt to reach. Never leave anything on the hob surface when unattended and not in use.
-
Page 6: Using Your Hob
Choice Of Utensils Every Electric Hob deserves the right choice of utensils. We recommend for optimum performance the use of good quality utensils. PANS SHOULD NOT: Be concave (bowed in) Be convex (bowed out) Be rimmed Be deeply ridged But essentially Flat Using Your Hob Always Use good quality flat-based... - Page 7 THE BEST COMBINATIONS This table is a general guide to the types of pan suitable for different types of hobs and cookers. Remember pans should be good quality, with smooth, flat bases. For any further information refer to manufacturers’ instructions. Saucepan Types Aluminium Stainless steel with single layer copper base...
- Page 8 NEVER allow aluminium foil to be in contact with the hob surface when in use. Cooking Zone description The Halogen Solarglo Cooking Zones ensure the immediate visibility of their operation and provide instant heat. We recommend you use these zones to cook dishes requiring fierce heat and for rapid heating up of small quantities of food.
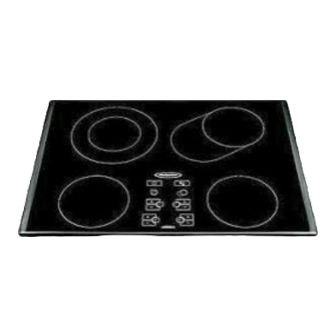
- Page 9 Features Mixed Halogen Solarglo and Ceramic dual cooking zone (850 / 2400W) Ceramic Cooking zone (1200W) On/Off sensor Total power capacity: Using Your Hob Cooking zone controls 6700W 230V oval Ceramic cooking zone (800 / 1000W) Halogen Solarglo cooking zone (1300W) Lock control 4 Cooking zone controls...
- Page 10 Operation Cooking-plate selection Using Your Hob The appliance is controlled by simply touching the different keys marked on the ceramic surface. Connect the cooking hob to the mains electricity supply by touching inside the area marked indicator light, to the right of the key, will light up. To enable the control panel, press seconds.
- Page 11 Choosing the power setting Using Your Hob Touch the symbol corresponding to the chosen control zone, and the display will increase ... when the desired level is reached. NOTE: By pressing the to level and then back down to level if you so wish. To turn down the heat, press the To turn off the cooking zones press the lower and top parts of the key simultaneously, the power will reduce to...
- Page 12 Blinking temperature indicators The temperature indicators will blink if: An object (eg. saucepan/lid) is placed on the cooking zone for more than 10 seconds. Any boiled over liquids or food are spilled onto the control zone. Any extended pressure is placed on the control zone. These could cause the word ‘DEF’...
- Page 13 Overheating Prolonged use of the hob could cause the electronic components to overheat. A thermal protection device momentarily sets a reduced power (level 3) on the right hand cooking zones. The temperature indicators blink to show you that this safety measure has been taken. When the temperature returns to normal, the temperature indicators stop blinking and the cooking zones can once again be used at higher power levels if required.
-
Page 14: Something Wrong
Before contacting your Hotpoint Service Centre / Installer, check the following; there may be nothing wrong with your appliance. PROBLEM... - Page 15 Operating Faults (Cooking plate sensors) I switch the hob on and it switches off Hob emits a long bleep I want to use a particular function, but can’t The control zone is slightly warm, even though the hob is not in The symbols ...
-
Page 16: Care And Cleaning
SWITCH OFF THE ELECTRICITY SUPPLY BEFORE CLEANING. UPON SWITCHING ON AGAIN, ENSURE THAT ALL CONTROLS ARE IN THE OFF POSITION. NEVER USE BIOLOGICAL WASHING POWDER, HARSH ABRASIVE, SCOURING PADS, AEROSOL CLEANERS OR OVEN CHEMICAL CLEANERS OF ANY KIND. Cleaning Materials To Avoid 1. -
Page 17: Installation
WARNING - THIS APPLIANCE MUST BE EARTHED All Hotpoint hobs are suitable for installation over any Hotpoint Build-in or Build-Under Ovens. Your hob should have been checked to ensure that the voltage corresponds with your voltage supply. This is stated on the rating plate, which is situated on the under side of the base panel. -
Page 18: Fitting The Hob
FITTING THE HOB Unpack the hob from the carton. Lower the hob into the worktop ensuring the mains lead is fed into the base unit and is not trapped under the flanges. Fix the hob to the worktop. Connect the hob to the electrical supply (see INSTALLATION). Ensure that the hob is functioning correctly prior to use. - Page 19 TECHNICAL INFORMATION FOR THE INSTALLER Read this chapter carefully, as it contains vital information for a safe and secure installation. Recommendations The appliance must be installed by a qualified technician in compliance with the instructions provided by the manufacturer. The latter denies all responsibility for improper installation which may harm persons and animals and damage property.
- Page 20 TECHNICAL INFORMATION FOR THE INSTALLER Very Important: It is vital that you ensure the glass ceramic hob is built into a perfectly flat supporting surface. Deformations due to improper fastening could alter the characteristics of the hob and compromise its performance. Take particular care in ensuring the seal surrounding the hob is correclty in place, in order to avoid any leaks into the supporting cabinet.
-
Page 21: Installation
ELECTRICAL CONNECTION THIS APPLIANCE MUST BE EARTHED. The electrical safety of this appliance can only be garanteed when the latter is correctly and efficiently earthed, in compliance with regulations on electrical safety. The manufacturer denies all responsibility for damage resulting from a system which has not been earthed correctly. -
Page 22: Hotpoint Guarantee
All Hotpoint appliances carry a fully inclusive 12 month parts and labour guarantee as well as free replacement parts for the first 5 years (except microwaves, selected integrated appliances and cooker hoods, which have a one year guarantee) provided that they are fitted by a Hotpoint engineer. -
Page 23: After Sales Service
Hotpoint appliance than us - the manufacturer” As part of our commitment to you, all Hotpoint appliances have the added benefit of a fully inclusive parts and labour guarantee for the first 12 months. In addition to this you also have the advantage of free replacement parts for the first 5 years when fitted by a Hotpoint engineer. -
Page 24: Key Contacts
Over 1200 trained specialists, directly employed by us, ensure that you can have complete confidence in both the appliances and services we offer. Repair Service and Information Desk (Open 8 to 8 Mon - Fri, 8 to 6 Sat, 10 to 4 Sun & Bank Holidays) Note: Our operators will require the following information: General Domestic Appliances Limited, Morley Way, Peterborough, PE2 9JB.