Advertisement
Quick Links
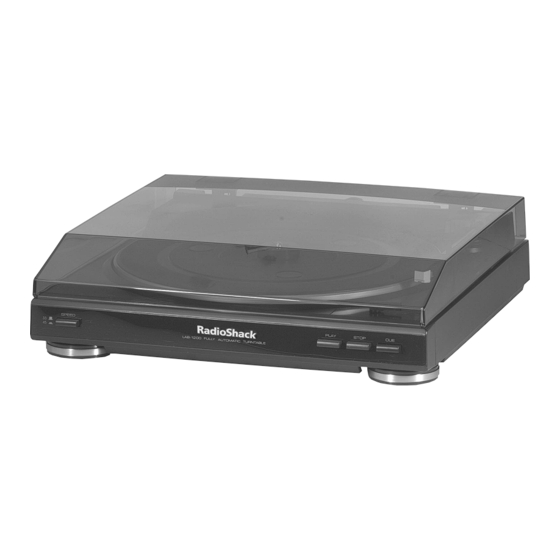
Fully-Automatic
Belt Drive Turntable
with Pre-Amp
42-7012
Thank you for buying the RadioShack LAB-1200 Fully-Automatic
Belt Drive Turntable. This is a high quality stereo turntable with
sensitive pickup and a built-in pre-amp that delivers great sound
from your records.
Assemble Your Turntable
Note: The LIN (lead in), RET (auto return),
and SW (tone arm switch) screws on the
bottom of the turntable are set at the factory
and should not be adjusted.
1. Open the dust cover.
2. Rotate the turntable's platter until one of
the platter's two larger holes is above
the drive motor spindle on the
turntable's upper left side.
3. Remove the tape and two ribbons from
the rubber drive belt. Be sure the belt is
not twisted.
4. Using your fingers, securely seat the
belt on the center of the drive motor's
spindle (against the lower rim).
5. Plug the turntable's power cord into a
standard AC outlet.
6. Remove the wire tie from the tone arm,
then press CUE to raise the tone arm.
7. Press PLAY and let the motor rotate the
turntable six or seven times, then press
STOP and check the location of the belt
on the spindle. If the belt is not securely
seated around the spindle, reposition it
properly and repeat Step 6.
Note: If the belt slips off the spindle, do not
attempt to remove the platter. Take it to your
local RadioShack store for assistance.
8.
Unplug the turntable's power cord from
the AC outlet.
9. Connect the turntable's ground wire to
the amplifier's/receiver's GND or earth
terminal to avoid hum.
10. Place the rubber mat, ridged side down,
on top of the platter.
PLAY
What's Included
WARNING:
expose this product to rain or moisture.
User's Guide - Turntable
Rubber Turntable Mat - 45 RPM adapter
Connect Your Turntable
Connecting Your Turntable to a Receiver/Amplifier
You can connect your LAB-1100 to a receiver/amplifier (or stereo audio
mixer) that has low-level phono inputs (such as left and right PHONO
jacks) or line-level inputs (such as left and right AUX, TV, TAPE, or CD
jacks).
Cautions:
• Do not connect the turntable to AC power until you complete all other
connections.
• Do not place the turntable on top of the receiver/amplifier or on any
other component that gets hot.
• To avoid possible damage to your receiver/amplifier, turn it off before
making the connections .
Note: If you are not sure which type of input your receiver/amplifier has,
check your receiver's/amplifier's owner's manual.
Low Level Inputs
To connect the turntable to a low-level phono input, plug the white
and red plugs into the receiver's/amplifier's left and right PHONO
jacks. Then set LINE OUT ON/PHONO OUT OFF to
PHONO OUT OFF.
s
Line Level Input
To connect the turntable to a line-level input, plug the white and red
plugs into the receiver's/amplifier's left and
right AUX, TV, TAPE, or CD jacks. Then set
LINE OUT ON/PHONO OUT OFF to LINE
OUT ON.
Connecting to Power
Once you have connected the turntable to your
receiver/amplifier, plug the turntable's power
cord into an AC outlet on your receiver/amplifier
or into a standard AC outlet.
STOP
CUE
Caution: To prevent electric shock, the plug's blades are polarized and
fit only one way. If the plug does not fit easily, turn it over and try again.
CAUTION:
To reduce the risk of fire or shock hazard, do not
TO REDUCE THE
RISK OF ELECTRIC SHOCK,
DO NOT REMOVE COVER OR
CAUTION
BACK. NO USER-
SERVICEABLE PARTS INSIDE.
!
REFER SERVICING TO
RISK OF ELECTRIC SHOCK
DO NOT OPEN
QUALIFIED PERSONNEL.
Rear View
Power Cord
Ground Cable
Phono Plugs
The exclamation symbol is intended to inform you that
important operating and maintenance instructions are
!
included in the literature accompanying this product.
The lightning symbol is intended to alert you to the presence of
uninsulated dangerous voltage within this product's enclosure
that might be of sufficient magnitude to constitute a risk of
electric shock. Do not open the product's case.
Rubber mat
45 RPM adapter
Use Your Turntable
Note: Depending on if your sound system has
PHONO jacks or not, be sure to set
LINE OUT ON/ PHONO OUT OFF as described in
"Connect Your Turntable".
1. Open the dust cover.
2. Remove the stylus cover.
1
3. If you are playing a 33
/
RPM record, place it
3
directly over the spindle. If you are playing a 45
RPM record, place the supplied 45 RPM
adapter over the turntable spindle, then place
the record over the adapter.
4. Press SPEED in or out to set the turntable's
1
speed (33
/
or 45 RPM).
3
5. Press PLAY. The turntable starts to rotate and
the tone arm moves to the beginning of the
record, lowers to the record, then starts to play.
6. At the end of the record, the tone arm
automatically returns to the tone arm rest and
the turntable stops. To stop playing the record
sooner, press STOP. If the tone arm does not
automatically return when it reaches the end of
the record, press STOP to reset the
mechanism.
Using The Cue Button
1. Press CUE to raise the tone arm.
2. Push the tone arm to a spot directly over the
desired part of the record. The turntable starts
to rotate.
3. Press CUE again. The tone arm slowly lowers
and the record plays.
©2004 RadioShack Corporation
All Rights Reserved.
RadioShack and RadioShack.com are trademarks
used by RadioShack Corporation.
Dust cover
Tone arm
Stylus cover
SPEED
42-7012
Printed in China
04A04
Advertisement

Summary of Contents for Radio Shack LAB-1200
- Page 1 Pre-Amp 42-7012 Tone arm 45 RPM adapter Thank you for buying the RadioShack LAB-1200 Fully-Automatic Belt Drive Turntable. This is a high quality stereo turntable with sensitive pickup and a built-in pre-amp that delivers great sound from your records.
-
Page 2: Specifications
Specifications Care Turntable Platter If your turntable is not working as it should, these suggestions might help you solve Keep the turntable dry. If it gets wet, wipe it dry immediately. Type ......................................Plastic the problem. If the turntable still does not operate properly, take it to your local Use and store the turntable only in normal temperature environments.