Hoshizaki HUR40A(-D) Service Manual
Commercial refrigerators & freezers undercounter & worktop series
Hide thumbs
Also See for HUR40A(-D):
- Parts list (52 pages) ,
- Specifications (2 pages) ,
- Instruction manual (22 pages)
Table of Contents
Advertisement
Quick Links
Download this manual
See also:
Instruction Manual
Hoshizaki
Hoshizaki America, Inc.
"A Superior Degree
of Reliability"
www.hoshizaki.com
Commercial Refrigerators & Freezers
Undercounter & Worktop Series
Models
Refrigerators
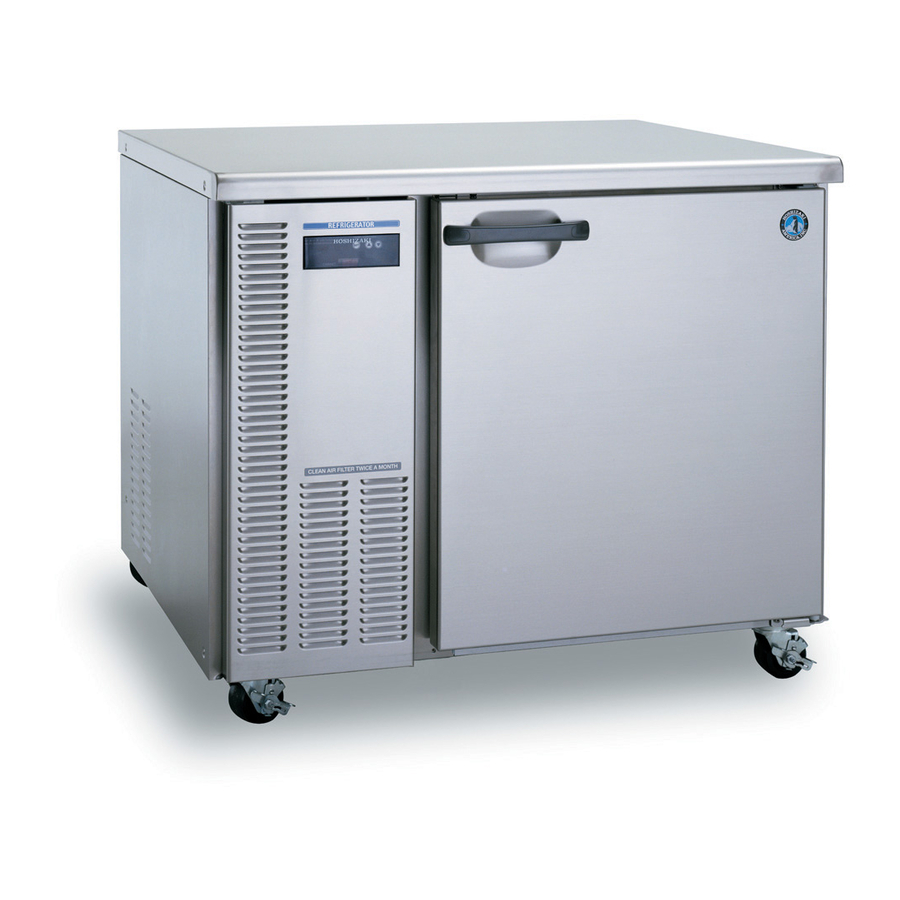
HUR40A(-D) HWR40A(-D)
HUR68A(-D) HWR68A(-D)
HUR96A(-D) HWR96A(-D)
Freezers
HUF40A(-D) HWF40A(-D)
HUF68A(-D) HWF68A(-D)
SERVICE MANUAL
Number: 73123
Issued: 2-4-2005
Revised: 9-30-2008
Advertisement
Table of Contents

Related Manuals for Hoshizaki HUR40A(-D)


Summary of Contents for Hoshizaki HUR40A(-D)
- Page 1 Hoshizaki America, Inc. “A Superior Degree of Reliability” www.hoshizaki.com Commercial Refrigerators & Freezers Undercounter & Worktop Series Models Refrigerators HUR40A(-D) HWR40A(-D) HUR68A(-D) HWR68A(-D) HUR96A(-D) HWR96A(-D) Freezers HUF40A(-D) HWF40A(-D) HUF68A(-D) HWF68A(-D) SERVICE MANUAL Number: 73123 Issued: 2-4-2005 Revised: 9-30-2008...
- Page 2 Hoshizaki provides this manual primarily to assist qualified service technicians in the service and maintenance of the unit. Should the reader have any questions or concerns which have not been satisfactorily addressed, please call, write or send an e-mail message to the Hoshizaki Technical Support Department for assistance. HOSHIZAKI AMERICA, INC.
-
Page 3: Table Of Contents
Please review this manual. It should be read carefully before the unit is serviced or maintenance operations are performed. Only qualified service technicians should service and maintain the unit. This manual should be made available to the technician prior to service or maintenance. - Page 4 4. Operating Modes ... 31 a) Continuous ... 32 b) Energy Saving ... 32 c) Automatic Corrections Made During Energy Saving Operating Mode ... 32 E. Perimeter Frame Heater ... 32 III. Service Diagnosis ... 33 A. Alarm Codes ... 33 1.
-
Page 5: Specifications
I. Specifications A. Nameplate Ratings Model HUR40A(-D), HWR40A(-D) HUR68A(-D), HWR68A(-D) HUR96A(-D), HWR96A(-D) HUF40A(-D), HWF40A(-D) HUF68A(-D), HWF68A(-D) Undercounter Model Names The undercounter models covered in this service manual initially had different model names. If you have a unit with an auxiliary code of N-6 and a serial number ending in "H", refer to the table below. -
Page 6: Hur40A, Huf40A
1. HUR40A, HUF40A Units: mm (in.) 1a. HUR40A-D, HUF40A-D... -
Page 7: Hwr40A, Hwf40A
2. HWR40A, HWF40A Units: mm (in.) 2a. HWR40A-D, HWF40A-D... -
Page 8: Hur68A, Huf68A
3. HUR68A, HUF68A Units: mm (in.) 3a. HUR68A-D, HUF68A-D... -
Page 9: Hwr68A, Hwf68A
4. HWR68A, HWF68A Units: mm (in.) 4a. HWR68A-D, HWF68A-D... -
Page 10: Hur96A
5. HUR96A Units: mm (in.) 5a. HUR96A-D... -
Page 11: Hwr96A
6. HWR96A Units: mm (in.) 6a. HWR96A-D... -
Page 12: General Information
II. General Information A. Construction Hoshizaki undercounters feature a cartridge-type refrigeration unit that can be removed without taking off the top and side panels. Evaporator Case Side Panel Compressor Capillary Tube/Suction Line Assembly Evaporator Case Cover Defrost Thermostat Defrost Heater... -
Page 13: Sequence Of Operation And Timing Charts
B. Sequence of Operation and Timing Charts For details on operating modes, see "II.D.4. Operating Modes." 1. Refrigerators – Continuous Operating Mode a) Sequence of Operation POWER ON Board Self Check 1. Frame heater(s) on 2. Evaporator fan(s) on Cycle On (Cut-on temperature reached) [Minimum 2 minutes] 1. - Page 14 b) Timing Chart Refrigerators – Continuous Operating Mode TIME-TEMPERATURE CONTROL CHART ENERGY SAVING MODE REFRIGERATORS...
-
Page 15: Freezers - Continuous Operating Mode
2. Freezers – Continuous Operating Mode a) Sequence of Operation POWER ON Board Self Check 1. Frame heater(s) on 2. Evaporator fan(s) on Cycle On (Cut-on temperature reached) [Minimum 2 minutes] 1. Compressor start-up 2. Condenser fan start-up Continue as normal cycling Five minutes after defrost heater off... - Page 16 TIME-TEMPERATURE CONTROL CHART [NOT DURING ENERGY SAVING MODE] FOR REFRIGERATORS & FREEZERS WITH AUXILIARY CODE _____ AND BEFORE b) Timing Chart Freezers – Continuous Operating Mode...
-
Page 17: Refrigerators - Energy Saving Operating Mode
3. Refrigerators – Energy Saving Operating Mode a) Sequence of Operation POWER ON Board Self Check 1. Frame heater(s) on continuously (Q5 and earlier) Frame heater(s) cycle on and off (Q6 and later) 2. Evaporator fan(s) cycles on and off Cycle On (Cut-on temperature reached) [Minimum 2 minutes]... - Page 18 TIME-TEMPERATURE CONTROL CHART [DURING ENERGY SAVING MODE] FOR b) Timing Chart REFRIGERATORS WITH AUXILIARY CODE _____ AND AFTER Refrigerators – Energy Saving Operating Mode...
-
Page 19: Freezers - Energy Saving Operating Mode
4. Freezers – Energy Saving Operating Mode a) Sequence of Operation POWER ON Board Self Check 1. Frame heater(s) on 2. Evaporator fan(s) cycles on and off Cycle On (Cut-on temperature reached) [Minimum 2 minutes] 1. Compressor start-up 2. Condenser fan start-up 3. - Page 20 TIME-TEMPERATURE CONTROL CHART [DURING ENERGY SAVING MODE] FOR FREEZERS (ALL UNITS) b) Timing Chart Freezers – Energy Saving Operating Mode...
-
Page 21: Control Board
C. Control Board • A Hoshizaki exclusive solid-state control board is employed in all Hoshizaki refrigerators and freezers. • All models are pretested and factory-adjusted. 1. Fragile, handle very carefully. 2. The control board contains integrated circuits, which are susceptible to failure due to static discharge. It is especially important to touch the metal part of the unit when handling or replacing the board. -
Page 22: Control Board Layout
2. Control Board Layout Rear K311 (6 pin) Relay Wiring Harness Board Part Number Chip Revision K251 (5 pin) (not used) K101 (3 pin) Transformer K151 (10 pin) Thermistor Wiring Harness F101 K361 (9 pin) 3 Amp Fuse (not used) (not used) Note: Fuse at position F101 on board is not currently used. -
Page 23: Settings And Diagnostics
D. Settings and Diagnostics Various settings and diagnostic information can be controlled via the display panel. The display panel is located behind the front panel. To open the front panel, grip the outer edge of the panel near the top and bottom and pull it open. This permits access to the display panel and control box. -
Page 24: Temperature Display
Model Refrigerator (auxiliary code Q5 and earlier) Refrigerator (auxiliary code Q6 and later) Freezer (Door) Freezer (Drawer) 3) After 10 seconds, the new setpoint will be saved automatically. Note: For refrigerators, the temperature differential for the compressor to turn off is -4.5°F (-2.5°C) for auxiliary code Q5 and earlier and -3.6°F (-2.0°C) for auxiliary... -
Page 25: C) Cabinet Temperature Correction (Calibration Factor)
Cabinet Temperature Correction (Calibration Factor) Model Refrigerator Freezer 2) If it is determined through discussion with the factory that the setting needs to be changed, press the 3) Press the button to save the new value. -
Page 26: Settings And Diagnostics Menu
1 to 12 hours in 1 hour increments Defrost Termination Refrigerator: 59 to 68°F (15 to 20°C) in Temperature one degree increments Freezer: 41 to 68°F (5 to 20°C) in one degree increments Setpoint 0 to 6.3°F in increments of .9°F Temperature (0 to 3.5°C in increments of .5°C) -
Page 27: A) Defrost Interval (F0)
a) Defrost Interval (F0) This unit is preset at the factory to defrost once every 6 hours for general conditions. However, if it is determined that this interval does not suit actual conditions, the interval can be changed. To change the defrost interval, follow the steps below. 1) Make sure the jumper is removed between connector K151 pins 7 and 8 on the control board. -
Page 28: C) Setpoint Temperature Differential (F2)
Note: The defrost termination temperatures can be adjusted within the following ranges: • Refrigerator: 59 to 68°F (15 to 20°C) in one degree increments • Freezer: 41 to 68°F (5 to 20°C) in one degree increments 4) Press the unmarked, blank button to save the setting. 5) Press the MANUAL DEFROST button to return to the menu screen. Press and hold... -
Page 29: D) High Temperature Alarm Delay Time (F3)
d) High Temperature Alarm Delay Time (F3) To change the high temperature alarm delay time, follow the steps below. 1) Make sure the jumper is removed between connector K151 pins 7 and 8 on the control board. Otherwise you will not be able to access this setting. For details, see "D.1. Gaining Access to Settings and Diagnostics."... -
Page 30: F) Temperature Display Scale (F5)
4) Press the unmarked, blank button to save the setting. 5) Press the MANUAL DEFROST button to return to the menu screen. Press and hold both the button and the mode and return to the temperature display. 6) If a jumper was present between connector K151 pins 7 and 8, reconnect it after all setting and diagnostic work is complete. -
Page 31: H) Compressor Run Time (F7)
4. Operating Modes Hoshizaki undercounters and worktops feature two operating modes, energy saving and continuous. Always use the default setting of your unit. To determine the default setting of your unit, see the chart below. -
Page 32: A) Continuous
Fan on/off time is dependent on the setpoint temperature. Model Refrigerator Freezer c) Automatic Corrections Made During Energy Saving Operating Mode (1) Temperature Display Correction When the unit is in energy saving mode and the evaporator fan shuts off, the temperature at the cabinet thermistor drops due to its close proximity to the evaporator. -
Page 33: Service Diagnosis
III. Service Diagnosis A. Alarm Codes If an error occurs, the alarm code and cabinet temperature are displayed in 1-second intervals. See the table below for a general description of the problem, then see the rest of this section for detailed instructions. Alarm Code Problem High Temperature Alarm... -
Page 34: Alarm Display Priority
1. Alarm Display Priority If multiple alarms occur simultaneously, only the alarm with the higher priority is displayed. Error Code Priority Description EEPROM Verification or Read Error Alarm EEPROM Write Error Alarm Defrost Temperature Sensor Malfunction Alarm Clogged Filter Sensor Malfunction Alarm High Pressure Alarm Clogged Filter Alarm Defrost Alarm... -
Page 35: Alarm Details And Countermeasures
2. Alarm Details and Countermeasures a. High Temperature Alarm (E1) If the cabinet temperature exceeds the setpoint temperature by 14.4°F (8°C) or more for more than x hours, "E1" is displayed. The default value of x is "2" (2 hours). The value of x can be changed under F3 on the Settings and Diagnostics Menu. -
Page 36: Low Temperature Alarm (E2)
b. Low Temperature Alarm (E2) If the cabinet temperature drops below the setpoint temperature by 9°F (5°C) or more for more than y minutes, "E2" is displayed. The default value of y is "1" (1 hour). The value of y can be changed under F4 on the Settings and Diagnostics Menu. (0=No delay; 1=1 hour) Note: • The low temperature alarm timer starts once the cabinet temperature drops 9°F... -
Page 37: Defrost Alarm (E3)
c. Defrost Alarm (E3) If the defrost thermistor does not turn off in one hour after defrost begins, "E3" is displayed. When "E3" is displayed, the next step in the defrost termination process (drain - fan delay - defrost display delay) begins. Reset Options To reset the alarm, turn the unit off and then back on. -
Page 38: Clogged Filter Alarm (E7)
e. Clogged Filter Alarm (E7) The unit is equipped with a filter for protecting the condenser from dirt, oils, grease, etc. The filter promotes clean condenser surfaces and efficient operation and should be checked twice monthly and cleaned when necessary. The unit is also equipped with a sensor to determine if this filter is excessively dirty. -
Page 39: Defrost Temperature Sensor Malfunction Alarm (E8)
f. Defrost Temperature Sensor Malfunction Alarm (E8) If input from the defrost thermistor is below the defrost open circuit detection point (equivalent to -67°F (-55°C)), "E8" is displayed. "E8" is also displayed when input from the defrost thermistor is above the defrost thermistor short circuit detection point (equivalent to 122°F (50°C)) for 10 minutes or more. -
Page 40: Clogged Filter Sensor Malfunction Alarm (E9)
g. Clogged Filter Sensor Malfunction Alarm (E9) If the input from the clogged filter sensor is below the clogged filter sensor open circuit detection point (equivalent to -7.6°F (-22°C)), "E9" is displayed. "E9" is also displayed when input from the clogged filter sensor is above the clogged filter sensor short circuit detection point (equivalent to 186.8°F (86°C)) for 10 minutes or more. -
Page 41: Control Board Error Alarms (Ea And Ed)
h. Control Board Error Alarms (EA and ED) "EA" is displayed when an EEPROM write error is detected. "ED" is displayed when an EEPROM verification or read error is detected. Reset Options Replacing the control board with a functioning replacement control board will eliminate this error condition. -
Page 42: Diagnosis Chart
B. Diagnosis Chart Problem Possible Cause [1] Compressor will a) Power Supply not start—no current draw. b) Cord and Plug c) Circuit Breaker (kitchen) d) Transformer e) Wiring to Control Board 1. Loose connection(s). f) Voltage g) High Pressure Switch h) Thermistor i) Control Board j) Compressor Overload... - Page 43 Problem Possible Cause [5] Cabinet a) Setpoint and/or temperature too Differential high. b) Door c) Defrost d) Refrigerant e) Fan Motor f) Air Filter g) Condenser h) Thermistor i) Control Board j) Outside Heat Source k) Air Flow l) Warm Food [6] Cabinet a) Power Supply temperature...
- Page 44 Problem Possible Cause [9] Defrost cycle a) Defrost Thermistor lasts too long. b) Control Board c) Defrost d) Defrost Heater e) Safety Defrost Thermostat [10]Condensate a) Cabinet Contents water overflow. b) Location of Unit c) Seals d) Environment [11] Abnormal Noise a) Fasteners b) Compressor c) Fan...
-
Page 45: Thermistor Check
C. Thermistor Check A thermistor (semiconductor) is used for the cabinet control sensor and defrost termination sensor. The resistance varies depending on temperature. No adjustment is required. If necessary, check for resistance between thermistor leads and visually check the thermistor mounting. -
Page 46: Removal And Replacement Of Components
IV. Removal and Replacement of Components 1. Ensure all components, fasteners, and thumbscrews are securely in place after the equipment is serviced. 2. The Polyol Ester (POE) oils used in all units can absorb moisture quickly. Therefore it is important to prevent moisture from entering the system when replacing or servicing parts. -
Page 47: Evacuation And Recharge
5) Turn off the vacuum pump. Disconnect the vacuum pump hose and attach it to a refrigerant service cylinder. Remember to loosen the connection, and purge the air from the hose. See the nameplate for the required refrigerant charge. Hoshizaki recommends only virgin refrigerant or reclaimed refrigerant which meets ARI Standard No. -
Page 48: Removal And Replacement Of Refrigeration Unit
B. Removal and Replacement of Refrigeration Unit 1) Turn off the power supply, and unplug the unit. 2) Remove the front panel, then remove the wire guard located below the display panel. 3) Unhook the wiring connectors at the control box, then remove the two hex-head M6 attachment nuts and the M5 bolt. -
Page 49: Removal And Replacement Of Evaporator
1) Turn off the power supply, and unplug the unit. 2) Remove the front panel, then remove the wire guard located below the display panel. 3) Unhook the wiring connectors at the control box, then remove the two hex-head M6 attachment nuts and the M5 bolt. - Page 50 4) Very carefully slide out the refrigeration system. Support the evaporator as it clears the evaporator case. 5) Recover the refrigerant and store it in an approved container. 6) Remove the four 4×8 T2 screws holding the evaporator to the evaporator bracket and provide a safe means for supporting the evaporator away from the ABS liner of the evaporator case cover.
-
Page 51: Removal And Replacement Of Capillary Tube / Suction Line Assembly
E. Removal and Replacement of Capillary Tube / Suction Line Assembly Always install a new drier every time the sealed refrigeration system is opened. Do not replace the drier until after all other repair or replacement has been made. Install the new drier with the arrow on the drier in the direction of the refrigerant flow. -
Page 52: Removal And Replacement Of Thermistors
F. Removal and Replacement of Thermistors 1) Turn off the power supply, and unplug the unit. 2) Remove the front panel, then remove the wire guard located below the display panel. 3) Unhook the wiring connectors at the control box, then remove the two hex-head M6 attachment nuts and the M5 bolt. -
Page 53: Removal And Replacement Of Door Gasket
G. Removal and Replacement of Door Gasket Remove old gasket by pulling it directly out of the vinyl gasket retainer. Thoroughly clean the gasket area with mild soap and water prior to installing the new gasket. The new gasket should be installed by assembling it at the corners first, then working toward the center at the top, bottom and sides. -
Page 54: Removal And Replacement Of Control Board
I. Removal and Replacement of Control Board When receiving a service call, please ask the customer to turn the power off, then turn it back on and monitor the condition for awhile. Even if the control board malfunctions for some reason, it may resume normal operation after the power is turned off once. -
Page 55: Removal And Replacement Of Fan Motors
9) Plug in the unit, and turn on the power supply. K. Door Re-Hinging and Drawer Conversion Contact your local Hoshizaki distributor or Hoshizaki Technical Support (1-800-233-1940) if door reversing or drawer conversion is desired. CAUTION... -
Page 56: Cleaning And Maintenance Instructions
3. To prevent frostbite, do not touch foods or containers (especially metallic) in the freezer compartment with damp hands. 4. Before using a sanitizer such as inert soap and sodium hypochlorite, thoroughly read the manufacturer’s instructions on the proper usage and... -
Page 57: Maintenance
The filter should be checked monthly and cleaned when necessary—as described in "A.5. Air Filter". All other maintenance or service on this unit should be performed in accordance with the Hoshizaki Service Manual by a qualified service technician. -
Page 58: Wiring Diagrams
VI. Wiring Diagrams A1. HUR40A, HWR40A (auxiliary code Q5 and earlier) 115/60/1 Transformer Output 10V at 115V Note: Jumper (color: white) between pins 7 and 8 of connector K151 may not be present on all units, but this will not adversely affect performance. Before diagnosing and/or servicing the unit, confirm that you have the proper wiring diagram by checking against the diagram located inside the front panel. -
Page 59: A2. Hur40A(-D), Hwr40A(-D) (Auxiliary Code Q6 And Later)
A2. HUR40A(-D), HWR40A(-D) (auxiliary code Q6 and later) 115/60/1 Transformer Output 10V at 115V Note: Jumper (color: white) between pins 7 and 8 of connector K151 may not be present on all units, but this will not adversely affect performance. Before diagnosing and/or servicing the unit, confirm that you have the proper wiring diagram by checking against the diagram located inside the front panel. -
Page 60: Huf40A(-D), Hwf40A(-D)
B. HUF40A(-D), HWF40A(-D) 115/60/1 Transformer Output 10V at 115V Note: Jumper (color: white) between pins 7 and 8 of connector K151 may not be present on all units, but this will not adversely affect performance. Before diagnosing and/or servicing the unit, confirm that you have the proper wiring diagram by checking against the diagram located inside the front panel. -
Page 61: C1. Hur68A, Hwr68A (Auxiliary Code Q5 And Earlier)
C1. HUR68A, HWR68A (auxiliary code Q5 and earlier) 115/60/1 Transformer Output 10V at 115V Note: Jumper (color: white) between pins 7 and 8 of connector K151 may not be present on all units, but this will not adversely affect performance. Before diagnosing and/or servicing the unit, confirm that you have the proper wiring diagram by checking against the diagram located inside the front panel. -
Page 62: C2. Hur68A(-D), Hwr68A(-D) (Auxiliary Code Q6 And Later)
C2. HUR68A(-D), HWR68A(-D) (auxiliary code Q6 and later) 115/60/1 Transformer Output 10V at 115V Note: Jumper (color: white) between pins 7 and 8 of connector K151 may not be present on all units, but this will not adversely affect performance. Before diagnosing and/or servicing the unit, confirm that you have the proper wiring diagram by checking against the diagram located inside the front panel. -
Page 63: Huf68A(-D), Hwf68A(-D)
D. HUF68A(-D), HWF68A(-D) 115/60/1 Transformer Output 10V at 115V Note: Jumper (color: white) between pins 7 and 8 of connector K151 may not be present on all units, but this will not adversely affect performance. Before diagnosing and/or servicing the unit, confirm that you have the proper wiring diagram by checking against the diagram located inside the front panel. -
Page 64: Hur96A(-D), Hwr96A(-D)
E. HUR96A(-D), HWR96A(-D) 115/60/1 Transformer Output 10V at 115V Note: Jumper (color: white) between pins 7 and 8 of connector K151 may not be present on all units, but this will not adversely affect performance. Before diagnosing and/or servicing the unit, confirm that you have the proper wiring diagram by checking against the diagram located inside the front panel.