Brother QL-500 User Manual
Dk label, dk tape label printer
Hide thumbs
Also See for QL-500:
- Operation manual (118 pages) ,
- User manual (76 pages) ,
- Mode d'emploi (72 pages)
Table of Contents
Advertisement
Available languages
Available languages
QL-500
User's Guide
Guía del usuario
Be sure to read this guide before using the machine. We recommend that you
keep this guide nearby for future reference.
Asegúrese de leer este manual antes de usar la impresora. Le recomendamos
conservar este manual a mano para referencia en el futuro.
www.brother.com
Advertisement
Chapters
Table of Contents
Troubleshooting

Related Manuals for Brother QL-500


Summary of Contents for Brother QL-500
- Page 1 QL-500 User's Guide Guía del usuario Be sure to read this guide before using the machine. We recommend that you keep this guide nearby for future reference. Asegúrese de leer este manual antes de usar la impresora. Le recomendamos conservar este manual a mano para referencia en el futuro.
-
Page 2: Introduction
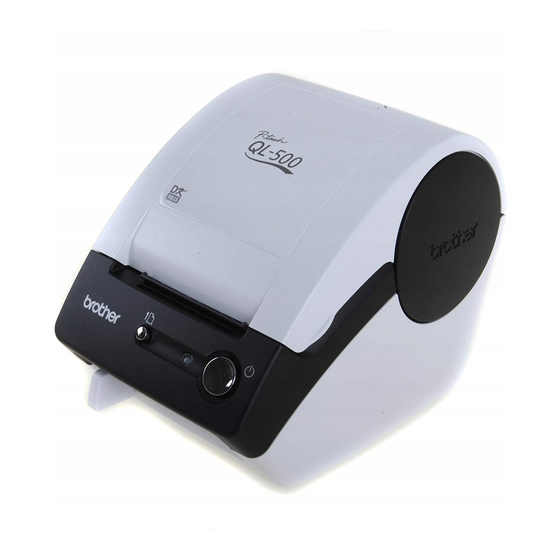
Introduction Congratulations on purchasing the Brother QL-500. Your new Brother QL-500 is a label printer that connects to your personal computer, enabling you to quickly and easily print professional custom labels that you have created on your personal computer using the label editing software provided. - Page 3 (collectively referred to in this warranty as "the machine"). • If you purchased a product from someone other than an authorized Brother reseller in the United States or if the product was used (including but not limited to floor models or refurbished product), prior to your purchase you are not the Original Purchaser and the product that you purchased is not covered by this warranty.
- Page 4 Your credit card will be charged up to the cost of a new Product only if: (i) you do not return your original Product to Brother within five (5) busi- ness days; (ii) the problems with your original Product are not covered by the limited war- ranty;...
- Page 5 This Limited Warranty (and Brother's obligation to you) may not be changed in any way unless you and Brother sign the same piece of paper in which we (1) refer to the machine and your bill of sale date, (2) describe the change to this warranty and (3) agree to make that change.
-
Page 6: Important Information
Introduction Important Information Should you have questions, or need information about your Brother Product, we have a variety of support options for you to choose from: USA-Customer Service: Customer Service 1-877-BROTHER (877-276-8437) Customer Service 1-901-379-1210 (fax) Website www.brother-usa.com Supplies / Accessories www.brothermall.com... -
Page 7: Manuals
Manuals The following manuals are provided to help you use the printer correctly and to utilize its features. Be sure to read this manual before using the printer. User’s Guide (This manual) Read this manual first. It gives information which should be read before using the printer, such as cautions, installation and setup. -
Page 8: General Information
General Information Compilation and Publication Notice Under the supervision of Brother Industries Ltd., this guide has been compiled and published, covering the latest product’s descriptions and specifications. The contents of this guide and the specifications of this product are subject to change without notice. -
Page 9: Safety Precautions
Safety Precautions We recommend that you read all of these instructions prior to using this product, and save them for later reference. Follow all warnings and instructions marked on the product. WARNING Tells you what to do to avoid the risk of injury. CAUTION Tells you about procedures you must follow to prevent damage to the machine. -
Page 10: Power Cord
Introduction WARNING Do not use paint thinner, benzene, The electrical outlet should be close to alcohol or any other organic solvents to the machine and be easily accessible. clean the machine. Doing so may cause Do not touch the cutter. Personal injury damage to the surface finish. -
Page 11: General Precautions
DK Rolls (DK Labels and DK Tapes) • Use only genuine Brother accessories and supplies (with marks). Do not use any unauthorized accessories or supplies. • If the label is attached to a wet, dirty, or oily surface, it may peel off easily. Before applying the label, clean the surface to which the label will be applied. - Page 12 CD/DVD player. • Users shall take full responsibility for applying CD/DVD labels. Brother accepts no responsibility for any loss or damage of data caused by the inappropriate use of CD/DVD labels.
-
Page 13: Table Of Contents
Status LED Indications ••••••••••••••••••••••••••••••••••••••••••••••••••••••••••••••••••••••••••• 15 2 Installing the DK Roll •••••••••••••••••••••••••••••••••••••••••••••••••••••••••••••• 16 3 Attaching the paper guide •••••••••••••••••••••••••••••••••••••••••••••••••••••••• 17 4 Connecting the power supply•••••••••••••••••••••••••••••••••••••••••••••••••••• 17 5 Installing the Software for QL-500 •••••••••••••••••••••••••••••••••••••••••••••• 18 ® ® 1. When using Microsoft Windows ••••••••••••••••••••••••••••••••••••••••••••••••••••••••••... -
Page 14: Before Using The Printer
Condition ON/OFF button Turns power to the QL-500 on and off. • When using DK Die-cut Labels, feeds the DK Label Roll to the beginning of the first label on the roll. If this button is held for more than one second, the DK Label Roll is fed to the beginning of the next label on the roll. -
Page 15: Status Led Indications
(Waiting for temperature of print head to lower) System error Turns off after flashing fast ten times Turn the QL-500 off and then on again. If this error re-occurs, contact the retail outlet where the QL-500 was purchased or your local authorized service center. -
Page 16: Installing The Dk Roll
Before using the printer 2 Installing the DK Roll Check that the power is turned OFF (check LED lamp). Lift up the DK Roll cover by the tabs at the sides of the cover. Pull up the roll release lever and remove the protective sheet of Roll release lever Printing unit protective sheet... -
Page 17: Attaching The Paper Guide
The wire in the power cord may become damaged. • Do not connect the QL-500 to the computer until directed to do so when installing the printer driver. For how to install the printer driver and software, refer to... -
Page 18: Installing The Software For Ql-500
Before using the printer 5 Installing the Software for QL-500 The printer names in the following screens may differ from your printer name. The procedure for installing them varies depending on the OS of the computer. Install procedure is subject to change without notice. -
Page 19: Driver Installation
When you are asked to restart the computer, choose "Restart" and click [Finish]. Start the software. • Click [Start] - [All Programs] - [Brother P-touch] - [P-touch Editor 5.0] to start P-touch Editor. • Click [Start] - [All Programs] - [Brother P-touch] - [P-touch Address Book 1.1] to start P-touch Address Book. -
Page 20: When Using Mac Os
Before using the printer 2. When using Mac OS ® This section explains how to install P-touch Editor 5.0, Fonts, Auto Format Templates, Clip Art, and the printer driver. After the driver is installed the driver configuration is explained. • Until the driver installation is completed, do not connect the machine to your ®... - Page 21 After restarting the computer, connect your printer to the computer by using the USB cable, Power port and then turn on the printer. • Before connecting the USB interface Power cord cable, remove the caution label affixed to the USB port of the USB port USB cable machine.
-
Page 22: Uninstalling Software And Printer Driver
/Windows From the [Control Panel], go to [Programs] and open [Programs and Features]. The [Uninstall or change a program] window appears. ® For Windows Choose "Brother P-touch Editor 5.0", and click [Remove]. ® ® For Windows Vista /Windows Choose "Brother P-touch Editor 5.0", and click [Uninstall]. - Page 23 ® For Windows Choose "Brother XX-XXXX", and click [File] - [Delete]. ® ® For Windows Vista /Windows Choose "Brother XX-XXXX", right click on the icon, and then click [Delete] ® ® (Windows Vista )/ [Remove device] (Windows ® For Windows Go to [File] - [Server Properties].
-
Page 24: Maintenance And Troubleshooting
Maintenance and Troubleshooting Maintenance and Troubleshooting 7 Maintenance Maintenance of the printer must be done as needed. However, some environments require that maintenance must be done more frequently (e.g. in dusty conditions). Print head maintenance The DK Roll (thermal recording paper type) used with the printer is designed to clean the print head automatically. -
Page 25: Label Outlet Maintenance
Insert the edge of cleaning sheet into the slot until it is just in front of the cutter. • Insert the sheet without removing the part of sheet. • Check that the printing surface of cleaning sheet is facing upward. After inserting the cleaning sheet into the slot, push down the roll release lever and remove part of cleaning sheet. -
Page 26: Replacing The Cutter Unit
Maintenance and Troubleshooting Replacing the cutter unit Eventually the cutting blade on the cutter unit will become dull and need to be replaced. When this happens, purchase a new replacement cutter unit and install it according to the following procedure. For assistance in purchasing a replacement cutter unit, refer to "Accessories (For USA Only)"... - Page 27 Hold the knob and carefully remove the cutter unit. Take care not to touch the blade of cutter. Replace the new cutter unit into the appropriate position. Tighten the screw which holds the cutting blade unit in place. Install the DK Roll and close the DK Roll cover. For details, refer to "Installing the DK Roll"...
-
Page 28: Troubleshooting
The power button does connected correctly, try connecting it to another electrical outlet. not light up or flash. * If the power button still does not light up or flash, contact Brother Customer Service at 1-877-BROTHER. • The printed label •... -
Page 29: Main Specifications
Main specifications Product specifications Item Specifications Display LED lamp (green) Printing method Direct thermal printing via thermal head Speed of printing Max. 3.5" (90 mm) / sec. Max. 50 labels/min. (address label) Print Print head 300 dpi/720 dots Max. printing width 2.3"... -
Page 30: Accessories (For Usa Only)
Brother recommends the use of genuine Brother accessories with the Brother QL-500. The use of other products may effect the print quality or may damage the Brother QL-500. The following supplies and accessories are available for the Brother QL-500 and can be ordered directly from Brother should your retailer not stock them. - Page 31 QL-500 Guía del usuario Asegúrese de leer este manual antes de usar la impresora. Le recomendamos conservar este manual a mano para referencia en el futuro. www.brother.com...
-
Page 32: Introducción
Introducción Le felicitamos por su compra de la impresora QL-500. La nueva QL-500 es una impresora de etiquetas que se conecta a su PC y le permite imprimir fácil y rápidamente etiquetas profesionales personalizadas creadas en el equipo con el software de edición de etiquetas proporcionado. - Page 33 (denominados colectivamente en esta garantía “la máquina”). • Si ha adquirido este producto a alguien que no es un distribuidor autorizado de Brother en los Estados Unidos, o si el producto ha sido utilizado (incluyendo, pero sin limitarse a modelos de exposición o productos reacondicionados) antes de que el usuario lo comprara, entonces dicho usuario no es el Comprador original y el producto adquirido no estará...
- Page 34 Sólo se cargará en su tarjeta de crédito el importe de un producto nuevo si: (i) no devuelve el producto original a Brother en un plazo de cinco (5) días hábiles; (ii) los problemas del producto original no están cubiertos por la garantía limitada;...
- Page 35 Limitaciones: Brother no se responsabiliza de los daños o pérdida de un equipo, soporte, programas o datos relacionados con el uso de esta máquina. Excepto en el caso de las reparaciones o sustituciones descritas anteriormente, Brother no será responsable de ningún daño directo, indirecto, accidental o consecuente, ni de desagravio específico.
-
Page 36: Información Importante
Introducción Información importante Si tiene alguna pregunta o necesita información acerca de su producto Brother, puede elegir entre las siguientes opciones de asistencia: (En EE.UU.) (En México) Servicio de atención al cliente Centro Nacional de Atención a Clientes Servicio de atención al cliente 1-877-BROTHER (877-276-8437) 8503-8701 (voz) - Ciudad de México... -
Page 37: Manuales
Manuales Le proporcionamos los siguientes manuales para ayudarle a usar la impresora correctamente y utilizar sus funciones. Asegúrese de leer este manual antes de usar la impresora. Guía del usuario (este manual) Lea este manual primero. En él obtendrá información que debe leer antes de usar la impresora como, por ejemplo, advertencias, consejos de instalación y configuración. -
Page 38: Información General
Información general Compilación y aviso de publicación Esta guía ha sido compilada y editada por Brother Industries Ltd. e incluye las descripciones y especificaciones más actualizas del producto. El contenido de esta guía y las especificaciones de este producto está sujeto a modificación sin previo aviso. -
Page 39: Precauciones De Seguridad
Precauciones de seguridad Lea y comprenda todas estas instrucciones y consérvelas para futuras consultas. Siga todas las advertencias e instrucciones indicadas en el producto. ADVERTENCIA Le indica qué hacer para impedir el riesgo de lesiones. PRECAUCIÓN Le indica los procedimientos que debe seguir para evitar dañar la máquina. Los símbolos utilizados en esta guía se indican a continuación: Acción NO permitida NO desmonte el producto. - Page 40 Introducción ADVERTENCIA No utilice disolvente para pintura, La toma eléctrica debe estar cerca de la bencina, alcohol u otros disolventes máquina y debe ser de fácil acceso. orgánicos para limpiar la máquina. Si lo No toque la cuchilla. Puede provocar hace, puede provocar daños en el lesiones personales.
-
Page 41: Precauciones Generales
Es recomendable limpiar la guía del papel cuando se sustituye la unidad del cortador. Rollo DK (etiqueta DK y cinta DK) • Utilice sólo accesorios y suministros originales de Brother (con las marcas ). No utilice accesorios o suministros no autorizados. •... - Page 42 CD/DVD. Si no los utiliza, puede dañar el reproductor de CD/DVD. • Los usuarios son responsables de la colocación de etiquetas de CD/DVD. Brother no se hace responsable de la pérdida o daños provocados por el uso inadecuado de las etiquetas de CD/DVD.
-
Page 43: Índices
Testigo LED •••••••••••••••••••••••••••••••••••••••••••••••••••••••••••••••••••••••••••••••••••••••• 15 2 Instalación del rollo DK ••••••••••••••••••••••••••••••••••••••••••••••••••••••••••• 16 3 Instalación de la guía de papel ••••••••••••••••••••••••••••••••••••••••••••••••• 17 4 Conexión de la alimentación eléctrica •••••••••••••••••••••••••••••••••••••••• 17 5 Instalación del software para QL-500 ••••••••••••••••••••••••••••••••••••••••• 18 ® ® 1. Usuarios de Microsoft Windows •••••••••••••••••••••••••••••••••••••••••••••••••••••••••... -
Page 44: Antes De Usar Esta Impresora
Descripción de los botones Botón Estado ON/OFF, botón de Enciende y apaga la QL-500. encendido y apagado • Cuando se utilizan Etiquetas troqueladas DK, hace avanzar el rollo de etiquetas DK hasta el principio de la siguiente etiqueta del rollo. Si se presiona este botón durante más de un segundo, el rollo de etiquetas DK... -
Page 45: Testigo Led
Se apaga tras Error del sistema parpadear rápidamente diez Apague la QL-500 y vuelva a encenderla. veces Si se repite el error, póngase en contacto con el distribuidor donde adquirió la QL-500 o con su Centro de servicio local autorizado. -
Page 46: Instalación Del Rollo Dk
Antes de usar esta impresora 2 Instalación del rollo DK Compruebe que la impresora esté apagada (revise el testigo LED). Abra la cubierta del rollo DK levantando las pestañas que se encuentran a ambos lados de la parte delantera de la cubierta. Levante la palanca de Palanca de desbloqueo del rollo desbloqueo del rollo y retire la... -
Page 47: Instalación De La Guía De Papel
El hilo del cable de alimentación se puede dañar. • No conecte la QL-500 al ordenador hasta que se le indique en el procedimiento de instalación del controlador de impresora. Para instalar el controlador y software, consulte la "Guía de instalación del... -
Page 48: Instalación Del Software Para Ql-500
Antes de usar esta impresora 5 Instalación del software para QL-500 Los nombres de impresora de las siguientes pantallas pueden no coincidir con el nombre de su impresora. El procedimiento de instalación varía dependiendo de sistema operativo del ordenador. El procedimiento de instalación puede estar sujeto a cambios sin previo aviso. - Page 49 Para obtener detalles sobre el software, consulte "Guía del usuario de software (PDF)". Puede encontrar la Guía del usuario de software (PDF) haciendo clic en [Inicio] - [Todos los programas] - [Brother P-touch] - [Manuals] - [QL-Series] - [Guía del usuario de software].
-
Page 50: Usuarios De Mac Os
Antes de usar esta impresora 2. Usuarios de Mac OS ® Esta sección explica cómo instalar P-touch Editor 5.0, las fuentes, las plantillas de formato automático, las imágenes prediseñadas y el controlador de impresora. Después de instalar el controlador de impresora, se explica cómo configurarlo. •... - Page 51 Una vez que finalice la instalación y aparezca el mensaje “Haga clic en Reiniciar para acabar de instalar el software”, haga clic en [Reiniciar]. ® El Macintosh se reinicia. La instalación del software habrá finalizado. Después de reiniciar la computadora, conecte la impresora Puerto de a la computadora mediante el cable alimentación...
-
Page 52: Desinstalación Del Software Y Del Controlador De La Impresora
/Windows En [Panel de control], vaya a [Programas] y abra [Programas y características]. Aparece la ventana [Desinstalar o cambiar un programa]. ® Para Windows Seleccione “Brother P-touch Editor 5.0” y haga clic en [Eliminar]. ® ® Para Windows Vista /Windows Seleccione “Brother P-touch Editor 5.0”... - Page 53 Seleccione “Brother XX-XXXX” y haga clic en [Archivo] - [Eliminar]. ® ® Para Windows Vista /Windows Seleccione “Brother XX-XXXX”, haga clic con el botón secundario en el icono ® ® y luego haga clic en [Eliminar] (Windows Vista )/[Quitar dispositivo] (Windows ®...
-
Page 54: Mantenimiento Y Corrección De Averías
Mantenimiento y corrección de averías Mantenimiento y corrección de averías 7 Mantenimiento Las tareas de mantenimiento deben realizarse según sean necesarias. Sin embargo, algunos ambientes exigen que el mantenimiento se lleve a cabo con mayor frecuencia (por ejemplo, en ambientes con excesiva cantidad de polvo). Mantenimiento del cabezal de impresión El rollo DK (tipo de papel térmico) que se usa en esta impresora está... -
Page 55: Mantenimiento Del Punto De Salida De Las Etiquetas
Introduzca el borde de la hoja de limpieza en la ranura hasta ponerla delante del cortador. • Introduzca la hoja sin retirar la parte de la hoja. • Compruebe que la superficie de impresión de la hoja de limpieza esté hacia arriba. Después de introduzca la hoja de limpieza en la unidad impresora, baje la palanca de desbloqueo del rollo y retire la parte... -
Page 56: Reemplazo De La Unidad Del Cortador
Mantenimiento y corrección de averías Reemplazo de la unidad del cortador Eventualmente la hoja de corte del cortador perderá su filo y deberá reemplazarse. Cuando sucede esto, compre una nueva unidad de cortador de repuesto e instálela conforme al siguiente procedimiento. Para adquirir una unidad del cortador de reemplazo, refiérese a "Accesorios (sólo en Estados Unidos)"... - Page 57 Sostenga la perilla y retire cuidadosamente la unidad del cortador. Tenga cuidado para evitar tocar la hoja del cortador. Instale la nueva unidad del cortador en la posición indicada. Apriete el tornillo que mantiene la unidad de la hoja de corte en su sitio. Instale el rollo DK y cierre la cubierta del compartimiento del rollo Si desea conocer más detalles, consulte la sección "Instalación del rollo DK"...
-
Page 58: Localización Y Resolución De Problemas
Si está bien conectado, intente enchufarlo a una toma de corriente distinta. ilumina ni * Si el botón de encendido sigue sin encenderse ni parpadear, póngase en parpadea. contacto con el servicio de Atención al cliente de Brother en el número 1-877-BROTHER. • La etiqueta impresa •... -
Page 59: Especificaciones Principales
Especificaciones principales Especificaciones del producto Elemento Especificaciones Visor Testigo LED (verde) Método de Impresión térmica directa a través de un cabezal térmico impresión Velocidad de Máx. 3.5" (90 mm)/segundo, 50 etiquetas/minuto (etiqueta de dirección) impresión Cabezal de Impresión 300 ppp/720 puntos impresión Máximo ancho de 2.3"... -
Page 60: Accesorios (Sólo En Estados Unidos)
El uso de otros productos puede afectar a la calidad de impresión o puede causar daños a la Brother QL-500. Están disponibles los siguientes accesorios y suministros para la impresora Brother QL- 500 y puede pedirlos directamente a Brother si su distribuidor no dispone de ellos. Disponibilidad de accesorios tema variar sin noticia. Rodillos DK Etiquetas DK con tamaños predeterminados... - Page 61 Cortador de reemplazo Nº de stock Descripción DK-BU99 Unidad del cortador (2 unidades) Hoja de limpieza Nº de stock Descripción DK-CL99 Hoja de limpieza (10 hojas)
- Page 62 Printed in China LB8718001...