Table of Contents
Advertisement
Advertisement
Table of Contents

Related Manuals for JL Audio 13W7-D1.5

Summary of Contents for JL Audio 13W7-D1.5
- Page 1 Owner’s Manual...
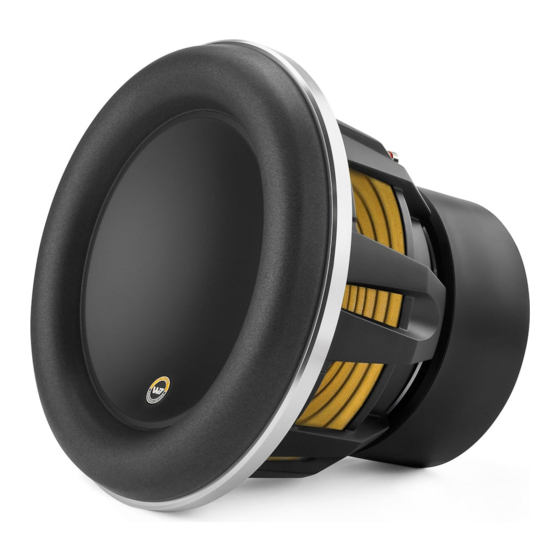
- Page 2 An Introduction Thank you for purchasing a JL Audio W7 subwoofer driver. The W7 In addition to the enclosure recommendations, we also provide embodies JL Audio’s commitment to pushing the envelope of speaker recommended amplifier settings for JL Audio amplifiers used with technology, with eight patented technologies, a design patent and a W7’...
- Page 4 Wrong in the unlikely event that the W7 ever needs to be shipped back to JL Audio for service. Step 2: Remove Clamp-Ring Gently insert the tip of the large flat-head screwdriver between the shiny aluminum clamp-ring Two tools are required to install a W7: and the foam surround (picture 2a).
- Page 5 Step 5: Ready to Install You are now ready to install the W7 into its enclosure. The parts are shown below. Step 6: Connect the speaker wires and place the W7 into the enclosure Connect the positive wire to the red terminal and the negative wire to the black terminal of the W7 (picture 6a).
- Page 6 Amplifier Recommendation: 1000/1v2 Bass EQ: Generally not necessary in W7 applications (we recommend defeating it by JL Audio 1000/1v2: switching the switch to ). May be used with Remote Bass Control to provide some user controllable broad bass boost. When used in this...
- Page 7 Driver Specifications Grille Clearance: 2.7 in. (69 mm) from the bottom of the mounting Mounting Hardware: Twelve #12 x 1.75" long clear, zinc-plated steel flange to the lowest inside surface of the grille. Phillips pan-head sheet metal screws (included) or twelve #12-28 long steel Phillips pan-head machine screws with #12-28 T-Nuts, each at least Displacement: 0.21 cu.
- Page 8 1000/1v2 (pictured), HD750/1, 500/1v2 or G-MAX Bass EQ: Generally not necessary in W7 applications (we recommend defeating it by JL Audio 1000/1v2: switching the switch to ). May be used with Remote Bass Control to provide some user controllable broad bass boost. When used in this...
- Page 9 Driver Specifications Grille Clearance: 2.6 in. (66 mm) from the bottom of the mounting Mounting Hardware: Twelve #10 x 1.75" long clear, zinc-plated steel flange to the lowest inside surface of the grille. Phillips pan-head sheet metal screws (included) or twelve #10-32 long steel Phillips pan-head machine screws with #10-32 T-Nuts, each at least Displacement: 0.14 cu.
- Page 10 Amplifier Recommendation: 500/1v2 (pictured), HD750/1 or G-MAX Bass EQ: Generally not necessary in W7 applications (we recommend defeating it by JL Audio 500/1v2: switching the switch to ). May be used with Remote Bass These settings are intended Control to provide some user controllable broad bass boost. When used in this as a “baseline”...
- Page 11 Driver Specifications Grille Clearance: 2.25 in. (57 mm) from the bottom of the mounting Mounting Hardware: Twelve #10 x 1.75" long clear, zinc-plated steel flange to the lowest inside surface of the grille. Phillips pan-head sheet metal screws (included) or twelve #10-32 long steel Phillips pan-head machine screws with #10-32 T-Nuts, each at Displacement: 0.09 cu.
- Page 12 5 0 0 W 1 0 0 0 W 2 0 0 0 W Amplifier Recommendation: 250/1v2 (pictured) or G1700 JL Audio 250/1v2: These settings are intended as a “baseline” for tuning your system. Depending on your vehicle and your...
- Page 13 Driver Specifications Grille Clearance: 2.3125 in. (25 mm) from the bottom of the Mounting Hardware: Twelve #8 x 1.00" long clear, zinc-plated steel mounting flange to the lowest inside surface of the grille. Phillips pan-head sheet metal screws (included) or twelve #8-32 long steel Phillips pan-head machine screws with #8-32 T-Nuts, each at least Displacement: 0.06 cu.
- Page 14 Input Sensitivity Setting Guide What follows is a simple method for accurately setting the input sensitivity (commonly referred to as “gain”) of JL Audio subwoofer amplifiers. You will need the following equipment: AC Voltmeter (digital display type) 0dB reference level in the frequency range to be Step 6: Connect the AC voltmeter to the “Subwoofer Output”...
-
Page 15: Limited Warranty
Limited Warranty JL AUDIO warrants this speaker to be free of defects in materials and If you need service on your JL AUDIO product: workmanship for a period of one (1) year from the original date of purchase. All warranty returns should be sent to JL AUDIO freight prepaid through... - Page 16 HOME AUDIO | MOBILE AUDIO | MARINE AUDIO “JL Audio®” and the JL Audio logo are registered trademarks of JL Audio, Inc. “W7”, “VRC”, “OverRoll”, “W-Cone”, “Ahead of the Curve”, and their respective logos are trademarks of JL Audio, Inc.
- Page 17 Register this product online and receive a FREE GIFT! Registering is simple... have the serial number handy and visit: http://register.jlaudio.com If you can't locate your serial number or have questions about the registration process, please call1-888-JLAUDIO. Printed in USA SKU#O 11309-02092011...