Table of Contents
Advertisement
Quick Links
PLEASE READ
This manual is provided as a free service
by Projector.com.
We are in no way responsible for the
contents of the manual. We do not guarantee
its accuracy and we do not make any claim
of copyright. The copyright remains the
property of their respective owners.
ABOUT PROJECTOR.COM
Projector.com (http://www.projector.com) is
your review and buying guide resource for
DLP and LCD video projectors.
Visit the site to read the latest projector
news and reviews, read and comment on
projector specifications, download user
manuals and much more.
Advertisement
Table of Contents

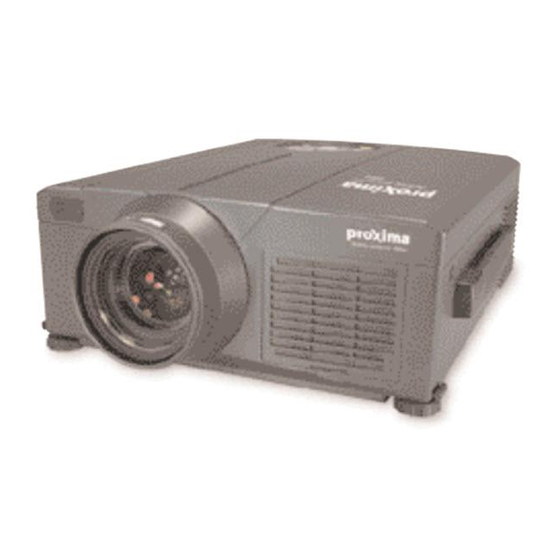
Related Manuals for Proxima desktop projector 6860


Summary of Contents for Proxima desktop projector 6860
- Page 1 PLEASE READ This manual is provided as a free service by Projector.com. We are in no way responsible for the contents of the manual. We do not guarantee its accuracy and we do not make any claim of copyright. The copyright remains the property of their respective owners.
- Page 2 In Focus Corporation: 27700B SW Parkway Avenue • Wilsonville , Oregon 97070-9215 Phone: 503-685-8888 • 1-800-294-6400 • Fax: 503-685-8887 In Europe: Olympia l • NL-1213 NS Hilversum, The Netherlands Phone: (31) 35 6474000 • Fax: (31) 35 6423999 Freephone: 008000 4636287 (008000 INFOCUS) In Asia: 238A Thomson Road •...
-
Page 4: Table Of Contents
Liquid Crystal Projector USER'S GUIDE USER'S GUIDE WARNING • Please read the accompanying manual “SAFETY INSTRUCTIONS” and this “USER'S GUIDE” thoroughly to ensure correct usage through understanding. After reading, store this instruction manual in a safe place for future reference. NOTE TRADEMARK ACKNOWLEDGMENT : CONTENTS... -
Page 5: Features
FEATURES FEATURES Outstanding Brightness Partial Magnification Function Distortion Correction Function BEFORE USE BEFORE USE Contents of package • NOTE Power Cord RGB Cable Power Cord (US Type) (Europe Type) Projector Video/Audio Cable Component Digital RGB Cable (with white lead) Video Cable User's Guide (with green lead) (this manual) -
Page 6: Part Names
Part Names ZOOM Button FOCUS Button ZOOM FOCUS MUTE Button INPUT Button MUTE INPUT MENU STANDBY/ON Button MENU Button STANDBY/ON RESET LAMP POWER TEMP LAMP Indicator RESET Button POWER Indicator TEMP Indicator Control Panel (Refer to P.9 "OPERATIONS") Control Panel Ventilation Openings Remote Control Sensor (exhaust) - Page 7 Part Names (continued) VIDEO Button STANDBY/ON Button LASER Button BLANK Button RGB Button Disk Pad MOUSE / RIGHT Button Used to operate the Used to click the right mouse shift function and mouse button. left click function. POSITION Button AUTO Button RESET Button MENU Button Used to click the right...
-
Page 8: Loading The Batteries
Loading the Batteries CAUTION • Use only the specified batteries with this remote control transmitter. Also, do not mix new and old batteries. This could cause battery cracking or leakage, which could result in fire or personal injury. • When loading the batteries, make sure the plus and minus terminals are correctly oriented as indicated in the remote control transmitter. -
Page 9: Installation
INSTALLATION INSTALLATION Installation of the Projector and Screen Screen Table 1. Installation Reference a [inches (m)] Diagonal Screen Top View [inches (cm)] Size [inches (m)] Min. Max. 40 (1.0) 55 (1.4) 73 (1.9) 60 (1.5) 85 (2.2) 114 (2.9) 80 (2.0) 114 (2.9) 151 (3.8) 100 (2.5) -
Page 10: Cabling
Cabling Table 2. Cabling Function Terminal Cable RGB IN 1 Accessory RGB cable or optional RGB Analog RGB input RGB IN 2 cable with D-sub 15-pin shrink jack and inch thread screws Analog RGB output RGB OUT Optional digital RGB cable with inch thread Digital RGB input DIGITAL screws... -
Page 11: Power Connection
Power Connection CAUTION • Be carful in handling the power Power outlet cord according to instructions of the accompanying manual "SAFETY INSTRUCTIONS" and this manual. • Connect the power cord firmly. Avoid using a AC Inlet loose, unsound outlet or contact failure. Power Cord Example of system setup Computer... -
Page 12: Operations
OPERATIONS OPERATIONS STANDBY/ VIDEO STANDBY/ON LASER ON Button POWER Indicator STANDBY/ON Button BLANK ZOOM button FOCUS button AUTO MENU POSITION MENU SELECT PinP RESET Power Switch FREEZE VOLUME MAGNIFY FOCUS button MUTE FOCUS ZOOM Lens cap ZOOM button Power ON Power OFF WARNING •... -
Page 13: Basic Operation
Basic Operation Table 3 . Basic Operation Item Description Select Input Signal ( : Press the INPUT button. RGB IN 1 → RGB IN 2 → DIGITAL → VIDEO → S-VIDEO → COMPONENT VIDEO (→ RGB IN 1) Select RGB Input : Press the RGB button. VIDEO/S-VIDEO/COMPONENT VIDEO →... - Page 14 Table 3. Basic Operation (continued) Item Description VOLUME Volume Adjustment : Press the VOLUME button. Set/Clear Mute Mode : Press the MUTE button. No sound is heard in the MUTE ( MUTE mode. Automatic Adjustment at RGB Input : Press the AUTO button. Horizontal position(H.POSIT), vertical position (V.POSIT),clock phase (H.PHASE), and horizontal size(H.SIZE) are automatically adjusted.
-
Page 15: Setup Menu
Setup Menu SETUP INPUT IMAGE OPT. SETUP INPUT IMAGE OPT. BRIGHT BRIGHT CONTRAST CONTRAST V POSIT SHARPNESS H POSIT COLOR H PHASE TINT H SIZE COLOR BAL R COLOR BAL R COLOR BAL B COLOR BAL B ASPECT ASPECT RGB IN 1 VIDEO RGB IN 2 S-VIDEO... -
Page 16: Input Menu
Input Menu SETUP INPUT IMAGE OPT. AUTO EXECUTE CANCEL VIDEO VIDEO NR Progressive BLACK Table 5. Input Menu Item Description Automatic Adjustment at RGB Input: Select the EXECUTE with the button. Horizontal position (H.POSIT), vertical position (V.POSIT), clock phase (H.PHASE), and horizontal size (H.SIZE) are automatically adjusted. Use with the window at maximum size in the application display. -
Page 17: Image Menu
Image Menu SETUP INPUT IMAGE OPT. KEYSTONE BLANK MIRROR START UP P. IN P. Table 6. Image Menu Item Description Keystone Adjustment: ↔ Reduce size of bottom of image Reduce size of top of image KEYSTONE • When this function is activated, the image may not be displayed correctly with some input signals. -
Page 18: Options Menu
Options Menu SETUP INPUT IMAGE OPT. VOLUME MENU COLOR LANGUAGE AUTO OFF SYNC ON G HDTV Table 7. Options Menu Item Description ↔ VOLUME Volume Adjustment: Reduce VOLUME Increase VOLUME MENU COLOR Select Menu Background Color: Select with the buttons. Operation Start/Stop: Press the button. -
Page 19: No Signal Menu
No Signal Menu VOLUME KEYSTONE BLANK MIRROR START UP MENU COLOR LANGUAGE AUTO OFF SYNC ON G Table 8. No Signal Menu Item Description ↔ Volume Adjustment: Reduce VOLUME Increase VOLUME • When this function is used, audio input is automatically switched to video. The VOLUME audio input can be switched by moving the DISK PAD left and right during the display of the volume adjustment bar. -
Page 20: Maintenance
MAINTENANCE MAINTENANCE Lamp HIGH VOLTAGE HIGH TEMPERATURE HIGH PRESSURE WARNING • For disposal of used lamp, treat according to the instruction of community authorities. • Since the lamp is made of glass, do not apply shock Lamp to it and do not scratch it. •... - Page 21 Replacing the Lamp CAUTION • Ensure that screws are tightened properly. Screws not tightened fully may result in injury or accidents. • Do not use the projector with the lamp cover removed. Resetting the Lamp Timer → • NOTE ENGLISH-18 ENGLISH-18...
-
Page 22: Air Filter
Air Filter Maintenance CAUTION • Switch power OFF and remove the power cord from the power outlet before beginning maintenance work. Please read the separate “SAFETY INSTRUCTIONS” thoroughly to ensure that maintenance is performed correctly. • Replace the air filter if contamination cannot be removed, or if it is damaged. Contact your dealer in such case. -
Page 23: Troubleshooting
TROUBLESHOOTING TROUBLESHOOTING OSD Message Table 9. OSD Messages Message Contents The message shown at left appears after the lamp has been used for more than 1700 hours. CHANGE THE LAMP The lamp is approaching the end of its life. AFTER REPLACING LAMP, Power is switched OFF automatically when the lamp RESET THE LAMP TIME. -
Page 24: Indicators Message
Indicators Message Table 10. Indicators Message POWER LAMP TEMP Contents indicator indicator indicator Lights Turns off Turns off The Standby mode has been set. orange Blinks Turns off Turns off Warming up. Please wait. green Lights Turns off Turns off ON. Normal operation possible. green Blinks Turns off Turns off Cooling. -
Page 25: Symptom
Symptom Table 11. Symptom Symptom Possible cause Remedy Page The main power switch is not Turn on the main power switch. turned on. The power is not turned on. The power cord is Plug the power cord into an AC disconnected. -
Page 26: Specifications
SPECIFICATIONS SPECIFICATIONS Table 12. Specifications Item Specification Product name Liquid crystal projector Panel size 3.3 cm (1.3 type) Liquid crystal Drive system TFT active matrix panel Pixels 786,432 pixels (1024 horizontal x 768 vertical) Lens Zoom lens F=1.7 ~ 2.3 f=49.0 ~ 64.0 mm Lamp 250 W UHB Speaker... -
Page 27: Warranty And After-Service
WARRANTY AND AFTER-SERVICE WARRANTY AND AFTER-SERVICE ENGLISH-24 ENGLISH-24... - Page 28 PLEASE READ This manual is provided as a free service by Projector.com. We are in no way responsible for the contents of the manual. We do not guarantee its accuracy and we do not make any claim of copyright. The copyright remains the property of their respective owners.