
Related Manuals for Nexus Multi Control Instrument


Summary of Contents for Nexus Multi Control Instrument
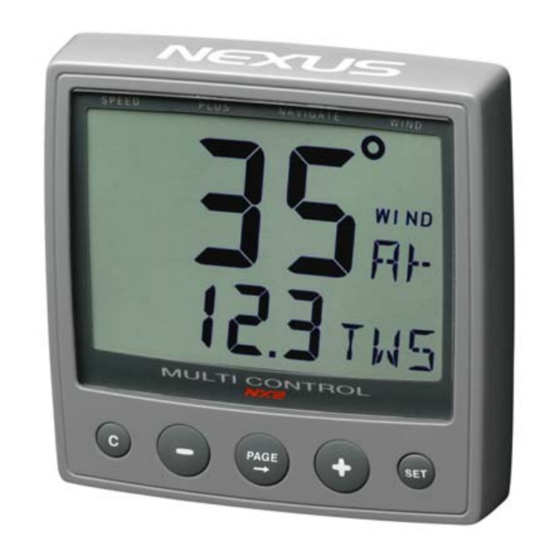
- Page 1 Multi Control - Instrument - Installation and Operation Manual Installation and Operation Manual English English...
- Page 2 MULTI CONTROL...
- Page 3 MULTI CONTROL Navigation terms...
- Page 4 MULTI CONTROL This manual is written for NX2 Multi Control version 3.1 – 5.0 Edition: March 2007...
-
Page 5: Table Of Contents
MULTI CONTROL Part specification ............... 8 Installation................. 12 Installing the instrument ................13 2.1.1 Installing instru ment to the Server............14 First start ................15 Initialising the inst rume ................15 Re-initialising the instru nt ................15 Operation................16 About this manual ..................16 How to use the push-butto... - Page 6 MULTI CONTROL Silencing an alarm ..................25 Turning off / on an alarm................25 NAVIGATION func ns............26 NAVIGATION m ain-function ................ 26 NAVIGATION s -functi s ................ 26 8.2.1 STEER REFERENCE ( Pilot OFF) ............26 8.2.2 STEER VALUE (STR) ................26 8.2.3 (SOG) and (CO G)..................
- Page 7 MULTI CONTROL 12.2.3 C22 ( - 00.0 ADJ) .................41 12.2.4 C23 (Unit°C) ..................41 12.2.5 C24 (0°C TM P) ..................41 12.2.6 C25 (Unit hPA)..................41 12.3 C30, calibration of navigat ...............42 12.3.1 C30 (RET)....................42 12.3.2 C31 (PAGE ATO) ................42 12.3.3 C32 (00°...
- Page 8 Fault finding ....................54 13.2.1 General....................54 13.2.2 Fault - action..................55 13.2.3 Error messages ................... 55 Specifications ................56 14.1 Technical specifications ................56 14.2 Nexus Network introduction and user policy ..........56 14.3 Optional Accessories ................... 57 14.4 Abbreviations ....................59 Warranty..................62...
-
Page 9: Part Specification
Silicon pa ste tube Plastic cable strap Adhesive drill template for instrument Nexus Network cable, 8 m (26 ft) Quick guide laminated Inter-connection cable, 0,3 m (1 ft ) Installation and Operating manual Warranty card National distributor list... - Page 10 MULTI CONTROL...
- Page 11 The Nexus Network is designed with the industry standard RS 485 databus, which allows you to connect u p to 32 NX2 instrument units on the single Nexus Network cable, thereby allowing you the flexibility to easily develop your system. The...
- Page 12 MULTI CONTROL...
-
Page 13: Installation
MULTI CONTROL Installation • The installation inc 6 major steps: 1. Read the installation an operation manual. 2. Plan where to install the transducers and instruments. 3. Run the cables. 4. Install the transducers and instruments. 5. Take a break and admire your install ation. -
Page 14: Installing The Instrument
Run the Nexus Network cable from the Server to the instrument. • If you want to cut the Nexus Network cable to length, disconnect 4-pole jack plug and cut the cable. Peel off about 35 mm (1,4") of the cable insulation. Remove about 6 mm (1/4") from the 3 isolated wires (the 4th wire is an earth / screen). -
Page 15: Installing Instru Ment To The Server
Mount the connection back cover w ith the screw. 2.1.1 Installin g instrument to the Server All NX2 instruments are connected directly to the Nexus Network in a daisy chain. They all use the same colour coded 4-pole jack plugs. -
Page 16: First Start
ID number is 16. Re-initialising the instrument If two instruments by mistake have the same ID number, this can cause disturbance and block the information on the Nexus data bus. To re-initialise the instrument, press CLEAR during the power up sequence when version and ID numbers are displayed. -
Page 17: Operation
BTW, DTW etc. There can only be one instrument on the Nexus Network which is keeping the waypoints in memory, but the waypoints can be reached from all instruments. -
Page 18: How To Use The Push-Buttons
MULTI CONTROL How to use the push-buttons PAGE SIGN MAIN FUNCTION FUNCTION CLEAR MINU PAGE PLUS 4.2.1 PAGE A press on PAGE moves the top LCD arrow to the next page. It scrolls in a circular pattern, one step to the right for every press, in the order SPEED, DEPTH, NAVIGATE, WIND and then back to SPEED page again. -
Page 19: Set
MULTI CONTROL In edit mode it increases to th e next digit. 4.2.4 A press on SET unlocks a digit to access edit mode. When unlocked, the digits are ”active” (flashes) and can be edited by pressing MINUS, PL US and PAGE as required. When finished editing, l ock the digit by another press on SET. -
Page 20: Function Overvi Ew
MULTI CONTROL Function overv The functions in the M ulti Control instrument are divided i nto 4 pages: SPEED, DEPTH, NAVIG ATE and WIND. The selected page is indicated by the LCD arrow at top of the display. Each page has 2 types of functions that can be displyed together: 1. -
Page 21: Speed Function S
MULTI CONTROL SPEED functio SPEED main-function Boat speed through the water Unit available in knots (KT), km/h (Kh) or miles/h (Mh) (Se 12.1.2, C11). If a nav igator is connected, speed over ground (SOG) can be displayed . (See 12.6.11,C95). SPEED sub -functions 6.2.1... -
Page 22: Depth (Unit/Dpt)
MULTI CONTROL 6.2.8 DEPTH (unit/DPT) Depth from the water surface or the keel depending on calibration setting (See 12.2.3, C22). Unit available in meters (m), feet (FT) or fathoms (FA). (See 12.2.2,C21). The text alternates between the selected (unit) and (DPT). -
Page 23: Plus Functions
MULTI CONTROL PLUS function General information Alarm on = minute sign ( ´ ) displayed above the last depth digit in the sub-function. Alarm off = no minute si gn ( ´ ) displayed. The alarms will be trigge red, if the actual depth becomes le ss (shallow alarm), or more (depth a... -
Page 24: Battery (Bat)
MULTI CONTROL 7.2.2 BATTER Y (BAT) Battery voltage at the S ver. 7.2.3 SHALLOW ARM (SHA) Depth at which point au dible and visual alarms will be triggered, if the actual depth becom es less than the set value. (See 7. 7.2.4 DEPTH ALARM (DEA) Depth at which point a... -
Page 25: Remote Control (Rem)
NX2 instruments. All digital NX2 instrum ents has their unique ID number on th Nexus Network. At pow r up the ID numbers are displayed for a short time. The instrument to the right has ID number 16 (version number is 2.0) -
Page 26: Set And Turn On Shallow (Sha) And Depth Alarm (Dea)
MULTI CONTROL Set and turn on shallow (SHA) and depth alarm (D Select shallow (SHA) or depth (DEA) alarm, pres s SE The first digit in the prev ious value flashes. If you want to reset the previous value to zero (0), Press CLEAR. To select desired dep pres MINUS, PLUS and PAGE... -
Page 27: Navigation F Unctions
MULTI CONTROL NAVIGATION f unctions NAVIGATIO N main-function Heading 000° to 359°. Heading true (HT) or heading magn tic (HM) can be displayed the compass transducer is c nnecte (See 12.3.11 C40) If a navigator is conn ected, course over ground (CG) can be selected instead of com pass heading. -
Page 28: Set And Drift
MULTI CONTROL To stop alternating, pre ss SET. To restart alternating, press SET again. 8.2.6 SET and DRIFT Direction of current (SE ) and spee d of current (DRF). Alternating function. To stop alternating, press SET. To restart alternating, p ress SET again. -
Page 29: Steer Refere Nce (Pilot)
MULTI CONTROL steer your boat so tha t the display readout is 0.00 NM , which means you are on the desired track. Steer refere nce (Pilot) The sub-function (Pilot) is intended to be used together with the optional analogue inst rument steer pilot (Art. -
Page 30: Overview Of Steer R Ef Erence
(OFF)=Steer pilot off When any steer refere nce function is activated, the text on the display will be copied a nd shown on all Multi Control instruments in your Nexus Network. 8.3.2 Steer ref erence (MEM) This function requires th e NX2 or NMEA compass transducer. -
Page 31: Steer Reference (Btw)
MULTI CONTROL in (Pilot OFF) function . (Available from Server software version 1.9.) 8.3.3 Steer reference (BTW) This function requires the NX2 or NMEA compass transducer and a NX2 GPS or NMEA navigator. When selected, the function displays (BTW) and the analogue steer pilot instrument displays the difference between the compass heading and the bearing to waypoint (BTW). -
Page 32: Steer Ref Erence (Cts)
MULTI CONTROL 8.3.4 Steer ref erence (CTS) This function requires log transducer, NX2 or NMEA comp transducer , NX2 GPS o r NMEA navigator. When selected the fu nction displays (CTS) and the analogue steer pilot instrument displays the difference between the compass heading and t he bearing to waypoint (CTS) including set and drift. - Page 33 When a NX2 Autopilot is activated in wind mode, the (AWA) function on the Multi Control instrument can be used to perform an automatic tack. The minus sign ( - ) in front of the wind angle value = port side.
-
Page 34: Wind Functions
MULTI CONTROL Wind functions WIND Main- function Apparent wind angle (AWA), true wind angle (TWA) 000° - 359°, apparent wind speed (AWS) or true wind speed (T WS): Note! This page can either be on or off. As a factory setting this page is automatically on if a Compass transducer or GPS is connected. -
Page 35: Apparent Wind Speed (Aws)
MULTI CONTROL 9.2.3 APPARE NT WIND SPEED (AWS) Units displayed in m/s (m/s), knots (KTS) or Beaufort (BF), (see 12.5.4, C53). The function alternates between (AWS) and the selected (units). 9.2.2 TRUE WIND ANGL E (T This function requires a log transducer. The complimenting he complimenting function to what is displ function to what is displ... -
Page 36: Geographic Wind Direction
MULTI CONTROL 9.2.7 GEOGRA PHIC WIND DIR ECTION This function requires a compass transducer. Displays the direction in 000° to 359° and the each cardinal point abbreviation as shown: 000.0° = N 022.5° = NNE 045.0° = NE 067.5° = ENE 090.0°... -
Page 37: Tactical Function
MULTI CONTROL Tactical function This function requires a compass transducer and displays course memory. One for starboard and one for port tack. To fully use the tactical function it is recommended to install the optional trim button (Art. No. 19763) and analogue steer pilot instrument (Art. No 22115-02). The trim button is usually installed close to the steering position. -
Page 38: Man Over Board (Mob) Function
If a navigator, a compass and a log transducer is connected, dead reckoning (MOB) will be performed and displayed in the SPEED Log instrument. At the same time the Multi Control instrument will display (MOB) relative position stored in memory when the (MOB) button was activated. -
Page 39: Customise Your Display
MULTI CONTROL Distance to the MOB po sition will be displayed in the sub-function. All you have to do is to keep calm and steer the boat in the indicated direction and d istance to pick up your wet crew member. To reset the (MOB) func tion, press CLEAR. -
Page 40: Select Power On Function
MULTI CONTROL the sub-function (TWS) will be displayed. The copied sub-function remains in its original location. It is only copied to a second loca tion, where it takes the place of the empty sub-function in the list. Note: The sub-function damping (SEA) should not be moved, to avoid misunderstanding... -
Page 41: 12 Calibration
MULTI CONTROL 12 Calibration To get the most out of y our Nexus Network, it is important to carefully calibrate the N etwork. The calibration values are stored in a non volatile memory To access calibration mo de, press and hold SET more than 2 seconds. -
Page 42: C13 Damping (Sea)
MULTI CONTROL 12.1.4 C13 DAM PING (SEA) Damping of indicated bo at speed through the water. Controls the response time of speed changes. To change damping, pre ss SET. To select damping level press PLUS and select from: d0 (Min) to d9 (max). To store the value, pres s SET. -
Page 43: C30, Calibration Of Navigat Ion
MULTI CONTROL 12.3 C30, calibrat ion of navigation 12.3.1 C30 (RET To return to the normal mode, press SET. 12.3.2 C31 (PAG E ATO) This setting allows you to display the Navigate page or not. PAGE ATO Page automa tically on if Compass tran sducer or GPS is connected... -
Page 44: C40 (Off Mag)
MULTI CONTROL (Available for analogue steer pilot instruments, from version 1.3). 12.3.11 C40 (OFF MAG) (Available from Multi ve rsion 2.0) (ON) = All headings and bearings will be magnetic. (OFF) = All headings an d bearings will be true. Note a: In the (Goto W ) function, the bearing for every leg will always be displayed as tru e bearing. -
Page 45: Automatic Co Mpass Dev Iation Check (Auto Chk)
MULTI CONTROL Note: You will get the b est result in calm water with a smooth turn on the steering whe el independently of how the circle is performed. When activa ted, you can stop the automatic compass deviation at any time wi th a press on CLEAR. -
Page 46: C50, Calibration O F Wind
MULTI CONTROL 12.5 C50, calibra tion of wind 12.5.1 C50 (RET To return to the normal mode, press SET. 12.5.2 C51 (PAG E ATO) This setting allows you to display the Navigate page or not. PAGE ATO Page automa tically on if Compass tra nsducer or GPS is c onne... -
Page 47: C64 (Wia)
MULTI CONTROL C59 (180° 180) to the calibration certificate. C60 (225° 225) C61 (270° 270) C62 (315° 315) 12.5.8 C64 (WIA Select from 5 functions. (WIA) is the factory setting. Select the function to be displayed as main-function under WIND. The optional analogue wind instrument will display the same selection. -
Page 48: C67 Wind Speed Alarm (Wsa)
(OFF) = NX2 log transducer. (On) = NMEA log transducer. If you want to use a NMEA transducer (connected to the NMEA input, you have to set C73 to On. The Server will then transmit this information on the Nexus Network to all connected instruments. -
Page 49: C75 (Off Cmp)
If you want to use a NM EA transducer (connected to the NM EA input, you have to set C75 to On. The Server will then transmit this information on the Nexus Network to all connected instrum ents. After you have changed this setting, you have to restart the system 12.6.7 C76 (OFF WND... -
Page 50: 12.7 Nmea
The Server supports 29 different NMEA sentences. This means you can s elect up to 16 f the 29 availabl e NMEA sentences. The Nexus Network uses the NM A 01 83 sente nces, ve rsion 1.5 and 2.0. The number in brac... -
Page 51: Change Nmea Sentences Out From Server
In a similar way, you can select the a sentence 4 times to make it 4 times faster. Example: If you want to transmit the Nexus compass heading via NMEA, to for example an autopilot, select (HDM) for every odd slot number, C79, C81, C83 ... -
Page 52: Receive Nmea Sentences In To Server
(MWV) data, only if (C7 6 WND) is set to (ON) See 12.6.7. True wind angle and wind speed is calculat ed by Nexus, when the boat speed (the speed of the water) is known. The following NMEA se can be ntences received IN to Server: Autopilot sentence ”A”... - Page 53 The transmission ID (the first two letters after “$”) is ignored by the Server. Present position is read, after that possible latitude and longitude correction is added (C39 and C40) before the position is sent over the Nexus Network to all instruments...
-
Page 54: Special Nmea Sentences
From power up, baudrate is always set to 4800 and the above procedure must be repeated. The receiving unit (Nexus Server) will always check for the proprietary message when in normal baudrate, not when in high baudrate. -
Page 55: Maintenance And Fault Finding
• Server software version number. • Nexus Network data bus ID numbers for each instrument (displayed at power up). 13.2.1 General In most cases, the reason for faults in electronic equipment is the installation or poor connections. Therefore, always first check that: •... -
Page 56: Fault - Action
Turn completed, error larger than 1,5°. ERROR 19 The boat probably hit a wave during turn. Error larger than 1,5°. If other error messages than the above appears on the Multi Control instrument, contact your NX2 dealer. -
Page 57: 14 Specifications
14.2 Nexus Netw ork introduction and user policy Introduction: The Nexus data bus is a multi talker multi receiver data bus specially designed for marine navigation applications. It utilises the RS485 standard with up to 32 senders and/or receivers to form a Local Area Network. -
Page 58: 14.3 Optional Accessories
GPS Antenna, 8+10m cable NX2/N exus Transducers 22120-1 Server compl with 3m pow er cables 20707 Log/Temp transducer, 8 m cable (for Nexus and Star) 19915-8 Depth transducer, 8m cabl e (for NX2 only) 21731 Compa ss transduc er 35°, 8... - Page 59 21684-1 Multi XL Set, Multi XL instrument and Remote Control instrument 69995 Mast b racket X L, i n alumin ium for Multi XL and Nexus / Star 110x 110mm instr. NX2 G 22118-6 GPS N avigator, wi th GPS...
-
Page 60: Abbreviations
MULTI CONTROL 14.4 Abbreviatio Abbreviation. Descri ption Angle ADJust ANChor ANChor alarm Arrival Arrival Arrival Circle AVerage Speed Apparent Wind Angle Apparent Wind Speed BATtery BeauFort Bearing Original Des tination Boat Speed Bearing To Waypoint Celsius Communaute Europèenne Calibrate 10 Calibrate Course over Ground CHecK... - Page 61 MULTI CONTROL Geographic Latitude Lo ngitude GoTo Go To Global Positioning Netw HeaDing Magnetic HeaDing True Heading Magnetic Heading True Identity Init Initiation Insert Insert Kilometre per hour KnoTs KnoTS Local LATitude Liquid Crystal Display Local Geodetic Datum LONgitude metres per second MEMory Miles per hour Magnetic North...
- Page 62 MULTI CONTROL STeeR South West TACtical TeMPerature TRiP Time To Go True Wind Angle True Wind Speed Universal Time Co-ordinate VARiation Velocity Made Good West Waypoint Closure Velocity Waypoint Cross Track Error Minus Plus Wind from port side Wind from starboard side The boat is left of the desired track The boat is right of the desired track...
-
Page 63: 15 Warranty
MULTI CONTROL 15 Warranty WARRANTY GENERAL All our products are designed and b uilt to comply to the highest class industry standards. If the products are correctly installed, ntained and operated, as described in the installation and operation manual, they will pr ovide long and reliable service. - Page 64 MULTI CONTROL File id: WARRANTY CARD TO BE RETURNED TO Y OUR NATIONAL DISTRIBUTOR OWNER: Name: Street : City/Zip Code : Country: Product name: Serial number: Date of purchase: _______________ Date installed ________________ Dealers stamp: Tick here if you do not wish to receive news about future products...
- Page 65 MULTI CONTROL...
- Page 66 MULTI CONTROL...
- Page 67 MULTI CONTROL...
- Page 68 MULTI CONTROL Copyright ©: Nexus Marine AB Kuskvägen 4, 191 62 Sollentuna, Sweden Tel: +46 -(0) 8 – 506 939 00. Fax: +46 -(0) 8 -506 939 01 www.nexusmarine.se...