Table of Contents
Advertisement
Advertisement
Table of Contents
Troubleshooting

Related Manuals for Motorola VIP 1216 PVR


Summary of Contents for Motorola VIP 1216 PVR
- Page 1 MTS Ultimate TV Service User Guide...
-
Page 2: Table Of Contents
MTS Ultimate TV Set-Top Box General Information and Maintenance .......2... - Page 3 Connecting the MTS Ultimate TV Set-Top Box ........
-
Page 4: Welcome To Mts Ultimate Tv
• Keep your Remote in “STB” or “MTS” mode to control your Ultimate TV service – If you’re pressing buttons on your remote and they don’t work, try pressing the STB/MTS button. (STB stands for “set-top box” – that’s the name of the Ultimate TV box under your TV!) •... -
Page 5: Mts Ultimate Tv Set-Top Box General Information And Maintenance
MTS Ultimate TV Set-Top Box General Information and Maintenance Basic set-top box maintenance: • Ensure the vents on the set-top box are not blocked • Do not place on a rug or bed as it may overheat • Do not stack equipment on it •... -
Page 6: The Remotes
Motorola symbol on back Look for the LEARN button RF remotes come with a converter Ultimate Ultimate Ultimate Ultimate MXv4 MXv3 Silver or Charcoal Black RF Black Remote Black Remote (with MTS logo and (no MTS logo) writing on back) -
Page 7: Getting To Know The Buttons On Your Mts Ultimate Tv Remote
Getting to Know the Buttons on Your MTS Ultimate TV Remote: Set your TV to STB mode or your MTS service will not work. On some remotes this button is labelled “MTS”. Change video input (Must be in TV mode for TV service to work) -
Page 8: The Tv Basics
TV Basics Navigating the On Screen Menus Menus and Screens When in the MENU, GUIDE, MTS Video on Demand, or Recorded TV screens: • Use the ARROW buttons and/or the CH|PG button to highlight items in the screen. The highlighted item shows the selection •... -
Page 9: Customize Channels In The Guide
The Program Info Screen The Program Info screen displays information about all programs in the Guide, and provides access to a variety of options related to the program. GUIDE • Press • Press the UP/DOWN ARROWS CH|PG to highlight the program •... -
Page 10: Setup Favourite Channels
Setup Favourite Channels Group your most watched channels together in your favourites so they are easy to find. • Press MENU • RIGHT ARROW to SETTINGS., then DOWN ARROW highlight TELEVISION and press • Highlight SETUP FAVOURITES, and press • Use the UP/DOWN ARROW buttons or CH|PG... -
Page 11: Call Display On Tv
Live TV Call Display on TV See who’s calling right on your TV screen with MTS Ultimate TV Message Centre. TV Call Display is free when you subscribe to MTS Call Display on your MTS home phone. This feature is not available in Steinbach. -
Page 12: Myremote
MyRemote MyRemote lets you customize the A, B, and C buttons on your remote for one-touch access to your favourite MTS Ultimate TV channels, menu options, and applications. How to Set Up or Change the A, B, and C Buttons •... -
Page 13: How To Use Descriptive Video And Closed Captioning
Once you have set up descriptive video on your remote you can turn it on or off by simply pressing the button – whichever button you chose in the steps above. Descriptive video will only have audio if the show has descriptive video. MTS Weather Channel The MTS Weather Channel is available on Channel 29 and features local weather 24/7. -
Page 14: Lobby Camera
Lobby Camera MTS Lobby Camera lets tenants with Ultimate TV in select apartments and condos view their lobby directly on their TV screen. • Tune to channel 95 • Press to start the Lobby Camera Access. You will be presented with a video stream of your building’s lobby camera •... -
Page 15: Whole Home Pvr Service
Whole Home PVR Service You must subscribe to PVR service to use this section. To subscribe to PVR service call MTS at 204-225-5687 (204-CALLMTS). Whole Home PVR turns all your set-top boxes into HD PVRs. With Whole Home PVR you can: •... - Page 16 How to Change Single Recording Settings • Press RECORDED TV • Use the ARROW buttons to highlight the program recording (indicated by a red dot) • Press The recording info page appears • Highlight RECORD SETTINGS, and press OK. The Record Settings screen appears ARROW STOP...
- Page 17 • STOP RECORDING – At Scheduled Time – 5 Minutes After – 15 Minutes After – 30 Minutes After – 1 Hour After – 2 Hours After – 3 Hours After • Highlight your choice and press SAVE CHANGES • When choices have been selected, highlight and press EXIT •...
-
Page 18: View Upcoming/Scheduled Recordings
How to Check PVR Capacity MTS’s standard PVR comes with 160GB of space. We offer a large PVR of 500GB for a fee. Please contact MTS at 204-225-5687 to learn more about increasing your PVR capacity. Check the capacity of your PVR by: •... -
Page 19: Cancel, Stop, Erase Recordings
Cancel, Stop, Erase Recordings How to Cancel Recording from the Guide The easiest way to cancel a single or series recording is by using the Guide. Individually scheduled recordings are marked by a red dot, and series recordings are marked by three overlapping dots. GUIDE •... -
Page 20: Resolving Recording Conflicts
Resolving Recording Conflicts The PVR can record three programs at a time. Recording conflicts occur when additional recordings are attempted. How to Resolve a Single Recording Conflict When an individual recording conflicts with one or more previously scheduled recordings, a Recording Conflict screen alerts you to the problem. -
Page 21: Mypvr
MTS Video on Demand • A list of MTS Video on Demand movies and trailers are also available at mts.ca/nowplaying. If the video is locked by parental or rental locking, enter your PIN to unlock the video. A video remains unlocked for four hours. -
Page 22: Controlling Video On Demand Programs
• The video probably expired • When a video expires, it is deleted from the Current Rentals screen MTS Pay-Per-View Events Get front row seats to some of the best live TV events including mixed marital arts, wrestling, and other special events, without having to leave the comfort of your couch. -
Page 23: Parental & Rental Locking - Vod And Live Tv
• Locked channels and programs still appear in the Guide and they can be scheduled to record, however the PIN is required to watch recorded locked programs • A default PIN (1234) was pre-set by MTS to prevent access to adult content. The default PIN (1234) can be used to temporarily access adult content for up to 30 minutes •... -
Page 24: Getting Ready To Use Parental Locking
CONTROLS, and press • Highlight PARENTAL LOCKING, and press 1234 • A default PIN has been pre-set by MTS to prevent access to Adult Content NUMERIC KEYPAD • Use the to enter a four-digit PIN • If PIN is entered incorrectly, press... -
Page 25: Watching A Locked Program
Watching a Locked Program Rental locking blocks household members from purchasing Pay-Per-View or Video on Demand Movies. A monthly spending limit is set to $100 for both MTS Pay-Per-View and MTS Video On Demand. • Press MENU RIGHT ARROW SETTINGS •... -
Page 26: Parental Control Tips
Parental Control Tips Rental Locking is in Effect Even When Parental Locking is Temporarily Turned Off After Rental Locking is set up, it remains in effect even if Parental Locking is temporarily turned off. You can watch any program without entering a parental control PIN during the suspension period, but you must still enter a PIN to rent videos and other content. -
Page 27: Apps On Tv
We are constantly adding new apps to our TV service. Check mts.ca/ultimatetv for the most up-to-date list. To access Apps on TV you must also subscribe to MTS High Speed Internet service (any plan other than Light and Super Max). Visit our Apps on TV demo channel (channel 96) to try out our apps. -
Page 28: Ultimate Picks
Ultimate Picks (not available with VIP2262 PVR model) Ultimate Picks lets you keep track of up to six shows at once within a genre! Choose from a selection of genres right on your TV screen like Kids, Movies, and Sports. •... -
Page 29: On-Tv Messaging
On-TV Messaging MTS Ultimate TV ‘Entertainment News’ and ‘TV Service’ message notifications will show up on your TV. A small window will pop-up in the lower right corner of your TV screen, indicating you have been sent a message. • To immediately view the message, select READ and press OK. - Page 30 MTS TV will let you know when there is an opportunity to purchase ‘add-ons’, such as specialty channels, through your TV. To complete the purchase, enter your 4-digit pin. This is the same PIN used to order MTS Video on Demand.
-
Page 31: Remote Control Programming
Program your MTS Ultimate TV Remote to Control your TV, DVD, Home Theatre Receiver, or Other Devices You can program your MTS TV Remote to control other devices using the TV, DVD, mode keys. User Tip: The DVD and AUX mode keys can be setup with codes for any type of equipment. - Page 32 8. Now that your devices are programmed, you can press the appropriate mode key on the remote control to work with the selected device. To use the remote control for your MTS TV set-top box again, press the mode key...
-
Page 33: Power Control For Multiple Devices
To use the remote control for your Set Top Box again, press the STB/MTS mode key User Tip: You may need to repeat steps 1 through 8 to find a code. - Page 34 4. Press the desired mode key on the MTS TV remote (TV, DVD, or AUX) for the device you wish to set up, then the key on the MTS remote that you want to teach 5.
-
Page 35: Set Volume Options For Multiple Devices
Set Volume Options for Multiple Devices The default setting for your power, volume, and channel control are to control your MTS TV set-top box regardless of the mode you are in. For example, even in DVD mode, the volume will still control the set-top box. - Page 36 flashes for 3 seconds and turns off, then the selected mode will have no volume commands of its own and will need to start over from step 1 above and select a different mode to program the device Black MXv4 (with MTS logo) Remote:: SETUP 1.
-
Page 37: Reset The Remote
4. If no key is pressed within 30 seconds, the remote control times out. The selected mode key light flashes for 3 seconds and turns off. The remote control returns to normal operation and you will need to start over Black MXv4 (with MTS logo) Remote:: SETUP 1. -
Page 38: Connections And Devices
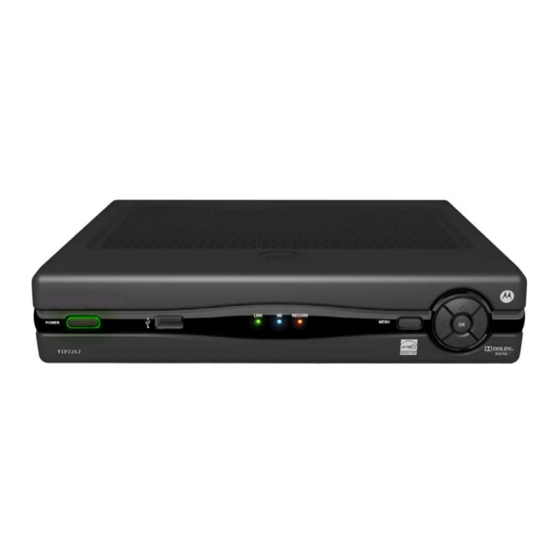
1. Connecting the MTS Ultimate TV Set Top Box Connections and Devices Before moving or changing components, disconnect the power cord from the MTS Ultimate TV set-top box and other components. Set-top boxes with hard drives and those without hard drives have identical front panels and rear panel connectors; only the size varies. - Page 39 Connecting to an HDTV, use one of: HDMI offers higher quality than component video. If your HDTV has an HDMI input, use the HDMI connector. HDMI carries HDMI video and audio. If you connect your HDTV using HDMI, no ad- ditional audio connection to the TV is needed.
-
Page 40: Video Connection Options
• If you are connecting to a DVI or Y Pb Pr input on your TV, a separate audio connection is required. Refer to Connect to an HDTV – Audio Only Connect to a Home Theatre – Audio Only • If you are connecting to a home theatre receiver, refer to VIP 1216 PVR Set-top box TO TV TO WALL... - Page 41 VIP 2262 PVR – Option 2 Connect to an HDTV – Audio Only Video Connection Options. • To determine your best connection, refer to • If you are connecting to a DVI or Y Pb Pr input on your TV, a separate audio connection is required. Refer to Connect to an HDTV –...
-
Page 42: Audio Connection Options
VIP 2262 Connect to a Home Theatre Receiver – Audio Only Audio Connection Options • To determine your best connection, refer to Connect an HDTV – Audio • This video connection method does not support HD video. For more information, see Only VIP 1216 Set-top box... - Page 43 VIP 2262 – Option 1 VIP 2262 – Option 2...
-
Page 44: Connect To A Stereo Tv
Connect to a Stereo TV Video Connection Options • To determine your best connection, refer to VIP 1216 Set-top box POWER TO TV TO WALL OPTICAL (VIDEO OUT) +12V (VIDEO IN) HDMI NETWORK S-Video RCA-type Video S-VIDEO VIDEO OUT AUDIO OUT Video in RCA-type Optical... -
Page 45: Connect To A Stereo Tv And Stereo Vcr
Connect to a Stereo TV and Stereo VCR • To determine your best connection, refer to Video Connection Options Connect an HDTV – Video • This video connection method does not support HD video. For more information, see Only VIP 1216 Set-top box POWER TO TV... - Page 46 VIP 2262 – Option 2...
- Page 47 Connect to a Home Theatre Receiver, TV, and VCR • To determine your best connection, refer to Video Connection Options Connect an HDTV – Video • This video connection method does not support HD video. For more information, see Only Set-top box POWER TO TV...
-
Page 48: Troubleshooting
Troubleshooting The below information should help you with troubleshooting issues with your MTS Ultimate TV service. If your problem is not resolved by this troubleshooting information, please call us, anytime, at 204-225-5687 (204-CALLMTS). General Troubleshooting Resetting the MTS Ultimate TV Set-Top Box •... -
Page 49: Audio And Picture Troubleshooting
There is No Audio from the Centre and/or Surrounding Speakers of a Home Theatre Receiver Connected to the MTS Ultimate TV Set-Top Box • Not all Dolby Digital programs feature full 5.1 surround sound. In some cases the programs may only contain left and right stereo audio. - Page 50 Video or Audio is Choppy, Jerky, or of Poor Quality The video or audio can be affected when the network is slow. • Check to see if something else is running on the same Internet connection (like a graphics-intensive online video game).
- Page 51 Changing TV Screen Aspect Ratio Changing the screen aspect ratio changes the screen dimensions for the video image and for the TV screens. • Press MENU • Press the RIGHT ARROW button to highlight SETTINGS • Highlight TELEVISION, and press Highlight SCREEN ASPECT RATIO AND...
-
Page 52: Guide Troubleshooting
Guide Troubleshooting Channels are Missing in the Program Guide The program guide appears on-screen correctly, but some channels in the program guide are not showing Check the Customize Channels Settings screen to determine if channels have been selected to not show in the guide. This feature affects only the TV on which it was setup. -
Page 53: Pvr Troubleshooting
PVR Troubleshooting Cannot Record a Program • Ensure the set-top box has PVR functionality and that you are subscribed to the MTS PVR service • Movies and programs within the Video on Demand service are copy-written material and cannot be recorded •... -
Page 54: Remote Troubleshooting
• Check that there is power to your set-top box. You will see a green light around the power button on the front panel • Check that your TV’s Input/Source is set to the type of cable that is connecting the MTS Ultimate TV set-top box to your TV set (i.e., Component or HDMI)