Table of Contents
Advertisement
Quick Links
Advertisement
Table of Contents

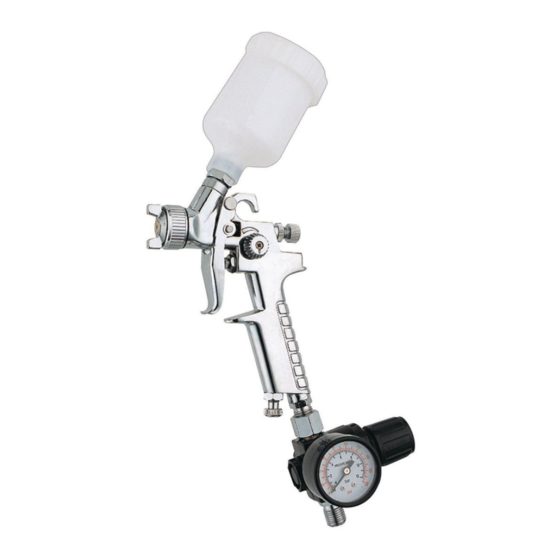
Summary of Contents for Central Pneumatic 46719
-
Page 2: Table Of Contents
Distractions are able to result in fire, and injury to persons. the loss of control of the tool. Page 2 For technical questions, please call 1-800-444-3353. Item 46719... -
Page 3: Personal Safety
Use only lubricants supplied with the by qualified repair personnel. tool or specified by the manufacturer. b. When servicing a tool, use only identical replacement parts. Use only authorized parts. Item 46719 For technical questions, please call 1-800-444-3353. Page 3... -
Page 4: Air Source
Wear NIOSH-approved respirator. SCFM at standard conditions WARNING marking concerning Risk of Explosion. National pipe thread, tapered WARNING marking concerning Risk of Fire. National pipe thread, straight Do not use solvents improperly. Page 4 For technical questions, please call 1-800-444-3353. Item 46719... -
Page 5: Specifications
§ 25249.5, et seq.) Specifications Maximum Air Pressure 43 PSI Cup Capacity 120 cc Air Inlet 1/4" – 1 8 NPS Air Consumption 3.2 – 5 .6 CFM @ 40 PSI Item 46719 For technical questions, please call 1-800-444-3353. Page 5... -
Page 6: Setup
5. Turn on the air compressor according to and quick coupler, will make operation the manufacturer’s directions and allow more efficient, but are not required. it to build up pressure until it cycles off. Page 6 For technical questions, please call 1-800-444-3353. Item 46719... - Page 7 7. Inspect the air connections for leaks. measure to attempt to discharge the tool in a Repair any leaks found. safe fashion after disconnecting to ensure that the tool is disconnected and unpowered. Item 46719 For technical questions, please call 1-800-444-3353. Page 7...
- Page 8 NOTICE Clean the Spray Gun IMMEDIATELY after use. Delayed or inadequate cleaning will permanently clog the Spray Gun. Page 8 For technical questions, please call 1-800-444-3353. Item 46719...
-
Page 9: Operation
3. Before spraying, mask nearby objects not being sprayed pattern and lay cloths (not included) Adjustment on the floors. Knob Trigger Air Inlet Control Knob Air Regulator Figure C: Components and Controls Item 46719 For technical questions, please call 1-800-444-3353. Page 9... - Page 10 8. To change the direction of the fan from horizontal to vertical, loosen the Lock Ring and turn the Nozzle 90°. 9. After the adjustment, tighten the Lock Ring by hand. Page 10 For technical questions, please call 1-800-444-3353. Item 46719...
- Page 11 Fluid Knob. Figure E: pattern Adjustment If spray is too thick (globs of paint): Close the Fluid Knob slowly, checking the pattern after each adjustment. Item 46719 For technical questions, please call 1-800-444-3353. Page 11...
-
Page 12: Spraying Technique
3. Using two hands, one to steady the Cup after EVERY use, according to and the other to operate the Spray Gun, instructions on the following pages. aim Nozzle at the workpiece. Page 12 For technical questions, please call 1-800-444-3353. Item 46719... -
Page 13: Maintenance
• damaged air supply hose • misalignment or binding of moving parts • cracked or broken parts • clogged nozzle • any other condition that may affect its safe operation Item 46719 For technical questions, please call 1-800-444-3353. Page 13... - Page 14 Air Supply Maintenance Every day, perform maintenance on the air supply according to the component manufacturers’ instructions. Storage Store in a dry, secure area out of reach of children. Page 14 For technical questions, please call 1-800-444-3353. Item 46719...
- Page 15 Nozzle are plugged. left only 3. Damaged Needle. 3. Have qualified technician replace Needle. Follow all safety precautions whenever diagnosing or servicing the tool. Disconnect air supply before service. Item 46719 For technical questions, please call 1-800-444-3353. Page 15...
- Page 16 4. Worn/damaged air valve/seat. 4. Replace air valve. 5. Bent valve stem. 5. Replace valve stem. Follow all safety precautions whenever diagnosing or servicing the tool. Disconnect air supply before service. Page 16 For technical questions, please call 1-800-444-3353. Item 46719...
- Page 17 AND LICENSED TECHNICIANS, AND NOT BY THE BUYER. THE BUYER ASSUMES ALL RISK AND LIABILITY ARISING OUT OF HIS OR HER REPAIRS TO THE ORIGINAL PRODUCT OR REPLACEMENT PARTS THERETO, OR ARISING OUT OF HIS OR HER INSTALLATION OF REPLACEMENT PARTS THERETO. Item 46719 For technical questions, please call 1-800-444-3353. Page 17...
-
Page 18: Parts List And Diagram
Note: If product has no serial number, record month and year of purchase instead. Note: Some parts are listed and shown for illustration purposes only, and are not available individually as replacement parts. Page 18 For technical questions, please call 1-800-444-3353. Item 46719... -
Page 19: Assembly Diagram
NOTICE Clean the Spray Gun IMMEDIATELY after use. Delayed or inadequate cleaning will permanently clog the Spray Gun. Assembly Diagram 24 25 26 28 29 Item 46719 For technical questions, please call 1-800-444-3353. Page 19... -
Page 20: Warranty
Limited 90 Day Warranty Harbor Freight Tools Co. makes every effort to assure that its products meet high quality and durability standards, and warrants to the original purchaser that this product is free from defects in materials and workmanship for the period of 90 days from the date of purchase.


