Table of Contents
Advertisement
Advertisement
Table of Contents

Related Manuals for Emotiva UMC-200

Summary of Contents for Emotiva UMC-200
- Page 1 7.1 Home Theater Preamp/Surround Processor User Manual...
-
Page 3: Important Safety Precautions And Explanation Of Symbols
Do not install the UMC-200 on any stand, shelf, or other piece of furniture that is unable to support its weight. If a cart is used to move the UMC-200, use caution to avoid injury from tip-over. - Page 4 If the provided plug does not fit your outlet, consult an electrician to replace your obsolete outlet. If you replace the UMC-200 power cord, only use one of similar type and equal or greater current rating.
-
Page 5: Fcc Interference Statement
• Connect the equipment to an outlet on a circuit different from that of the receiver. • Consult the dealer or an experienced radio/TV technician for help. Emotiva Audio Corporation Attn: Repair Department 135 Southeast Parkway Court Franklin, TN 37064 Tel 1-877-366-8324 www.emotiva.com... -
Page 6: Table Of Contents
UMC-200 Front Panel...............10 UMC-200 Rear Panel ...............11 UMC-200 Remote Control ..............13 EmoQ™ Gen2 ..................16 Using Advanced Features ..............21 Advanced Operation and Configuration (Menu) .......24 Specifications ...................27 Care and Maintenance ..............28 Troubleshooting ................29 Emotiva Audio Corporation Five-Year Limited Warranty ....30 Notes ....................32... -
Page 7: Introduction
UMC-200 offer amazing flexibility, allowing you to do your own precision adjustments if you choose to do so. The UMC-200 also offers a wide variety of advanced features, including Last Video Memory, which lets you switch audio sources while continuing to watch your previously selected video source, and Video On Standby, which lets you configure the UMC-200 to pass audio and video straight to your TV even when it’s in standby. -
Page 8: About This Manual
This manual will provide you with all the information you need to get great sound, and many years of reliable service, from your UMC-200 Preamp / Processor. The manual also includes a brief summary of the features offered by the UMC-200 and describes how the controls work and how to perform common operations. -
Page 9: Features
Balanced and unbalanced subwoofer outputs provide additional options for long cable runs or multiple subwoofers. • High-efficiency universal voltage switch mode power supply with excellent audio-band noise performance. • Includes ergonomic full-function remote control. • Full Emotiva Five Year warranty, 30 day return policy, and processor upgrade program. Page 4... -
Page 10: Unpacking
Gently remove your UMC-200 and its remote control from the packing carton and remove all wrappings and shipping material. It is important to save the box and all packing materials in case your UMC-200 ever needs to be moved or shipped back to the factory for service. -
Page 11: Connections
ARC, which allows your TV to send audio back to the UMC-200, and CEC, which allows the UMC-200 to send commands to your TV. You will have to consult the manual for your TV to see if it supports those features, what options they provide on your particular TV, and how to enable and configure them. - Page 12 UMC-200 There are also adapters which will allow you to connect the output of the UMC-200 to devices with component or composite video inputs. These devices will, however, typically offer a lower quality video image (or no video at all) with the majority of inputs, and we cannot support or endorse their use with the UMC-200.
-
Page 13: Basic Operation
Basic Operation High Speed Video Switching The high-speed HDMI switches in the UMC-200 take about one to two seconds to switch between video sources, however HDMI itself may take up to five seconds to complete handshaking between devices (so you might have to wait as long as five seconds for your picture and audio to appear). -
Page 14: Menu Navigation
HDMI 1 input connector on the rear panel of the UMC-200. Another example is that, if you tell the UMC-200 that you don’t have Side Surround speakers, it will also set the Rear Surround speakers to None, and you will be unable to change that setting unless you re-enable the Side Surround speakers - because you cannot have only Rear Surround speakers without Side Surround speakers.) -
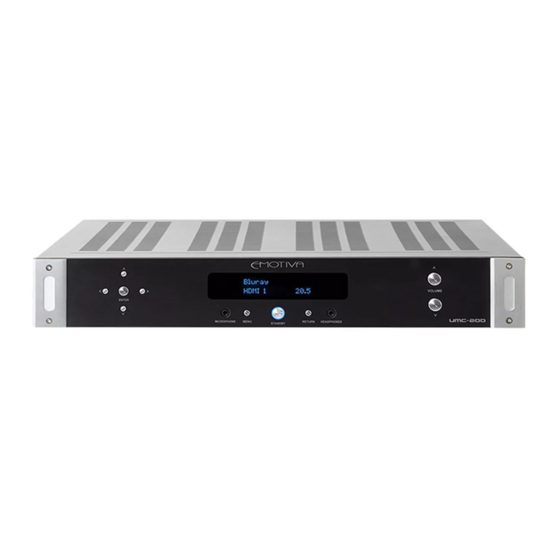
Page 15: Umc-200 Front Panel
Used to toggle the UMC-200 between Standby and On. The halo ring around the Standby Button will illuminate amber in Standby mode and blue when the UMC-200 is On. (The rear panel Power switch must be On to operate the UMC-200.) 6. -
Page 16: Umc-200 Rear Panel
UMC-200 from various Bluetooth-enabled devices. Please note that this port works ONLY with the Emotiva Bluetooth adapter. 6. HDMI Inputs (4) Connect up to four HDMI 1.4 devices to these inputs. The UMC-200 supports all versions of HDMI up to HDMI v1.4. 7. HDMI Output Connect one HDMI television, monitor, or projector to this output. - Page 17 UMC-200 8. Power Switch Switches the AC main power to the UMC-200 On and Off. When this switch is Off, the UMC-200 will not respond to trigger signals or manual controls. 9. Balanced Subwoofer Output Connect one powered subwoofer (with a balanced input connection) to this output. (This is also the place to connect an amplifier with a balanced input that is used to power a passive subwoofer.)
-
Page 18: Umc-200 Remote Control
UMC-200 UMC-200 Remote Control The full function remote control provides detailed control over many of the UMC-200’s advanced features, and includes the ability to directly select inputs and operating modes without going through a menu. 1. Standby Button Press this button when the UMC-200 is On to return it to Standby Mode. - Page 19 UMC-200 3. Direct Input Selector Buttons Press one of the Direct Input Selector Buttons to switch the UMC-200 directly to that input. The button with the “B” symbol is used to select a Bluetooth wireless device, and will only work if you have installed the (optional) Bluetooth wireless dongle in the appropriate jack on the rear panel of the UMC-200.
- Page 20 (dim but not fully off). 15. Mute Button Press this button to mute the audio output of the UMC-200; press it again to return to the previous Volume level. 16. Volume Buttons Press these buttons to turn the volume up or down on the UMC-200.
-
Page 21: Emoq™ Gen2
EQ settings accordingly.) First, unpack your calibration microphone, unwind the wire, and plug it into the Microphone jack on the front panel of the UMC-200. (The UMC-200 is calibrated for this particular microphone, so don’t use a different one.) Second, place the microphone in your listening location. - Page 22 UMC-200 • Avoid moving around the room during the test. It’s best if you pick a spot that doesn’t block or change the sound field to stand or sit while the test is running. The best place is in the rear of the room towards the center of the wall. Avoid walking near the microphone during the test (even if you don’t block any speakers) because reflections...
- Page 23 On the current Menu screen, you can see the equalization settings that are currently applied by the UMC-200. The options include EMOQ, Manual EQ 1, Manual EQ 2, Manual EQ 3, and Flat. By moving the highlight to each choice and pressing Enter, you change the current setting to that choice (and may hear what it sounds like).
- Page 24 UMC-200 You will be able to go back later and change your choice, and to manually adjust the settings made by EmoQ if you prefer. You may also create up to three full sets of custom manual EQ setting and choose between them. To make your new EmoQ settings active, and apply them to your inputs, you must select EMOQ as the active EQ choice.
- Page 25 UMC-200 EmoQ Gen2: How it works. For the technically inclined, here is a brief explanation of how EmoQ Gen2 works: The first set of tones you hear (the ones that get progressively louder) are used to set an appropriate level at which to run the test.
-
Page 26: Using Advanced Features
Video On Standby is a rather sophisticated feature that actually allows the UMC-200 to continue to pass video and audio to a TV when it’s in Standby mode (the UMC-200 actually remains in a special mode that, while it uses a tiny bit more power than true Standby mode, uses far less than when the UMC-200 is On). - Page 27 Blu-Ray player Off. Zone Control The UMC-200 has stereo analog outputs that can be used to provide audio to two additional zones. These are line level outputs, so each zone requires its own amplifier (or powered speakers). Zone 2 and Zone 3 each have separate pairs of stereo unbalanced outputs on the rear panel of the UMC-200, and can be controlled by the Zone Buttons on the UMC-200 remote control.
- Page 28 The Bluetooth implementation in the UMC-200 is quite advanced. Once your Bluetooth device is paired with the UMC-200, the pairing will remain active until one or the other is powered Off. (Since the Bluetooth connection on the UMC-200 remains active, if you switch to a different input on the UMC-200, then switch back, under most circumstances your Bluetooth device will still be paired with the UMC-200.)
-
Page 29: Advanced Operation And Configuration (Menu)
UMC-200 Advanced Operation and Configuration (Menu) The UMC-200 offers many advanced configuration options. This section will provide a brief description of each, and instructions on how to access it. Menu : Input Allows you to directly select from the full list of available inputs. - Page 30 EMO-Q, Manual EQ 1, Manual EQ 2, Manual EQ 3, Flat; selects which EQ curve to apply to the UMC-200. Highlighting any of these and pressing Enter will select it as your default EQ curve; selecting any of these and pressing Enter when it is already highlighted will take you to a sub-menu where you can manually adjust the parameters for that selection.
- Page 31 Standby Video; allows you to enable or disable Video On Standby Mode. Menu : Setup : Load Default Allows you to wipe all settings in the UMC-200, resetting the UMC-200 to its factory defaults. WARNING: Once you select Load Defaults, and press Enter to accept your choice, all user settings and EmoQ configuration stored in the UMC-200 will be lost.
-
Page 32: Specifications
• (2) SPDIF coaxial digital audio inputs • (2) Toslink (optical) digital audio inputs • (1) Bluetooth audio input (requires optional Emotiva Bluetooth dongle) • (1) FM Antenna input; 75 ohms coax (F-connector) • (1) AM antenna input (spring terminals) •... -
Page 33: Care And Maintenance
If necessary, the UMC-200 should be cleaned gently with a soft rag. • If something sticky gets on the front panel or case of the UMC-200, it should be cleaned with a mild cleaning solution applied to a soft rag, followed by wiping with a clean rag dampened with plain water and drying with a soft dry rag or cloth. -
Page 34: Troubleshooting
Try re-selecting the Input. (If you were using Last Video Memory when you turned the UMC-200 Off it will remain in effect when you turn the UMC-200 back on. If so, and the video source you were using is still active, but the audio source is not, you may end up with no audio.) -
Page 35: Emotiva Audio Corporation Five-Year Limited Warranty
NOT APPLY TO YOU. A claim under this warranty must be made by you within the Term. A claim shall not be valid (and Emotiva has no obligation related to the claim) if it is not made within the Term and if it is not made in strict compliance with the requirements of the “How do you get service?”... - Page 36 The CSR will provide you with a returned material authorization number (“RMA”). Ship the product to Emotiva at the following address, with the RMA written in large, bold numbers on the outside of the box, and with the letters “RMA” written before the number.
-
Page 37: Notes
UMC-200 Notes Page 32...