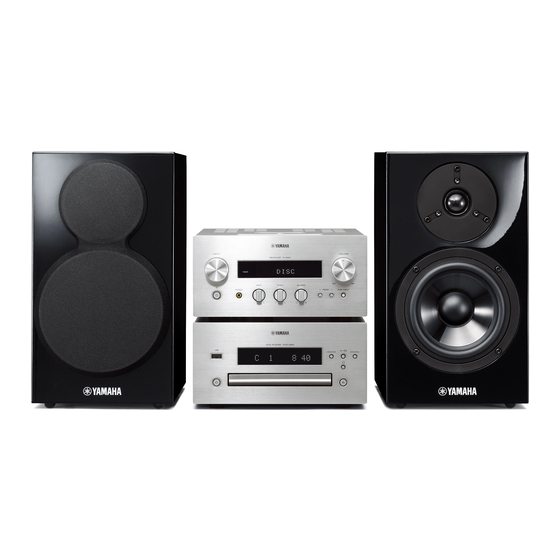
Yamaha PianoCraft MCR-840 Owner's Manual
Receiver/dvd player
Hide thumbs
Also See for PianoCraft MCR-840:
- Owner's manual (408 pages) ,
- Service manual (85 pages) ,
- Owner's manual (220 pages)
Table of Contents
Advertisement
Advertisement
Table of Contents

Related Manuals for Yamaha PianoCraft MCR-840


Summary of Contents for Yamaha PianoCraft MCR-840
- Page 1 MCR-840 (R-840 + DVD-840 + NS-BP300) RECEIVER/DVD PLAYER OWNER'S MANUAL...
- Page 2 5 mW (DVD) with a higher voltage than specified is dangerous and may cause 7 mW (VCD/CD) fire, damage to this unit, and/or personal injury. Yamaha will not Beam divergence 20 degree be held responsible for any damage resulting from use of this unit with a voltage other than specified.
-
Page 3: Table Of Contents
CONTENTS Using Disc Navigator with MP3, WMA, INTRODUCTION ® MPEG-4 AAC, DivX , WMV, and JPEG discs/USB devices ........27 FEATURES ............. 2 Viewing disc information......... 28 SUPPLIED ACCESSORIES ......... 2 Viewing the audio format ........28 NOTES ABOUT PLAYABLE DISCS/FILES ..3 TUNER OPERATIONS CONTROLS AND FUNCTIONS...... -
Page 4: Introduction
FEATURES INTRODUCTION FEATURES Receiver (R-840) DVD player (DVD-840) • Minimum RMS output power per channel • Plays DVDs, Super Video CDs/Video CDs, 65W + 65W (6Ω, 1kHz, 10% THD) Audio CDs, MP3/WMA/MPEG-4 AAC discs, • 30-station DAB preset tuning WMV discs, DivX discs and JPEG discs •... -
Page 5: Notes About Playable Discs/Files
NOTES ABOUT PLAYABLE DISCS/FILES ■ Playable discs Refer to “DISC AND USB DEVICE OPERATIONS” (☞p.19) The DVD player is designed for use with the following for details. discs. ■ Region codes DVD disc: DVD-Video, DVD-R/-RW/-R DL, DVD+R/+RW/+R DL The DVD player is designed to support the Region Management System. -
Page 6: Controls And Functions
CONTROLS AND FUNCTIONS CONTROLS AND FUNCTIONS Receiver (R-840) ■ Front panel 2 3 4 VOLUME INPUT PRESET TUNED STEREO SLEEP iPod TIMER BASS TREBLE BALANCE PHONES PRESET PURE DIRECT Front view Top view 1 INPUT B TIMER indicator Selects an input source. Lights up when the timer is set (☞p.35). -
Page 7: Dvd Player (Dvd-840)
CONTROLS AND FUNCTIONS DVD player (DVD-840) ■ Front panel CD MP3 WMA TRACK TOTAL REMAIN PROG RANDOM REP OFF S ALL A-B 1 USB port (On/Standby) Connect your USB device. Turns on the DVD player or sets it to standby mode. When this button is pressed during standby mode, the 2 Front panel display receiver automatically turns on and the input source... -
Page 8: Remote Control
CONTROLS AND FUNCTIONS Remote control This remote control can operate the system components (including tuner functions) and an iPod stationed in the iPod dock on the top of the receiver. To operate the DVD player, tuner functions, or an iPod using the remote control, you need to set the receiver to corresponding input mode (☞8Input selection keys). - Page 9 CONTROLS AND FUNCTIONS A DISPLAY S TUNING / d d Press TUNING / d d to Manual tuning and press and Switches the information shown on the front panel display / d d of the receiver and DVD player (☞p.28, p.30). hold TUNING to Automatic tuning (☞p.29, p.33).
-
Page 10: Preparation
• If there is a problem of weak radio wave reception in your area or you want to improve radio reception, we recommend that you use commercially available outdoor antennas. For details, consult the nearest authorized Yamaha dealer or service center. -
Page 11: Connecting Power Cables
PREPARATIONS Connecting a TV to the system 1 Connect the system and your TV via the HDMI jack, COMPONENT jacks or VIDEO jack of the DVD player and the corresponding jack(s) of your TV. 2 Set “TV Screen” according to your TV (see “Setting the TV display” on page 14). DVD player (DVD-840) Composite video cable (supplied) When connecting the system and your TV via the COMPONENT jacks, set the DVD player as described in “Selecting... -
Page 12: Connecting A Recorder (Cdr, Mdr, Etc.)
PREPARATIONS Connecting a recorder (CDR, MDR, Connecting an AV receiver or etc.) decoder You can connect a recording component, such as a CDR or The DVD player downmixes multi-channel sources, such MDR, to the DVD player for recording. as Dolby Digital and DTS, into a 2-channel stereo mix that you can enjoy through the speakers connected to the DVD DVD player (DVD-840) player. -
Page 13: Connecting An Ipod
• Yamaha and suppliers accept no liability for the loss of data • Do not connect any iPod accessories (such as headphones, a saved on the USB devices connected to the receiver. As a... -
Page 14: Installing The Batteries In The Remote Control
PREPARATIONS Installing the batteries in the Using the remote control remote control The remote control transmits a directional infrared beam. Be sure to aim the remote control directly at the remote control sensor on the front panel of the receiver during operation. -
Page 15: Adjusting The Clock
PREPARATIONS Adjusting the Clock Set the hour using / , and press The minute digits start flashing. Before starting playback operation, follow the procedure below to adjust the clock setting of the receiver. Notes • Use the remote control to set the clock. You cannot set the clock with the buttons on the receiver. -
Page 16: Setting The System
SETTING THE SYSTEM SETTING THE SYSTEM Turn on the TV and the system Press to select “Video Output”, and then press ENTER. Make sure that you have completed all the necessary connections (see “Connecting a TV to the system” on Press to select “TV Screen”, and then page 9). -
Page 17: Selecting The Output Type For Component Jacks
SETTING THE SYSTEM Selecting the output type for Press repeatedly to select “HDMI A- COMPONENT jacks ON”. To use progressive display function, connect to a TV, Press which has that function, via COMPONENT jacks. HDMI Audio output is turned on and the DVD player goes on standby. -
Page 18: Audio, Subtitle And Disc Menu Languages
SETTING THE SYSTEM Audio, Subtitle and Disc menu languages Press SETUP. DVD setup menu appears on the screen. Press to select “Initial Settings”, and then press ENTER. Press to select “Language”, and then press ENTER. Initial Settings Digital Audio Out Audio Language English Subtitle Language... -
Page 19: Basic Operations
SYSTEM OPERATIONS BASIC OPERATIONS SYSTEM OPERATIONS Follow the procedure below to select an input source and adjust the sound settings on the system. (On/Standby) TREBLE VOLUME Basic system operations PURE INPUT BASS BALANCE DIRECT Press (On/Standby) to turn on the receiver. Depending on input mode of the receiver, the DVD player also turns on by the system control connection VOLUME... -
Page 20: Changing The Brightness Of The Front Panel Display
SYSTEM OPERATIONS To turn off Pure Direct mode Press PURE DIRECT again. The PURE DIRECT backlight turns off and the front panel display turns on. ■ Muting the sound (MUTE) Press MUTE to reduce the current volume level by approximately 20dB. “MUTE ON”... -
Page 21: Disc And Usb Device Operations
DISC AND USB DEVICE OPERATIONS DISC AND USB DEVICE OPERATIONS This chapter explains how to play discs/USB devices. Using the on-screen display Playback operations ■ To start disc playback When the input source is DISC or USB, you can operate various functions and settings by using the on-screen You can play the following types of discs: DVD-Video, menus that appear on the connected TV. -
Page 22: Stopping Playback
DVD player. • Playback with all USB storage devices, and the ability to power Press all USB devices is not guaranteed. Yamaha accepts no To resume playback, press again, or press responsibility whatsoever in the unlikely event that any data is... -
Page 23: Selecting Chapters And Tracks
DISC AND USB DEVICE OPERATIONS Selecting chapters and tracks VCD and SVCD menus (PBC) ■ To select the next chapter or track Some VCD and SVCD discs have PBC (Playback Control) menus from which you can select what you want to watch. -
Page 24: Slow-Motion Playback
DISC AND USB DEVICE OPERATIONS Slow-motion playback Selecting languages and audio ® You can play DVD-Video, VCD, SVCD, DivX , and Some DVD discs have soundtracks in multiple languages WMV discs in slow motion at four different speeds. You or audio formats, such as Dolby Digital and DTS, that you can also play DVD-Video discs in reverse slow motion. -
Page 25: Selecting Camera Angles
DISC AND USB DEVICE OPERATIONS Zoom During playback, press SUBTITLE repeatedly to select the available subtitles. You can zoom the picture 2x or 4x when playing DVD- The name of the selected subtitle language is displayed ® Video, VCD, SVCD, DivX , WMV, or JPEG data on a on-screen. -
Page 26: A-B Repeat Playback
DISC AND USB DEVICE OPERATIONS During playback, press SETUP. Select “A(Start point)”, and then press ENTER. The Setup menu appears on-screen. Select “Play Mode”, and then press ENTER. Select “B(End point)”, and then press The Play Mode menu appears on-screen. ENTER. -
Page 27: Program Playback
DISC AND USB DEVICE OPERATIONS ■ To close the Setup menu • To insert a new item in the program, select the step where you want to insert it, select the title, chapter, or track you want to insert, and then press ENTER. Press SETUP. -
Page 28: Playing Jpeg Slideshows
DISC AND USB DEVICE OPERATIONS The following buttons can be used during slideshow. • For DVD discs, you can select “Title Search”, “Chapter Search”, or “Time Search”. Button Description • For VCD, SVCD, and Audio CD discs, you can select “Track Search” or “Time Search”. Pauses the slideshow (or music playback if ®... -
Page 29: Using Disc Navigator With Mp3, Wma, Mpeg-4 Aac, Divx ® , Wmv, And Jpeg Discs/Usb Devices
DISC AND USB DEVICE OPERATIONS Using Disc Navigator with MP3, Select “Disc Navigator”, and then press ® WMA, MPEG-4 AAC, DivX , WMV, ENTER. A list of items appear on-screen. The items available and JPEG discs/USB devices depends on the type of disc. You can use Disc Navigator to browse and select MP3, ®... -
Page 30: Viewing Disc Information
DISC AND USB DEVICE OPERATIONS ■ To close the Setup menu Viewing the audio format Press SETUP. You can view audio format during playback. • If the disc contains JPEG picture files and music files (MP3, WMA, MPEG-4 AAC), you can listen to music while watching a slideshow. -
Page 31: Tuner Operations
TUNER OPERATIONS DAB (DIGITAL AUDIO BROADCASTING) TUNING DAB (Digital Audio Broadcasting) uses digital signals for Tuning DAB stations clearer sound and more stable reception compared to analog signals. This unit can also receive DAB+ (an upgraded version of DAB) that allows for more stations using MPEG-4 audio codec (AAC+), which has a more efficient transmission method. -
Page 32: Dab Station Information
DAB (DIGITAL AUDIO BROADCASTING) TUNING DAB station information Presetting DAB stations ■ Switching the information of DAB You can store your favorite DAB stations with the preset function. Use this feature to display various information about the DAB service currently being received. DISPLAY TUNER Press DISPLAY repeatedly while receiving DAB. -
Page 33: Using Dab Option Menu
DAB (DIGITAL AUDIO BROADCASTING) TUNING Using DAB option menu You can set the following functions in DAB option menu. Function Description PRESET DELETE Deletes unnecessary preset DAB stations. TUNER STATION ORDER Enables you to change the station order. ALPHA-NUMERIC: Stations are OPTION listed in alphabetical order. -
Page 34: Dab Frequency Information
DAB (DIGITAL AUDIO BROADCASTING) TUNING ■ TUNE AID DAB frequency information Press TUNER repeatedly to set the unit to the This unit can receive Band III only. DAB mode. Frequency Channel label Press OPTION to display the DAB option 174.928 MHz menu. -
Page 35: Fm Tuning
FM TUNING There are 2 tuning methods: automatic and manual. You can also use the automatic and manual preset tuning features to store up to 30 stations. Automatic tuning Automatic preset tuning Automatic tuning is effective when station signals are Follow the procedure below to preset radio stations strong and there is no interference. -
Page 36: Manual Preset Tuning
FM TUNING Manual preset tuning Selecting preset stations You can store up to 30 stations. You can tune into any desired station simply by selecting the preset station under which it was stored (☞p.33). TUNER PRESET u / d MEMORY PRESET u / d OPTION Tune into a radio station you want to preset. -
Page 37: Other Operations
OTHER OPERATIONS SETTING THE TIMER The receiver is equipped with 2 types of timer functions. The DVD player also turns on or sets to standby mode automatically by the system control connection (☞p.8). Setting the clock timer Press to select “ON” (timer enabled) or “OFF”... -
Page 38: Setting The Sleep Timer
SETTING THE TIMER To cancel the timer setting operation Press TIMER during the operation. You can return to the previous screen by pressing RETURN. Setting the sleep timer The sleep timer sets the receiver to standby mode after the specified time elapses. SLEEP Press SLEEP repeatedly to select the desired duration. -
Page 39: Setting The Auto-Standby Mode
SETTING THE AUTO-STANDBY MODE The auto-standby function automatically sets the system to standby mode when DISC or USB is selected as input source and the system is not operated for 30 minutes. Notes • Unless you connect the receiver and the DVD player with the supplied system control cable properly (☞p.8), this feature does not function for the system. -
Page 40: Controlling Ipod
CONTROLLING iPod™ CONTROLLING iPod™ In addition to controlling the receiver (R-840) and DVD player (DVD-840), you can operate your iPod stationed in the iPod dock using the supplied remote control. Using iPod™ Once you have stationed your iPod to the iPod dock, you can enjoy playback of your iPod using the supplied remote control. -
Page 41: Dvd Setup Menu Options
DVD SETUP MENU OPTIONS This chapter explains the Audio Settings menu, the Video Adjust and Initial Settings menus. • The Audio DRC function also applies to audio output from the Audio Settings menu HDMI output, with the same restrictions as above. ■... -
Page 42: Initial Settings Menu
DVD SETUP MENU OPTIONS Initial Settings menu Select “Video Adjust”, and then press ENTER. The Initial Settings menu contains digital audio output, The Video Adjust menu appears on-screen. video, language, display, and other settings. When a menu item is grayed out, it means that it cannot currently be changed. -
Page 43: Video Output Settings
DVD SETUP MENU OPTIONS DTS Out If your TV or projector supports progressive scanning, select Progressive. Refer to your TV owner’s manual for Turns DTS to PCM conversion on and off. If you’ve details. connected the OPTICAL DIGITAL OUT to your AV •... -
Page 44: Language Settings
DVD SETUP MENU OPTIONS • Other Languages: Use the language abbreviations and codes listed on page 57 to specify languages not Set the DVD player to standby. listed above. While holding down on the DVD player, Notes press • With some DVD-Video discs, the soundtrack language will be set by the disc regardless of this setting. -
Page 45: Parental Lock
DVD SETUP MENU OPTIONS • Language: Available languages depends on where you purchased this system. Press ENTER. The password is set. Angle Indicator Determines whether the camera icon ( ) is displayed Notes on-screen when playing content on a DVD-Video disc that •... -
Page 46: Divx Vod
DVD SETUP MENU OPTIONS to select your country or region by abbreviation, and then press ENTER. To specify your country or region by using the 4-digit codes, use or the numeric keys to enter the appropriate code, and then press ENTER. The country or region is set. -
Page 47: Additional Information
Refer to the table below when this system does not function properly. If the problem you are experiencing is not listed below or if the instruction below does not help, turn off this system, disconnect the power cable, and contact the nearest authorized Yamaha dealer or service center. Receiver (R-840) ■... - Page 48 TROUBLESHOOTING ■ DAB reception Problem Cause Remedy page Cannot tune into The initial scan operations were not performed. Perform the initial scan operations. any DAB stations. There is no DAB coverage in your area. Check with your dealer or WorldDMB online at —...
-
Page 49: Remote Control
TROUBLESHOOTING ■ iPod Note If a transmission error occurs but no status message is displayed on the front panel display of the receiver, check the connection between the receiver and your iPod (☞p.11). Status message Cause Remedy page CONNECT ERR There is a problem with the signal path Turn off the receiver and try resetting your iPod. - Page 50 TROUBLESHOOTING Problem Cause Remedy page Power suddenly The auto-standby function of the receiver Check the connection of the system control cable shuts off during works when the receiver does not receive between the receiver and the DVD player. playback. a playing signal transmitted from the DVD player via the system control cable for 30 minutes.
-
Page 51: Supported Discs And Formats
SUPPORTED DISCS AND FORMATS ■ DVD+R/RW/R DL Copy Control CDs • The DVD player is compatible with DVD+R/RW and DVD+R DL (Dual Layer) discs recorded with the The DVD player conforms to the Audio CD standard. following formats: DVD-Video. Operation and performance with discs that do not conform •... -
Page 52: Jpeg Files
SUPPORTED DISCS AND FORMATS ■ Using external subtitle files JPEG files ® DivX movies use special files called external subtitle files for displaying subtitles. The font sets listed below are • The DVD player can play the following picture disc available for use with external subtitle files. -
Page 53: About Mpeg-4 Aac
SUPPORTED DISCS AND FORMATS About MPEG-4 AAC AAC, which stands for Advanced Audio Coding, is the audio compression technology used for MPEG-2 and MPEG-4. The actual format of the data and file extension depends on the application used to make the AAC file. •... -
Page 54: Notes About Handling Discs
NOTES ABOUT HANDLING DISCS NOTES ABOUT HANDLING DISCS • Always handle with care so that the playing surface is not scratched. Do not warp discs. • To keep clean the playing surface, wipe with a clean, dry cloth. Do not use any type of disc cleaner, spray, or any other chemical-based liquid. -
Page 55: Glossary
GLOSSARY ® ■ AAC (Advanced Audio Coding) ■ DivX Ultra ® An audio compression scheme defined as part of the DivX Ultra Certified products provide enhanced MPEG-2/MPEG-4 standard. AAC supports up to 48 playback of advanced media features supported by the ®... -
Page 56: Region Code
GLOSSARY ■ HDMI ■ Progressive Scan HDMI (High-Definition Multimedia Interface) is the first A method of displaying all scanning lines in a frame at industry-supported, uncompressed, all-digital audio/video once, reducing flicker noticeable on a larger screen and interface. Providing an interface between any source (such creating a sharp and smooth image. -
Page 57: Specifications
SPECIFICATIONS ■ R-840 ■ DVD-840 AMPLIFIER SECTION DVD section • Minimum RMS output power per channel • AUDIO OUT (6 Ω, 1 kHz, 10 % THD) ...........65 W + 65 W Output level (1 kHz, 0 dB) ..........2 V (± 0.3) •... -
Page 58: Resetting The Dvd Player
SPECIFICATIONS MPEG Layer-3 audio decoding technology licensed from Resetting the DVD player Fraunhofer IIS and Thomson Multimedia. iPod™ You can reset the DVD player to its factory defaults. “iPod” is a trademark of Apple Inc., registered in the U.S. and other countries. -
Page 59: Language, Country, And Region Lists
LANGUAGE, COUNTRY, AND REGION LISTS Language list ■ Language (abbreviation), code number Japanese (ja), 1001 Bhutani (dz), 0426 Kirghiz (ky), 1125 Sinhalese (si), 1909 English (en), 0514 Esperanto (eo), 0515 Latin (la), 1201 Slovak (sk), 1911 French (fr), 0618 Estonian (et), 0520 Lingala (ln), 1214 Slovenian (sl), 1912 German (de), 0405... - Page 60 Use of controls or adjustments or performance of procedures other than those specified herein may result in hazardous radiation exposure. CAUTION - VISIBLE AND / OR INVISIBLE LASER RADIATION WHEN OPEN. AVOID EXPOSURE TO BEAM. DVD-840 DVD-840 © 2009 Yamaha Corporation All rights reserved. Printed in Malaysia WS51490...