Table of Contents
Advertisement
Advertisement
Table of Contents

Related Manuals for Roland A-88


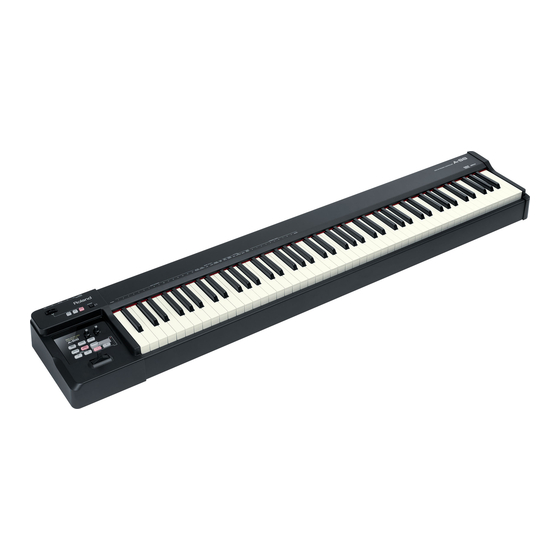
Summary of Contents for Roland A-88
- Page 1 Owner’s Manual...
-
Page 2: What Is Midi
DAW software is a term that refers to music production software, such as SONAR. NOTE Do not connect the A-88 to the computer until the driver has been installed (p. 17). Before using this unit, carefully read the sections entitled:”USING THE UNIT SAFELY” (p. 3) and “IMPORTANT NOTES”... -
Page 3: Using The Unit Safely
Do not repair or replace parts by yourself When using the unit with a rack or stand Do not attempt to repair the unit, or recommended by Roland, the rack or replace parts within it (except when this stand must be carefully placed so it is level manual provides specific instructions and sure to remain stable. - Page 4 AC Roland Service Center, or an authorized adaptor’s body. Other AC adaptors may Roland distributor, as listed on the use a different polarity, or be designed “Information”...
- Page 5 This unit is designed to be used in wet hands combination with specific stands (KS-12, KS-18Z) manufactured by Roland. If used Never handle the AC adaptor or its plugs in combination with other stands, you with wet hands when plugging into, or risk sustaining injuries as the result of this unplugging from, an outlet or this unit.
-
Page 6: Important Notes
• Depending on the material and temperature of • When not connected to a computer, the A-88 will the surface on which you place the unit, its rubber automatically be switched off four hours after you feet may discolor or mar the surface. -
Page 7: Additional Precautions
IMPORTANT NOTES Additional Precautions Copyrights/Licences/Trademarks • Roland assumes no liability concerning such loss • Before you open the included CD-ROM or DVD-ROM, you must read the “license agreement. ” of data, nor any obligation to recover it. Opening the CD-ROM or DVD-ROM will be taken to •... -
Page 8: About The Ivory Feel Keyboard
About the Ivory Feel Keyboard Features of an ivory feel keyboard Traditional piano keys are made from the best materials-ivory (for white keys) and ebony (for black keys). The Ivory Feel keyboard uses the latest in technology to reproduce the touch and feel of these materials. -
Page 9: Placing The A-88 On A Stand
Placing the A-88 on a Stand If you want to place the A-88 on a stand, use the Roland KS-12 or KS-18Z. Place the A-88 on the stand as follows. Be careful not to pinch your fingers when setting up the stand. -
Page 10: Table Of Contents
Placing the A-88 on a Stand . . . . . . . . . . . . . . . . .9... -
Page 11: Quick Page Reference Table
42 Assigning functions to the knobs, buttons, and jacks p. 43 Switching the function of the [C2] knob in SuperNATURAL mode (SN Changing the A-88’s p. 42 SETTING) Settings Changing the direction of value increases for the knobs, D-BEAM controller, p. - Page 12 How to read the procedural explanations Press the [FUNCTION] button. Press the key that has “PRGM CHANGE” printed above it. 0–9 Value 1–128 Press the keys that have Press the key that has “ENTER” “NUMERIC ENTRY” printed above printed above it. them.
-
Page 13: Contents Of The Package
Service Center, or an authorized Roland distributor, as listed on the “Information” page. ☐ USB cable Use this cable to connect the A-88 to the USB connector of your computer. ☐ Damper pedal This is the dedicated damper pedal for the A-88. -
Page 14: Panel Descriptions
This turns the power This will light when the on/off. power is on. * When not connected to a computer, the A-88 will automatically be [C1][C2] knobs switched off four hours after you stop playing Turn this knob to use the or operating it (if the function you’ve assigned... - Page 15 [DUAL/SPLIT] [LOWER] [UPPER] buttons These buttons allow you to play two layered sounds simultaneously (Dual), or to play different sounds in the left and right sections of the keyboard, divided at a specified key (Split) (p. 30). How the buttons indicate the DUAL/SPLIT status Status Button illumination Keyboard section...
-
Page 16: Rear Panel
Panel Descriptions Rear Panel [POWER SOURCE] switch, DC IN jack This switch specifies whether the A-88 will be powered by USB bus power (USB) or by the AC adaptor (AC ADAPTOR). Switch setting Explanation The A-88 will use USB bus power. The AC adaptor does not need to be connected. Use this setting when the A-88 is connected to a desktop computer. -
Page 17: Driver Installation
Mac OS X NOTE Do not connect the A-88 to the computer until you are directed to do so. A “driver” is software that transfers data between the A-88 and application software running on your computer when your computer and the A-88 are connected. - Page 18 When the screen indicates “Ready to install A-88 rear panel the driver,” use the USB cable to connect the A-88 to your computer, and then turn on the [POWER] switch . * Turn down the volume on any peripheral devices before connecting the USB cable.
- Page 19 Driver Installation Windows 8/Windows 7/Windows Vista When “Installation has been completed . ” appears, click [Close] . Close the “A-Series Keyboard Driver Setup” dialog box. If the “Change System Settings” dialog box appears, click [Yes] to restart Windows. page 23 Windows XP If a dialog box that asks whether you want to connect to Windows Update appears, select [No,...
- Page 20 It may take some time for the computer to restart. After the Mac restarts, use the USB cable to connect the A-88 to the Mac, and then turn on the [POWER] switch . * Turn down the volume on any peripheral A-88 devices before connecting the USB cable.
- Page 21 Confirm that [A-Series Keyboard] appears in the “MIDI Studio” window or the “Audio MIDI Settings” dialog box . If [A-Series Keyboard] does not appear or if it is grayed out, it means that the A-88 is not being detected properly. Click [Rescan MIDI]. Also try disconnecting and reconnecting the A-88’s USB cable.
- Page 22 Driver Installation Using your mouse, drag and connect the ▲ and ▼ (which represent the input/ output ports of each device) of the [A-Series Keyboard] and each [New Device] that you added so that they are connected as shown in the figure . Close the “MIDI Studio”...
-
Page 23: Verify That You Can Hear Sound
Driver Installation Verify That You Can Hear Sound After you’ve installed the driver, check to verify that the driver was installed correctly. We will use SONAR LE as an example for Windows, and GarageBand as an example for Mac OS X. Checking with a SONAR Soft Synths (Windows) Here’s an example using a plug-in synth included with SONAR LE. -
Page 24: Checking In Garageband (Mac Os X)
In the “New Project” screen, assign a name and click [Create] . Play the A-88’s keyboard . If you hear the Grand Piano sound that’s assigned to the GarageBand track, the A-88 is correctly connected to your computer. This completes the necessary settings. Now you can proceed to “About the Operating Modes” (p. 26)! -
Page 25: Midi Signal Flow
Make the following settings for MIDI input/output. Input device Output device A-Series Keyboard A-Series Keyboard MIDI OUT MIDI Signal Flow The illustration below shows the MIDI signal flow. PC/Mac A-88 MIDI MIDI OUT device A-Series Keyboard MIDI OUT MIDI IN device A-88 A-Series Keyboard... -
Page 26: About The Operating Modes
About the Operating Modes Switching the Operating Mode The A-88 has four operating modes. When you turn on the power, the A-88 will automatically start up in PLAY mode. You can switch the operating mode by pressing the following buttons. PLAY mode page 26 or when you’ve... -
Page 27: Function Mode
Change the Auto Off You can have the power be turned off automatically after a specified p. 42 setting amount of time has passed. Restoring the factory You can return all of the A-88’s settings to the factory-set state. p. 47 settings... -
Page 28: Supernatural Mode
SuperNATURAL Mode What is SuperNATURAL mode? This is the mode that lets you control a SuperNATURAL sound module. You can control the SuperNATURAL sound module that’s connected to the A-88 via a MIDI cable. What are SuperNATURAL Tones? Taking advantage of Behavior Modeling Technology, SuperNATURAL is Roland’s exclusive sound set that achieves a new level of realism and expression that were difficult to realize with previous sound generators. -
Page 29: Midi Visual Control Mode
This is the mode that lets you control a video device that supports MIDI Visual Control (MVC). You can control images on the Visual Control device that’s connected to the A-88 via a MIDI cable. When you select MIDI Visual Control mode and play the keyboard of the A-88, images will be controlled in synchronization with your performance. -
Page 30: Layering Two Parts
Button Function [LOWER] button Sound is produced according to the LOWER part settings when you play the A-88. [UPPER] button Sound is produced according to the UPPER part settings when you play the A-88. In FUNCTION mode Either the [UPPER] or the [LOWER] button will blink. -
Page 31: Layering Two Sounds (Dual)
Layering Two Parts Layering Two Sounds (DUAL) This allows you to use all of the A-88’s keys to simultaneously play the sounds assigned to the UPPER part and the LOWER part. Playing Different Sounds with the Right and Left Hands (SPLIT) Such a division of the keyboard into right- and left-hand sections is called a “Split, ”... -
Page 32: Performing
Play the keyboard . When you play the keyboard, MIDI messages will be transmitted. * Since the A-88 itself does not contain a built-in sound generator, you can’t play the A-88 on its own. Setting the MIDI Transmit Channel (MIDI CHANNEL) In order to play sounds on your MIDI sound module, the A-88’s MIDI transmit channel must match... - Page 33 Performing * Program numbers have a range of 1–128. MEMO You can change the functions that are assigned to the [S1] [S2] buttons. For details, refer to “Assigning Functions to the Knobs, Buttons, and Jacks” (p. 43). To select sounds from a different bank, first transmit a Bank Select message, and then transmit a Program Change message.
-
Page 34: Shifting The Pitch Of The Keyboard
Performing Transmitting a Program number (PRGM CHANGE) 0–9 For details on this value, refer to p. 12. Value 0–127 Shifting the Pitch of the Keyboard Changing the octave (Octave Shift) You can raise or lower the pitch range of the keyboard (Octave Shift) by using the [+] [–] buttons. You can change this setting in the range of -4 to 5 octaves. -
Page 35: Using The Lever To Modify The Sound
Performing Using the Lever to Modify the Sound Changing the pitch of a sounding note (Pitch Bend) Moving the [Pitch Bend/Modulation] lever to the left or right will transmit pitch bend messages, causing the pitch to change slightly. * The range of the pitch change (“bend range”) will depend on the settings of your sound module. -
Page 36: Using The D-Beam To Modify The Sound
Performing Using the D-BEAM to Modify the Sound You use the D-BEAM controller simply by moving your hand above it. By assigning different functions to it, you can control the sound in various ways. Press the D-BEAM [PITCH], [VOL], or [ASSIGN] button to turn the D-BEAM controller on . -
Page 37: Using The Knobs To Modify The Sound
Performing Using the Knobs to Modify the Sound You can modify the sound by turning the [C1] [C2] knobs. Knob Function [C1] knob Transmits a Cutoff (CC#74) message. [C2] knob Transmits a Resonance (CC#71) message. * The effect that’s applied will depend on the sound module. For details, refer to the owner’s manual of your sound module. -
Page 38: Using The Pedals To Modify The Sound
Performing Using the Pedals to Modify the Sound The A-88 supports the use of an included damper pedal, a pedal unit (RPU-3; sold separately), an expression pedal (EV-5, EV-7; sold separately) and a pedal switch (DP series; sold separately). Jack... -
Page 39: Using Aftertouch To Modify The Sound
Aftertouch is a function that lets you modify the sound by applying additional pressure to the key after playing a note. On the A-88, applying further pressure to a key after playing a note will not affect the sound, turning on the [ASSIGN] button and moving your hand above the D-BEAM controller will cause Aftertouch messages to be transmitted. -
Page 40: Changing The A-88 Settings
Changing the A-88 Settings To change settings for the A-88, you need to be in FUNCTION mode. The following parameters are common to both the UPPER and LOWER parts; they cannot be set individually. Parameter Factory setting Explanation Page When you play the A-88’s keyboard, the transmitted note message will include a velocity value (volume data) corresponding to the force of your strike. -
Page 41: (Velo Curve)
Changing the A-88 Settings Changing the Velocity Curve (VELO CURVE) 0–4 Value 0–4 For details on this value, refer to p. 12. * Values outside the acceptable range (5–) will not be entered. Value Setting Explanation SUPER LIGHT An even lighter setting than LIGHT. -
Page 42: Making The Power Automatically Turn
Time (Auto Off) WARNING When not connected to a computer, the A-88 will automatically be switched off four hours after you stop playing or operating it (if the factory settings have been unmodified). If you don’t want the unit to turn off automatically, change the “AUTO OFF” setting to “OFF” as described below. -
Page 43: Buttons, And Jacks
Changing the A-88 Settings Assigning Functions to the Knobs, Buttons, and Jacks Assigning a Program Change Message (PRGM CHANGE) [S1] [S2] buttons Press either Button Function [S1] button Decrement the program number [S2] button Increment the program number Other controllers... -
Page 44: Assigning A Control Change
Changing the A-88 Settings Assigning a Control Change Number (CC#) [S1] [S2] buttons Momentary 0–9 Press either Latched Value 0–127 For details on this value, refer to p. 12. Button [S1][S2] buttons The button will alternately transmit ON (127) and OFF (0) each time you press it (Latched... - Page 45 Changing the A-88 Settings Frequently used CC# Function Factory assignments Modulation Modulation of [Pitch Bend/Modulation] lever Portamento time — Volume [VOL] button Panpot — Expression — Hold DAMPER jack Portamento — Sostenuto FC2 jack Soft FC1 jack Resonance [C2] knob Release time —...
-
Page 46: Changing The Direction Of Value Increases For The Knobs, D-Beam Controller, And Pedals (Ctrl Dir)
Changing the A-88 Settings Changing the Direction of Value Increases for the Knobs, D-BEAM Controller, and Pedals (CTRL DIR) Operate either Button Setting Explanation Moving the knob toward the right will increase the value. Moving POSITIVE your hand closer to the D-BEAM controller will increase the value, and... -
Page 47: Returning The Pedal Jacks Assignments
Changing the A-88 Settings Returning the Pedal Jacks Assignments to the Factory Settings Here’s how to return the functions assigned to the DAMPER, FC1, and FC2 jacks to their factory-set settings. Value For details on this value, refer to p. 12. -
Page 48: Troubleshooting
If the problem is not resolved, refer to the contact information listed at the end of this manual. Roland support website: http://www.roland.com/ Problems When Installing the Driver... -
Page 49: Problems When Using The Unit
Troubleshooting Problems When Using the Unit Problem Confirmation Resolution If the AC adaptor is connected, set the Is the [POWER SOURCE] switch set appropri- [POWER SOURCE] switch to the “AC ADAPTOR” ately? position (p. 16). Power won’t turn Make sure that the AC adaptor and the power Are the unit’s AC adaptor and power cord cord are connected correctly (p. - Page 50 D-BEAM controller. Is the driver installed? Install the driver (p. 17). Are the software’s input device and output Select the A-88 as the input and output device configured? device (p. 23). Make sure that the unit is connected to the computer correctly.
- Page 51 Troubleshooting Problem Confirmation Resolution Are multiple programs running? Exit programs that are not in use. Run Windows Update or Microsoft Update Windows and make sure the system software is up to date. Is the system software up to date? Mac OS X Run Software Update and make sure the system software is up to date.
-
Page 52: Problems
Troubleshooting Changing Computer Settings to Avoid Problems Changing these computer settings can help you avoid the problems described in “Problems When Installing the Driver” (p. 48) and “Problems When Using the Unit” (p. 49). Driver Signing Options Setting (Windows XP) If the “Driver Signing Options”... - Page 53 Troubleshooting Click [Change advanced power settings] . In the [Advanced settings] tab of the “Power Options” control panel, click the [+] mark next to “Hard disk,” and then click the [+] mark next to “Turn off hard disk after . ” Click [Setting], click the down arrow, and then select [Never] .
-
Page 54: Reinstalling The Driver
Troubleshooting Reinstalling the Driver If you experience problems installing the driver, use the following procedure and reinstall the driver. Delete the driver . Install the driver again as described in “Driver Installation” (p . 17) . Deleting the Driver If the computer does not detect the unit correctly, use the following procedure to delete the driver, and then install the driver again as described in “Driver Installation”... -
Page 55: Lightening The Midi Load (Windows)
Troubleshooting Mac OS X Start up the Mac without the unit connected . Disconnect all USB cables other than those for a USB keyboard and/or USB mouse (if used). Insert the included CD-ROM into the computer’s DVD-ROM drive . Double-click [Uninstaller] in the [MacDriver] folder on the included CD-ROM . When “This uninstalls A-Series Keyboard driver from this Mac . -
Page 56: Main Specifications
Main Specifications Roland A-88: MIDI Keyboard Controller Keyboard 88 keys (Ivory Feel-G keyboard with Escapement) Buttons: [S1] [S2] (Assignable) Knobs: [C1] [C2] (Assignable) Controllers Foot Pedals: DAMPER, FC1, FC2 [Pitch Bend/Modulation] lever D-BEAM controller [FUNCTION] button [SuperNATURAL] button Buttons [+][–] buttons... -
Page 57: Midi Implementation Chart
MIDI Implementation Chart Date: Sep. 1, 2012 Model: A-88 Version: 1.00 Function . . . Transmitted Recognized Remarks Default × Basic Channel Changed 1–16 × Default Mode 3 × Mode Messages OMNI ON/OFF, MONO, POLY × Altered ************** × 0–127 ×... -
Page 58: Index
Index Symbols [+][–] buttons ....15 KEY VELO ..... 41 Transpose . - Page 59 MEMO...
- Page 60 MEMO...
- Page 61 MEMO...
- Page 62 For EU Countries For China...
-
Page 63: Declaration Of Conformity
Compliance Information Statement Model Name : A-88 Type of Equipment : MIDI Keyboard Controller Responsible Party : Roland Corporation U.S. Address : 5100 S. Eastern Avenue, Los Angeles, CA 90040-2938 Telephone : (323) 890-3700 For EU Countries This product complies with the requirements of EMC Directive 2004/108/EC.