
Related Manuals for Radio Shack 63-255


Summary of Contents for Radio Shack 63-255
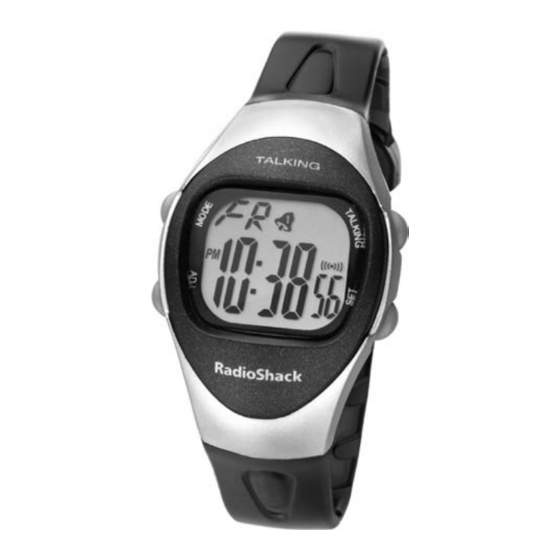
- Page 1 User’s Guide 63-255 4-Alarm Talking Watch Thank you for purchasing your 4-Alarm Talking Watch from RadioShack. Please read this user’s guide before installing, setting up, and using your new talking watch.
-
Page 2: Package Contents
Package contents Button-Cell Battery (Installed) Quick Start Talking Watch Features • Date and time announcement with a touch of a button • Hourly time announcement from 6:00 AM till 10:00 PM • Talking stopwatch that keeps track of lap times • Four daily alarms to remind you of important events throughout the day... - Page 3 MODE TALKING Select Hear the current the time, time, elapsed stopwatch, stopwatch time, and each of or alarm time four alarm while in each modes. mode. Turn the Press to hear hourly report the date. Press on or off. again to view the year. Day of the Week Alarm – 4 on Clock Time Hourly Report On 12hr format...
-
Page 4: Set Date And Time
Set Date and Time 1. Press MODE until the watch announces and displays the time. 2. Hold down SET until the watch announces “time set,” and the time format 24 H flashes. 12 H 3. Repeatedly press ADJ to select your option. Hold down to move digits quickly. 4. Press SET to confirm and go to set the next setting. 5. Repeat Steps 3 and 4 to set the hour, minute, year, month, and date. 6. Press MODE when finished. Notes: • Remove the plastic film on the display before use. • The calendar extends from 2000 to 2099. • If you do not press a key for more than one minute, the watch returns to the current time display. -
Page 5: Voice Announcements
Voice Announcements To hear the current time: Press TALKING. Example: “It is ten thirty-eight PM.” To hear the date: Press SET. The date appears on the display. Example: “Today is the twenty-third” Month Date Notes: • The month is not announced. • To display the current year, press SET again. Turn Hourly Time Announcements On and Off Press ADJ in time mode. When hourly report turns on, the watch announces “hourly report on,” and ¡displays. -
Page 6: Set Alarm
When hourly report turns off, the watch announces “hourly report off,” and ¡disappears. Note: The hourly time announcement sounds at the beginning of each hour from 6:00AM till 10:00PM. Set Alarm You can set up to four daily alarms. To set alarm time: 1. Press MODE until the watch announces and displays the number of the alarm you want to set. 2. Hold down SET until the watch announces the selected alarm (for example, “alarm 1 set”) and “hour set.” The hour digits flash. 3. Press ADJ to set the alarm hour. 4. Press SET to store the hour. 5. Repeat Step 3 to set the minute. 6. Press MODE when finished. 7. Press ADJ to turn alarm on. 8. Press MODE to select other alarms or return to the time. - Page 7 Alarm 1 set Note: If you do not press a key within 30 seconds of turning on the alarm, the watch beeps twice and displays the current time. At the alarm time, the watch announces the time, then beeps for one minute. To silence the alarm sooner, press any key. To turn alarm on or off: 1. Press MODE until the watch displays and announces the desired alarm. 2. Press ADJ to turn alarm on and off. When you turn an alarm on, the corresponding icon displays and your watch announces that the selected alarm is on. For example, when alarm 1 is on, your watch announces “alarm one on” and displays.
-
Page 8: Use The Stopwatch
When you turn an alarm off, the corresponding icon disappears and your watch announces that the selected alarm is off. 3. Press MODE to select other alarms or return to time display. Use the Stopwatch The stopwatch counts elapsed time up to 23 hours, 59 minutes and 59 seconds. When the stopwatch reaches , it 23:59 59 resets to , and begins counting up 0:00 00 again. 1. Press MODE until the watch announces “stopwatch.” 2. Press ADJ to start the stopwatch. The stopwatch announces the elapsed time as listed on Page 9. - Page 9 Elapsed Time Announcement 0 to 9 seconds Each second 10 to 59 seconds Every 10 seconds 1 to 9 minutes Every minutes 10 to 59 minutes Every 10 minutes 1 to 23 hours Every hour 3. Press ADJ to stop counting. 4. Press ADJ again to continue counting. Note: While the stopwatch is running, press MODE to use the watch’s other features, or press TALKING to hear the voice announcement. Record Lap Times The watch’s lap function lets you freeze the display, document the timed reading, then return to the stopwatch to see the advancing time. You can monitor as many laps as you want as long as the stopwatch continues to run.
- Page 10 1. Follow Steps 1 and 2 under “Use the Stopwatch.” 2. When the first lap is finished, press SET. The stopwatch display freezes, but the stopwatch continues to run in the background. : flashes. 3. When you have documented the lap time, press SET. The display changes to show the advancing time. 4. Repeat Steps 2-3 for each additional lap. Reset Stopwatch to 0:00 00 • If the stopwatch is not counting (: not flashing), press SET. • If the stopwatch is counting time, press ADJ then SET. The watch announces “all clear.” • If the stopwatch is in lap mode (: is flashing but digits not changing), press ADJ then SET twice.
-
Page 11: Replace Battery
Replace Battery Your watch comes with one CR2016 lithium battery installed. When the display dims or the watch stops operating properly, replace the battery. 1. Use a Phillips jeweler’s screwdriver to remove the screws from the back panel. 2. Remove the back panel. 3. Remove the battery holder by loosening two screws. 4. Remove the old battery and install a new battery with the positive (+) side up. 5. Replace the battery holder with the four legs facing downward and secure it with screws. 6. If necessary, re-insert the black rubber ring making sure it’s the right way up (with the longer straight edge downward) if the Reset hole ring has moved out of position. - Page 12 7. Replace the back panel and secure the back panel with four screws. 8. Set the watch to the right time. Notes: • After you finish replacing battery, if the watch displays incomplete segments, frozen segments or displays nothing, remove the back panel and reset the watch by pressing the reset hole with a pointed object such as a toothpick. • The watch can keep your settings for about 5 minutes after you remove the battery. Make sure you insert a new battery within 5 minutes and avoid pressing any button, otherwise you need to reset the settings. • Do not lose small parts such as screws.
-
Page 13: Specifications
• Keep button-cell batteries away from children. Swallowing a button-cell battery can be fatal. Specifications Power source ....CR2016 lithium battery Accuracy ........ ±0.67 seconds/day Current drain ........Less than 5µA Weight (including battery) .... 1.13 oz. (32 g) Specifications are subject to change and improvement without notice. Actual product may vary from the images found in this document. Limited Warranty RadioShack warrants this product against defects in materials and workmanship under normal use by the original purchaser for one (1) year after the date of purchase from a RadioShack-owned store or an authorized RadioShack franchisee or dealer. RADIOSHACK MAKES NO OTHER EXPRESS WARRANTIES. This warranty does not cover: (a) damage or failure caused by or attributable to abuse, misuse, failure to follow instructions, improper installation or maintenance, alteration, accident, Acts of God (such as floods or lightning), or excess voltage or current; (b) improper or incorrectly performed repairs by persons who are not a RadioShack Authorized Service Facility; (c) consumables such as fuses or batteries; (d) ordinary wear and tear or cosmetic damage; (e) transportation, shipping or insurance costs; (f) costs of product removal, installation, set-up service, adjustment or reinstallation; and (g) claims by persons other than the original purchaser. Should a problem occur that is covered by this warranty, take the product and the RadioShack sales receipt as proof of purchase date to any RadioShack store in the U.S. RadioShack will, at its option, unless otherwise provided by law: (a) repair the product without charge for parts and labor; (b) replace the product with the same or a comparable product; or (c) refund the purchase price. All replaced parts and products,... - Page 14 RadioShack. New or reconditioned parts and products may be used in the performance of warranty service. Repaired or replaced parts and products are warranted for the remainder of the original warranty period. You will be charged for repair or replacement of the product made after the expiration of the warranty period. RADIOSHACK EXPRESSLY DISCLAIMS ALL WARRANTIES AND CONDITIONS NOT STATED IN THIS LIMITED WARRANTY. ANY IMPLIED WARRANTIES THAT MAY BE IMPOSED BY LAW, INCLUDING THE IMPLIED WARRANTY OF MERCHANTABILITY AND, IF APPLICABLE, THE IMPLIED WARRANTY OF FITNESS FOR A PARTICULAR PURPOSE, SHALL EXPIRE ON THE EXPIRATION OF THE STATED WARRANTY PERIOD. EXCEPT AS DESCRIBED ABOVE, RADIOSHACK SHALL HAVE NO LIABILITY OR RESPONSIBILITY TO THE PURCHASER OF THE PRODUCT OR ANY OTHER PERSON OR ENTITY WITH RESPECT TO ANY LIABILITY, LOSS OR DAMAGE CAUSED DIRECTLY OR INDIRECTLY BY USE OR PERFORMANCE OF THE PRODUCT OR ARISING OUT OF ANY BREACH OF THIS WARRANTY, INCLUDING, BUT NOT LIMITED TO, ANY DAMAGES RESULTING FROM INCONVENIENCE AND ANY LOSS OF TIME, DATA, PROPERTY, REVENUE, OR PROFIT AND ANY INDIRECT, SPECIAL, INCIDENTAL, OR CONSEQUENTIAL DAMAGES, EVEN IF RADIOSHACK HAS BEEN ADVISED OF THE POSSIBILITY OF SUCH DAMAGES. Some States do not allow limitations on how long an implied warranty lasts or the exclusion or limitation of incidental or consequential damages, so the above limitations or exclusions may not apply to you. This warranty gives you specific legal rights, and you may also have other rights which vary from State to State. You may contact RadioShack at: RadioShack Customer Relations 300 RadioShack Circle, Fort Worth, TX 76102 04/08 Protect the environment by recycling used electronics. Go to E-CyclingCentral.com to find an electronic recycling center near you. www.RadioShack.com ©2010. RadioShack Corporation. All rights reserved. RadioShack and RadioShack.com are trademarks used by RadioShack Corporation. Printed 06A10 in China 63-255...