Table of Contents
Advertisement
Quick Links
Advertisement
Table of Contents

Related Manuals for Hawking HGS24S


Summary of Contents for Hawking HGS24S
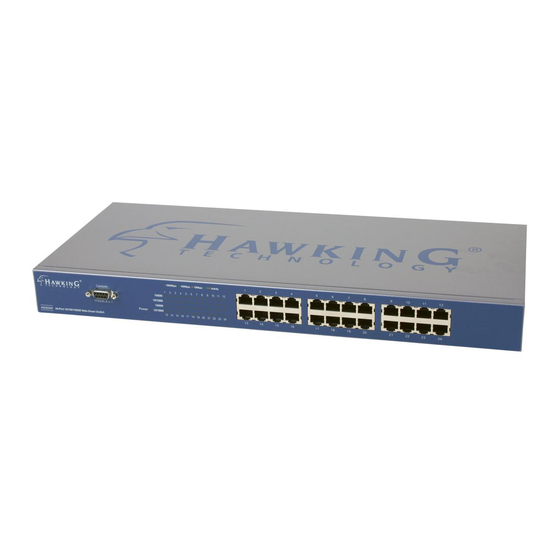
- Page 1 Please place main product photo here.
- Page 2 Hawking Customer Service in order to obtain a Return Authorization number. The warranty is for repair or replacement only. Hawking Technology does not issue any refunds. BE SURE TO HAVE YOUR PROOF OF PURCHASE. RETURN REQUESTS CANNOT BE PROCESSED WITHOUT PROOF OF PURCHASE.
-
Page 3: Table Of Contents
3.1 PHY Monitoring and Port Mode Setup 3.2 Flow Control 3.3 Aging 3.4 VLAN 3.5 Link Aggregation 3.6 Quality of Service Management Guide 4.1 Access the Switch 4.2 Homepage 4.2.1 System 4.2.2 Ports 4.2.3 VLANs 4.2.4 Aggregation/Trunking Configuration 4.2.5 QoS 4.2.6 Mirror... - Page 4 The complete HGS24S package consists of: • One HGS24S 24-Port 10/100/1000M Web-Smart Switch • Rack mount kit: 2 mounting brackets and screws • Four rubber feet with adhesive backing • One AC power cord • One RS-232 cable • One CD •...
-
Page 5: General Description
Under full-duplex mode, transmission and reception of frames occurs simultaneously without causing collisions while doubling the network bandwidth. The HGS24S is ideal for micro-segmenting large networks into smaller, connected subnets for improved performance, enabling the bandwidth required by today’s networks for increasingly demanding applications of all kinds. Also, unlike traditional “dumb”... -
Page 6: Features
Please place photo of Port Operation There are 24 * 1000Mbps RJ-45 (copper) ports on the front panel. The switch’s auto-negotiation feature allows each port of the device to be running at one of the following operation modes: All ports support MDI/MDI-X auto-crossover, meaning that the port can connect a PC or other device without crossover cable adjustment. -
Page 7: Rear Panel
If the connecting cable is good and of the correct type If the cable is firmly seated in its connectors in the switch and in the associated device If the connecting device, including any network adapter, is well installed and functioning properly 1.5 Rear Panel... -
Page 8: Desktop Installation
2.1 Desktop Installation For desktop installation, the switch needs to be put on a clean, flat desk or table close to a power outlet. After you have plugged in all network cables and the power cord, the system is ready. -
Page 9: Installing Network Cables
The gigabit ports provide a larger pipe to the server or backbone for boosting the total system performance. Furthermore, as the switch supports Port Aggregation (Port Trunk) capabilities and up to 8 groups, it is also great for building switch-to-switch connectivity. -
Page 10: Phy Monitoring And Port Mode Setup
3.1 PHY Monitoring and Port Mode Setup One of the software’s major tasks is to continuously monitor the PHYs in order to set up the switch ports according to whether the link is up or down, and in the latter case, what the current speed, duplex mode and pause capabilities are. The PHYs are polled every 100 ms. -
Page 11: Access The Switch
(out-of-band) on the rear panel or by Telnet session / Internet Browser over the network (in-band). Factory Default value: IP: 192.168.1.1 Subnet Mask: 255.255.255.0 Default Gateway: 192.168.1.254 4.1 Access the Switch Console Port (Out-of-band) connection The operating mode of the console port is: • •... - Page 12 In-Band Connections (Web Browser / Telnet) To manage the switch through in-band access, you should configure the management station with an IP address and subnet mask compatible with your switch. 1. Run your Web Browser and enter the IP address “192.168.1.1” as the URL in the “address” field.
-
Page 13: Homepage
4.2 Homepage On the Home page, you can select what you would like to configure by clicking the menu tabs located at the top of the homepage. They include: • System • Ports • VLANS • Aggregation • • Mirror •... - Page 14 To restore the default values of switch, click the “Default” button at the top of the homepage. If you want to reboot the switch, click the “Reboot” Button. To check the connection status of each port, from 1 to 16, take a look at the port monitor.
-
Page 15: System
The value zero disables the timeout. Timeout value in seconds, 0, 60-10000. System name Name of the Switch IP Address Set the IP Address of the Switch Subnet Mask Set the Subnet mask of Switch Gateway Set the Gateway of Switch Name... -
Page 16: Ports
Note: After you change the IP address, the switch will reboot itself. You may click the new address to link the New IP Address with your browser. 4.2.2 Ports On this page, you can view the port status, set up the speed “Mode” and enable the “FDX Flow Control”. -
Page 17: Vlans
To save the configuration of the system, click “Apply”. To see the latest port status, click the refresh button. 4.2.3 VLANs VLAN configuration is for dividing the LAN into subnet groups for better network management. The benefit is that the user can move one client to another subnet group without physically moving the machine. - Page 18 PVID When the VLAN-enabled switch receives a tagged packet, the packet will be sent to the port’s default VLAN according to the PVID (port VLAN ID) of the receiving port. Items Port PVID Aware Only Tagged Apply Functions Port Number 1~16...
-
Page 20: Aggregation/Trunking Configuration
4.2.4 Aggregation/Trunking Configuration To set up the Port trunk groups, put the port numbers into the same Aggregation group line. There are eight groups that can be made. Do not forget to click the “Apply” to save the settings. The maximum number of ports for one group is 8. There are three aggregation modes for you to setup, SMAC (Source MAC), DMAC (Destination MAC), and XOR. -
Page 21: Qos
110 - Internetwork Control 101 - CRITIC/ECP 100 - Flash Override 011 - Flash 010 - Immediate 001 - Priority 000 - Routine Items Functions Port To select the switch port, from 1 to 16 Priority Select the priority of the TOS group... - Page 22 4.2.5.2 QoS Port Shaper To control the port data’s flow rate, select “Enable” and enter the value you need from 250 - 1000000Kbps. Any packet size that is larger than the limit will be discarded. Click “Apply” to save.
- Page 23 To control the port data’s flow rate, select “Enable” and enter the Value you need from 250 - 1000000K bps. If the packet size that is larger than the limit, the switch will make the associated client suspend the frame transmission by using back pressure or pause frame.
-
Page 24: Mirror
(mirrored) simultaneously to 1 Monitor port (target port). (Note that the target port must be in the same VLAN as the source port.) Items Functions Monitor Port Select the switch port, from 1 to 16 to be the target port to collect traffic info Source Ports To select the mirror ports, click the check box of the port. -
Page 25: Statistics
When you install several our 16-port and 24-port gigabit web-smart switches, the discovery management tool helps you to search and access those switches on the LAN easily. Therefore you can access any switch on your LAN without memorizing those IP addresses. You can only find switches with the IP Address compatible with the one you access. -
Page 26: Default
4.2.9 Default To restore to default values, 1. Click the default button on the homepage. 2. Click “Yes” to restore default values. Do not power off the switch while it is working. 4.2.10 Reboot To reboot the switch, 1. Click the “Reboot” button on the homepage... -
Page 27: Specifications
Standard IEEE802.3 10BASE-T IEEE802.3u 100BASE-TX IEEE802.3x full-duplex operation and flow control IEEE802.3ab 1000BASE-T IEEE802.1Q VLAN interoperability IEEE802.1p Traffic prioritization Interface 24 * 10/100/1000Mbps auto MDI/MDI-X RJ-45 switching ports 1 * RS-232 Console port Cable Connections RJ-45 (10BASE-T): Category 3,4,5 UTP/STP RJ-45 (100BASE-TX): Category 5 UTP/STP RJ-45 (1000BASE-T): Category 5,5e or enhanced UTP/STP...