Table of Contents
Advertisement
Quick Links
Advertisement
Table of Contents

Related Manuals for Linksys AG310


Summary of Contents for Linksys AG310
-
Page 1: User Guide
ADSL2+ Gateway with VoIP User Guide AG310 Model No. - Page 2 ADSL2+ Gateway with VoIP Copyright and Trademarks Specifications are subject to change without notice. Linksys is a registered trademark or trademark of Cisco Systems, Inc. and/or its affiliates in the U.S. and certain other countries. Copyright © 2007 Cisco Systems, Inc. All rights reserved.
-
Page 3: Table Of Contents
ADSL2+ Gateway with VoIP Table of Contents Chapter 1: Introduction Welcome What’s in this User Guide? Chapter 2: Planning Your Network The Gateway’s Functions IP Addresses Chapter 3: Getting to Know the ADSL Gateway Back Panel LEDs on the Front and Side Panel Chapter 4: Connecting the ADSL2+ Gateway with VoIP Overview Connecting the Gateway to a Computer... - Page 4 ADSL2+ Gateway with VoIP The Applications & Gaming - DMZ Tab The Applications & Gaming - QoS Tab The Administration - Management Tab The Administration - Reporting Tab The Administration - Diagnostics Tab The Administration - Backup & Restore Tab The Administration - Factory Defaults Tab The Administration - Firmware Upgrade Tab The Administration - Reboot Tab...
- Page 5 ADSL2+ Gateway with VoIP List of Figures Figure 2-1: Network Figure 3-1: Back Panel Figure 3-2: Front Panel Figure 4-1: Connect the ADSL Line Figure 4-2: Connect the Voice Line Figure 4-3: Connect a Phone Figure 4-4: Connect a PC Figure 4-5: Connect the Power Figure 6-1: Login Screen Figure 6-2: Basic Setup...
- Page 6 ADSL2+ Gateway with VoIP Figure 6-25: Advanced VPN Settings Figure 6-26: VPN Log Figure 6-27: Internet Access Figure 6-28: Internet Policy Summary Figure 6-29: List of PCs Figure 6-30: Add/Edit Service Figure 6-31: Single Port Forwarding Figure 6-32: Port Range Forwarding Figure 6-33: Port Triggering Figure 6-34: DMZ Figure 6-35: QoS...
-
Page 7: Chapter 1: Introduction Welcome
Chapter 1: Introduction Welcome Thank you for choosing the AG310 ADSL2+ Gateway with VoIP. This Gateway will provide your computers with a high-speed Internet connection as well as access to local resources, including files and printers. lan (local area network): The computers and... -
Page 8: What's In This User Guide
• Appendix G: Regulatory Information This appendix supplies the regulatory information regarding the Gateway. • Appendix H: Contact Information This appendix provides contact information for a variety of Linksys resources, including Technical Support. Chapter 1: Introduction What’s in this User Guide? -
Page 9: Chapter 2: Planning Your Network
ADSL2+ Gateway with VoIP Chapter 2: Planning Your Network The Gateway’s Functions A Gateway is a network device that connects two networks together. In this instance, the Gateway connects your Local Area Network (LAN), or the group of computers in your home or office, to the Internet. - Page 10 ADSL2+ Gateway with VoIP Since you use the Gateway to share your DSL Internet connection, contact your ISP to find out if they have assigned a static IP address to your account. If so, you will need that static IP address when configuring the Gateway.
-
Page 11: Chapter 3: Getting To Know The Adsl Gateway
ADSL2+ Gateway with VoIP Chapter 3: Getting to Know the ADSL Gateway Back Panel The Gateway’s ports and Reset button are located on the back panel. Figure 3-1: Back Panel The DSL port connects to the ADSL line from your telephone wall jack. Line The Line port connects your standard telephone and converts the signal to VoIP technology. -
Page 12: Leds On The Front And Side Panel
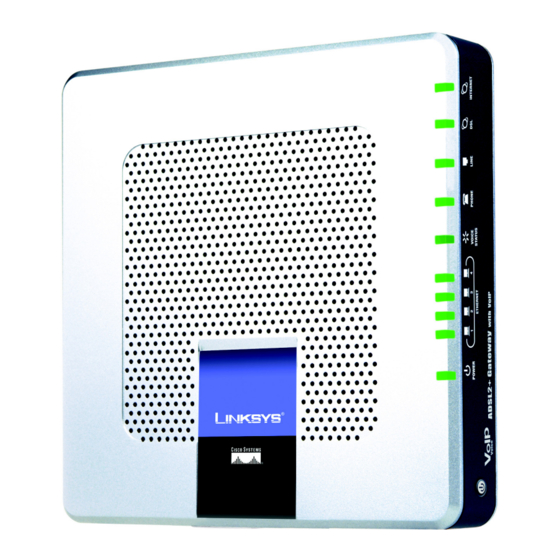
ADSL2+ Gateway with VoIP LEDs on the Front and Side Panel The Gateway's LEDs, which indicate network activity, are located on the front and side panel. Figure 3-2: Front Panel POWER Green. The POWER LED lights up when the Gateway is powered on. ETHERNET (1-4) Green. -
Page 13: Chapter 4: Connecting The Adsl2+ Gateway With Voip
ADSL2+ Gateway with VoIP Chapter 4: Connecting the ADSL2+ Gateway with VoIP Overview The installation technician from your ISP should have left the setup information for the modem with you after installing your broadband connection. If not, you can call your ISP to request that data. After you have the setup information you need for your specific type of Internet connection, you can begin installation and setup of the Gateway. -
Page 14: Figure 4-3: Connect A Phone
ADSL2+ Gateway with VoIP 4. Connect an analog telephone to the Phone port on the Gateway’s back panel. 5. Connect one end of an Ethernet network cable to one of the Ethernet ports (labeled 1-4) on the back of the Gateway, and the other end to an Ethernet port on a computer. -
Page 15: Chapter 5: Using The Interactive Voice Response Menu Overview
Voice Response Menu through an analog telephone, not any of the Internet phones.) 2. Press **** (in other words, press the star key four times). 3. Wait until you hear “Linksys configuration menu. Please enter the option followed by the # (pound) key or hang up to exit.”... - Page 16 **** Use this command to enter the Response Menu Interactive Voice Response Menu. Do not press any other keys until you hear, “Linksys configuration menu. Please enter the option followed by the # (pound) key or hang up to exit.”...
- Page 17 ADSL2+ Gateway with VoIP Table 1: Interactive Voice Response Menu Action Command (press these Choices Description keys on the telephone) Check Primary DNS Server IP Hear the IP address of the Address primary DNS (Domain Name Service) server. Check Internet Web Server Port Hear the port number of the Internet Web server used for the web-based utility.
- Page 18 ADSL2+ Gateway with VoIP Table 1: Interactive Voice Response Menu Action Command (press these Choices Description keys on the telephone) Set the Mode Press 0 to select the router/ If the Voice Gateway acts as NAT mode. the router for your network, Press 1 to select the bridge/ use the router/NAT mode.
-
Page 19: Entering A Password
ADSL2+ Gateway with VoIP Entering a Password NOTE: These bulleted instructions only apply when you are entering a password. At all other times, pressing a number only selects a number, not a letter or punctuation mark. You may be prompted to enter a password when you want to reset the Voice Gateway to its factory default settings. -
Page 20: Chapter 6: Configuring The Adsl2+ Gateway
ADSL2+ Gateway with VoIP Chapter 6: Configuring the ADSL2+ Gateway Overview Follow the steps in this chapter and use the Gateway’s web-based utility to configure the ADSL2+ Gateway with HAVE YOU: Enabled TCP/IP on your VoIP. This chapter will describe each web page in the Utility and each page’s key functions. The utility can be computers? Computers communicate over the accessed via your web browser through use of a computer connected to the Gateway. - Page 21 ADSL2+ Gateway with VoIP Security • Firewall. To disable or enable the firewall, set up filters, and block WAN requests, click this tab. vpn (virtual private network): a security • VPN. To enable or disable Virtual Private Network (VPN) passthrough, or to set up an IPSec VPN tunnel, use measure to protect data as it leaves one this screen.
-
Page 22: How To Access The Web-Based Utility
ADSL2+ Gateway with VoIP • Reboot. If you need to do a hard or soft reboot of the Gateway, use this screen. Status • Gateway. This screen provides status information about the Gateway. • Local Network. This provides status information about the local network. Figure 6-1: Login Screen •... -
Page 23: Figure 6-3: Rfc 1483 Bridged - Dynamic Ip
ADSL2+ Gateway with VoIP VC Settings You will configure your Virtual Circuit (VC) settings in this section. Multiplexing. Select LLC or VC, depending on your ISP. QoS Type. Select from the drop-down menu: • UBR (Unspecific Bit Rate) for applications that are none-time sensitive, such as e-mail. •... -
Page 24: Figure 6-4: Rfc 1483 Bridged - Static Ip
ADSL2+ Gateway with VoIP Static IP If you are required to use a permanent (static) IP address to connect to the Internet, then select Use the following IP Address. • Internet IP Address. This is the Gateway’s IP address, when seen from the WAN, or the Internet. Your ISP will provide you with the IP Address you need to specify here. -
Page 25: Figure 6-7: Rfc 2516 Pppoe
ADSL2+ Gateway with VoIP • Primary DNS (Required) and Secondary DNS (Optional). Your ISP will provide you with at least one DNS (Domain Name System) Server IP Address. RFC 2516 PPPoE Some DSL-based ISPs use PPPoE (Point-to-Point Protocol over Ethernet) to establish Internet connections. If you are connected to the Internet through a DSL line, check with your ISP to see if they use PPPoE. -
Page 26: Figure 6-9: Bridged Mode Only
ADSL2+ Gateway with VoIP • Connect on Demand: Max Idle Time. You can configure the Gateway to disconnect the Internet connection after it has been inactive for a specified period of time (Max Idle Time). If your Internet connection has been terminated due to inactivity, Connect on Demand enables the Gateway to automatically re-establish your connection as soon as you attempt to access the Internet again. -
Page 27: Figure 6-11: Advanced Dhcp
ADSL2+ Gateway with VoIP • Local DHCP Server. A Dynamic Host Configuration Protocol (DHCP) server automatically assigns an IP address to each computer on your network for you. Unless you already have one, it is highly recommended that you leave the Gateway enabled as a DHCP server. You can also use the Gateway in DHCP Relay mode. -
Page 28: The Setup - Ddns Tab
ADSL2+ Gateway with VoIP • Time Server Address. The default value is Auto. To designate a specific NTP time server, select Manual and enter the NTP server address in the appropriate field. When finished making your changes on this tab, click the Save Settings button to save these changes, or click the Cancel Changes button to undo your changes. -
Page 29: The Setup - Advanced Routing Tab
ADSL2+ Gateway with VoIP The Setup - Advanced Routing Tab The Advanced Routing screen allows you to configure the NAT, dynamic routing, and static routing settings. Advanced Routing Operating Mode. In this section, you will configure the Gateway’s general routing settings. NAT. -
Page 30: Figure 6-15: Routing Table
ADSL2+ Gateway with VoIP Destination IP Address. The Destination IP Address is the address of the remote network or host to which you want to assign a static route. Enter the IP address of the host for which you wish to create a static route. If you are building a route to an entire network, be sure that the network portion of the IP address is set to 0. -
Page 31: The Setup - Voice Tab
ADSL2+ Gateway with VoIP • IEEE 802.3 Type/Length value (the value in the 13th and 14th octets of an Ethernet frame) • Presence of a specified IEEE 802.1Q virtual LAN (VLAN) ID • Packet length between specified minimum and maximum numbers of octets. •... - Page 32 ADSL2+ Gateway with VoIP RTP Bytes Sent. Displayed here is the number of RTP bytes sent by the Gateway. RTP Packets Recv. Displayed here is the number of RTP packets received by the Gateway. RTP Bytes Recv. Displayed here is the number of RTP bytes received by the Gateway. SIP Messages Sent.
- Page 33 ADSL2+ Gateway with VoIP Call 1/2 FAX. Displayed here is the status of the fax pass-through mode. Call 1/2 Type. Displayed here is the direction of the call. Call 1/2 Remote Hold. This indicates whether the far end has placed the call on hold. Call 1/2 Callback.
- Page 34 ADSL2+ Gateway with VoIP Next Registration In. Shown here is the number of seconds until the next registration. Last Called VoIP Number. VoIP stands for Voice over Internet Protocol, which is used by Internet phone calls. Displayed here is the last Internet phone number called from the landline. Last Called PSTN Number.
-
Page 35: Figure 6-18: Setup - Voice - System
ADSL2+ Gateway with VoIP VoIP Call Duration. Displayed here is the duration of the call. VoIP Call Packets Sent. Displayed here is the number of packets sent. VoIP Call Packets Recv. Displayed here is the number of packets received. VoIP Call Bytes Sent. Displayed here is the number of bytes sent. VoIP Call Bytes Recv. -
Page 36: Figure 6-19: Setup - Voice - User 1
ADSL2+ Gateway with VoIP The Voice - User 1 Screen This screen lets you configure the settings for the Internet phone line. Call Forward Settings Enter the call forwarding numbers you want to use. Cfwd All Dest. Enter the number for the Call Forward All Service feature (when you want to forward all calls). Cfwd Busy Dest. - Page 37 ADSL2+ Gateway with VoIP Dist Ring Setting. Select whether you want to use the distinctive ring feature, yes or no. The default is yes. Message Waiting. Select whether you want to use the message waiting feature, yes or no. The default is no. Distinctive Ring Settings Ring(1-8) Caller.
-
Page 38: Figure 6-20: Setup - Voice - Pstn User
ADSL2+ Gateway with VoIP The Voice - PSTN User Screen This screen lets you configure the settings for the LINE port service, which can be a PSTN service or a second VoIP service. PSTN-To-VoIP Selective Call Forward Settings Enter the landline caller numbers that will be forwarded to specific Internet phone numbers. Cfwd Sel(1-8) Caller. -
Page 39: The Security - Firewall Tab
ADSL2+ Gateway with VoIP The Security - Firewall Tab This panel shows firewall and filter settings. Use these features to enhance the security of your network. Firewall You can enable or disable the firewall, select filters to block specific Internet data types, and block anonymous Internet requests. -
Page 40: The Security - Vpn Tab
ADSL2+ Gateway with VoIP The Security - VPN Tab This panel shows VPN (virtual private network) settings. You can disable or enable passthrough for four kinds of VPNs. You can also set up IPSec (Internet Protocol Security) VPN tunnels for secure remote access. VPN Passthrough Virtual Private Networking (VPN) is a security measure that basically creates a secure connection between two remote locations. - Page 41 ADSL2+ Gateway with VoIP Tunnel Name: Click and type in this box to give the selected tunnel a name. A name is required, but is only for your reference and need not match the name used at the remote gateway or client. Local Secure Group: To give an entire local network access to the tunnel, select Subnet and enter the network address and mask.
-
Page 42: Figure 6-25: Advanced Vpn Settings
ADSL2+ Gateway with VoIP When you select automatic key management, an Advanced Settings button appears. Click this button if there are special requirements for this IPSec tunnel. The Advanced IPSec VPN Tunnel Setup window will appear. (Help for this window can be displayed by clicking More on the right side of the VPN panel.) In this window you can set parameters for IKE phases 1 and 2, and other settings. -
Page 43: The Access Restriction - Internet Access Tab
ADSL2+ Gateway with VoIP The Access Restriction - Internet Access Tab The Internet Access tab allows you to block or allow specific kinds of Internet usage. You can set up Internet access policies for specific computers and block websites by URL address or keyword. Internet Access Policy. -
Page 44: Figure 6-29: List Of Pcs
ADSL2+ Gateway with VoIP Then enter the range of ports you want to filter. If the service you want to block is not listed or you want to edit a service’s settings, then click the Add/Edit Service button. Then the Port Services screen will appear. To add a service, enter the service’s name in the Service Name field. -
Page 45: The Applications & Gaming - Single Port Forwarding Tab
ADSL2+ Gateway with VoIP The Applications & Gaming - Single Port Forwarding Tab Single Port Forwarding Use the Single Port Forwarding screen when you want to open a specific port so users on the Internet can see the servers behind the Gateway (such servers may include FTP or e-mail servers). When users send this type of request to your network via the Internet, the Gateway will forward those requests to the appropriate computer. -
Page 46: The Applications & Gaming - Port Range Forwarding Tab
ADSL2+ Gateway with VoIP The Applications & Gaming - Port Range Forwarding Tab The Port Range Forwarding screen sets up public services on your network, such as web servers, ftp servers, e-mail servers, or other specialized Internet applications. (Specialized Internet applications are any applications that use Internet access to perform functions such as videoconferencing or online gaming. -
Page 47: The Applications & Gaming - Dmz Tab
ADSL2+ Gateway with VoIP The Applications & Gaming - DMZ Tab The DMZ screen allows one local user to be exposed to the Internet for use of a special-purpose service such as Internet gaming and videoconferencing through DMZ Hosting. DMZ hosting forwards all the ports for one computer at the same time, which differs from Port Range Forwarding, which can only forward a maximum of 10 ranges of ports. -
Page 48: Figure 6-36: Edit List Of Qos Settings
ADSL2+ Gateway with VoIP Edit list of QoS Settings In addition to PVC-based QoS, you can assign different levels of priority to different packets based on information in the packets. To do this, click the Edit list of QoS Settings button. A window titled QoS Function will appear. This window lets you set the priority for packets selected by any of the following criteria, alone or in combination: •... -
Page 49: The Administration - Management Tab
ADSL2+ Gateway with VoIP The Administration - Management Tab The Management screen allows you to change the Gateway’s access settings as well as configure the SNMP (Simple Network Management Protocol), UPnP (Universal Plug and Play), IGMP (Internet Group Multicast Protocol)-Proxy, and WLAN management features. Gateway Access Local Gateway Access. -
Page 50: Figure 6-38: Allowed Ip - Ip Range
ADSL2+ Gateway with VoIP Use https. This checkbox enables HTTPS (HyperText Transport Protocol Secure) - An extension to the standard HTTP protocol that provides confidentiality by encrypting the traffic from the website. By default this protocol uses TCP port 443. Remote Upgrade Remote Upgrade. - Page 51 ADSL2+ Gateway with VoIP UPnP UPnP allows Windows Me and XP to automatically configure the Gateway for various Internet applications, such as gaming and videoconferencing. UPnP. To enable UPnP, click Enable. Otherwise, click Disable. Please select a PVC connection to bind. Select the number of the PVC over which the applications requiring UPnP will run.
-
Page 52: The Administration - Reporting Tab
Log. To enable log reporting, click Enable. Logviewer IP Address. Enter the IP Address of the computer that will receive logs. You will need Logviewer software to view these logs. This free software is available for download from www.linksys.com. Email Alerts Figure 6-39: Reporting E-Mail Alerts. -
Page 53: The Administration - Diagnostics Tab
ADSL2+ Gateway with VoIP The Administration - Diagnostics Tab Ping Test Ping Test Parameters Ping Target IP. Enter the IP address that you want to ping. This can be either a local (LAN) IP or an Internet (WAN) IP address. Ping Size. -
Page 54: The Administration - Factory Defaults Tab
The Gateway allows you to upgrade firmware from the LAN (Local Area Network) side of the Gateway. Upgrade from LAN To upgrade the Gateway’s firmware from the LAN: 1. Download the Gateway’s firmware upgrade file from www.linksys.com. 2. Extract the file on your computer. 3. Click the Browse button to find the firmware upgrade file. -
Page 55: The Administration - Reboot Tab
ADSL2+ Gateway with VoIP The Administration - Reboot Tab This screen allows you to do a soft or hard reboot of the Gateway. In most cases you should use the hard reboot. The soft reboot is similar to restarting your computer without physically powering down the computer. Reboot Reboot Mode. -
Page 56: The Status - Dsl Connection Tab
ADSL2+ Gateway with VoIP server. (This data is stored in temporary memory and changes periodically.) Click the Refresh button if you want to refresh the displayed information. To delete a client from the DHCP server, select the client, and then click the Delete button. -
Page 57: Appendix A: Troubleshooting
Provided are possible solutions to problems that may occur during the installation and operation of the Gateway. Read the descriptions below to help you solve your problems. If you can’t find an answer here, check the Linksys international website at www.linksys.com/international. - Page 58 ADSL2+ Gateway with VoIP For Windows 2000: A. Click Start, Settings, and Control Panel. Double-click Network and Dial-Up Connections. B. Right-click the Local Area Connection that is associated with the Ethernet adapter you are using, and select the Properties option. C.
- Page 59 ADSL2+ Gateway with VoIP 3. I want to test my Internet connection. A. Check your TCP/IP settings. For Windows 2000: 1. Click Start, Settings, and Control Panel. Double-click Network and Dial-Up Connections. 2. Right-click the Local Area Connection that is associated with the Ethernet adapter you are using, and select the Properties option.
- Page 60 E. In the command prompt, type ping www.linksys.com and press the Enter key. • If you get a reply, the computer is connected to the Internet. If you cannot open a webpage, try the ping command from a different computer to verify that your original computer is not the cause of the problem.
- Page 61 ADSL2+ Gateway with VoIP C. Set a static IP address on your system; refer to “Problem #3: I need to set a static IP address on a PC.” D. Refer to “Problem #10: I am a PPPoE user, and I need to remove the proxy settings or the dial-up pop-up window.”...
- Page 62 ADSL2+ Gateway with VoIP 7. I need to set up online game hosting or use other Internet applications. If you want to play online games or use Internet applications, most will work without port forwarding or DMZ hosting. There may be cases when you want to host an online game or Internet application. This would require you to set up the Gateway to deliver incoming packets or data to a specific computer.
- Page 63 ADSL2+ Gateway with VoIP 8. I can’t get the Internet game, server, or application to work. If you are having difficulties getting any Internet game, server, or application to function properly, consider exposing one PC to the Internet using DeMilitarized Zone (DMZ) hosting. This option is available when an application requires too many ports or when you are not sure which port services to use.
- Page 64 13. I need to upgrade the firmware. In order to upgrade the firmware with the latest features, you need to go to the Linksys international website and download the latest firmware at www.linksys.com/international. Follow the steps below to access the firmware: A.
- Page 65 ADSL2+ Gateway with VoIP D. To upgrade the firmware, follow the steps in the Administration section found in “Chapter 6: Configuring the ADSL2+ Gateway”. 14. The firmware upgrade failed, and/or the Power LED is flashing. The upgrade could have failed for a number of reasons. Follow these steps to upgrade the firmware and/or make the Power LED stop flashing: •...
-
Page 66: Frequently Asked Questions
ISP. Does the Gateway support any operating system other than Windows 2000 or XP? Yes, but Linksys does not, at this time, provide technical support for setup, configuration or troubleshooting of any non-Windows operating systems. - Page 67 How will I be notified of new Gateway firmware upgrades? All Linksys firmware upgrades are posted on the Linksys international website at www.linksys.com/international, where they can be downloaded for free. To upgrade the Gateway’s firmware, use the Administration tab of the Gateway’s web-based utility.
- Page 68 Ethernet adapter as a temporary measure. (Please look at the Network Control Panel in your Ethernet adapter’s Advanced Properties tab.) Make sure that your proxy setting is disabled in the browser. Check our website at www.linksys.com for more information. Will the Gateway function in a Macintosh environment? Yes, but the Gateway’s setup pages are accessible only through Internet Explorer 5.0 or Netscape Navigator 5.0 or...
- Page 69 ADSL2+ Gateway with VoIP I am not able to get the web configuration screen for the Gateway. What can I do? You may have to remove the proxy settings on your Internet browser, e.g., Netscape Navigator or Internet Explorer. Or remove the dial-up settings on your browser. Check with your browser documentation, and make sure that your browser is set to connect directly and that any dial-up is disabled.
-
Page 70: Appendix B: Finding The Mac Address And Ip Address For Your Ethernet Adapter
ADSL2+ Gateway with VoIP Appendix B: Finding the MAC Address and IP Address for Your Ethernet Adapter This section describes how to find the MAC address for your computer’s Ethernet adapter so you can use the MAC filtering feature of the Gateway. You can also find the IP address of your computer’s Ethernet adapter. This IP address is used for the Gateway’s filtering, forwarding, and/or DMZ features. -
Page 71: Windows 2000 Or Xp Instructions
ADSL2+ Gateway with VoIP Windows 2000 or XP Instructions 1. Click Start and Run. In the Open field, enter cmd. Press the Enter key or click the OK button. Note: The MAC address is also called the Physical Address. 2. At the command prompt, enter ipconfig /all. Then press the Enter key. 3. -
Page 72: Appendix C: Upgrading Firmware
ADSL2+ Gateway with VoIP Appendix C: Upgrading Firmware To upgrade the Gateway’s firmware: 1. Download the Gateway’s firmware upgrade file from www.linksys.com. 2. Extract the file on your computer. 3. Open the Gateway’s web-based utility and click the Administration tab. -
Page 73: Appendix D: Glossary
This glossary contains some basic networking terms you may come across when using this product. For more advanced terms, see the complete Linksys glossary at http://www.linksys.com/glossary. Access Point - A device that allows wireless-equipped computers and other devices to communicate with a wired network. - Page 74 ADSL2+ Gateway with VoIP DMZ (Demilitarized Zone) - Removes the Router's firewall protection from one PC, allowing it to be "seen" from the Internet. DNS (Domain Name Server) - The IP address of your ISP's server, which translates the names of websites into IP addresses.
- Page 75 Passphrase - Used much like a password, a passphrase simplifies the WEP encryption process by automatically generating the WEP encryption keys for Linksys products. Ping (Packet INternet Groper) - An Internet utility used to determine whether a particular IP address is online.
- Page 76 ADSL2+ Gateway with VoIP RJ-45 (Registered Jack-45) - An Ethernet connector that holds up to eight wires. Roaming - The ability to take a wireless device from one access point's range to another without losing the connection. Router - A networking device that connects multiple networks together. Server - Any computer whose function in a network is to provide user access to files, printing, communications, and other services.
- Page 77 ADSL2+ Gateway with VoIP TKIP (Temporal Key Integrity Protocol) - a wireless encryption protocol that provides dynamic encryption keys for each packet transmitted. Topology - The physical layout of a network. TX Rate - Transmission Rate. Upgrade - To replace existing software or firmware with a newer version. Upload - To transmit a file over a network.
-
Page 78: Appendix E: Specifications
ADSL2+ Gateway with VoIP Appendix E: Specifications Model Number AG310 Standards ANSI T1.413 Issue 2, ITU G.992.1 (G.dmt), G.992.2 (G.lite), G.992.3 (ADSL2), G.992.4 (ADSL2 Lite), G.992.5 (ADSL2+), G.994.1 (G.hs), G.996.1 (G.test) Ports Power, DSL, Ethernet (1-4), Phone, Line Buttons Power, Reset... - Page 79 ADSL2+ Gateway with VoIP Certifications FCC Part 15B Subpart B Class B, FCC Part 15C Subpart B, FCC Part 68, CE, UL, A-tick, UPnP Operating Temp. 0º~40ºC (32º~104ºF) Storage Temp. -20º~70ºC (-4º~158ºF) Operating Humidity 10~85% Non-Condensing Storage Humidity 5~90% Non-Condensing Appendix E: Specifications...
-
Page 80: Appendix F: Warranty Information
Your exclusive remedy and Linksys' entire liability under this warranty will be for Linksys at its option to repair or replace the Product or refund Your purchase price less any rebates. This limited warranty extends only to the original purchaser. -
Page 81: Appendix G: Regulatory Information
ADSL2+ Gateway with VoIP Appendix G: Regulatory Information FCC Statement This product has been tested and complies with the specifications for a Class B digital device, pursuant to Part 15 of the FCC Rules. These limits are designed to provide reasonable protection against harmful interference in a residential installation. - Page 82 Equipment (WEEE) This document contains important information for users with regards to the proper disposal and recycling of Linksys products. Consumers are required to comply with this notice for all electronic products bearing the following symbol: Appendix G: Regulatory Information...
- Page 83 ADSL Gateway Appendix G: Regulatory Information...
- Page 84 ADSL Gateway Appendix G: Regulatory Information...
- Page 85 ADSL Gateway Appendix G: Regulatory Information...
- Page 86 ADSL Gateway For more information, visit www.linksys.com. Appendix G: Regulatory Information...
-
Page 87: Appendix H: Contact Information
ADSL2+ Gateway with VoIP Appendix H: Contact Information Internet Service Provider (ISP) For support, contact your ISP. Linksys Visit Linksys online for information on the latest products and updates to your existing products at: http://www.linksys.com/international Appendix H: Contact Information...