Table of Contents
Advertisement
Advertisement
Table of Contents

Related Manuals for Yamaha MCR-B142


Summary of Contents for Yamaha MCR-B142
- Page 1 Micro Component System MCR-B142 M a y OWNER’S MANUAL...
- Page 2 TO REDUCE THE RISK OF FIRE OR ELECTRIC and may cause fire, damage to this unit, and/or personal injury. Yamaha will not be held responsible for any SHOCK, DO NOT EXPOSE THIS UNIT TO RAIN OR damage resulting from use of this unit with a voltage other MOISTURE.
-
Page 3: Table Of Contents
CONTENTS CONNECTIONS ............2 LISTENING TO DAB STATIONS......13 Connecting the speakers and antenna ......2 Preparing for DAB reception ........13 Connecting the power cable...........2 Selecting DAB stations..........14 Other connections ............3 Presetting DAB stations (remote control only) .....15 Selecting preset DAB stations........16 NAMES OF PARTS AND THEIR FUNCTIONS ..4 Checking the signal strength of DAB stations Top panel/Front panel ............4 (Option menu) ..............16... -
Page 4: Connections
CONNECTIONS Connecting the speakers and antenna Connect the speakers and antenna. If DAB/FM reception is poor, try changing the height or direction or placement of the antenna to find a location that has better reception. If you use a commercially available outdoor antenna instead of the supplied antenna, reception may be better. Do not connect this unit’s power cable until you’ve finished connecting all cables. -
Page 5: Other Connections
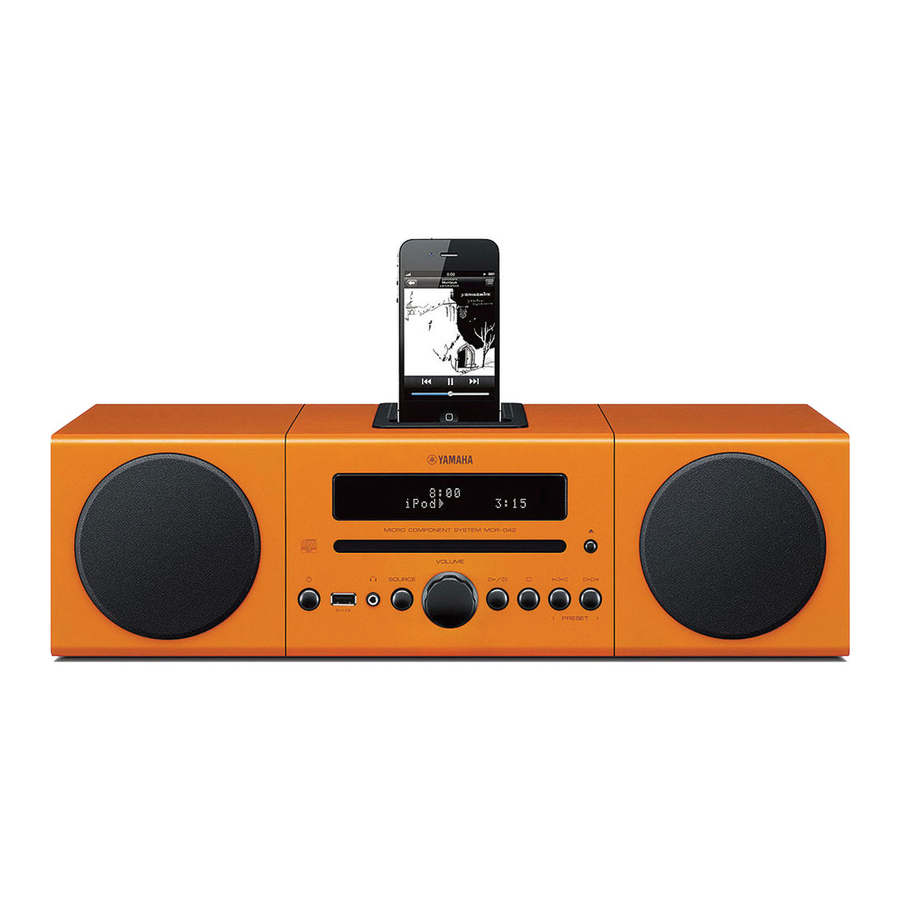
CONNECTIONS Other connections iPod Connect your iPod to the iPod dock on the top panel. For details on compatible iPod models, refer to “SPECIFICATIONS” (P. 30). • Be sure to use a dock adaptor that is compatible with your iPod. If you do not use the adaptor or the adaptor is not compatible, the connection could be loose or poor, which could cause damage to the Dock connector. -
Page 6: Names Of Parts And Their Functions
NAMES OF PARTS AND THEIR FUNCTIONS Top panel/Front panel 5 6 7 a iPod dock g SOURCE Connect your iPod here ( P. 3, 6, 7). Switch the audio source to be played. Be sure to use a dock adaptor that is compatible with Pressing this repeatedly will change the selection in the your iPod ( P. -
Page 7: Remote Control
NAMES OF PARTS AND THEIR FUNCTIONS Remote control a Remote control signal transmitter (Power) Press to turn the system on/off. c SNOOZE/SLEEP Set the sleep timer or switch the alarm to snooze mode ( P. 21, 23). d ALARM Switches the alarm on/off ( P. 23). e Source buttons Switch the audio source to be played. -
Page 8: Adjusting The Clock (Option Menu)
ADJUSTING THE CLOCK (OPTION MENU) You’ll use the option menu ( P. 20) to set this unit’s date and time. To copy the time from your iPod Press OPTION. The option menu will appear. Press to select “CLOCK SET,” and then press ENTER. -
Page 9: Listening To Your Ipod
LISTENING TO YOUR iPod Playing music from your iPod • For details on compatible iPod models, refer to “SPECIFICATIONS” (P. 30). • Your iPod can also play back music and charge while connected to the USB port. To do this, select USB as the audio source ( P. -
Page 10: Using Repeat/Shuffle Playback (Remote Control Only)
LISTENING TO YOUR iPod Using repeat/shuffle playback (remote control only) The playback status is shown by the repeat/shuffle indicator in the front panel display. Repeat playback Shuffle playback Press (repeat) repeatedly to Press (shuffle) repeatedly to select one of the following select one of the following playback modes. -
Page 11: Listening To Cd And Usb Devices
LISTENING TO CD AND USB DEVICES The unit will operate as follows when playing back tracks/files on CD/USB devices. • If the CD/USB device being played is stopped, the track that you listened will start playback from the beginning of the track the next time you play. -
Page 12: Listening To A Usb Device
LISTENING TO CD AND USB DEVICES Listening to a USB device Press the USB source button to switch the audio source to USB. If a USB device is already connected, playback will start. Connect a USB device to the USB port. Playback starts automatically. -
Page 13: Listening To Music From Your Bluetooth Component
(This procedure or display may differ depending on the type of your iPod touch/iPhone/iPad.) From the Bluetooth connection list of the other component, choose this unit (MCR-B142 1 5 : 3 0 Yamaha). B T D T A i P h o n e When pairing has been completed, your iPod touch/ iPhone/iPad will indicate “Connected”. -
Page 14: Listening To A Bluetooth Component
In the Bluetooth settings of the other component, turn Bluetooth on. From the Bluetooth connection list of the other component, choose this unit (MCR-B142 Yamaha). The Bluetooth connection will be established, and the front panel display of this unit will indicate the name of the other component. -
Page 15: Disconnecting A Bluetooth Connection
LISTENING TO DAB STATIONS Disconnecting a Bluetooth connection If any of the following operations are performed while a Bluetooth connection is being used, the Bluetooth connection will be disconnected. • Hold down on the remote control or SOURCE on this unit. •... -
Page 16: Selecting Dab Stations
LISTENING TO DAB STATIONS Selecting DAB stations Press the RADIO source button to switch the audio source to DAB. Press TUNING to select the DAB station. While receiving DAB, DAB station information is shown on the front panel display. If the unit does not receive a DAB signal, “Off Air” is displayed instead of the DAB station name. -
Page 17: Presetting Dab Stations (Remote Control Only)
LISTENING TO DAB STATIONS Presetting DAB stations (remote control only) Use the preset function to store your favorite 30 stations. Press TUNING to select a station that you want to preset. Press MEMORY. The display will indicate “PRESET MEMORY,” and the preset number will blink. -
Page 18: Selecting Preset Dab Stations
LISTENING TO DAB STATIONS Selecting preset DAB stations Press the RADIO source button to switch the audio source to DAB. Press PRESET / to select the DAB station that you want to hear. You can only select presets that have been stored. Checking the signal strength of DAB stations (Option menu) Press the RADIO source button to switch the audio source to DAB. -
Page 19: Listening To Fm Stations
LISTENING TO FM STATIONS Selecting an FM station To listen to an FM station, connect the antenna as described in “Connecting the speakers and antenna” (P. 2). Press the RADIO source button to switch the audio source to FM. Tune FM stations Automatic tuning: Press and hold TUNING Manual tuning: Press TUNING repeatedly. -
Page 20: Presetting Fm Stations (Remote Control Only)
LISTENING TO FM STATIONS Presetting FM stations (remote control only) Use the preset function to store your favorite 30 stations. Auto preset This method tunes automatically, and automatically presets only the stations that have good reception. Press and hold down MEMORY. “AUTO PRESET”... -
Page 21: Selecting Preset Fm Stations
LISTENING TO EXTERNAL SOURCES Selecting preset FM stations Press the RADIO source button to switch the audio source to FM. Press PRESET / to select the FM station that you want to hear. You can only select presets that have been stored. LISTENING TO EXTERNAL SOURCES Using a commercially available 3.5 mm mini- Rear panel... -
Page 22: Useful Functions
USEFUL FUNCTIONS Using the Option menu When you press OPTION, the option menu will appear in the front panel display, allowing you to make the following settings. (eject button) cannot be operated while the option menu is displayed. Option menu Setting or range See page PRESET DELETE Deletes a stored preset (shown only if the audio source is DAB/FM). -
Page 23: Using The Sleep Timer
Source Function method The unit resumes play from the last track you played. If you’ve created a playlist* with the name “ALARM Yamaha DTA” in advance, the iPod Resume playlist stored on the iPod can be played back repeatedly. When entering the playlist name, use single-byte spaces to separate words, and enter single-byte characters, taking care that uppercase/lowercase letters are used correctly. -
Page 24: Setting The Alarm
USEFUL FUNCTIONS Setting the alarm Setting the alarm time and alarm type (Option menu) The alarm will not function when the unit is in power saving ( P. 20). To use the alarm function, set the Option menu item POWER SAVING to NORMAL. -
Page 25: Operations While The Alarm Sound Is Playing
USEFUL FUNCTIONS Switching the alarm on/off Press ALARM to turn the alarm on/off. When the alarm is on, the alarm indicator ( ) will light, and the alarm time will be shown. If you press ALARM again, the alarm indicator ( ) and the alarm will turn off. -
Page 26: Using The "Dta Controller" Application For The Ipod/Iphone/Ipad
USING THE “DTA Controller” APPLICATION FOR THE iPod/iPhone/iPad By using the free “DTA Controller” application for the iPod touch/iPhone/iPad, you can control this unit by the application and make detailed alarm settings. For example, for each day of the week, you can specify the alarm time (Weekly Alarm) and adjust the IntelliAlarm as desired. -
Page 27: Troubleshooting
If there is a problem with the unit, check the following list first. If you cannot resolve the problem with the suggested solutions or if the problem is not listed below, turn off and unplug the system, and consult the nearest authorized Yamaha dealer or service center. -
Page 28: Disc Playback
TROUBLESHOOTING iPod Problem Cause Solution No sound. The iPod is not set in the iPod dock firmly. Remove the iPod from the unit, and then set it in the iPod dock again ( P. 3). The headphones of the iPod are connected. Remove the Headphones. - Page 29 TROUBLESHOOTING Bluetooth Problem Cause Solution Cannot make this unit paired The other component does not support A2DP. Perform pairing operations with a component which with the other component. supports A2DP. A Bluetooth adaptor, etc. that you want to pair Use a Bluetooth adaptor, etc. whose password is “0000”. with this unit has a password other than “0000”.
- Page 30 TROUBLESHOOTING FM reception Problem Cause Solution Too much noise. The antenna may be connected improperly. Make sure the antenna is connected properly ( P. 2) or use a commercially available outdoor antenna. The antenna is too close to the unit or to an Position the antenna as far away as possible from the unit electronic device.
-
Page 31: Notes On Discs And Usb Devices
(such as USB chargers or USB hubs), PCs, card readers, an external HDD, etc. * ISO 9660 format CD-R/RW • Yamaha will not be held responsible for any damage to or data loss on the USB device occurring while the device is connected to this unit. -
Page 32: Specifications
SPECIFICATIONS PLAYER SECTION AMPLIFIER SECTION • Maximum output power ..15 W + 15 W (6 Ω 1 kHz, 10 % THD) iPod (Digital connection) [As of July, 2012] • Headphones • Compatible iPod models ....3.5 mm (1/8") STEREO mini jack (Impedance 16 to 32 Ω) ........ - Page 33 • Yamaha does not guarantee all wireless connections between this We, Yamaha Music Europe GmbH hereby declare that this unit unit and devices compatible with Bluetooth function.
- Page 34 I For U.K. customers The laser component in this product is capable of emitting If the socket outlets in the home are not suitable for the plug radiation exceeding the limit for Class 1. supplied with this appliance, it should be cut off and an appropriate 3 pin plug fitted.
- Page 35 © 2012 Yamaha Corporation Printed in Malaysia ZD94990...